Getting started with Amazon Q Developer in Visual Studio Code
Integrate Amazon Q, an AI coding assistant into VS Code. This guide covers installing the extension for features like code completion chat, and productivity-boosting capabilities - powered by generative AI.
Rohini Gaonkar
Amazon Employee
Published Apr 30, 2024
Last Modified May 1, 2024
Introducing Amazon Q Developer
What about Amazon CodeWhisperer?
How to install the Amazon Q extension in Visual Studio Code?
Step 1: Install the Amazon Q extension for your editor
What if you have already AWS Toolkit with Amazon Q? How to update that?
Step 2.1 : with AWS Builder ID (no AWS account required)
Step 2.2 : Pro license with AWS IAM Identity Center
Step 3: Ask Amazon Q a question in the IDE
Amazon Q is available in the IDE to help you supercharge your development. You can ask Amazon Q to explain program logic in an unfamiliar codebase, quickly identify and fix bugs, or generate functional tests. Some of the features are as follows :
- Inline code completion: Code faster with inline code suggestions as you type. 15+ languages supported including Java, Python, TypeScript, Terraform, AWS CloudFormation, CDK and more
- Chat: Generate code, refactor existing code, explain code, and get answers to questions about software development.
- Code analysis: Analyze and fix security vulnerabilities in your code. (need to add auto-scan & project-scan)10+ languages supported including Java, Python, TypeScript, C#, and more
- Code reference log: Attribute code from Amazon Q that is similar to training data using the code reference log.
- Agent for software development*: Let Amazon Q plan and implement new functionality across multiple files in your workspace. Type “/” in Amazon Q chat to open the quick actions menu and choose the
/devaction. - Agent for code transformation*: Upgrade your Java applications in minutes, not weeks. Currently supports Java 8 or 11 Maven projects to Java 17. Type “/” in Amazon Q chat to open the quick actions menu and choose the
/transformaction.
* requires a Amazon Q Developer Pro tier
CodeWhisperer is now part of Amazon Q. All of the functionality that CodeWhisperer provides - inline code suggestions, security scanning, and more, is now available inside Amazon Q Developer. Please check out documentation How to switch to Amazon Q Developer.
Visual Studio Code is a lightweight but powerful source code editor which runs on your desktop and is available for Windows, macOS and Linux. Ensure you have installed Visual Studio Code for your operating system. You can find the setup steps in their official documentation.
Open Visual Studio Code and click on Extensions on the left activity bar.
In the extensions, search for "Amazon Q". Install the extension, restart/reload VSCode if required.

If you have installed AWS Toolkit already, then update the AWS toolkit, if you have existing Amazon Q and Amazon CodeWhisperer connections, even if they’re expired, the new Amazon Q extension will be automatically installed for you.
You have 2 options to sign-in and this blog explores both the authentication methods :
- with Builder ID for Individual users with Free Tier
- with AWS IAM Identity Center for Professional users with Pro Tier
You might use a workforce identity in IAM Identity Center to represent your work-self and an AWS Builder ID to represent your private-self. These identities operate independently. Amazon Q Developer Pricing for more details.

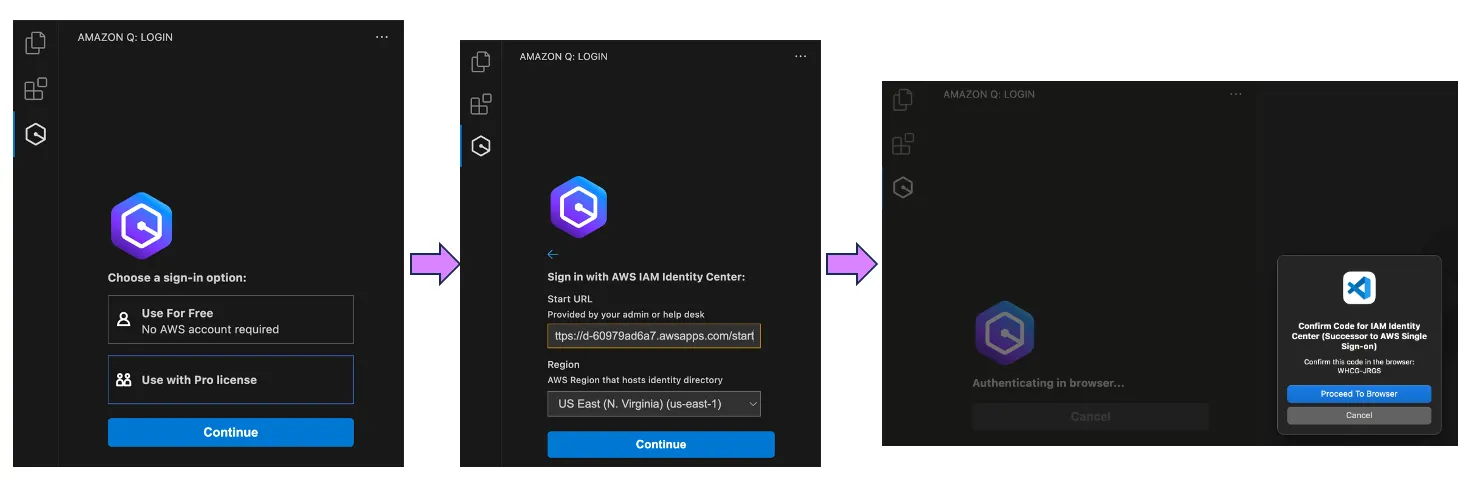
In the Visual Studio Code, Open Amazon Q from the left Activity Bar. You will be presented with following screen:

Choose this option to use Amazon Q for free. You do not need an AWS Account, however, you do need to sign up for an AWS Builder ID. AWS Builder ID is a personal profile that provides access to select tools and services. AWS Builder ID is free. You only pay for the AWS resources you consume in your AWS accounts, which is separate from Builder ID. You can use the same email for your AWS Builder ID and for the root user email of an AWS account.
- In the step 1, select on the first option "
Use for Free" and click "Continue". - You will get a pop-up with a confirmation code, click on "Proceed to browser".
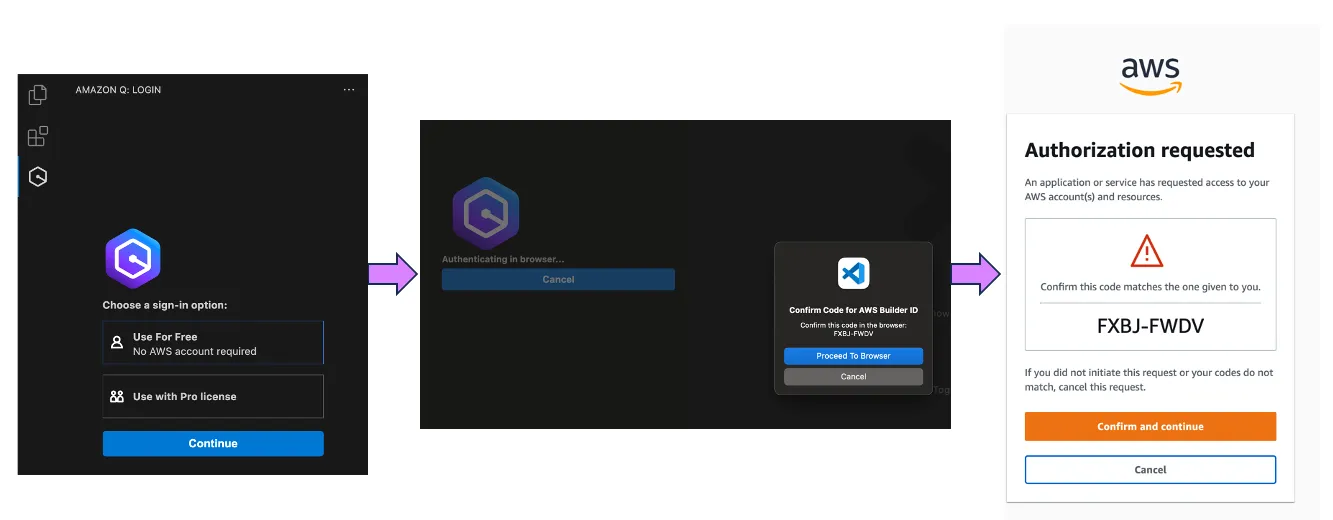
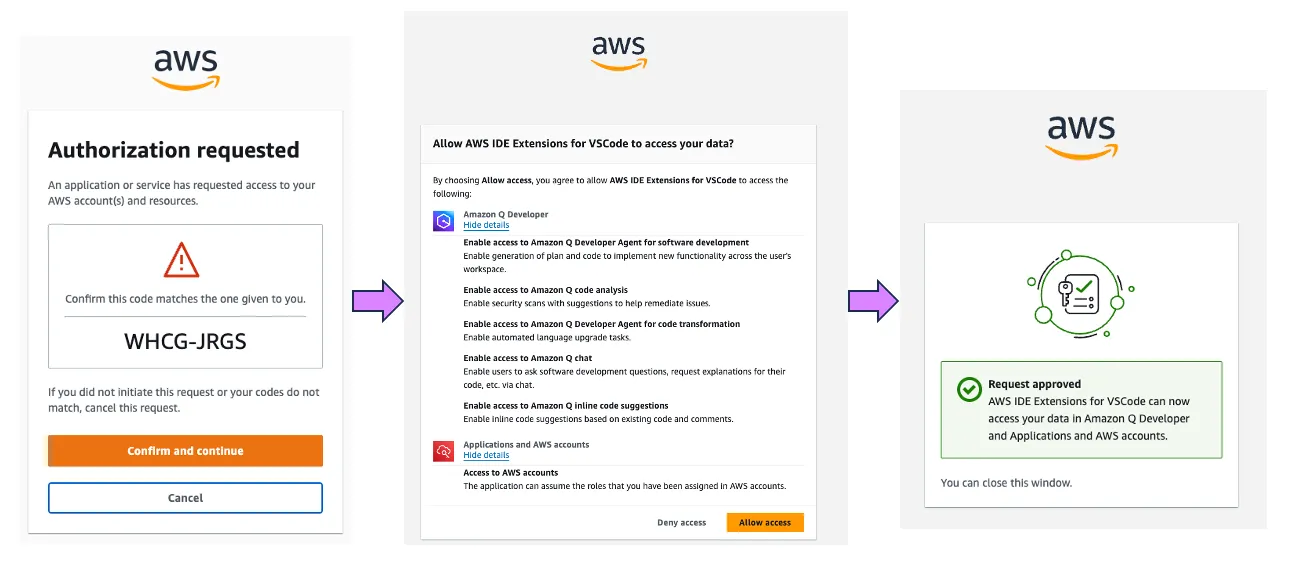
- You will be redirected to a web browser. confirm the code is same and click on "Confirm and continue".
- This redirects you to sign up or sign in to AWS Builder ID as shown in image below. If you are already signed in to Builder ID, sign up screen will be skipped.
- Allow the IDE extensions permissions to AWS services
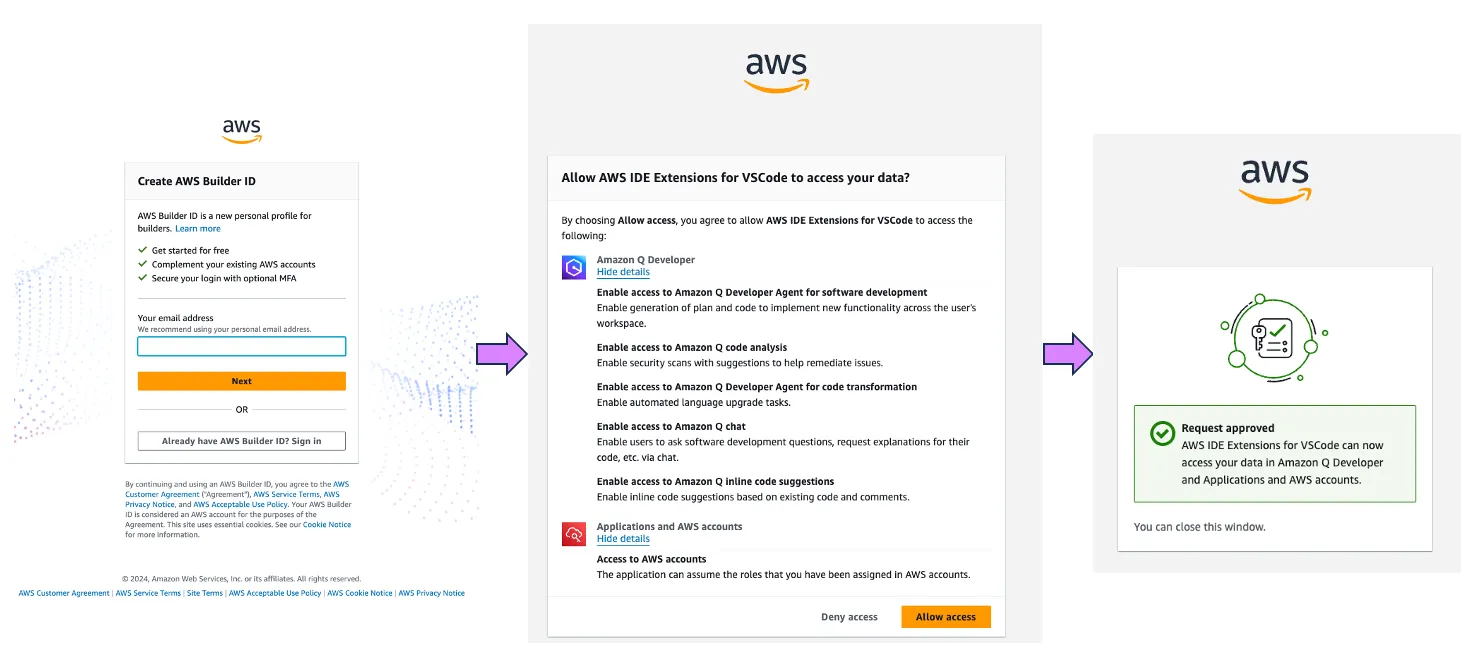
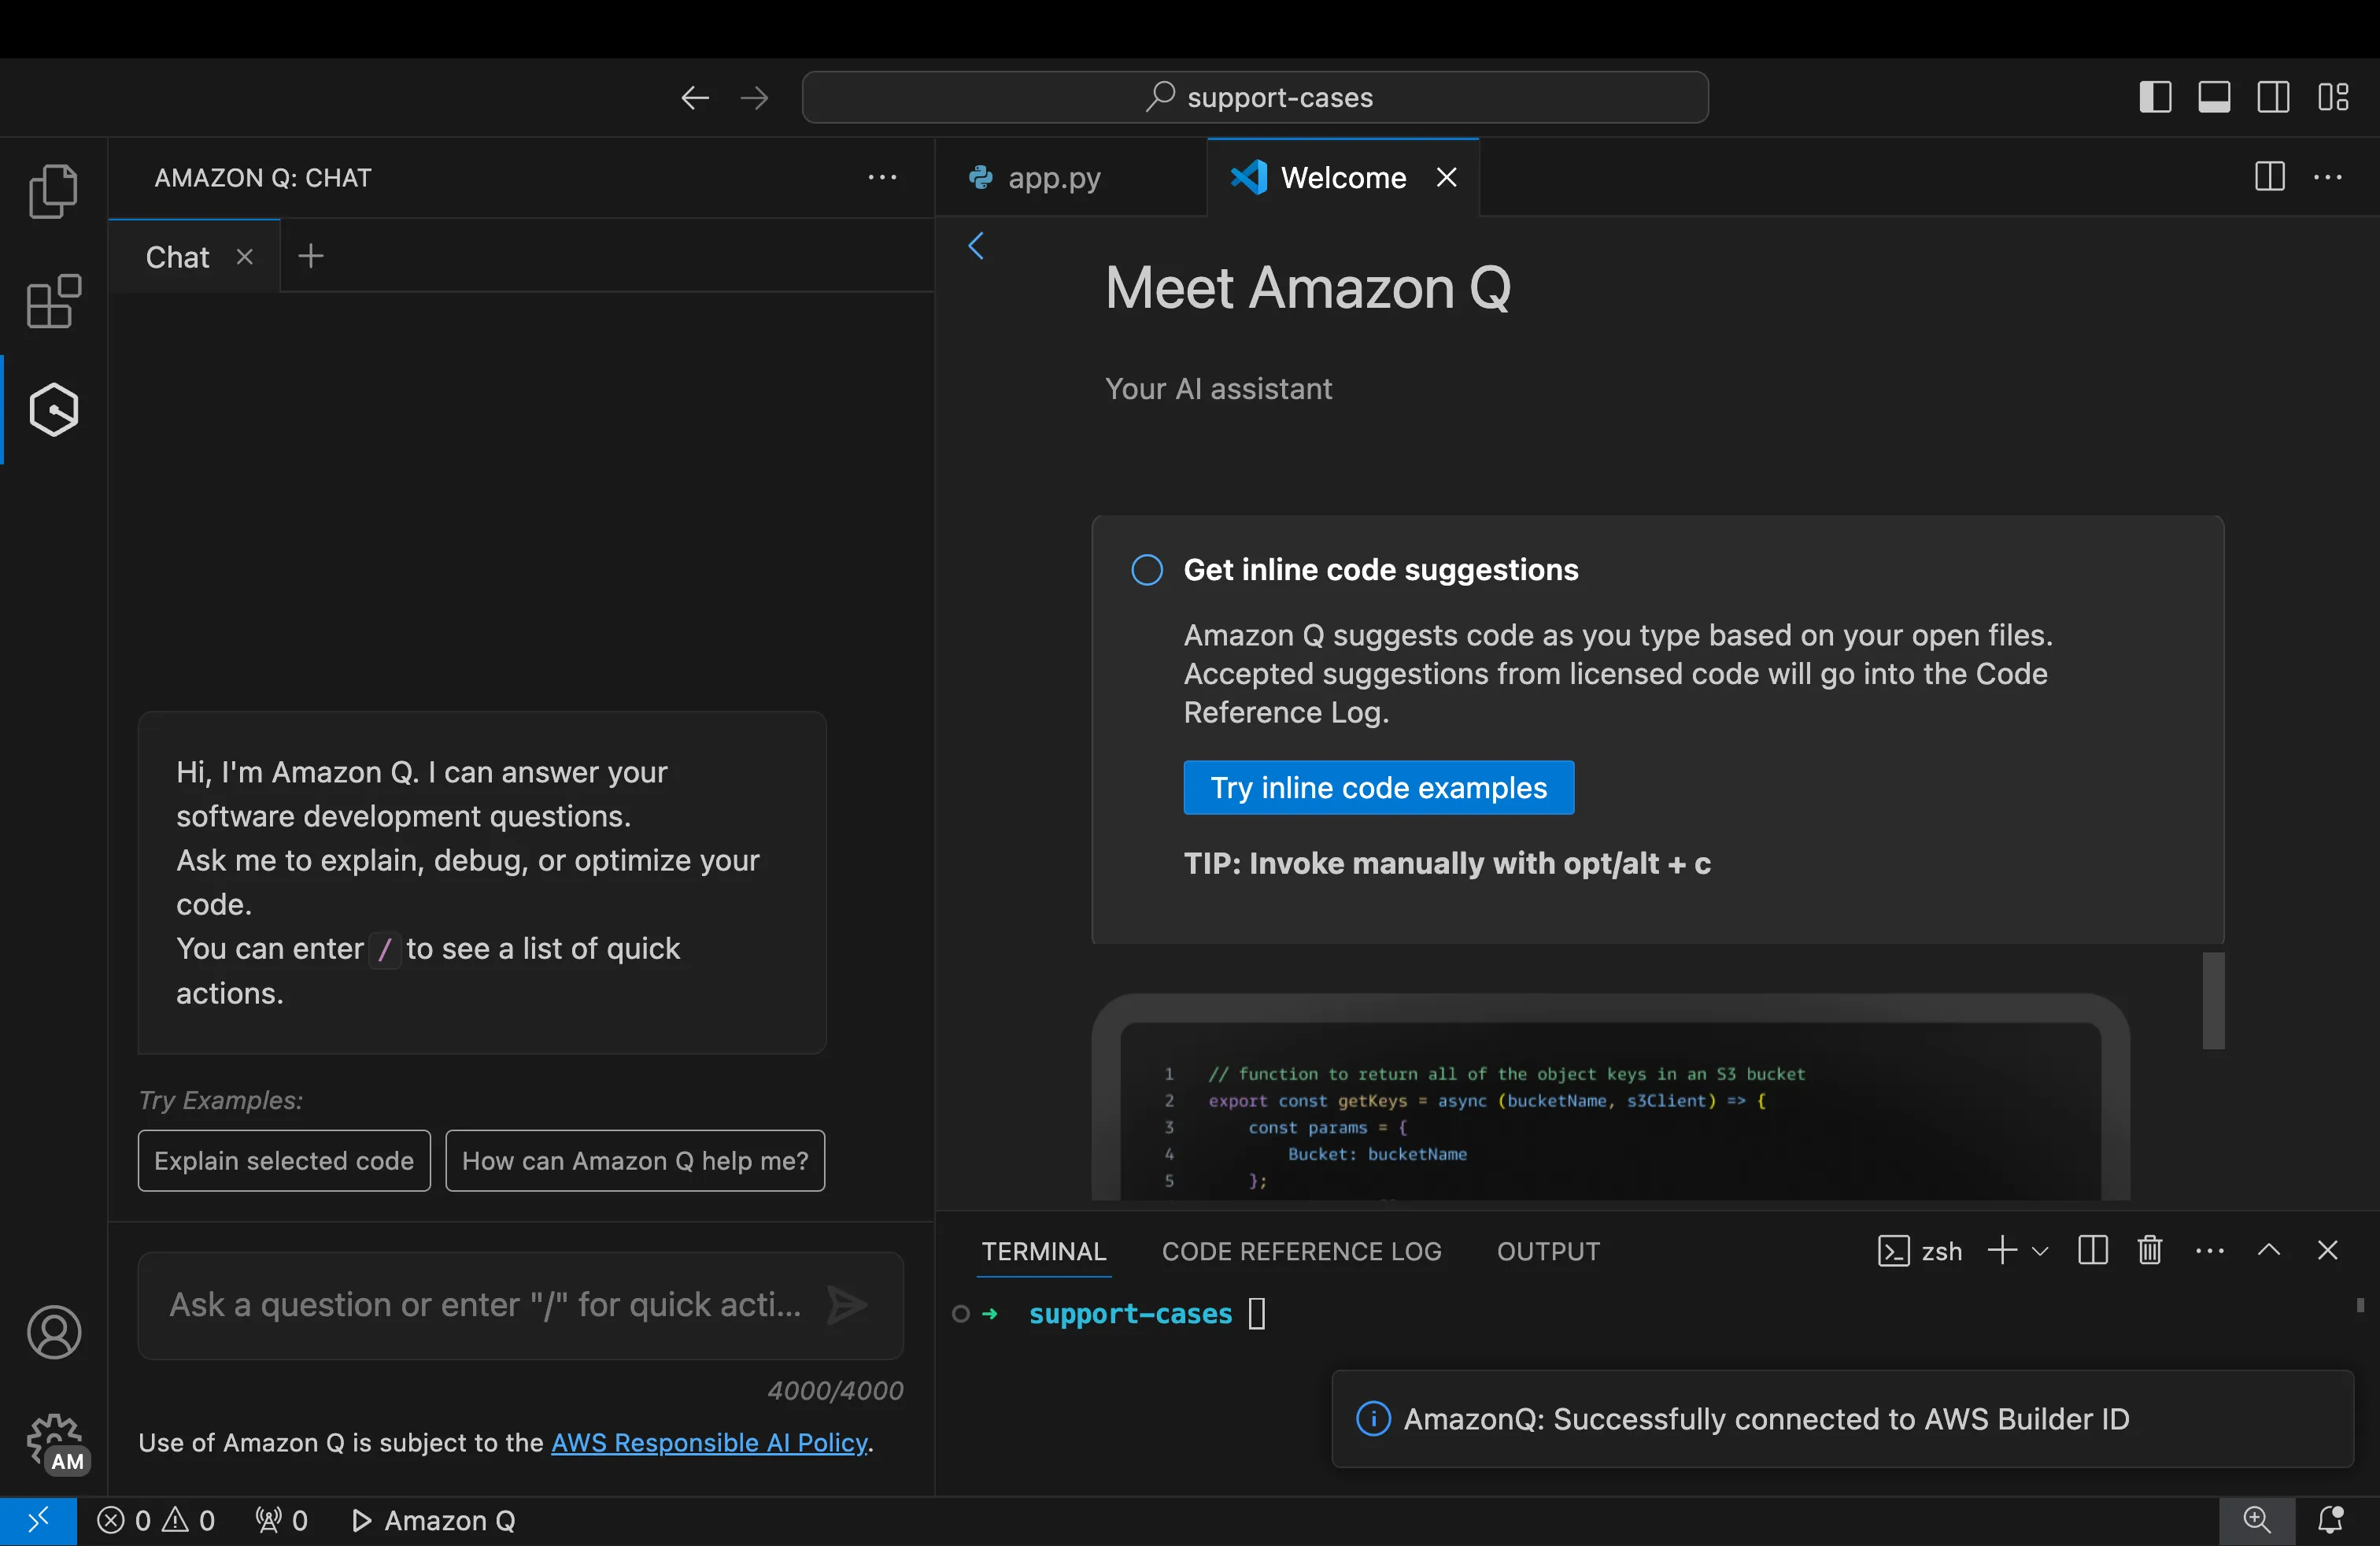
- Once done, you can switch back to your IDE. You have successfully logged into Amazon Q with Builder ID. A Q Chat window should automatically open for you.
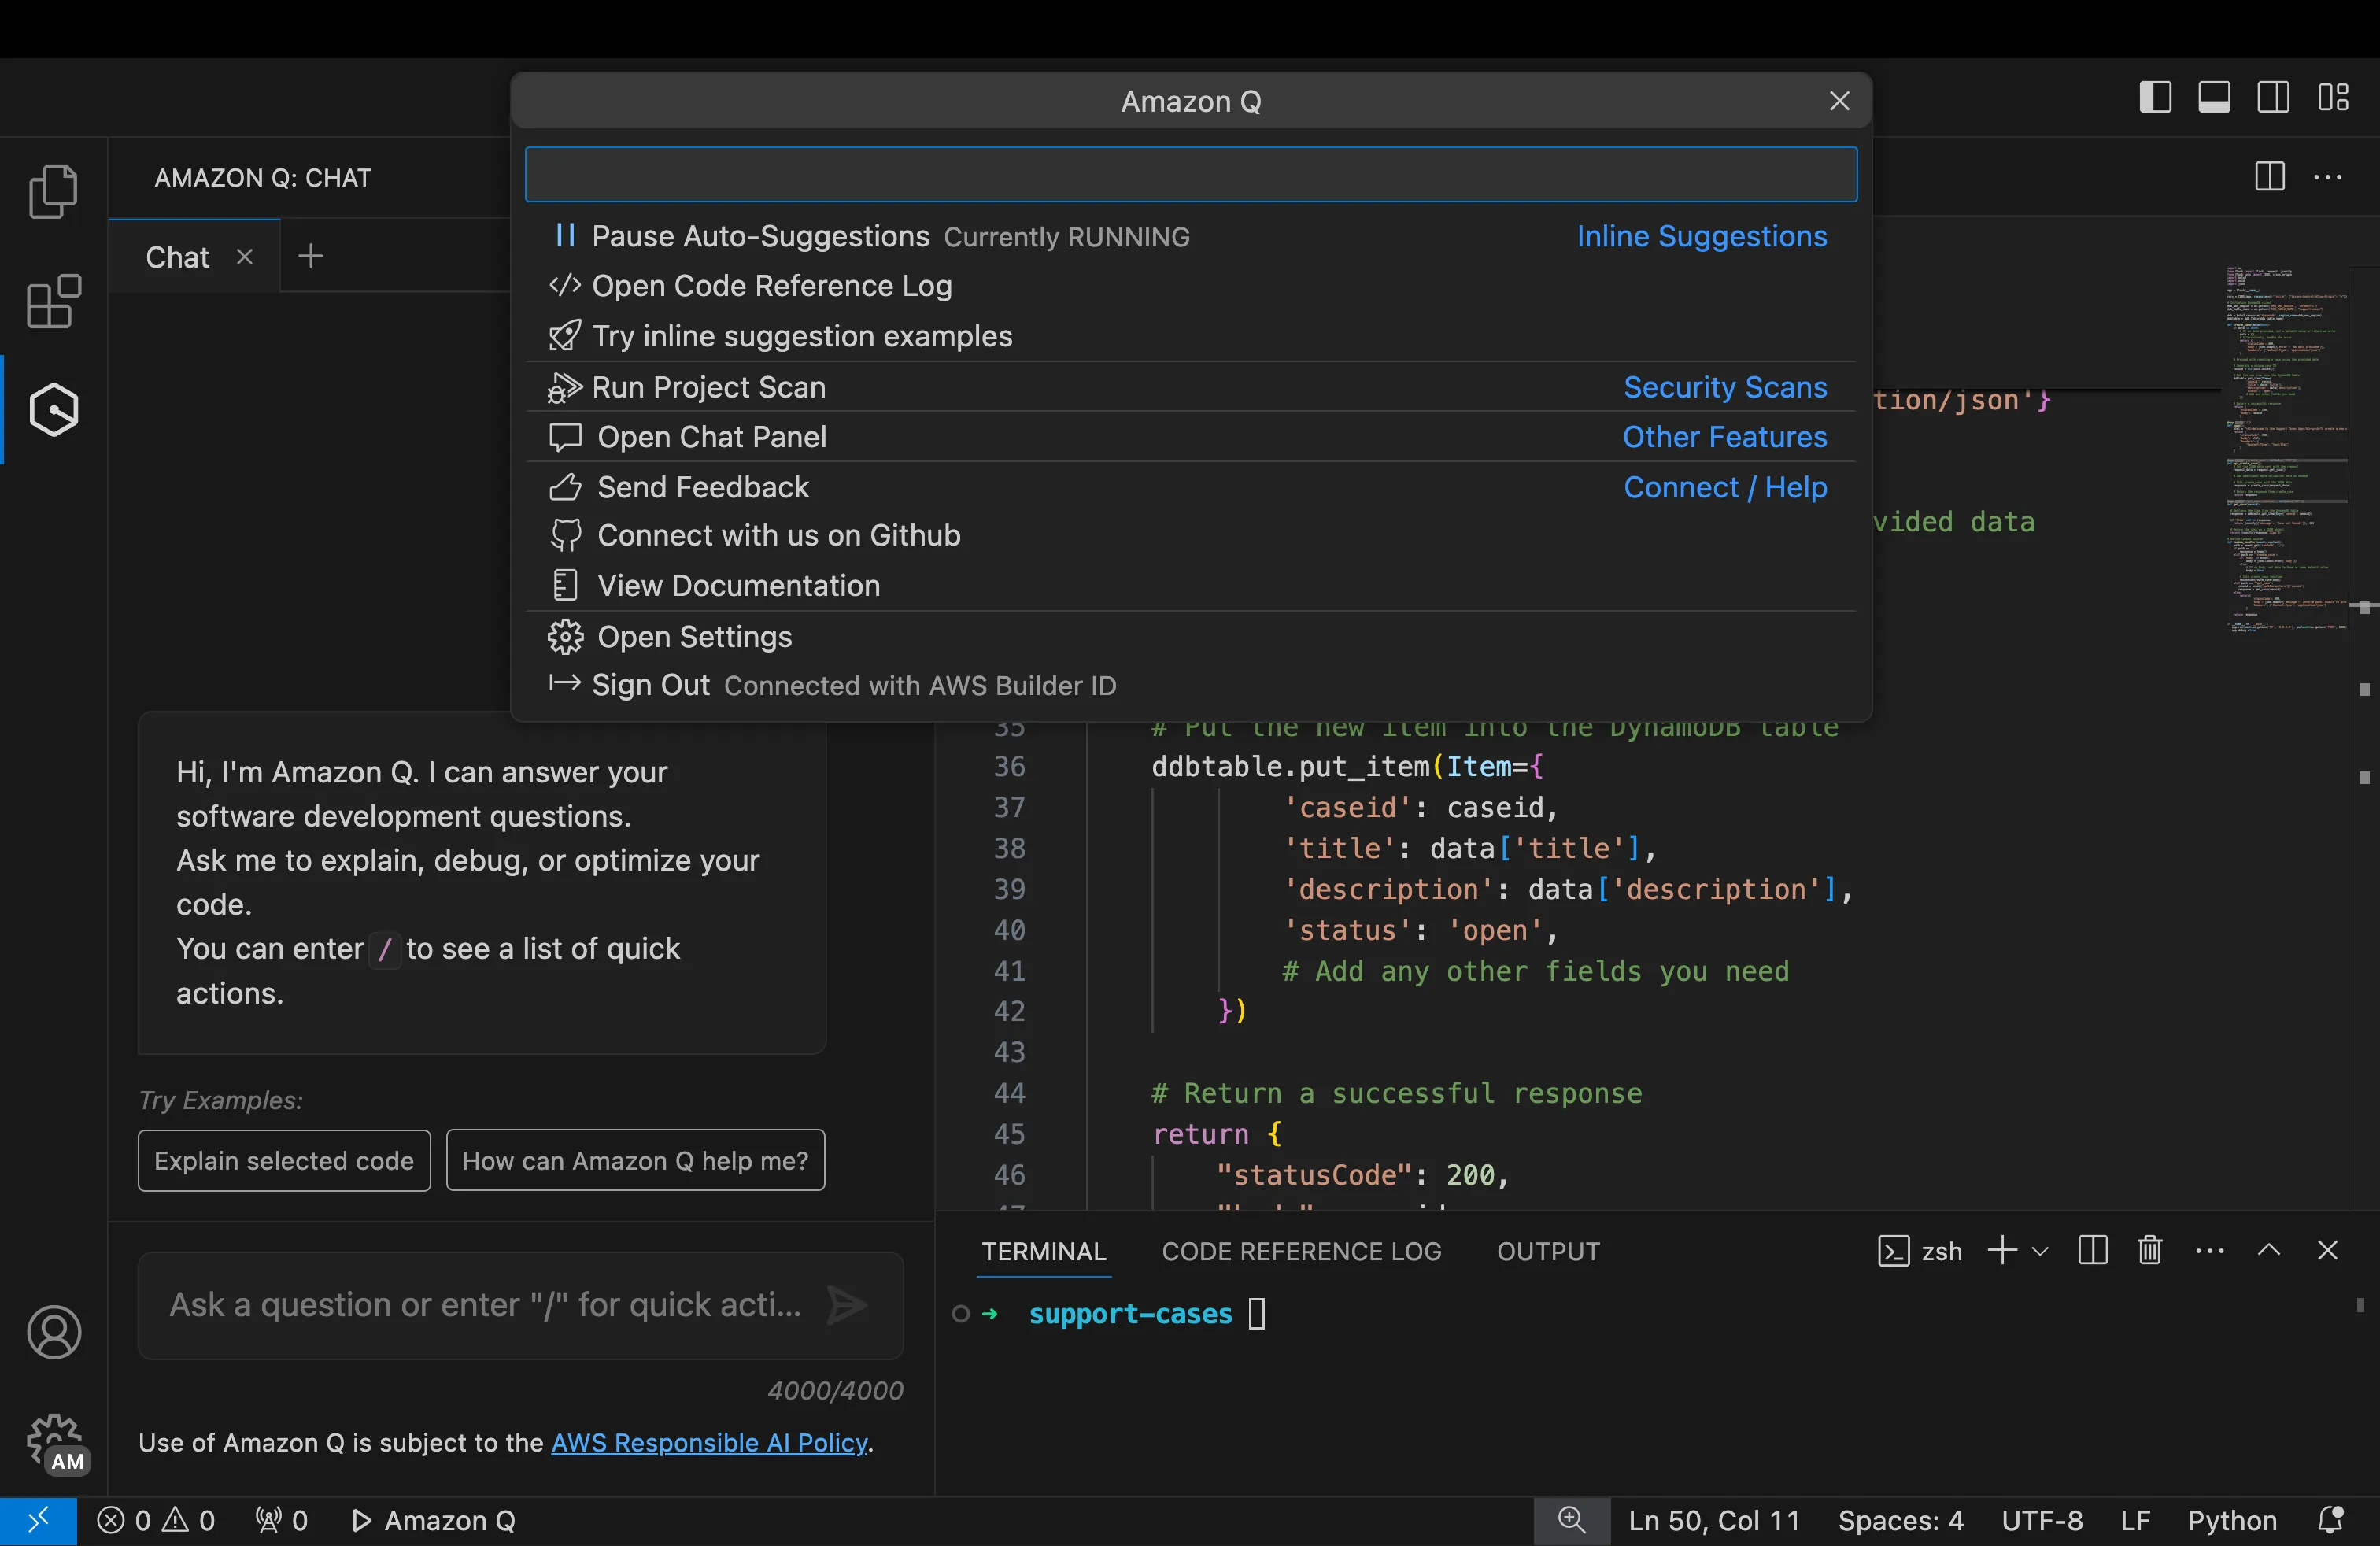
Click on "Amazon Q" in the Status Bar below for more options like Pause auto-suggestions, open settings or Sign out.
You can now skip to Step 3.
Important!! If you are following this step, you will incur AWS charges. If you are just testing this out, make sure to remove the users at the end to reduce the cost.
To authenticate via this method, it is important to have an AWS Account with activated IAM Identity Centre. Amazon Q requires IAM Identity Center. If your AWS Organization does not have IAM Identity Center activated. The Account Administrator must first activate IAM Identity Center in this account in order to set up Amazon Q. Use this step-by-step guide.
Request your account administrator to create an identity for you in the IAM Identity Center and subscribe this identity to Developer Pro.
Ensure the Account Administrator shares two key items for you to login via Visual Studio Code:
- Start URL
- AWS Region
These are available in the AWS Console for IAM Identity Center, in the "Settings" section you will the AWS access portal URL under Identity Source tab.
In Visual Studio Code, perform following steps to authenticate:
- On the Sign-in window in Amazon Q, select on the first option "
Use with Pro license" and click "Continue". - You will be asked to enter Start URL and AWS Region we noted earlier.
- You will get a pop-up with a confirmation code, click on "Proceed to browser".
- You will be redirected to a web browser. Confirm the code is same and click on "Confirm and continue".
- This redirects you to sign in to your Identity Center profile. Once done, simply "Allow access".
- You can now switch back to your Visual Studio Code IDE. You have successfully logged into Amazon Q with Pro license.
A Q Chat window should automatically open for you.
Amazon Q can be found in the activity bar in Visual Studio Code.
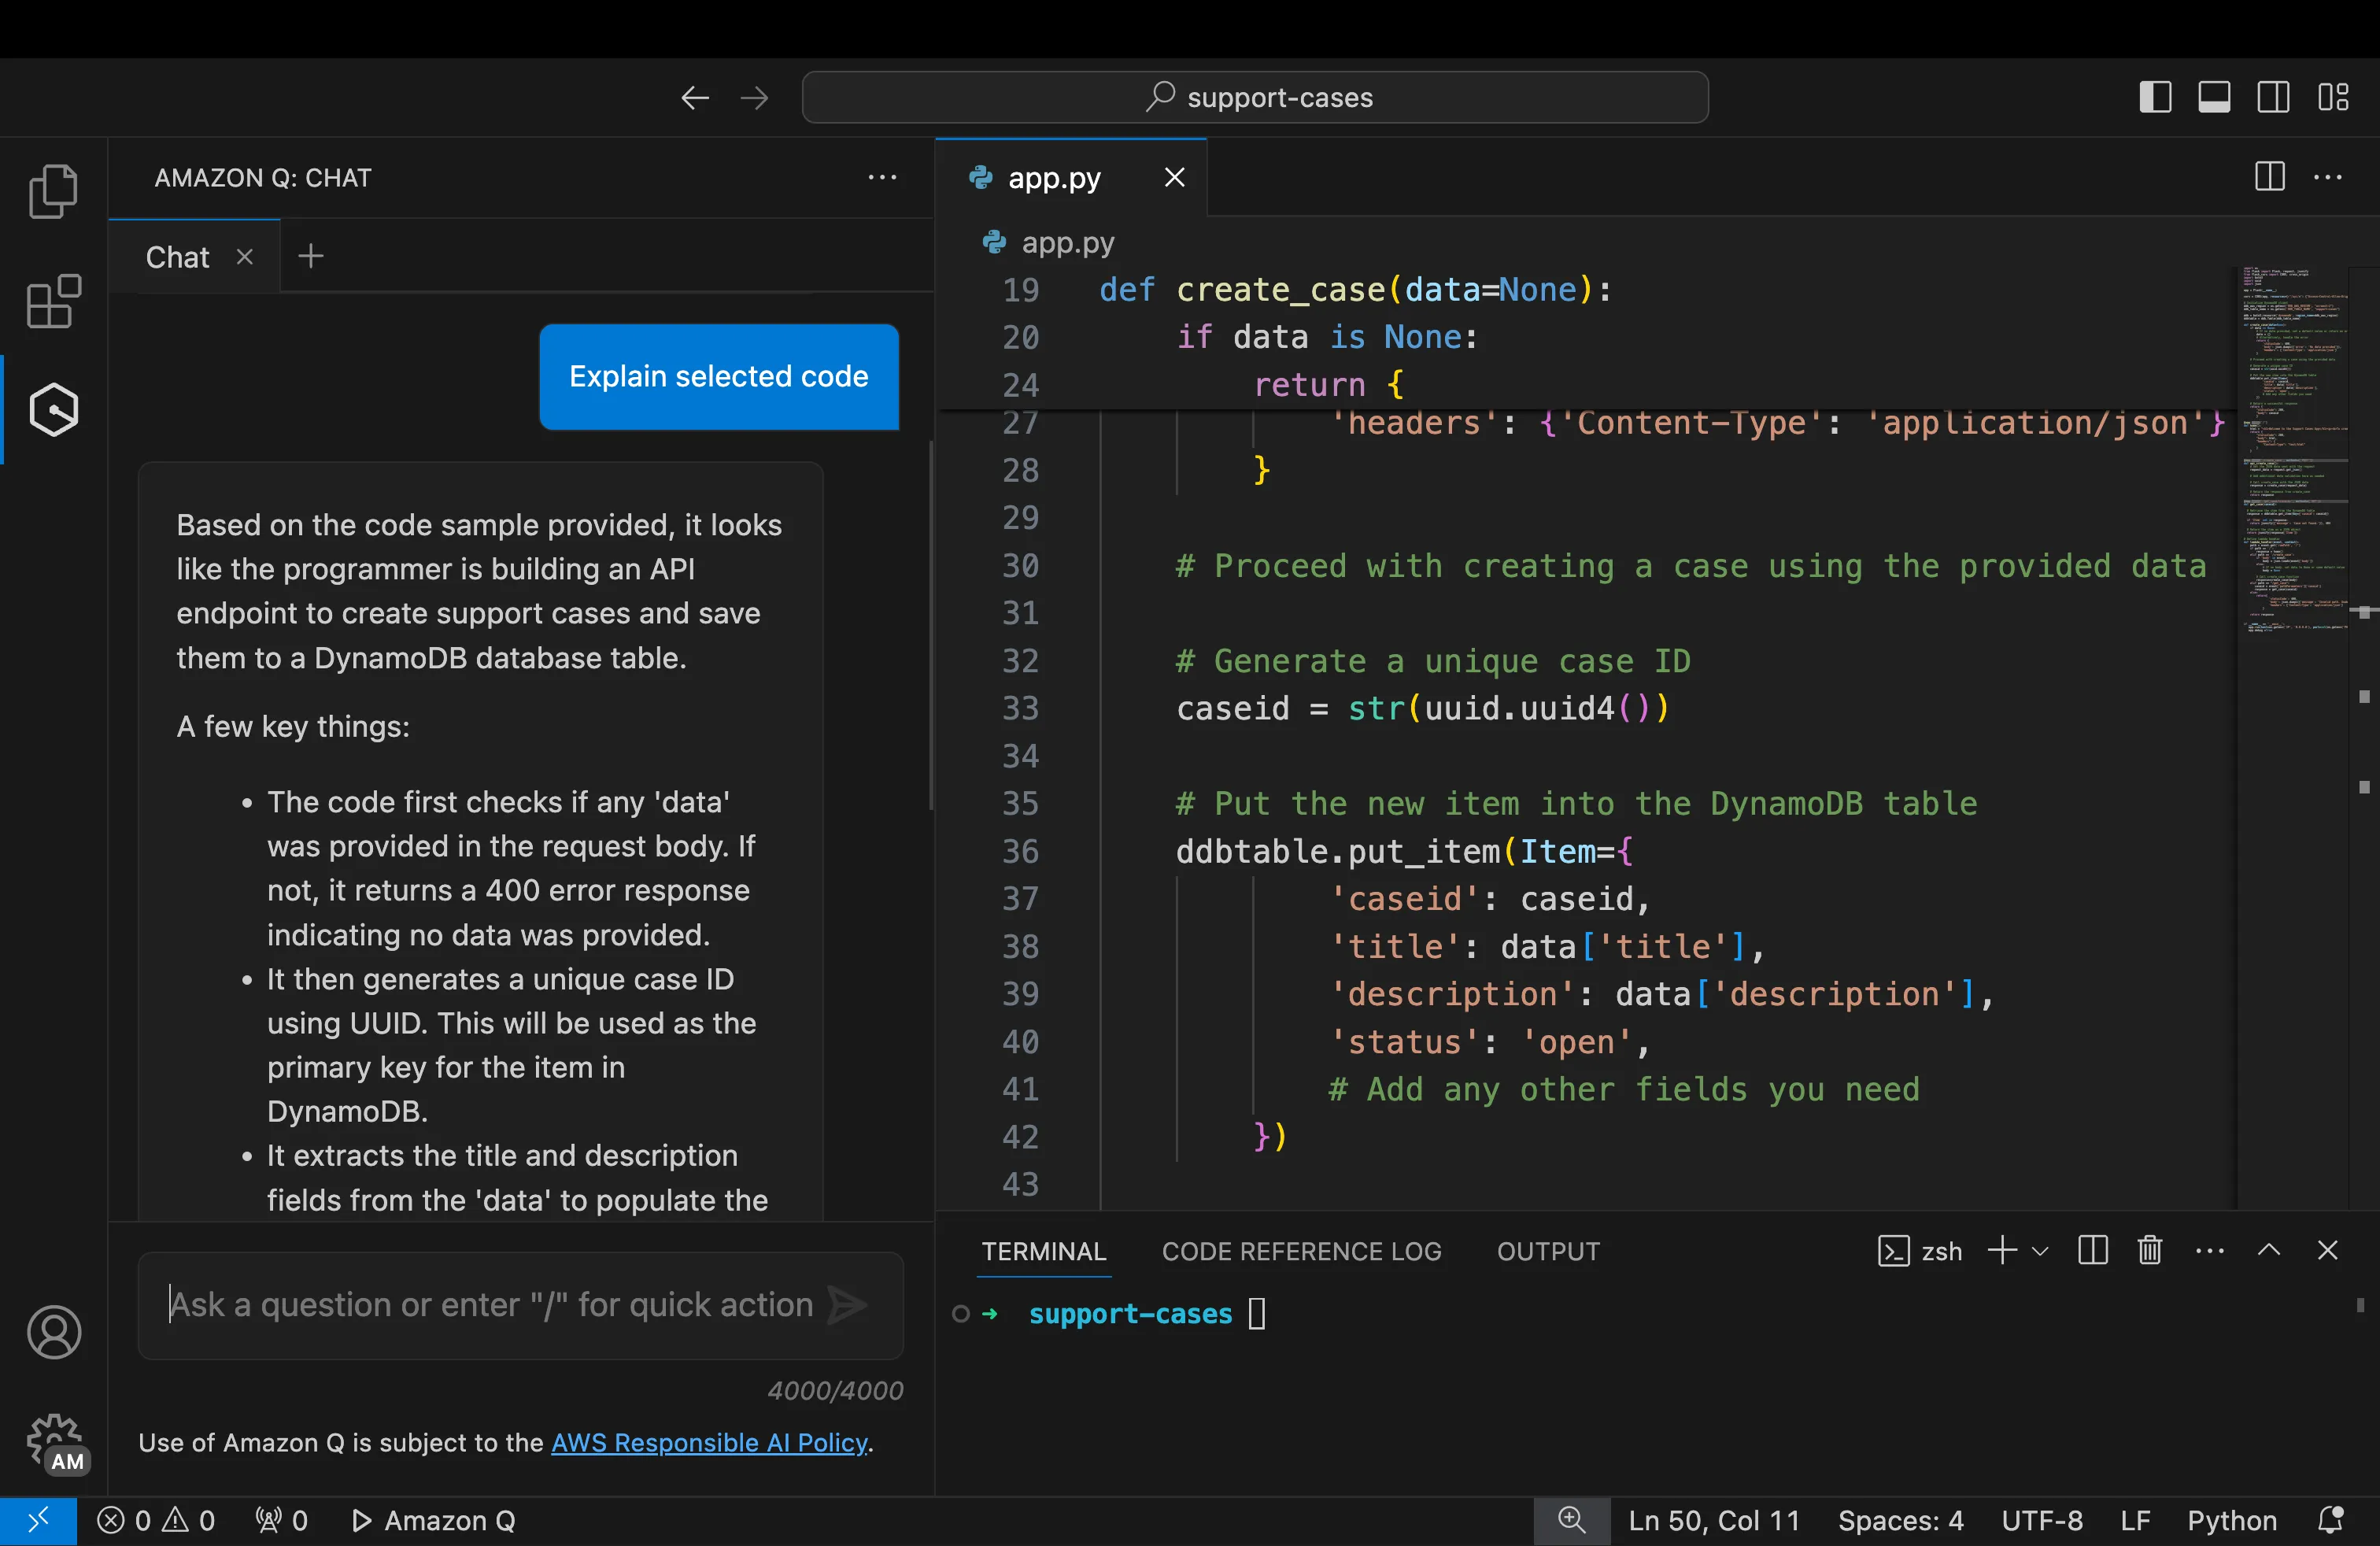
- Open your source code or a GitHub repository.
- Select code, right click send to Amazon Q to explain code OR open the file and ask Q to explain the code.
Once you’re on the Amazon Q Developer Pro license and have followed steps 1 - 3 above:
- Get started with the Amazon Q Developer Agent for software development (previously known as Amazon Q feature development) in the IDE.
- Get started with Amazon Q Developer Agent for code transformation (previously known as Amazon Q Code Transformation)
- Get started with the Amazon Q Developer Agent for software development (previously known as Amazon Q feature development) in the IDE.
- Get started with Amazon Q Developer Agent for code transformation (previously known as Amazon Q Code Transformation)
- Find more Amazon Q content from the community and dive deeper
- Want to report bugs, improvements, and features? File a bug or submit a feature request on our Github repository.
Any opinions in this post are those of the individual author and may not reflect the opinions of AWS.