
Run a java service serverless with ECS and Fargate
How to run a Java based service on Amazon ECS using Fargate and Fargate Spot. Cover the foundation and the infrastructure and steps needed to run this workload.
Published Jan 7, 2024
I normally don't write much about container workloads, most my posts are about some form of event-driven architecture with AWS Lambda, StepFunctions, and EventBridge. However, while working on a different post I realized that I needed to create an introduction to running container workloads on ECS with Fargate. But, is Fargate really serverless? Well I would say that for an container service it's serverless.
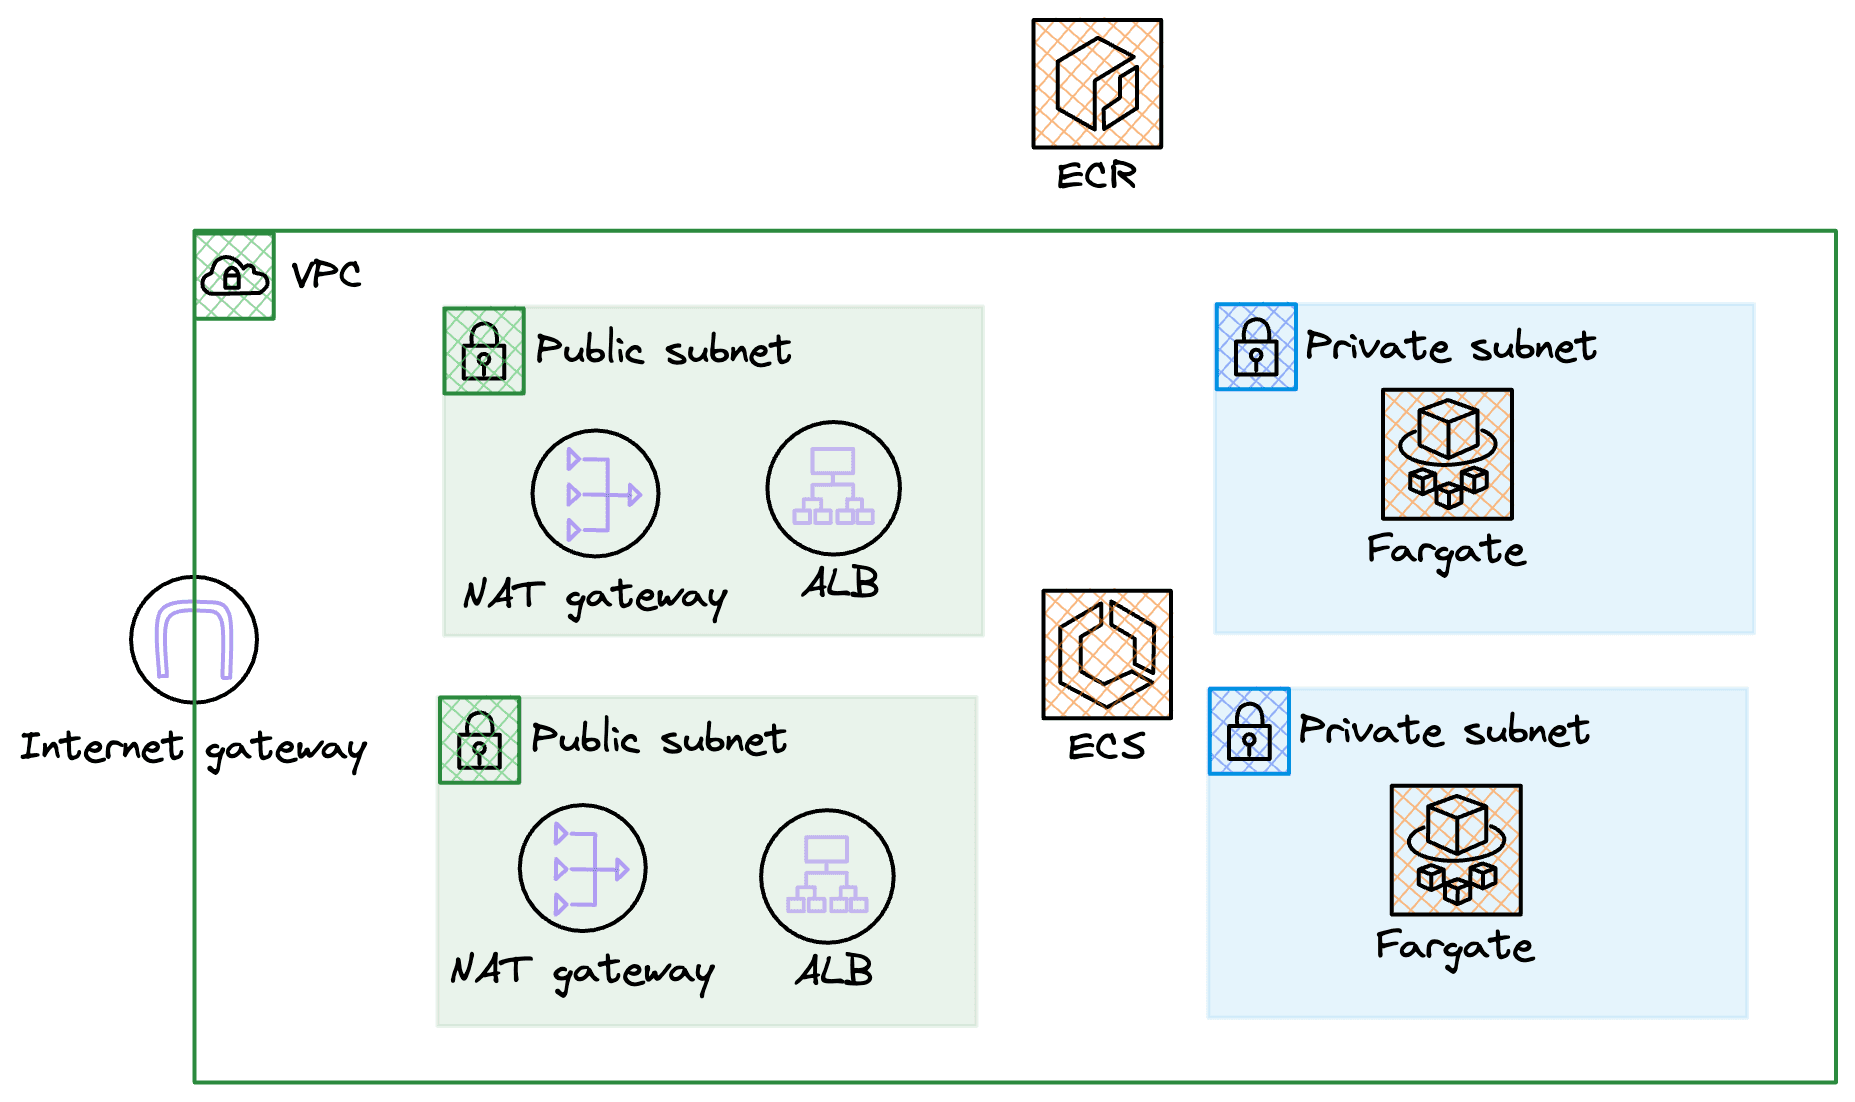
First of all, let us do an overview of the architecture that we need to create. When running a container workload on ECS we need to create a VPC to run in. We'll create a VPC with two public, two private subnets, a NAT Gateway in each public subnet (with routing from the private), an Internet Gateway, and of course all the needed Security Groups. There will be one Application Load Balancer (ALB) that spans both of the public subnets, the ALB will send traffic to the Fargate based containers running in the ECS cluster in each of the private subnets. Container images will be pulled from ECR by ECS when starting up new containers. Fairly basic architecture, so let's go build!
To deploy the VPC let's turn to CloudFormation and SAM CLI. I'll be using this template that will create our basic VPC, mentioned in the overview section.
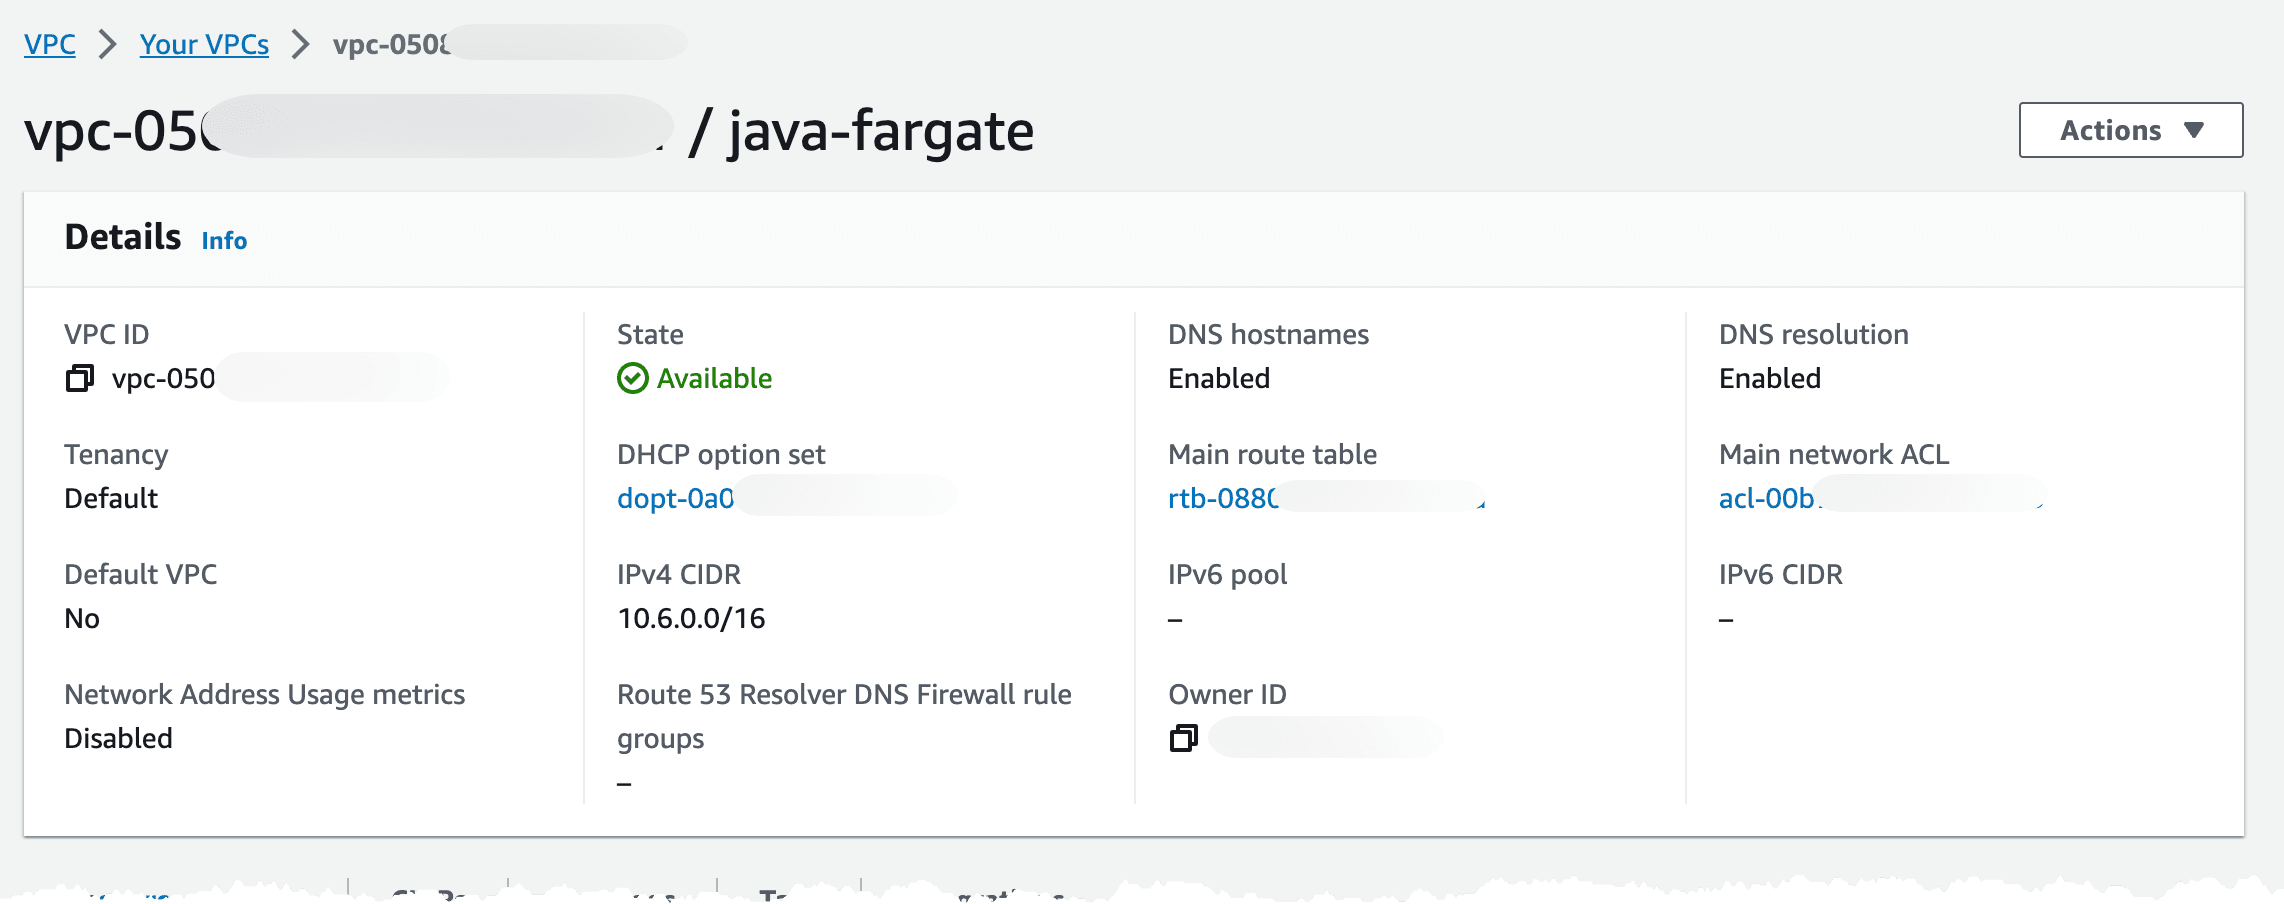
After deployment we should end up with a VPC looking like this. I decided to use a 10.6.0.0 cidr.
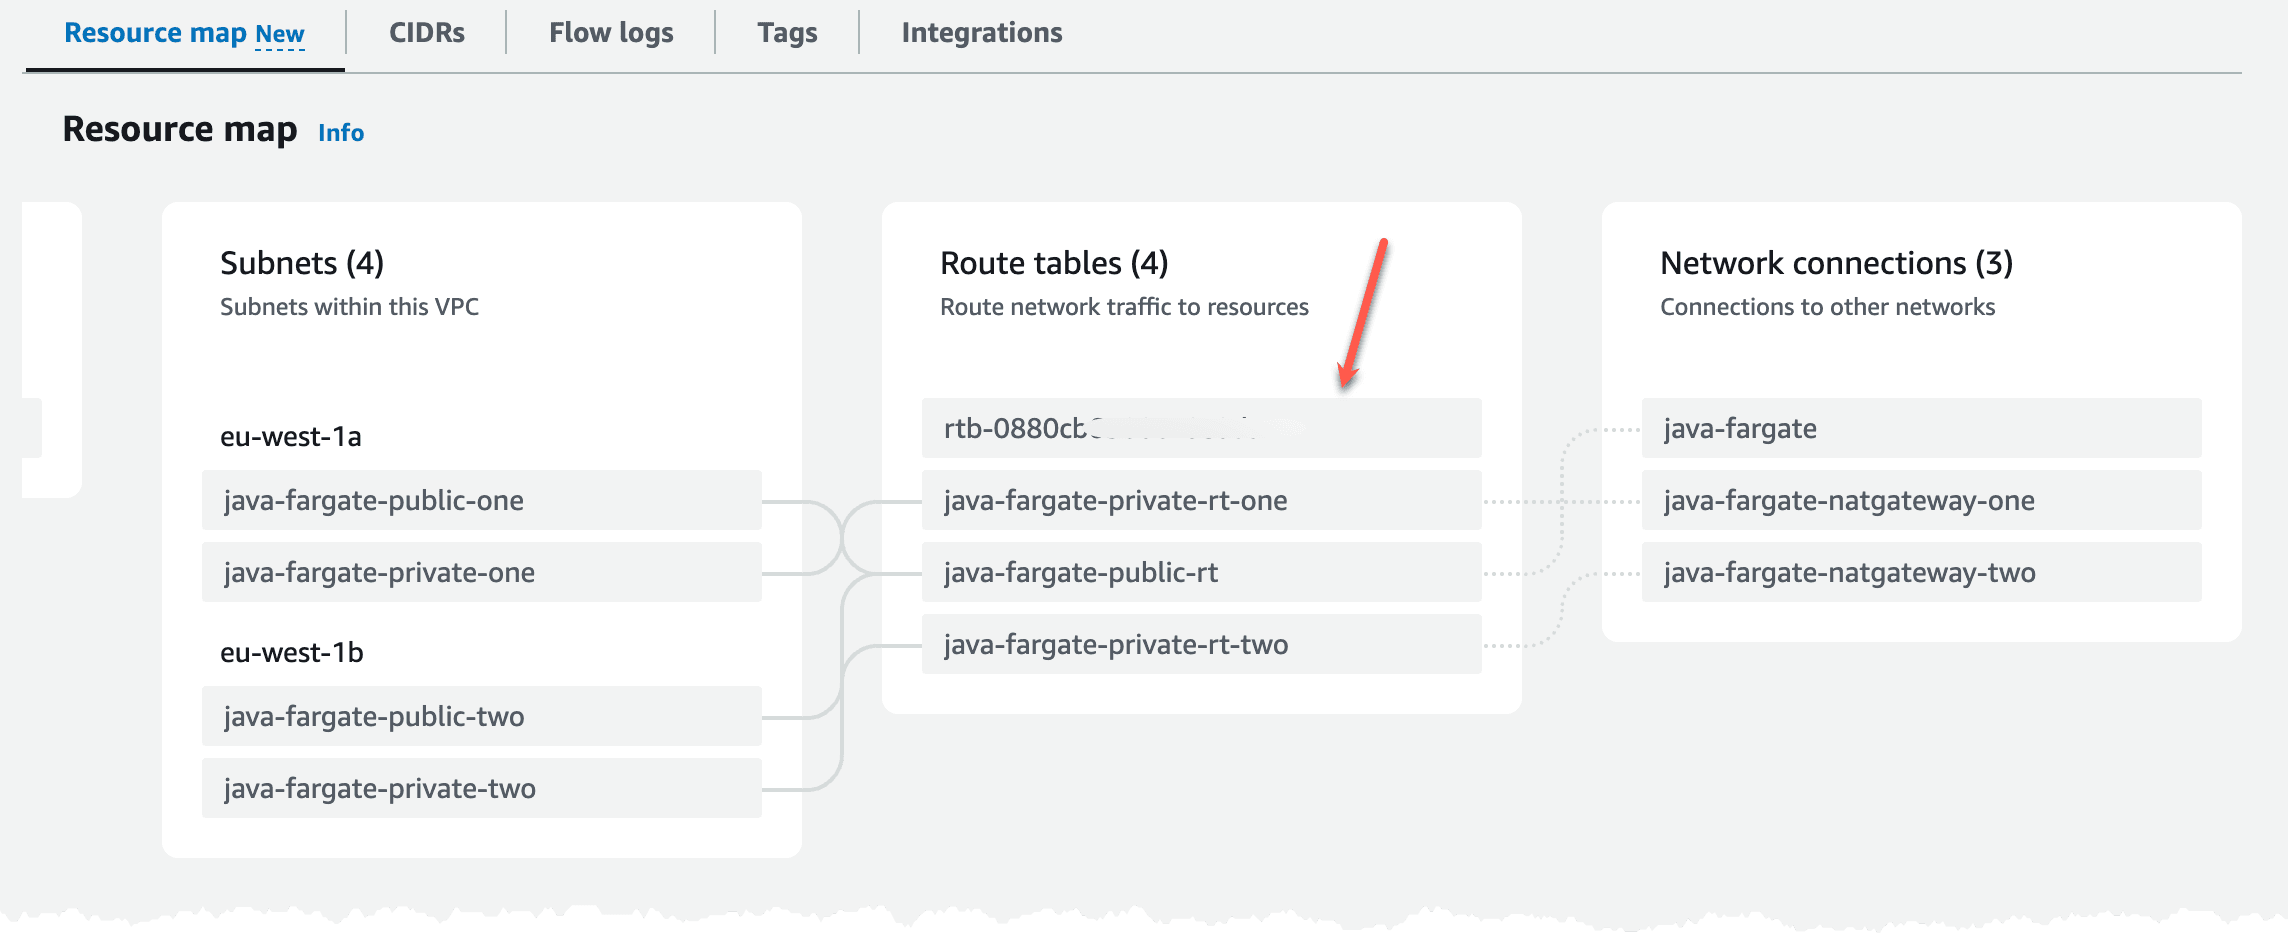
If we scroll down a bit we can see the resource map, this shows the current routing setup (the grey lines). It shows that we route the public subnets to the Internet Gateway and the private subnets are routed to each corresponding NAT Gateway. We can also see that the default route table, highlighted with the red arrow which is created automatically, is not used.
With the VPC in place we can deploy the ECS cluster and the ALB. We'll also create the security groups needed for communication. On the ALB we'll allow traffic on port 443, then on the ECS cluster we'll create a security group that allow traffic on port 8080 (port used by our service later) coming from the ALB only. On the ALB we'll create a listener with a rule that will only return a static response of 503, this will be our default rule action. When we later deploy our service it will create a new rule for routing. This way we can decouple the ALB from the services, and just have our services hook into the ALB. For the ECS cluster we'll create and attach an IAM Role so it can communicate with ECR, which is needed to pull images.
In this scenario we need a hosted zone in Route53, the reason for that is so we can create use secure connections to the ALB, HTTPS. We need to create an DNS record and an certificate in Certificate Manager. If you don't have an Route53 hosted zone to create DNS records in, you need to change the ALB security group and listener to port 80 instead of port 443.
We'll deploy this template to create all the resources needed.
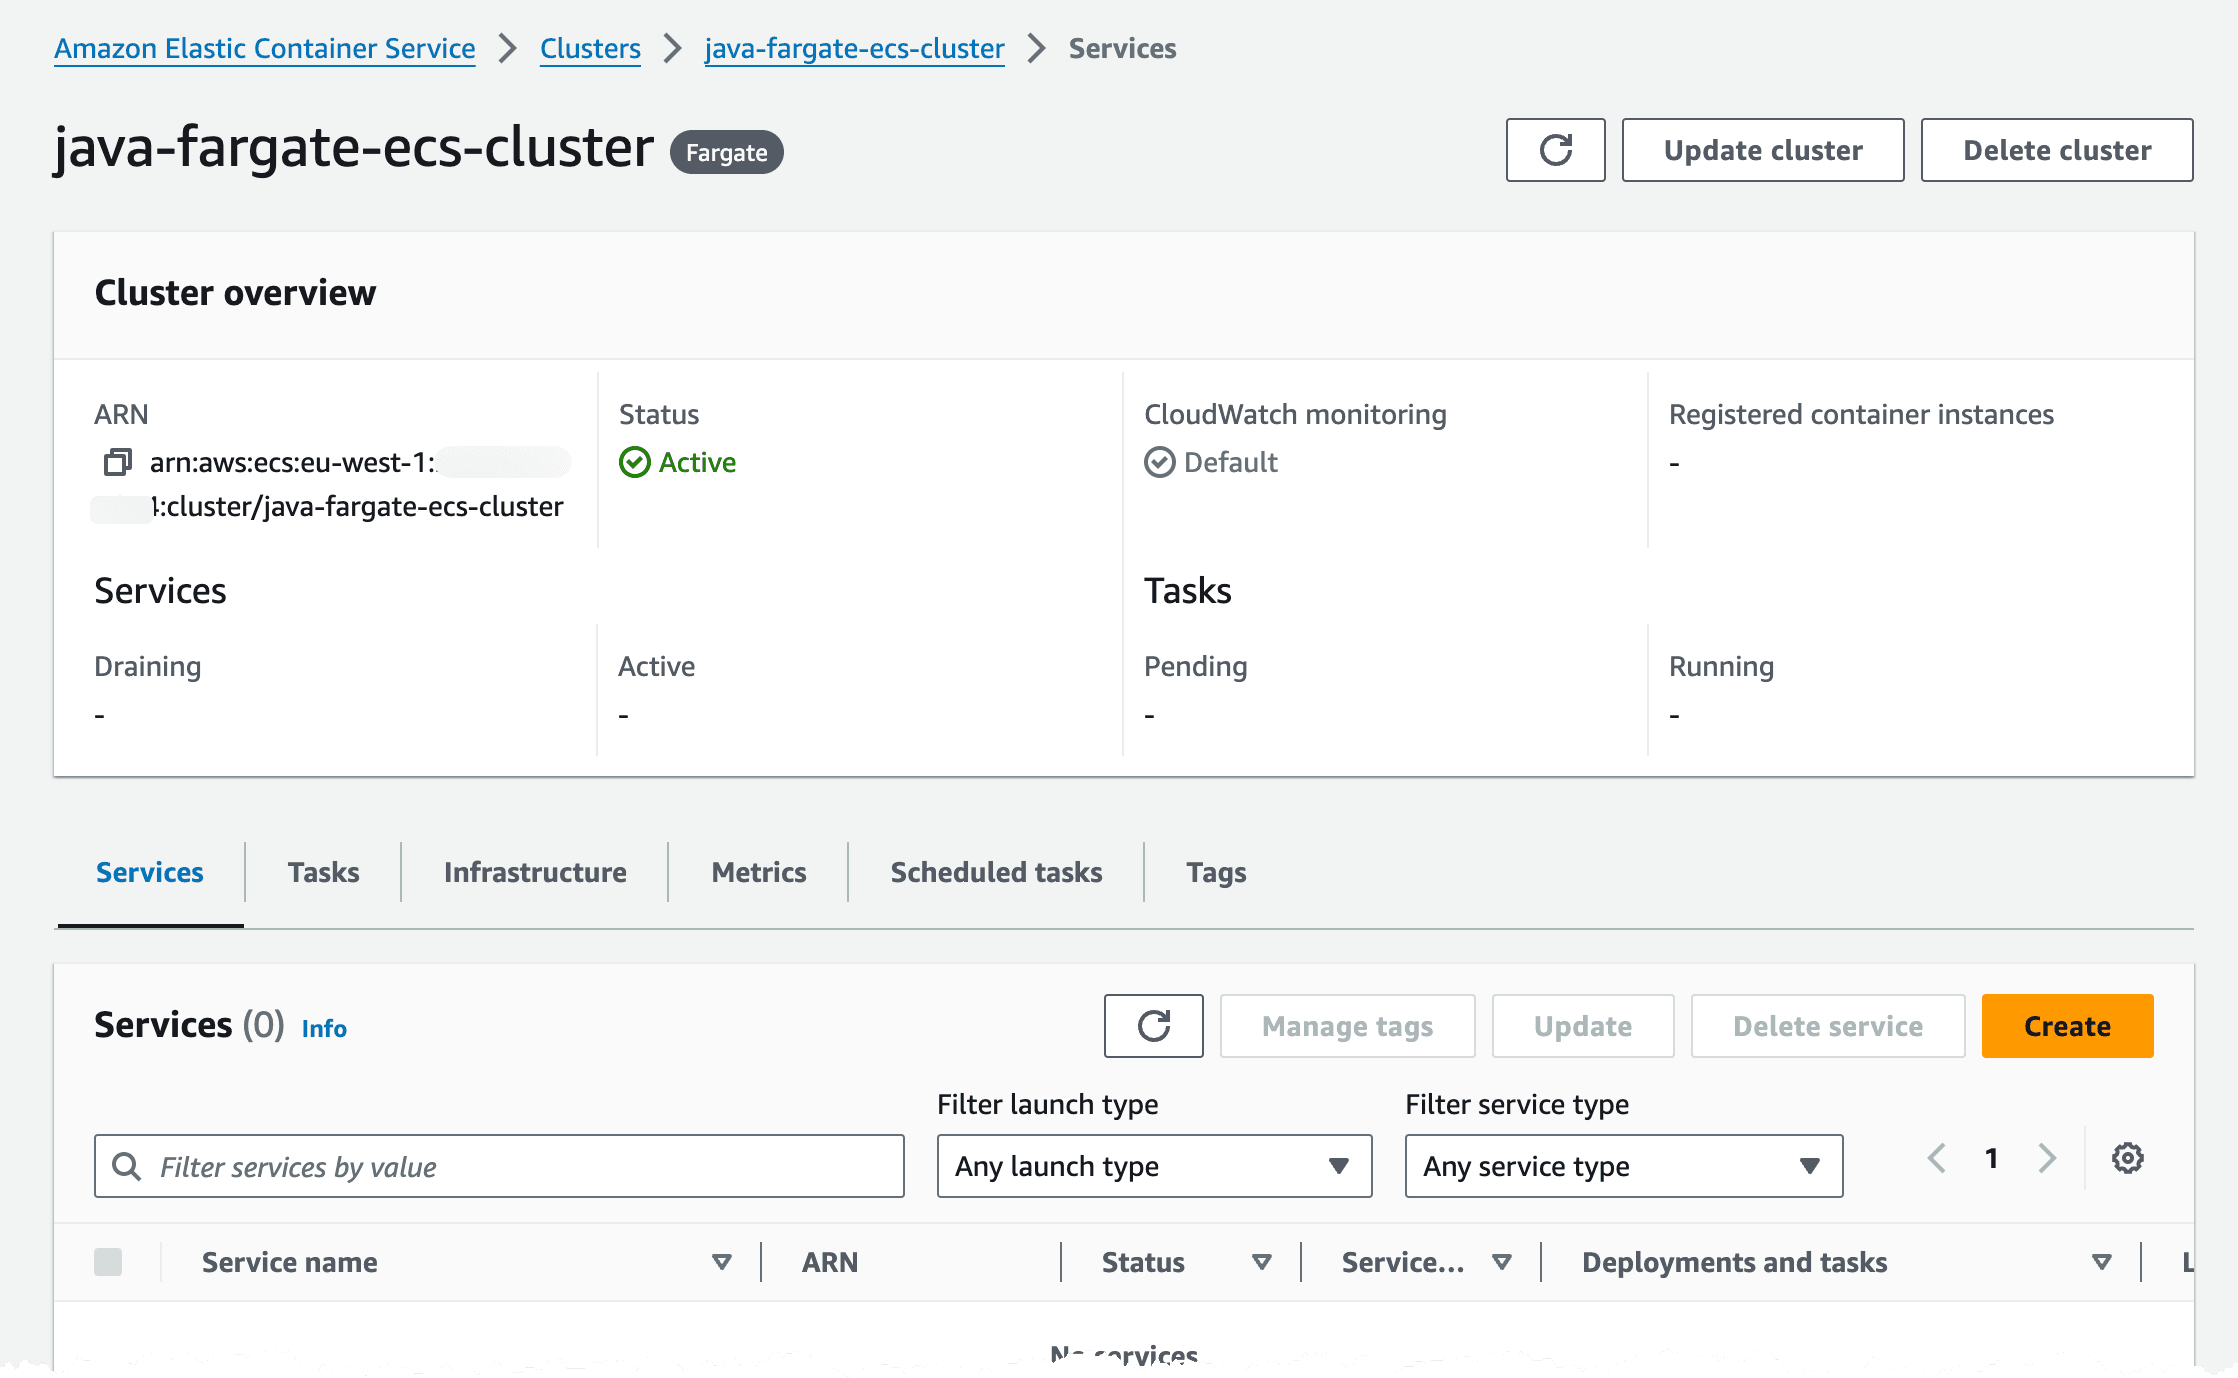
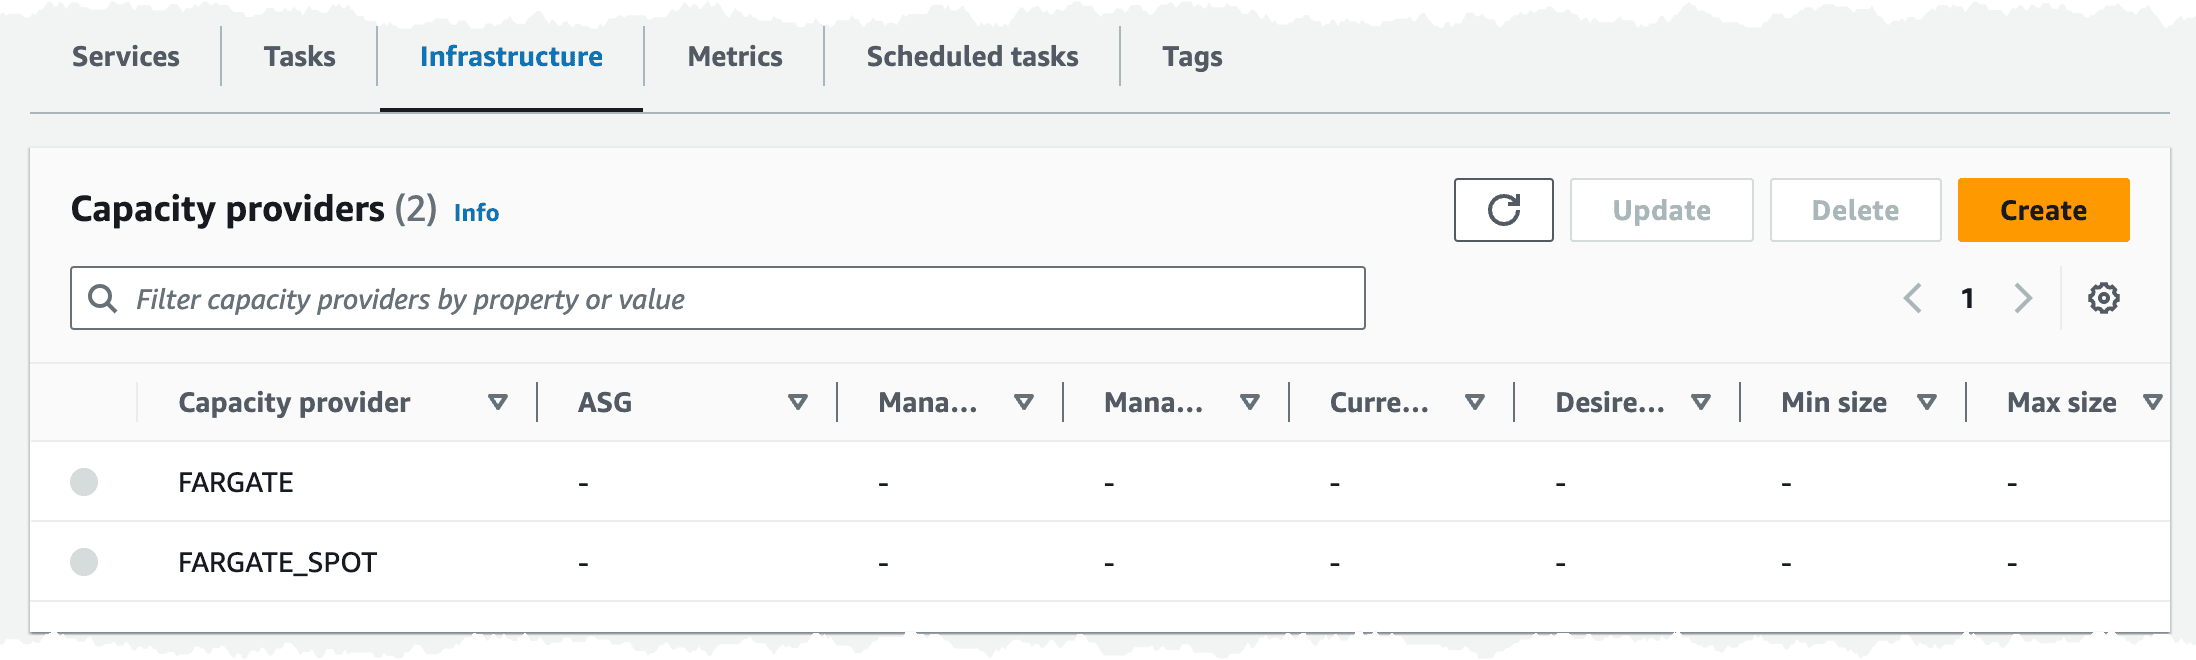
Looking in the console we should now have an ECS cluster looking something like this. We can see that we don't have any services or tasks running at this point, that has not been deployed yet.
We can also see that we use both Fargate and Fargate Spot placement strategy in the cluster.
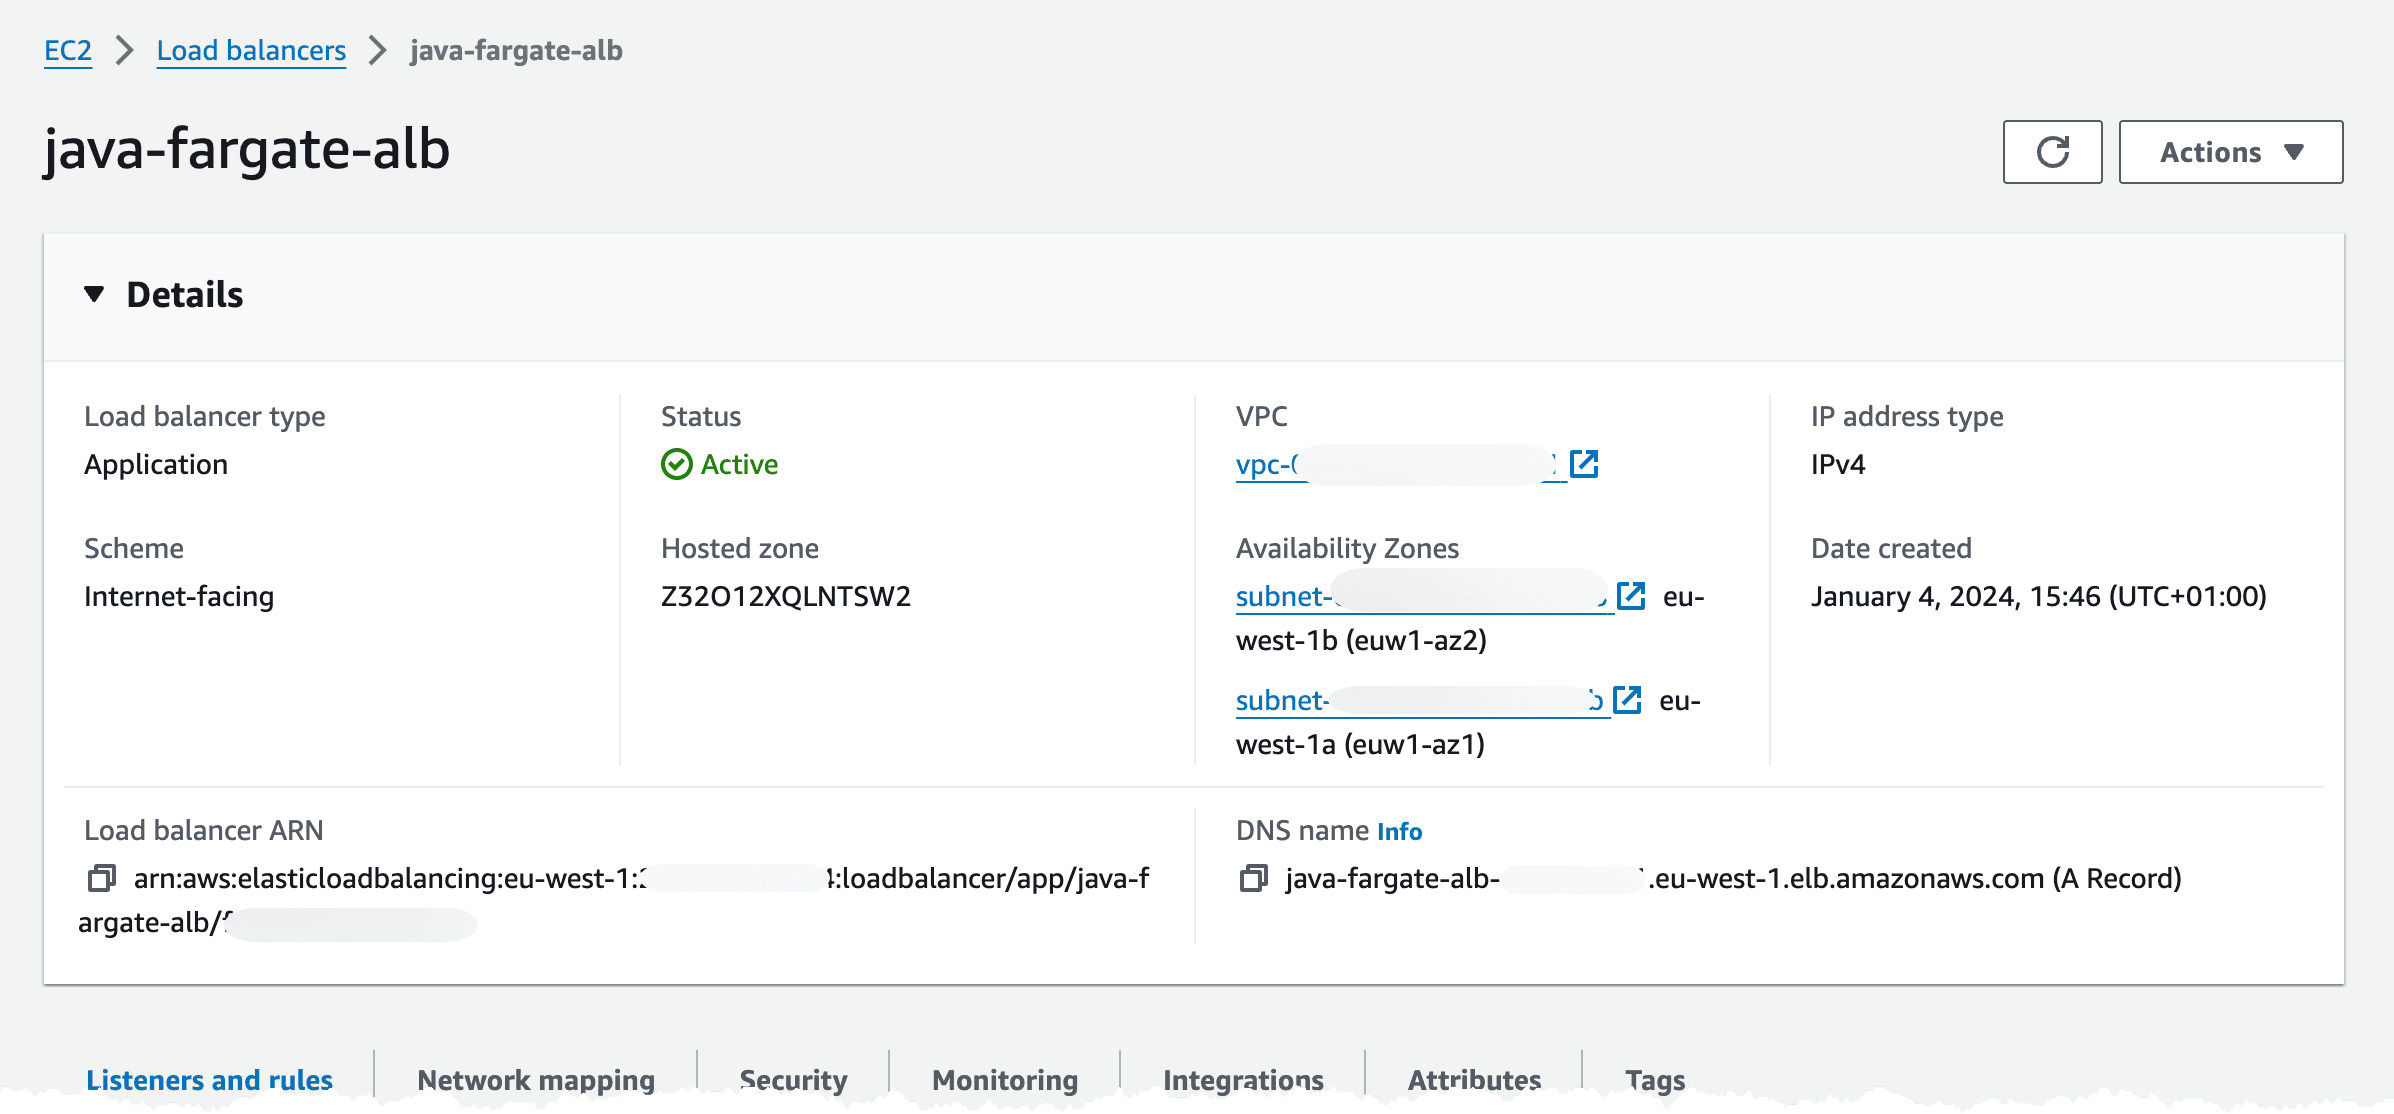
Turning to the ALB it has been deployed to two subnets in our VPC.
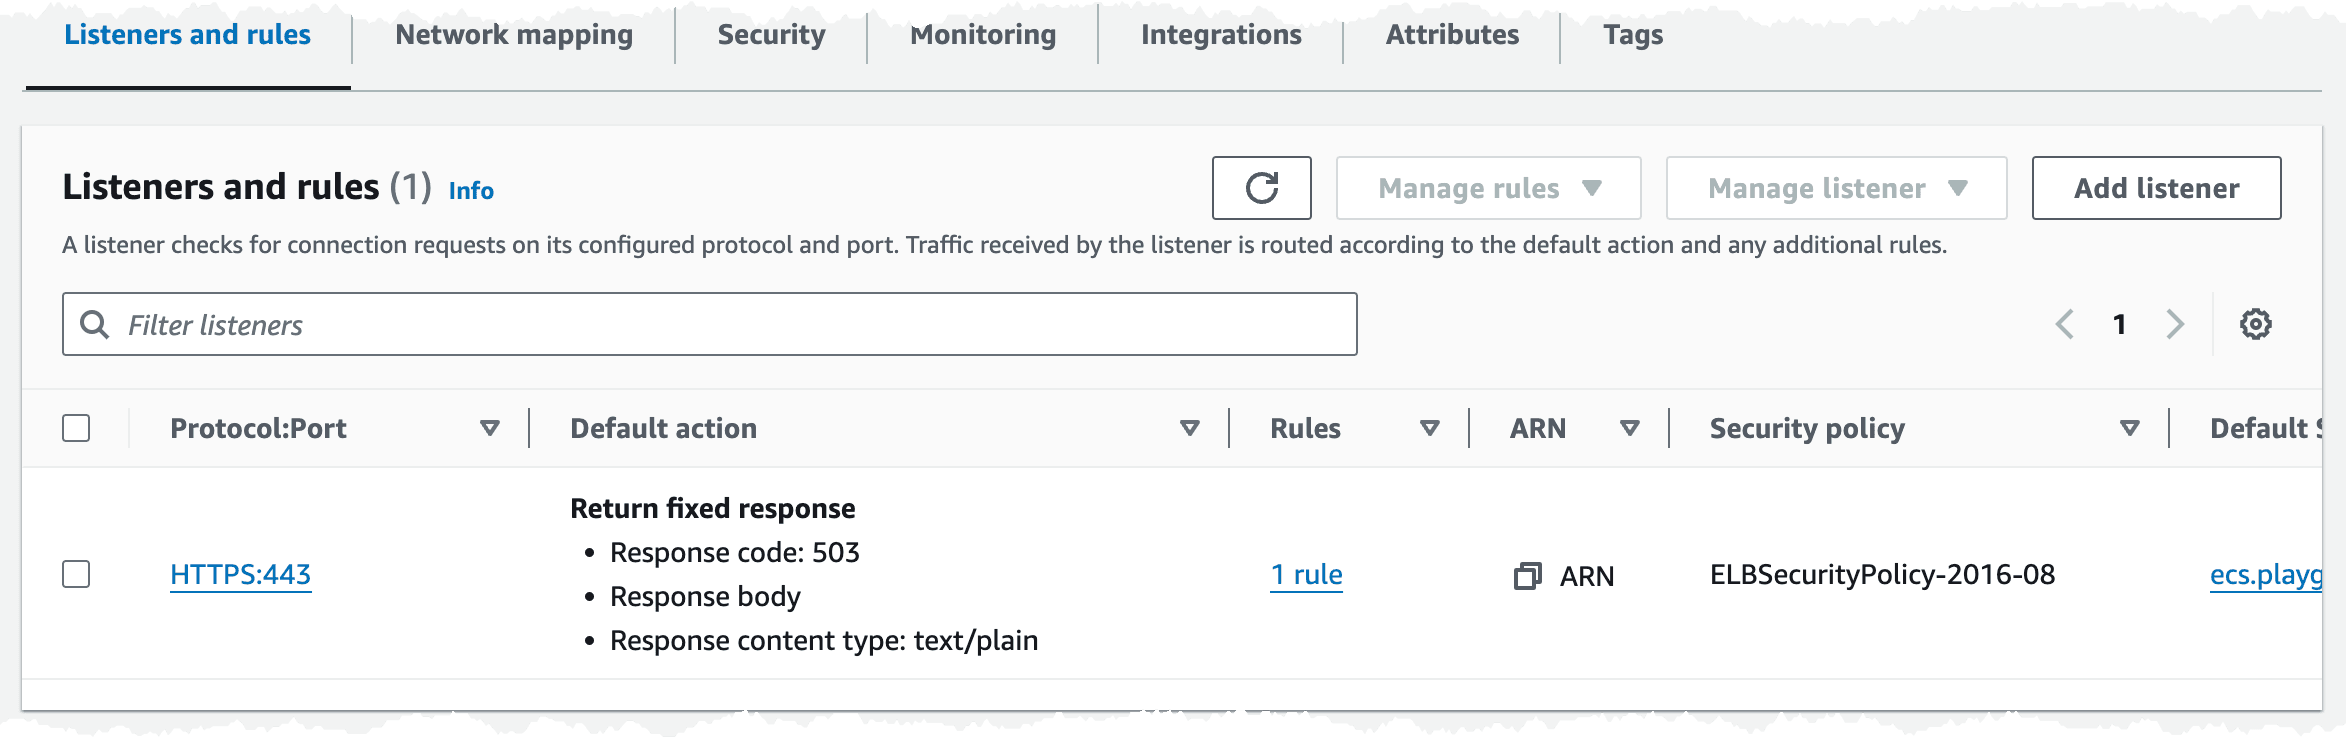
In the Listeners and rules tab, we can check that we got one listener rule with a fixed 503 response, on port 443.
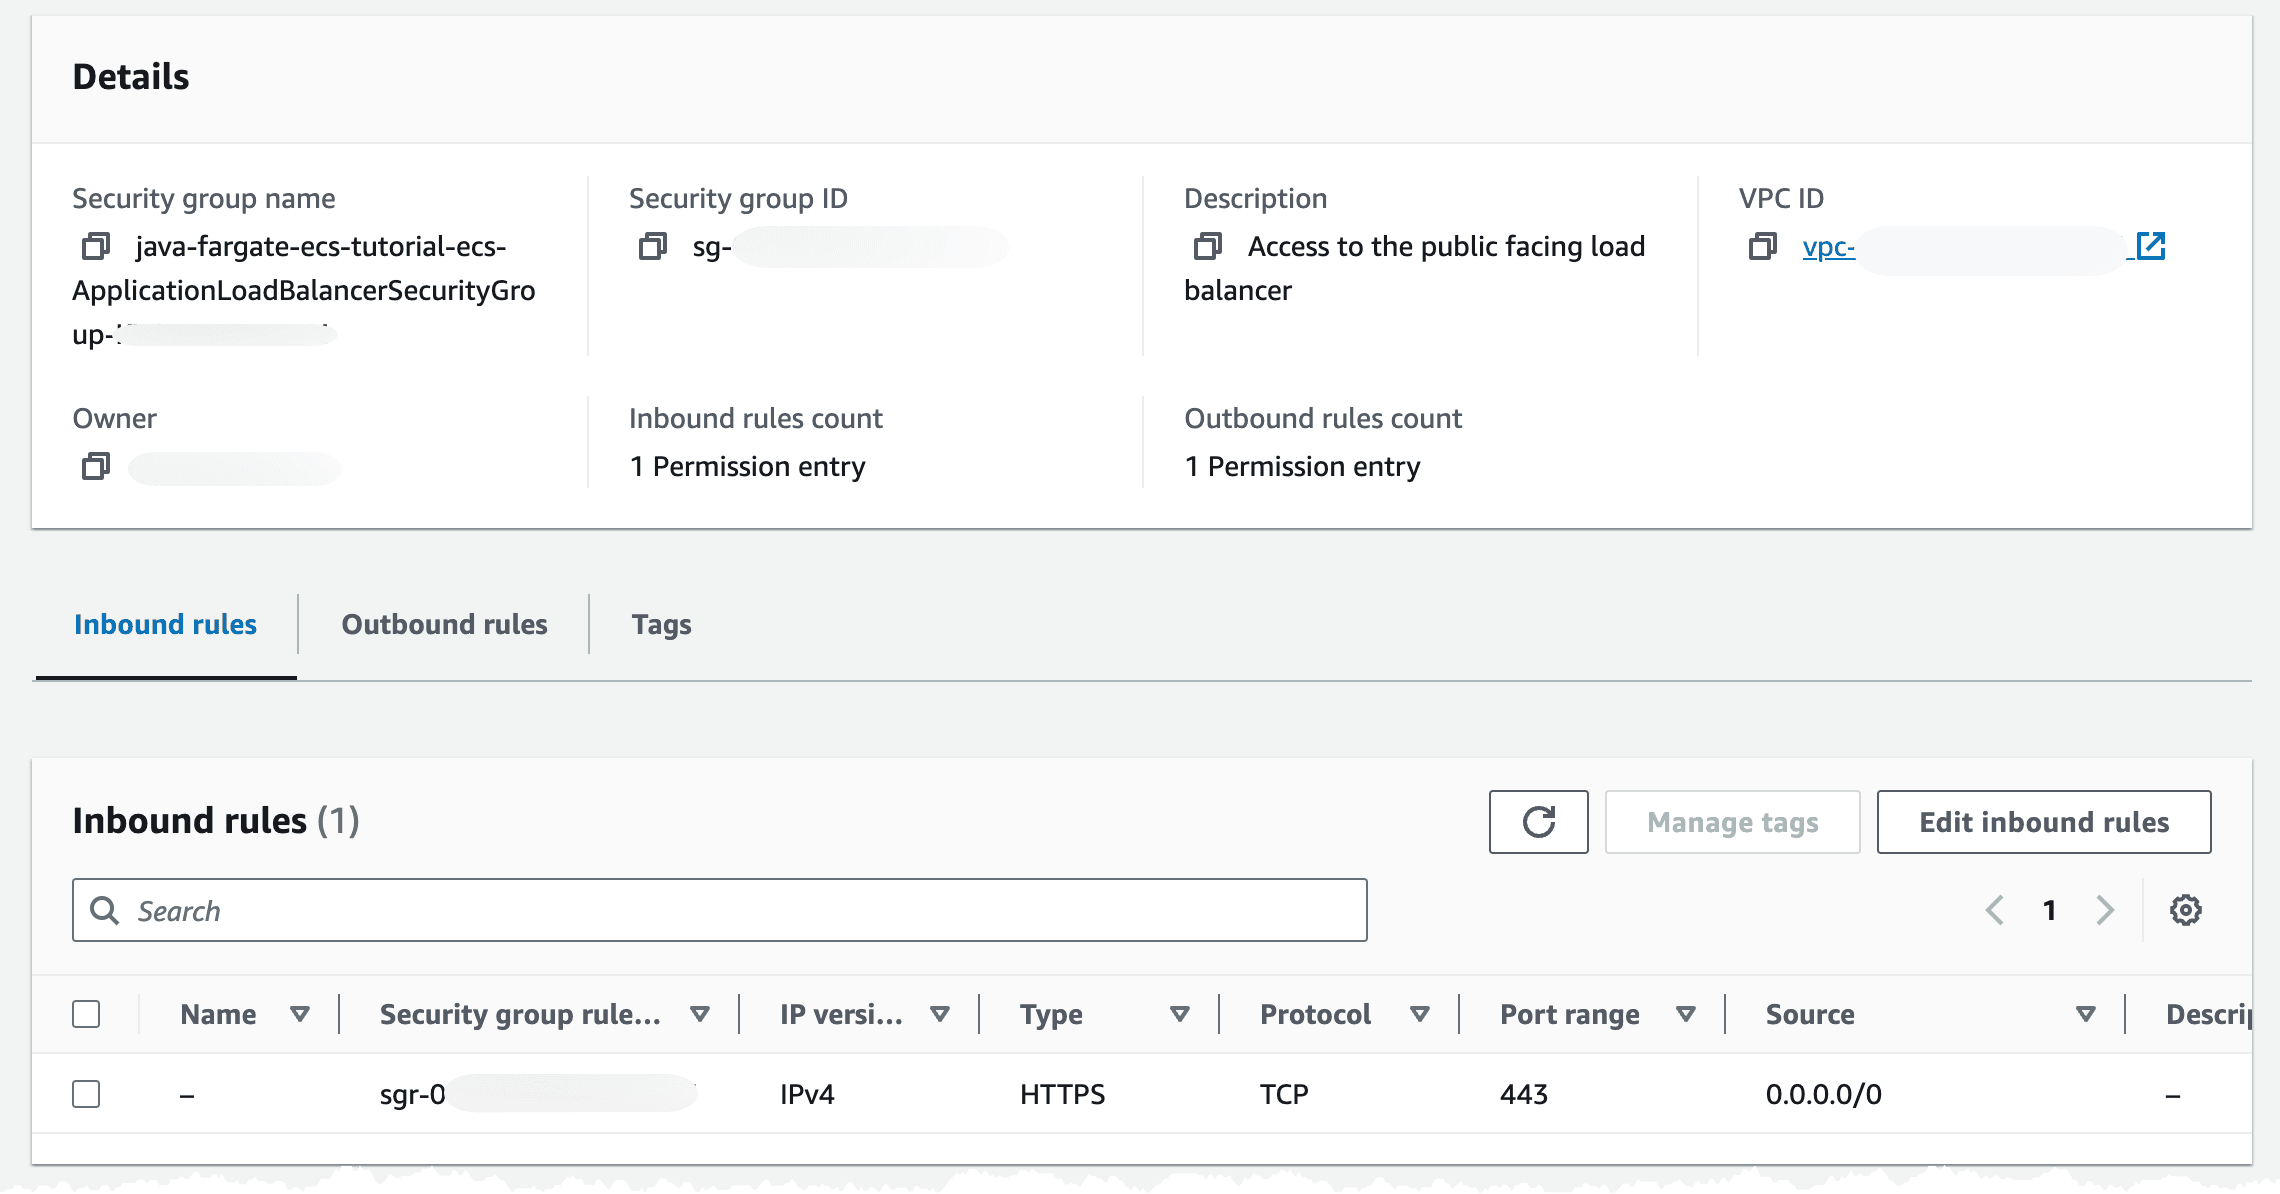
In the Security tab we have one Security Group associated, and if we check that group is should allow traffic on port 443 from internet.

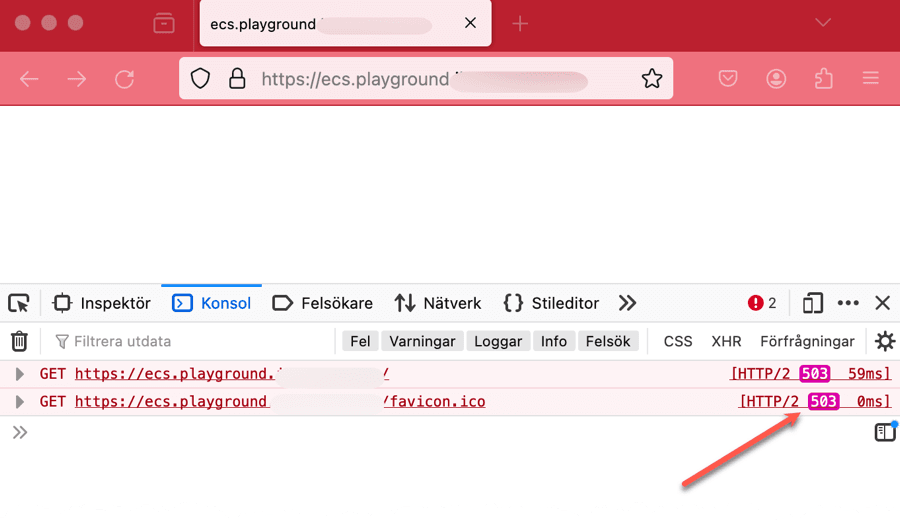
We can check that we get a 503 response back by navigating to the DNS record we created.
Now the basic infrastructure is created and we can deploy our decouple application service.
The first thing our application service needs is an ECR repository where we can push our images. To create that we deploy this short template. We ensure that we have security scanning on push enabled, that way ECR will scan our image for security vulnerabilities when we push a new image.
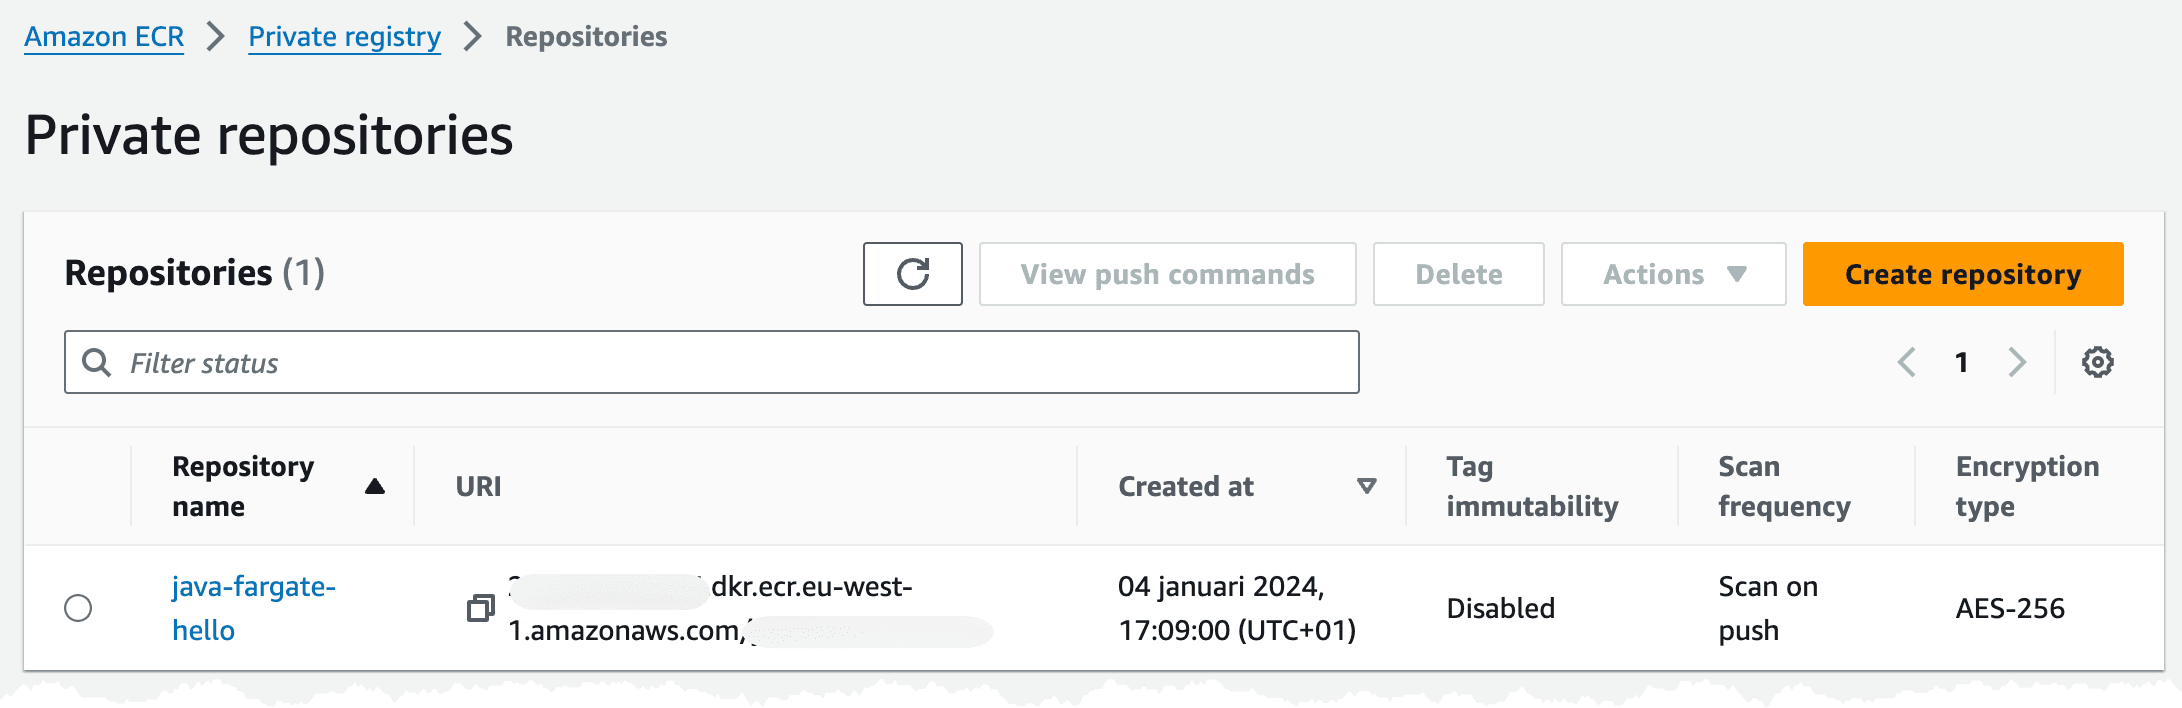
In the console we should see an empty repository looking like this.
The first thing we now need to do is to build our application service and the container image. In this example I will create a simple Hello World service using Java, SpringBoot, and Docker. I will build the application using Gradle.
An easy way to create the skeleton project is to visit Spring Initializr, I set the Project to Gradle - Groovy, Language to Java, and add Spring Web dependency. Then it's just to generate the project and unpack it.

Make sure you can build the project using command
With that out of the way we can package our application in an container (Docker) image and push that to ECR, before you start this step make sure you have installed Docker and that it's running.
My Docker file looks like this, where I base my image of the Amazon Corretto Java 17 image. I copy the built Java application to application.jar and start this using Java -jar command.
To build the image run the docker buildx command, I set the platform to linux/amd64 since I'm doing this from an Macbook with Apple CPU, which is ARM based, but in AWS we will run on X86 Intel based CPU.
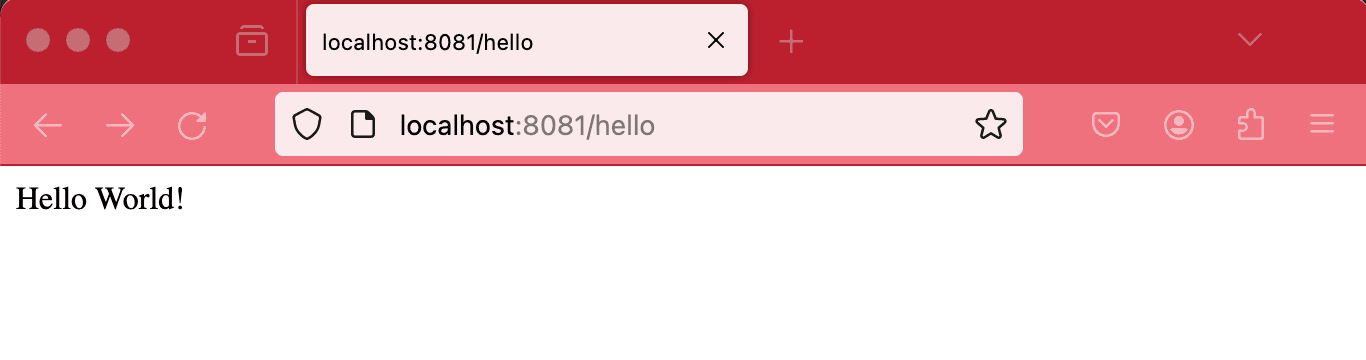
To run and test this locally we run command
In the command I map port 8081 on my local machine to port 8080 in the container, with it running I can open up http://localhost:8081/hello in the browser, that should render a Hello World response.
When things are running we can push the image to ECR and continue our deployment.
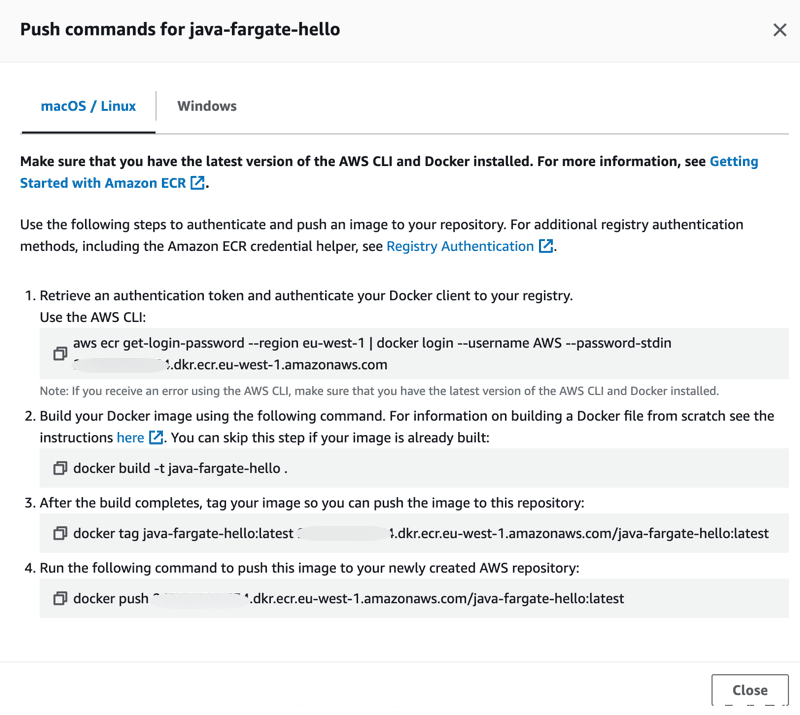
When pushing an image to ECR we first of all need to authenticate Docker to the login-password using the get-login-password cli command. More details in the documentation. After getting authenticated we can go ahead and push the image. The commands we need to run looks like this.
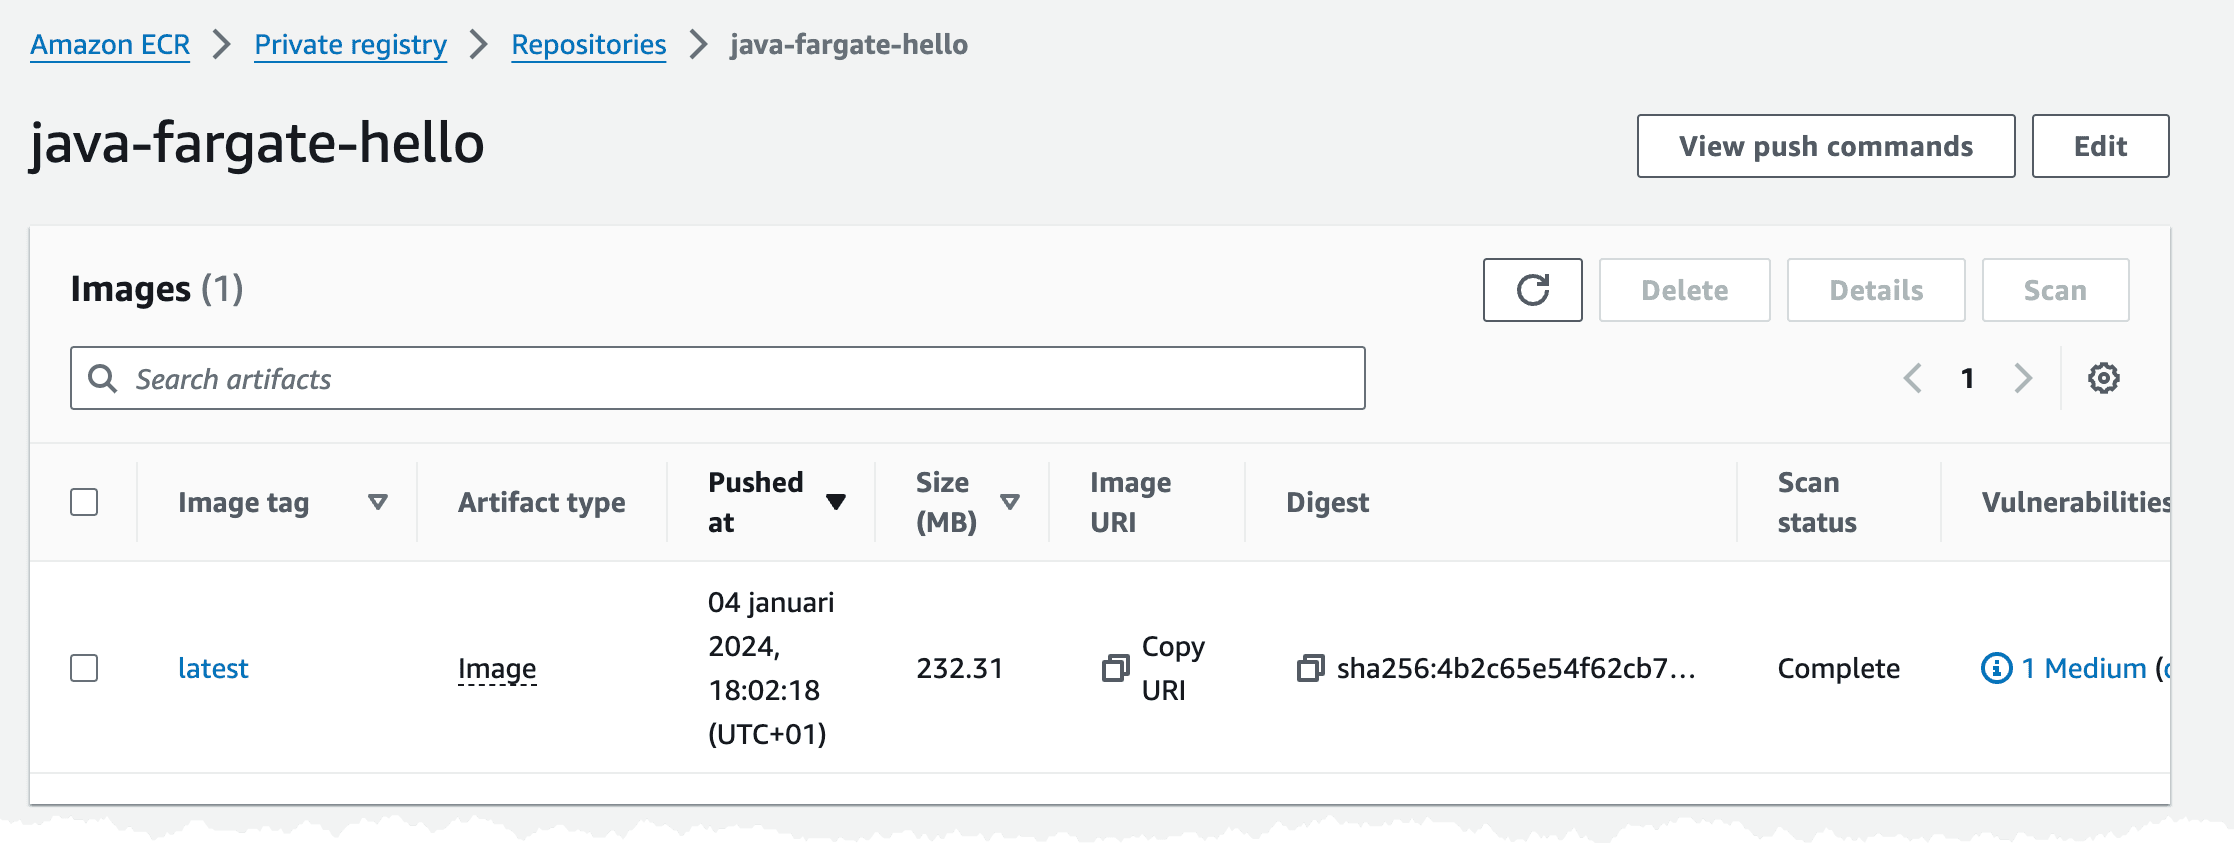
After running that, either locally or from our CI/CD pipeline, we should have an image in our ECR repository.
You can also get the a description of the image push commands in the console.
Time to deploy and start the service.
As mentioned before in this setup I have tried to decouple each application service and its infrastructure from the common infrastructure such as the ECS cluster and the ALB. So when we now deploy the application service infrastructure, we will hook into the ALB to create a new listener rule for our service, so the ALB can route traffic to it. We'll also hook into the ECS cluster and create the Service, task definition, etc that is needed. This way we can keep the infrastructure for each application service separate from the common infrastructure. Each service is responsible for creating what it needs and hook it. One thing we need to coordinate is the ALB listener rule weight, so we don't have a collision. What I normally do is assign each service its own 100 range, meaning that service X can assign weights in range 100 to 199 and service Y can assign weights in range 200 to 299. This way services can update and create additional rule actions if needed.
Now let's deploy our template to create the infrastructure, this deployment can take some time.
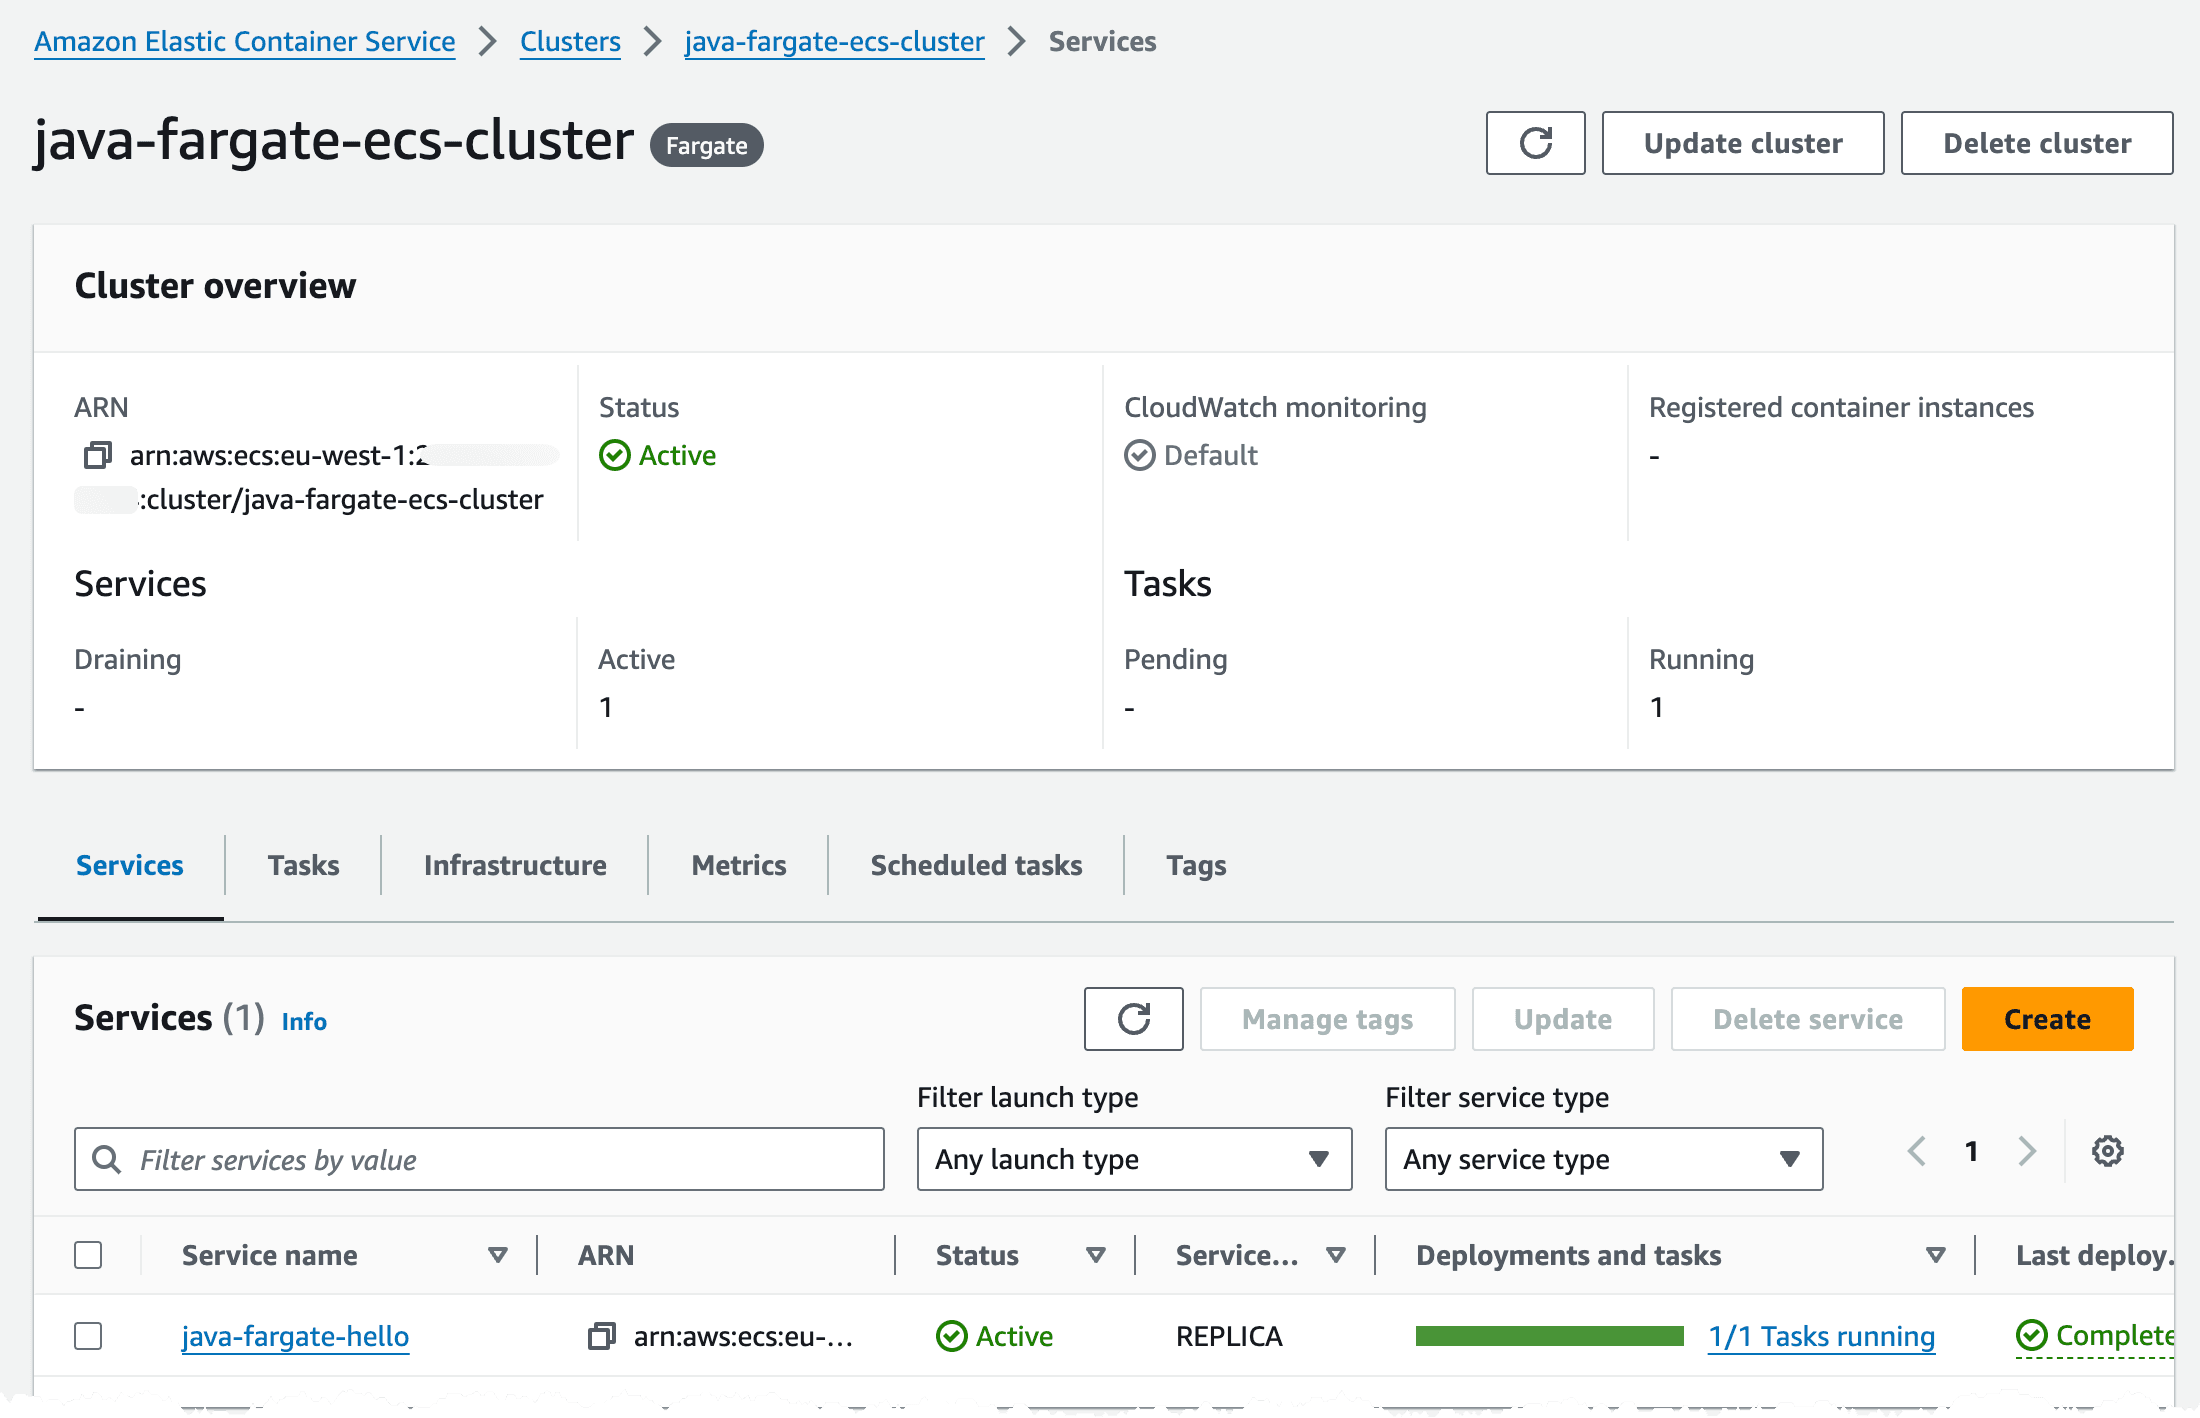
Turning to the console, when deployment has finished, we should have created a setup similar to this. The ECS cluster should show one service with 1/1 Running Task.
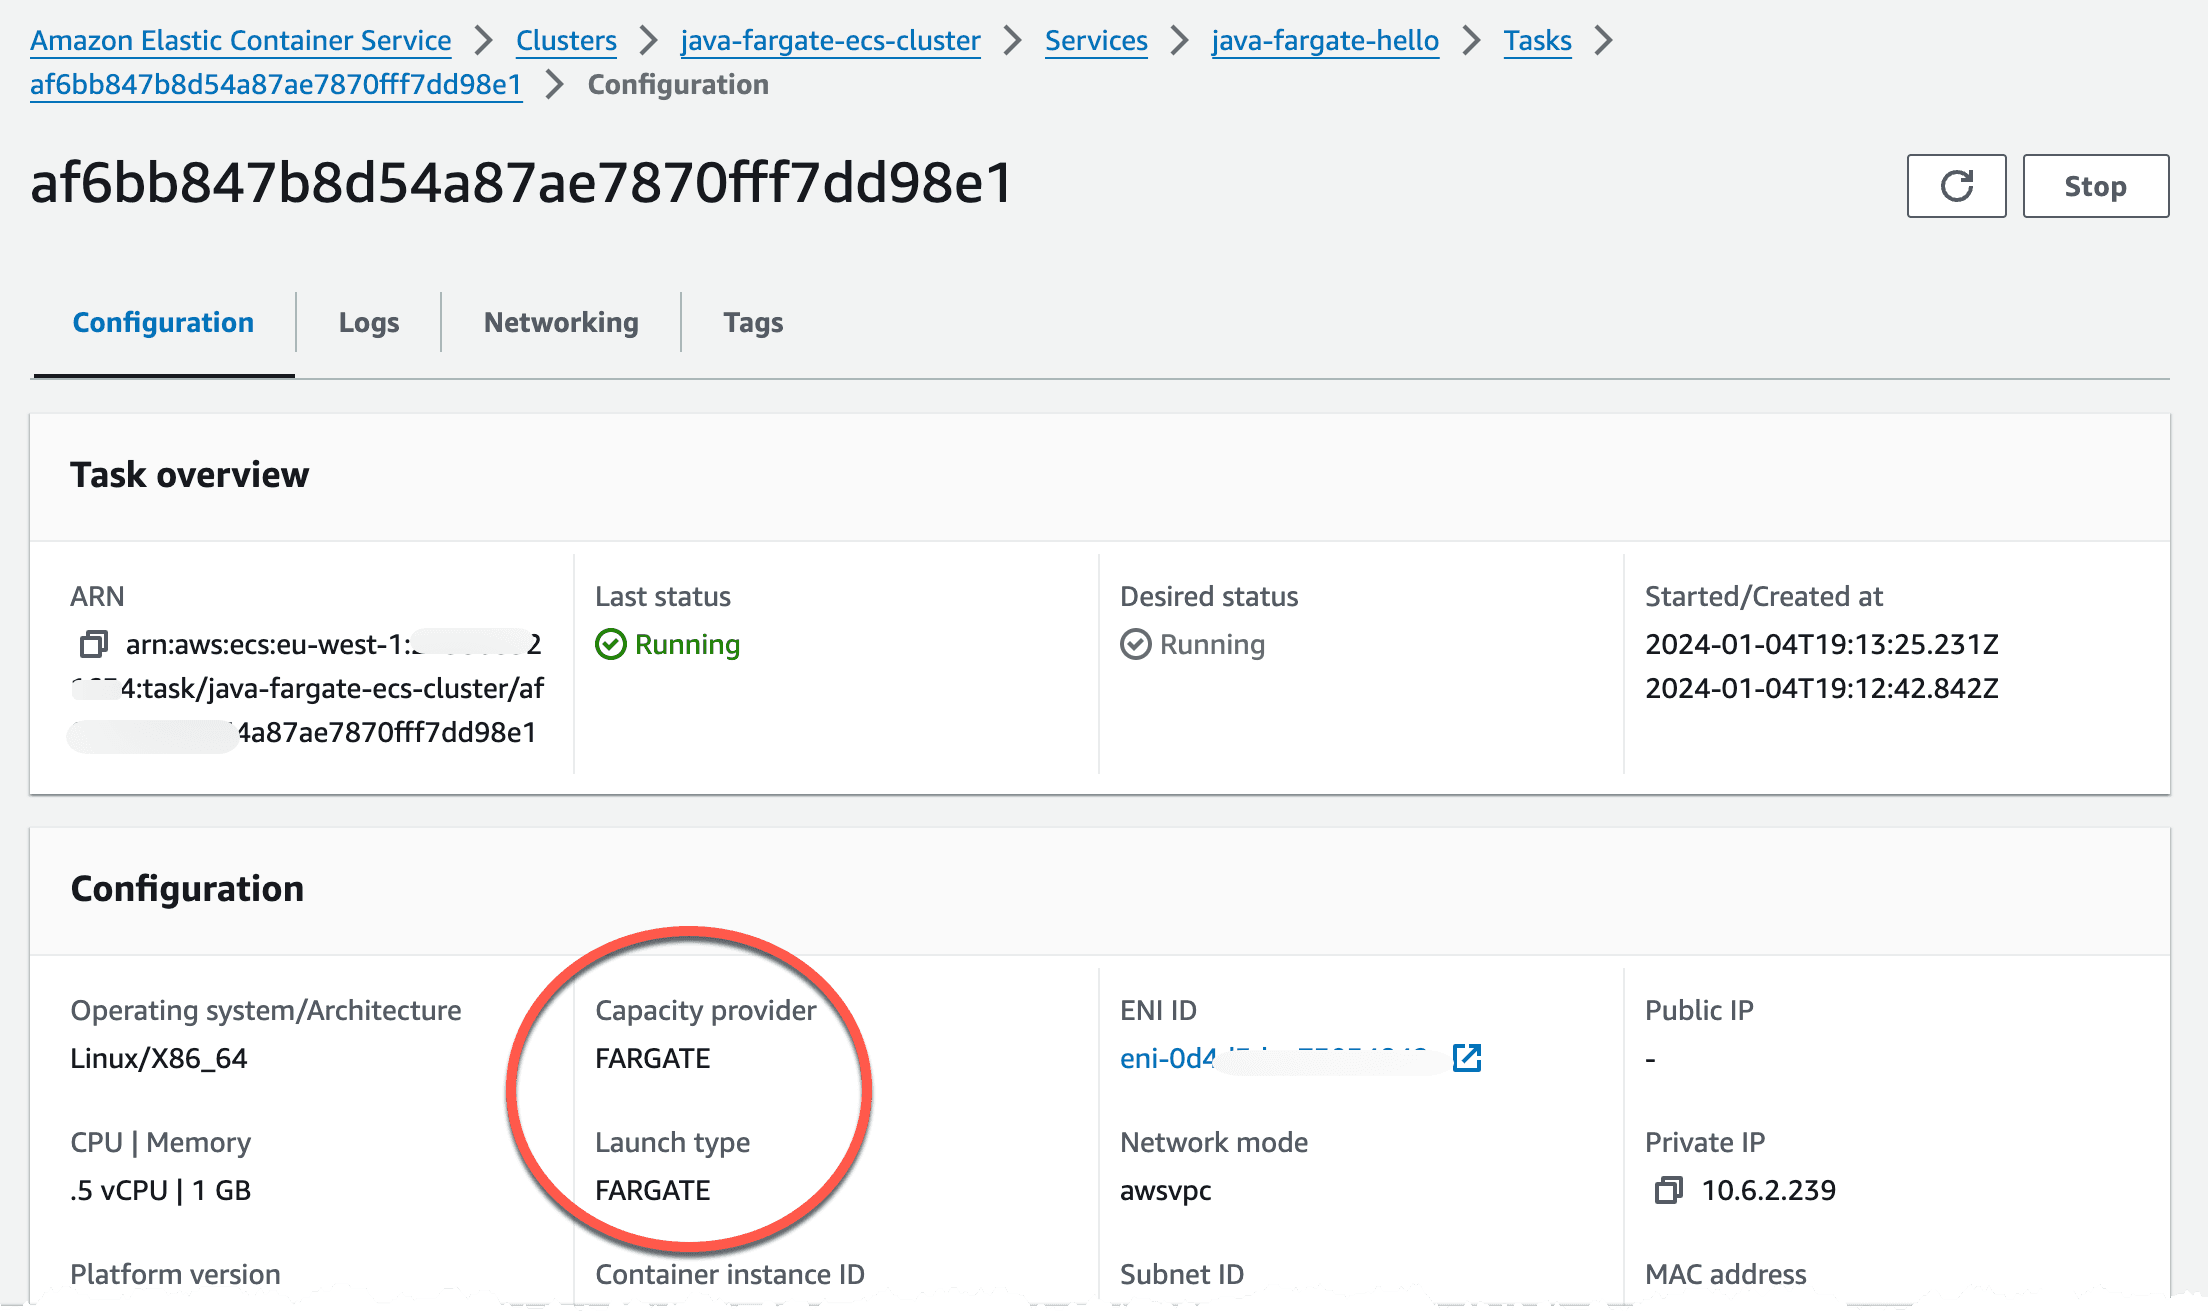
Navigating to the Task configuration, by clicking service -> Tasks -> And the Task ID will show that we run on Fargate launch type and with Fargate capacity provider strategy.
Navigating to the DNS record we created we should now see a Hello World message.

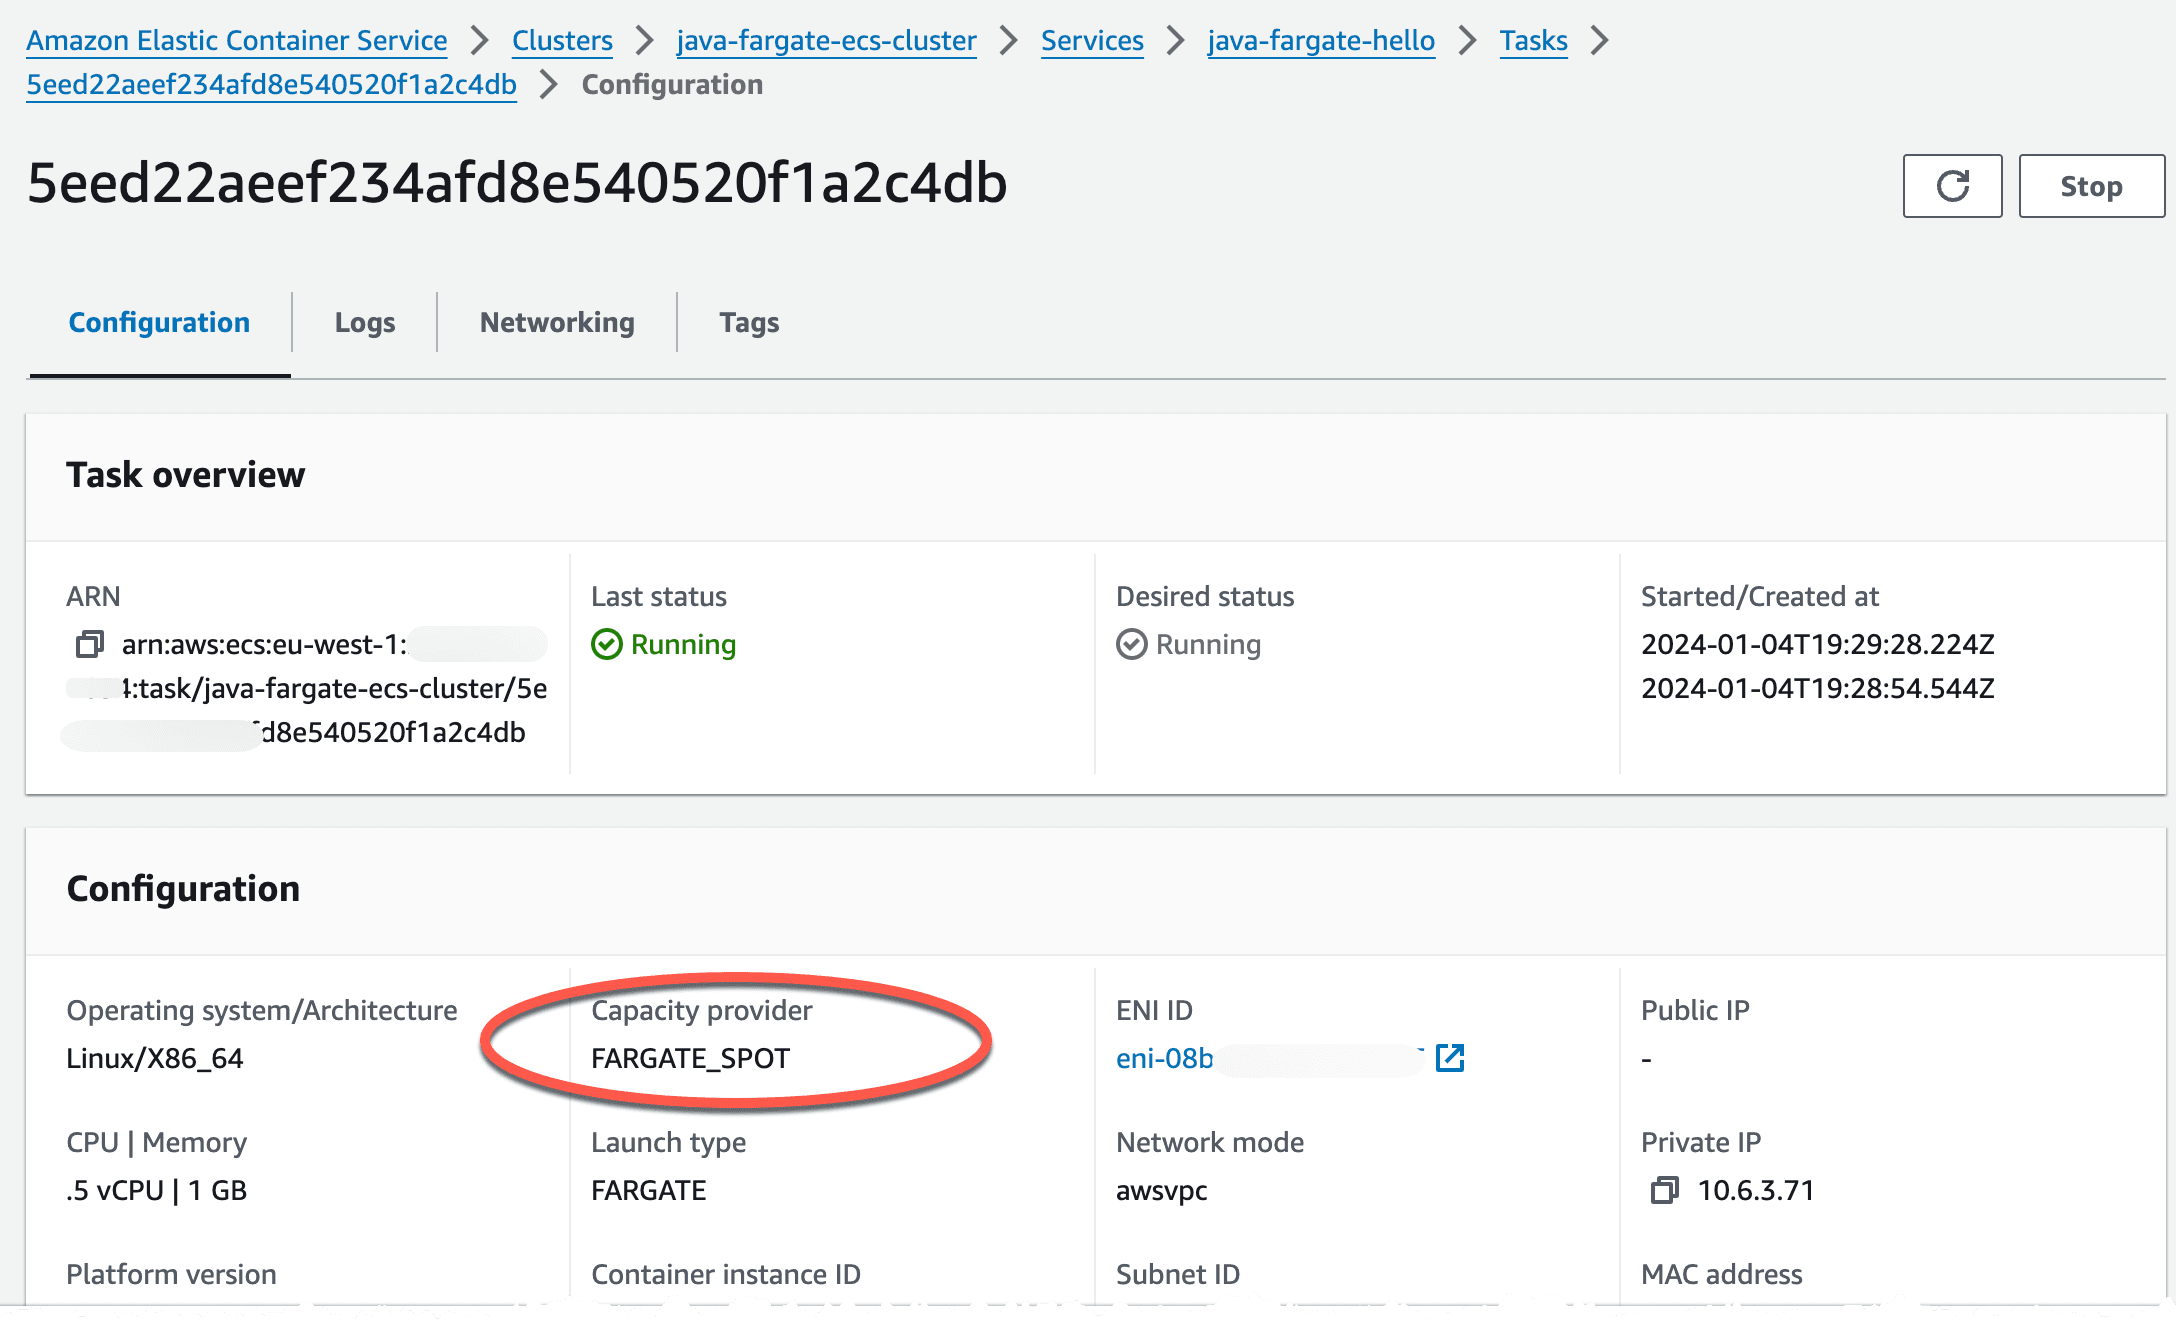
Now, to instead run this on Fargate Spot we need to update our capacity provider strategy and redeploy, so let's make a minor change to the template we used.
After redeployment we can see that we now run on Fargate Spot instead of on-demand.
In this post I showed how to run a Java SpringBoot service on ECS on Fargate. We looked at the infrastructure that we need to create and a way to decouple the services and tasks from the cluster and the ALB creation process. We also looked at the changes needed to run this on Fargate Spot instead of on-demand.