Experience the power of ACID Transactions with Amazon Athena & Apache Iceberg
Quickly experiment building a transactional data lake on AWS
AnupSivadas
Amazon Employee
Published Jan 10, 2024
Last Modified Jan 11, 2024
In this step-by-step walkthrough, I will discuss how you can quickly experiment building a transactional data lake on AWS with Amazon Athena ACID Transactions powered by Apache Iceberg.
Transactional Data Lakes and the ability to Insert, update and delete data records in S3 while maintaining ACID properties at scale is key for every business. This is where the power of Athena ACID Transactions and Apache Iceberg comes into play.
Apache Iceberg is an open table format for very large analytic datasets. Iceberg manages large collections of files as tables, and it supports data lake operations such as record-level insert, update, delete, and time travel queries. Iceberg also helps guarantee data correctness under concurrent write scenarios.
Amazon Athena ACID transactions add insert, update, delete, and time travel operations to Athena's SQL DML capability and its powered by Iceberg.
For this walkthrough, we are going to simulate ingesting data to S3 first, and then we will insert, update those records with a table that's powered by Iceberg. We will then look at interesting capabilities like time travel and merge operations which will be key when dealing with a transactional data lake.
Step 1 - We will ingest a sample data file(csv) to S3. For this walkthrough we will have an S3 bucket named "propdatain" and we upload a sample file to the bucket. The contents of the sample data file is as below (keeping it simple for now):
| home_id | home_name | value | tour_date | status |
|---|---|---|---|---|
| 1 | 1234 NE 90 ST | 900 | 3/28/23 | Scheduled |
| 2 | 4567 Bellevue Ave | 600 | 3/21/22 | Scheduled |
| 3 | 8910 Queen Ann | 700 | 2/25/21 | Completed |
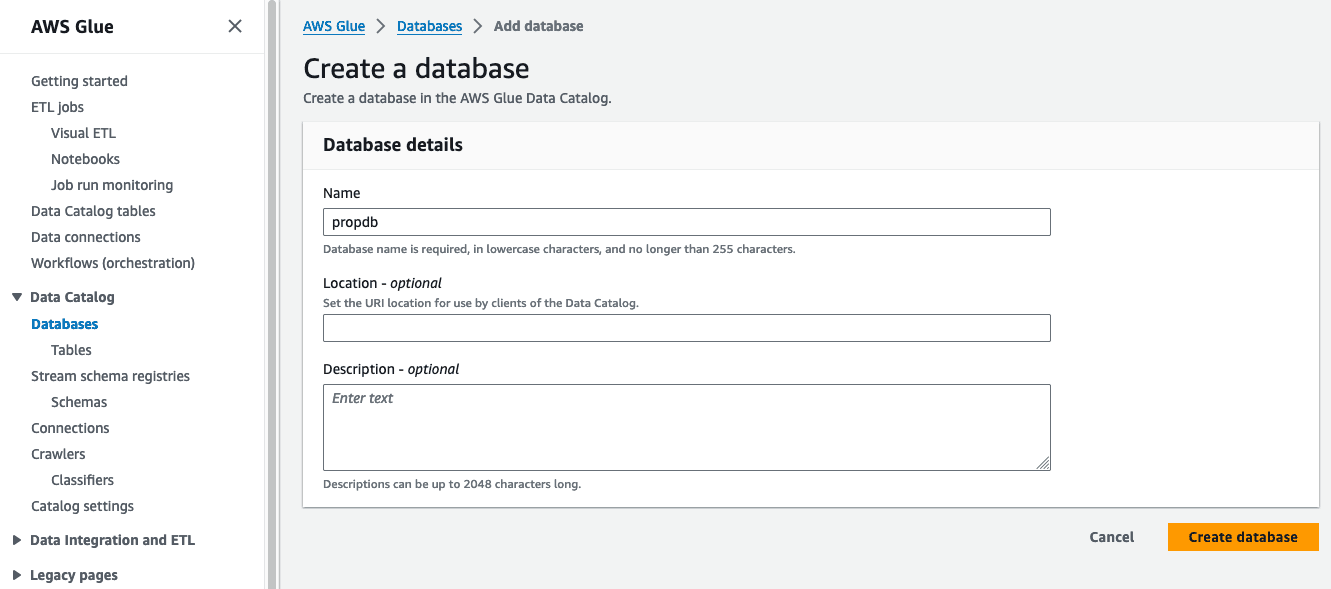
Step 2 - The next step is to create a database in the Glue Data Catalog. We need to leverage Glue Data Catalog here since Athena will interact with tables in the catalog.
Using the console, we can create a database named "propdb".
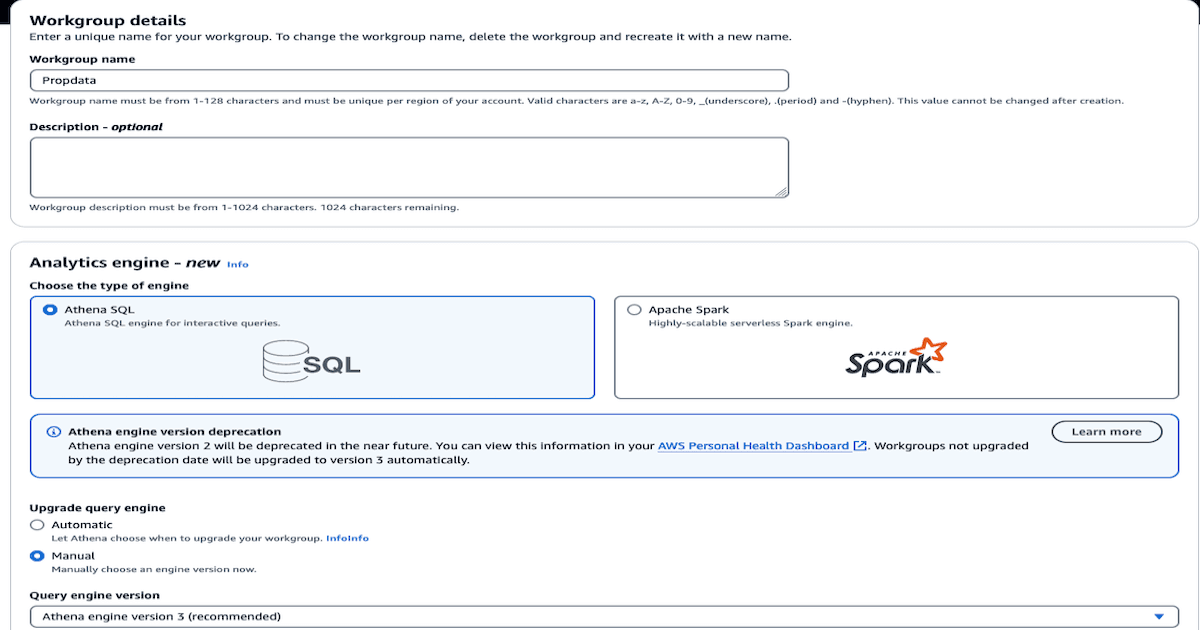
Step 3 - Once the database is created, our next step is to create tables in Athena. We will head over to the Athena console and create a workspace first.
Let's name the workgroup as "propdata" and the query engine as Athena SQL.
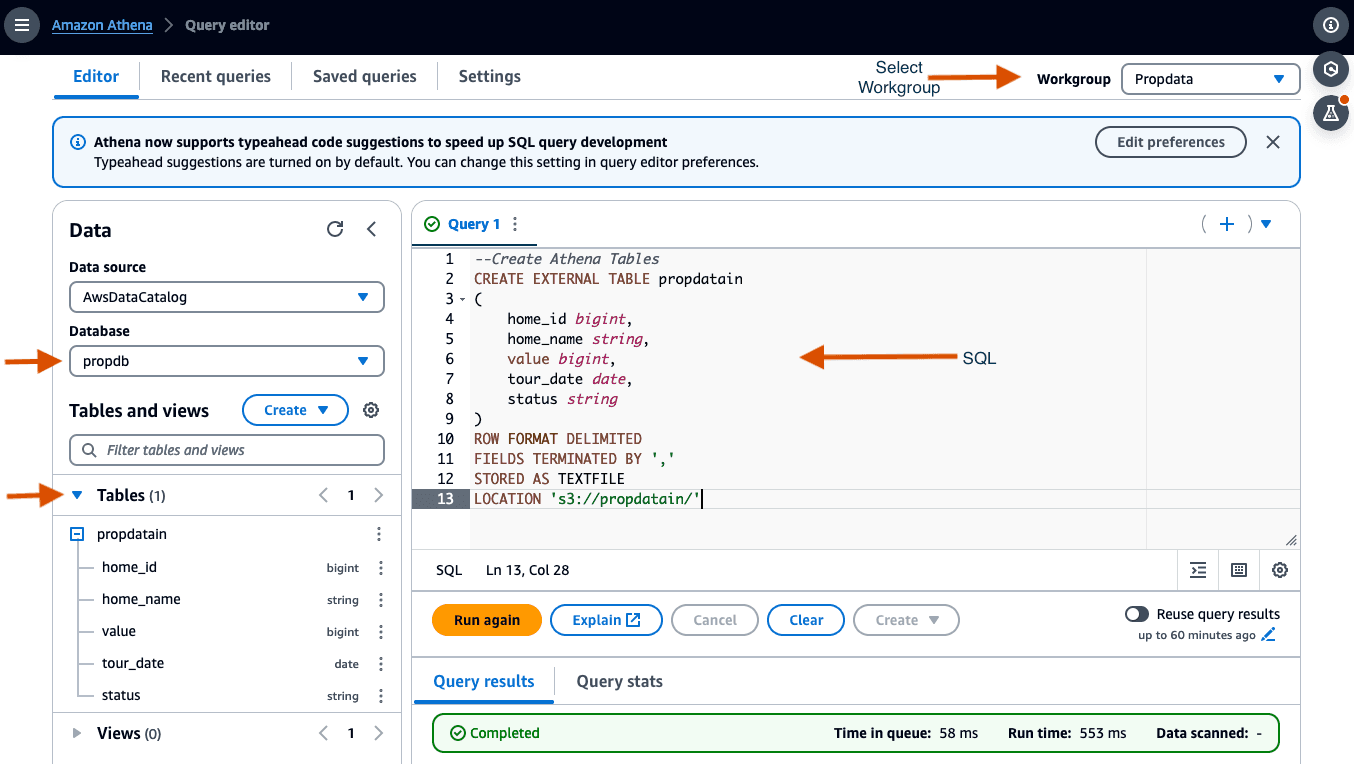
Step 4 - We are now ready to create the first table. We will head to the Query Editor section of Athena to start writing queries to create the tables.
As a one-time activity, you will be prompted to setup the query result location for the workgroup in S3. We can pick the first bucket we created in step1 for this purpose as well.
We will now create our first table named "propdatain" using the SQL script below. This table is going to be a regular table and in the next step we will create a table that's of type Iceberg. Run the script to create the table.
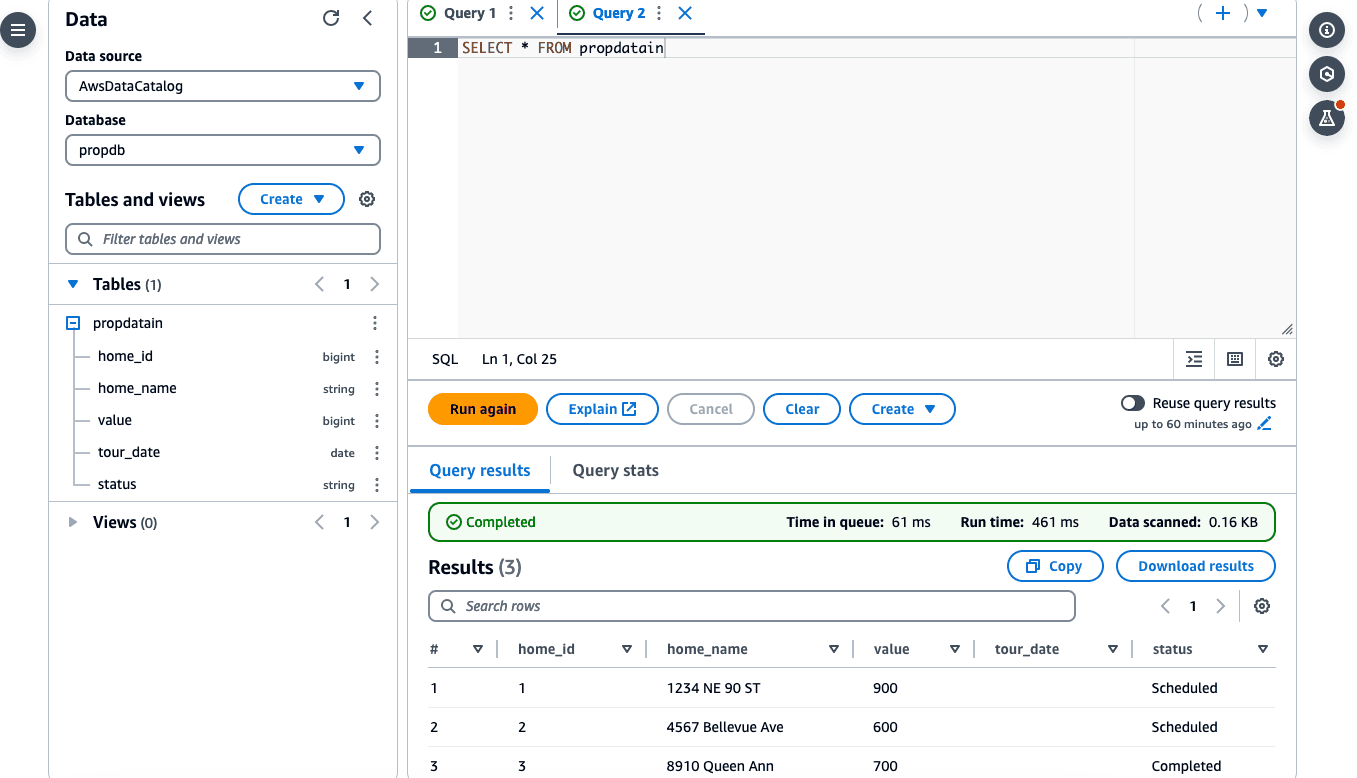
Step 5 - Let's run a SELECT statement to check if we can retrieve data from the table
Query runs successfully!
Step 6 - Next, we will create a table with similar structure, but with format = Iceberg. We will name this "propdataall".
If you note the LOCATION in the script above, the path is s3://propdataall/, so we will have to create this bucket as well before we run the script. This bucket is just to separate the data/file ingestion bucket we created in step 1 with the transactions bucket. "propdataall" will be our transactions bucket.
Run the SQL code top create the table with format Iceberg.
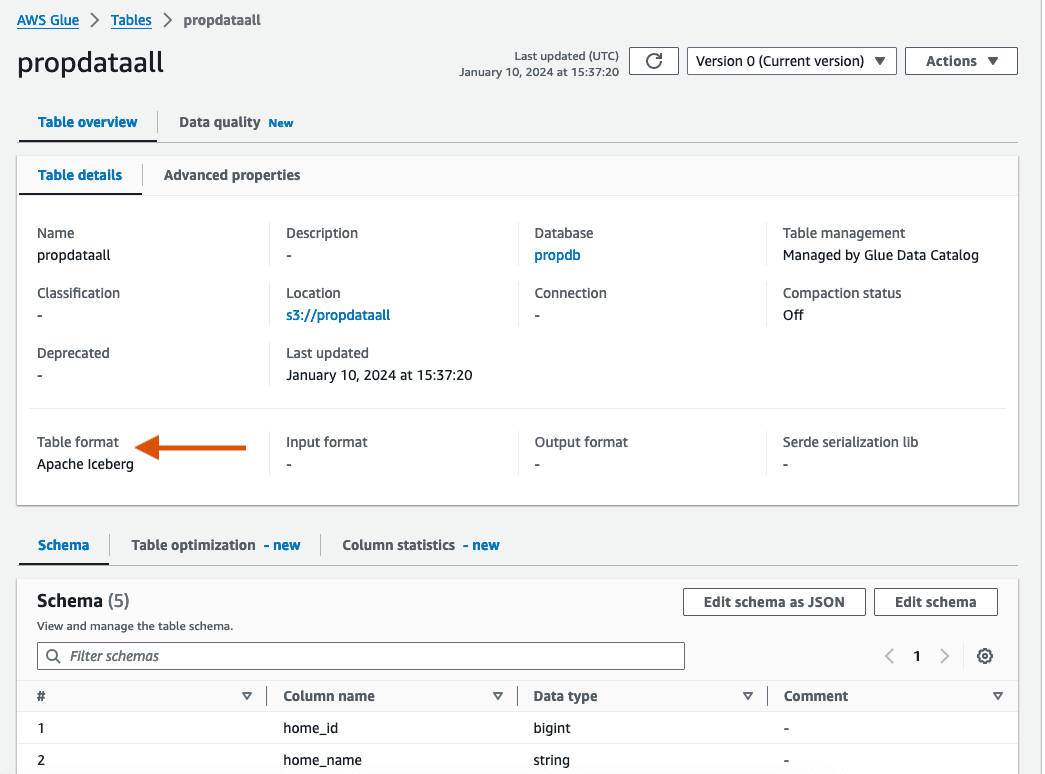
If we examine the Glue Data Catalog Tables, you can observe that the newly created table is of type Iceberg and the schemas are defined correctly.
Step 7 - If we query this table now, there won't be any data (No surprises there!).
Let's populate this new Iceberg table with some data. We can easily achieve this by using the INSERT INTO new table /SELECT * from previous table command.
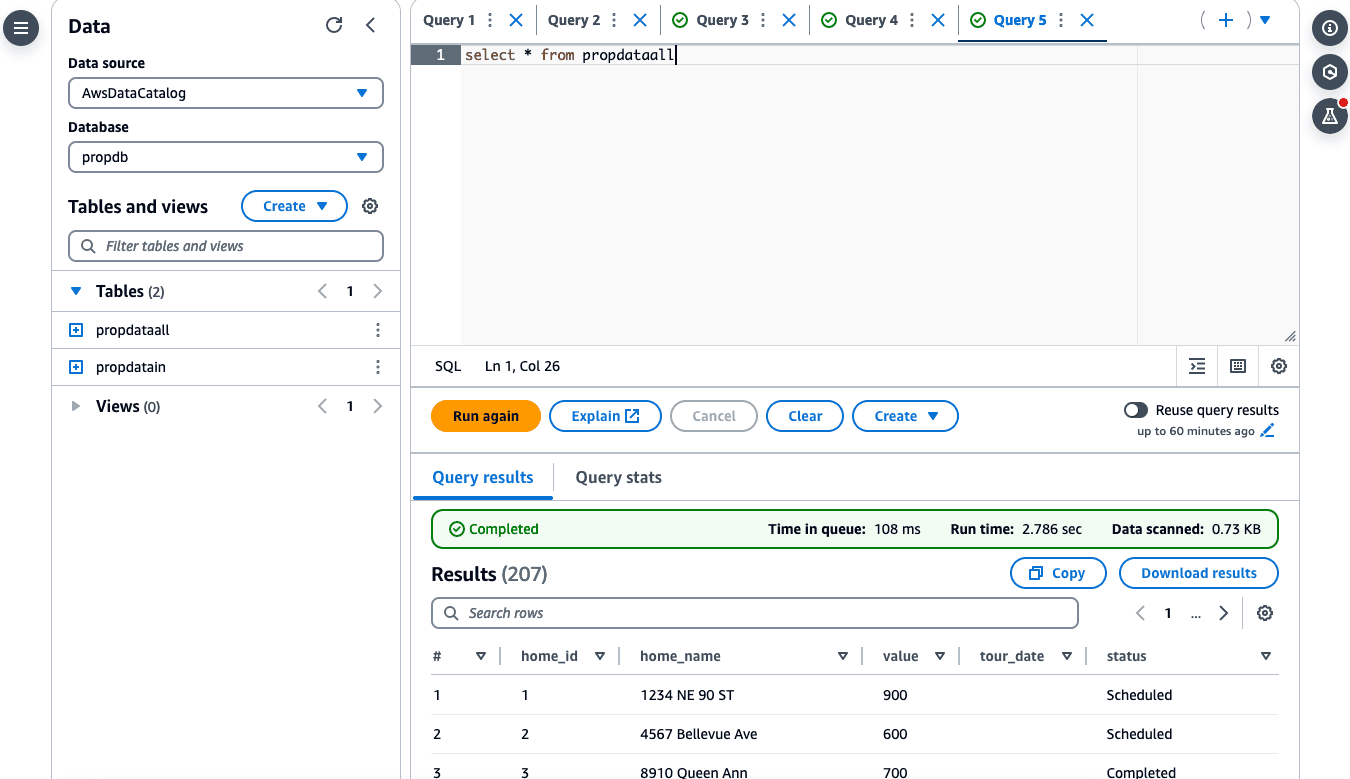
Step 8 - Since this table is of Iceberg type, we can transact with the data now.
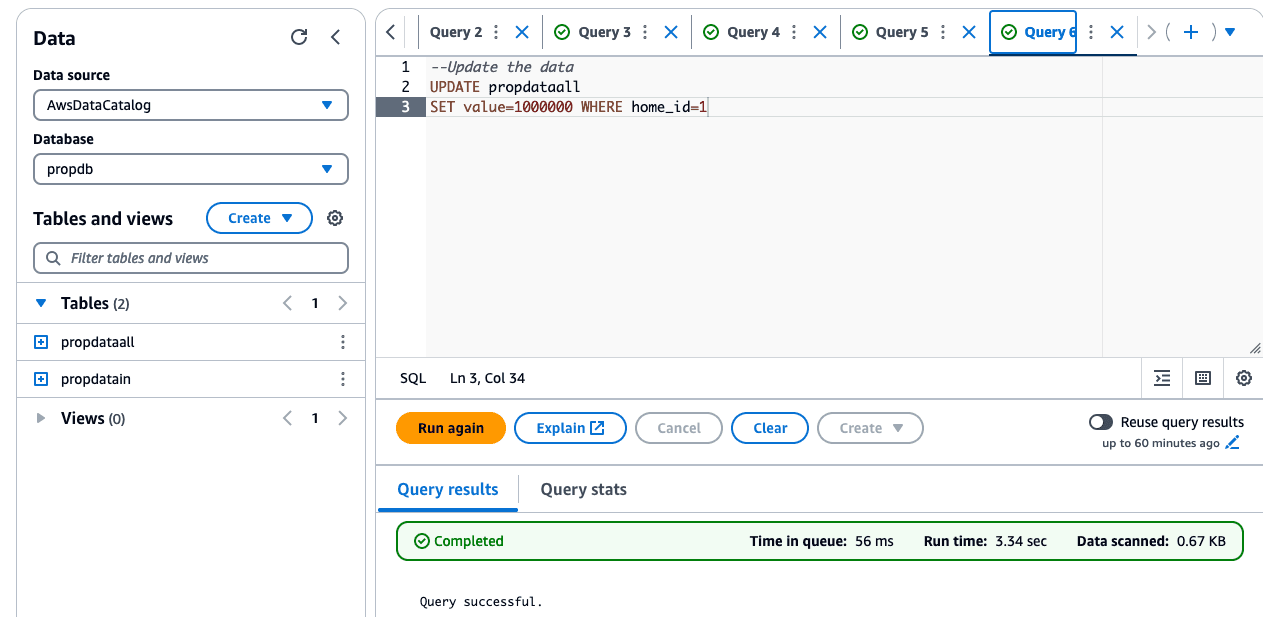
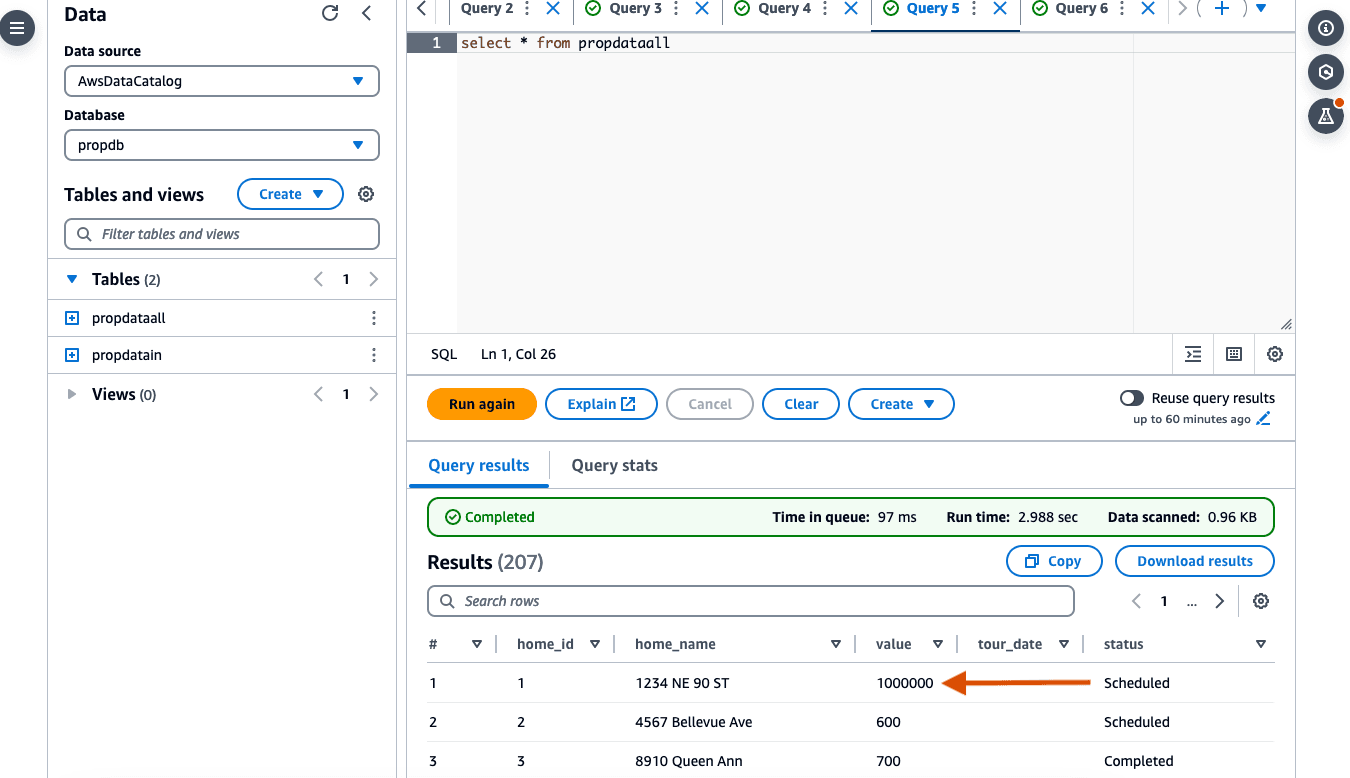
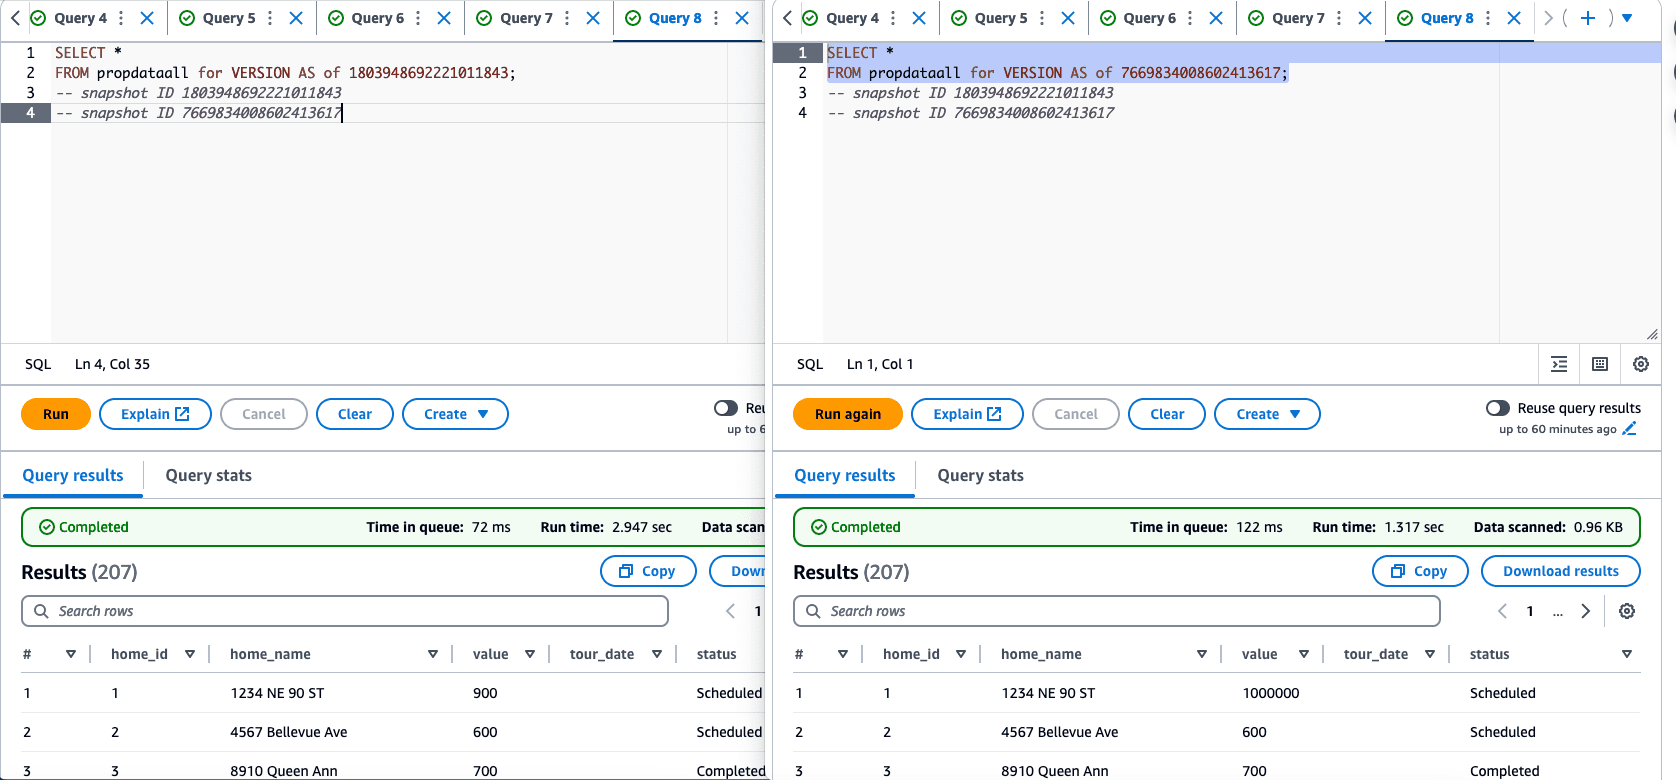
The previous value was 900 for home_id=1 and with the new update, it will be 1000000.
If we examine the S3 bucket for transactions, ie "propdataall", you can see all the partitions that's created for you seamlessly.

Step 9 - One super cool feature of Iceberg is the ability to Time Travel (Yes! you read that right!). This will help us understand how data has changed over a period of time.
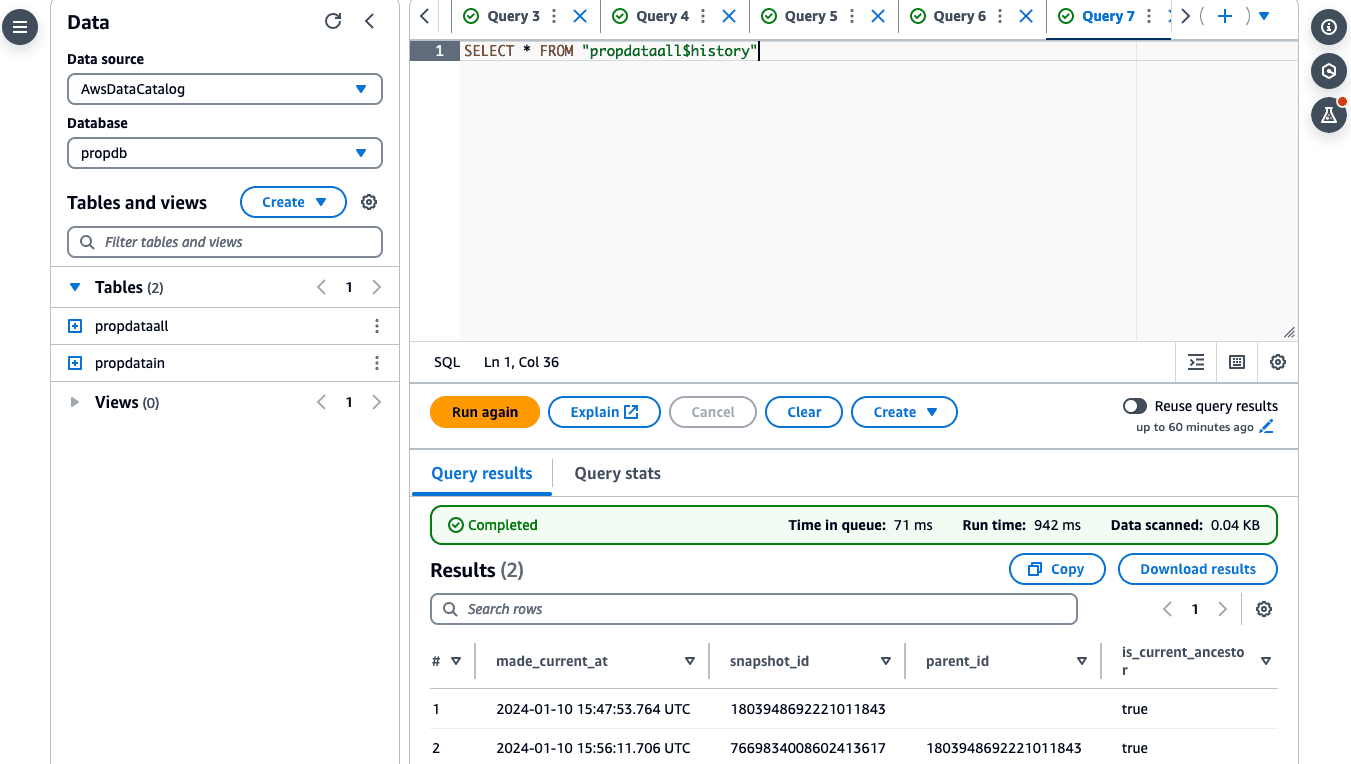
We can easily time travel using a special suffix, $history, which is added to the table name to query its metadata. This allows us to see the history of actions performed on the table over time.
If we query a specific snapshot, we can observe how value changed over time.
You can notice the changes for value based on the snapshot ID.
Iceberg has some cool tricks up its sleeve, and we'll dive into the details in another post!
#BuildOn #AWS
Any opinions in this post are those of the individual author and may not reflect the opinions of AWS.
