How to add Cognito as OIDC Identity Provider in Cognito
This post will look at how to setup AWS Cognito to use an OpenID Connect (OIDC) identity provider of another Cognito user pool.
Published Jun 15, 2024
Amazon Cognito is an identity platform for web and mobile apps. With Amazon Cognito, you can authenticate and authorise users from a built-in user directory, from your enterprise directory, or from consumer identity providers like Google and Facebook.
This post will look at how to setup AWS Cognito to use an OpenID Connect (OIDC) identity provider of another Cognito user pool.
Open ID Connect (OIDC) is an authentication protocol built on top of OAuth 2.0. It is designed to verify an existing account (identity of an end user) by a third party application using an Identity Provider site (IDP). It complements OAuth 2.0 which is an authorisation protocol.
In this case we are using Cognito as the IDP but you could replace this with many other providers like Salesforce, Github or Azure AD etc. etc.
You might wonder why you would want to integrate 2 Cognitos? 🤔

In this Cognito hosted UI login screen you can see various authentication options are offered, including an alternative Cognito user pool. There's even an option to log directly into this Cognito user pool, which is all configurable.
Integrating two Cognito user pools can be beneficial if you have a product linked to a Cognito user pool and a customer who has their own Cognito user pool with their user base. This setup allows the customer's user base to access your product without needing to migrate users to your product's user pool.
These 2 Cognito user pools can exist in different accounts and regions.
I feel obliged to mention before you go any further with this setup that it will cost you!
Cognito generally is known to be an inexpensive alternative to many other auth providers with one of the major benefits being that there is a free tier of 50,000 monthly active users per account or per AWS organisation. However, this is only the case for users who sign in directly to the user pool or through a social identity provider. So what about users who log in through an OIDC federation like this example. Well...
For users federated through SAML 2.0 or an OpenID Connect (OIDC) identity provider, Amazon Cognito user pools has a free tier of 50 MAUs per account or per AWS organization.
For users who sign in through SAML or OIDC federation, the price for MAUs above the 50 MAU free tier is $0.015.
I would recommend doing a quick estimate of the cost of this approach for your use case. Head over to AWS' pricing calculator before you continue any further as you may be surprised by the price. And if you never come back to this blog I will understand why! 😂

Here you can see each step in the authentication process. This is a very standard flow when using an external OIDC provider.
To keep things clear, we'll refer to the Cognito with the user base as the "Customer user pool" and the other one as the "Product user pool". Our product will first interact with its own user pool (Product user pool) before being redirected to the Customer user pool.
In this tutorial we will look at how to set this up from A to Z but in reality the Customer user pool may already exist with its user base. In that case you may just need to create a new client in your existing customer user pool so you can skip some of the following steps.
Let's first set up the Cognito user pool with the user base (i.e. the customer's user pool).
- Head to AWS Cognito and click
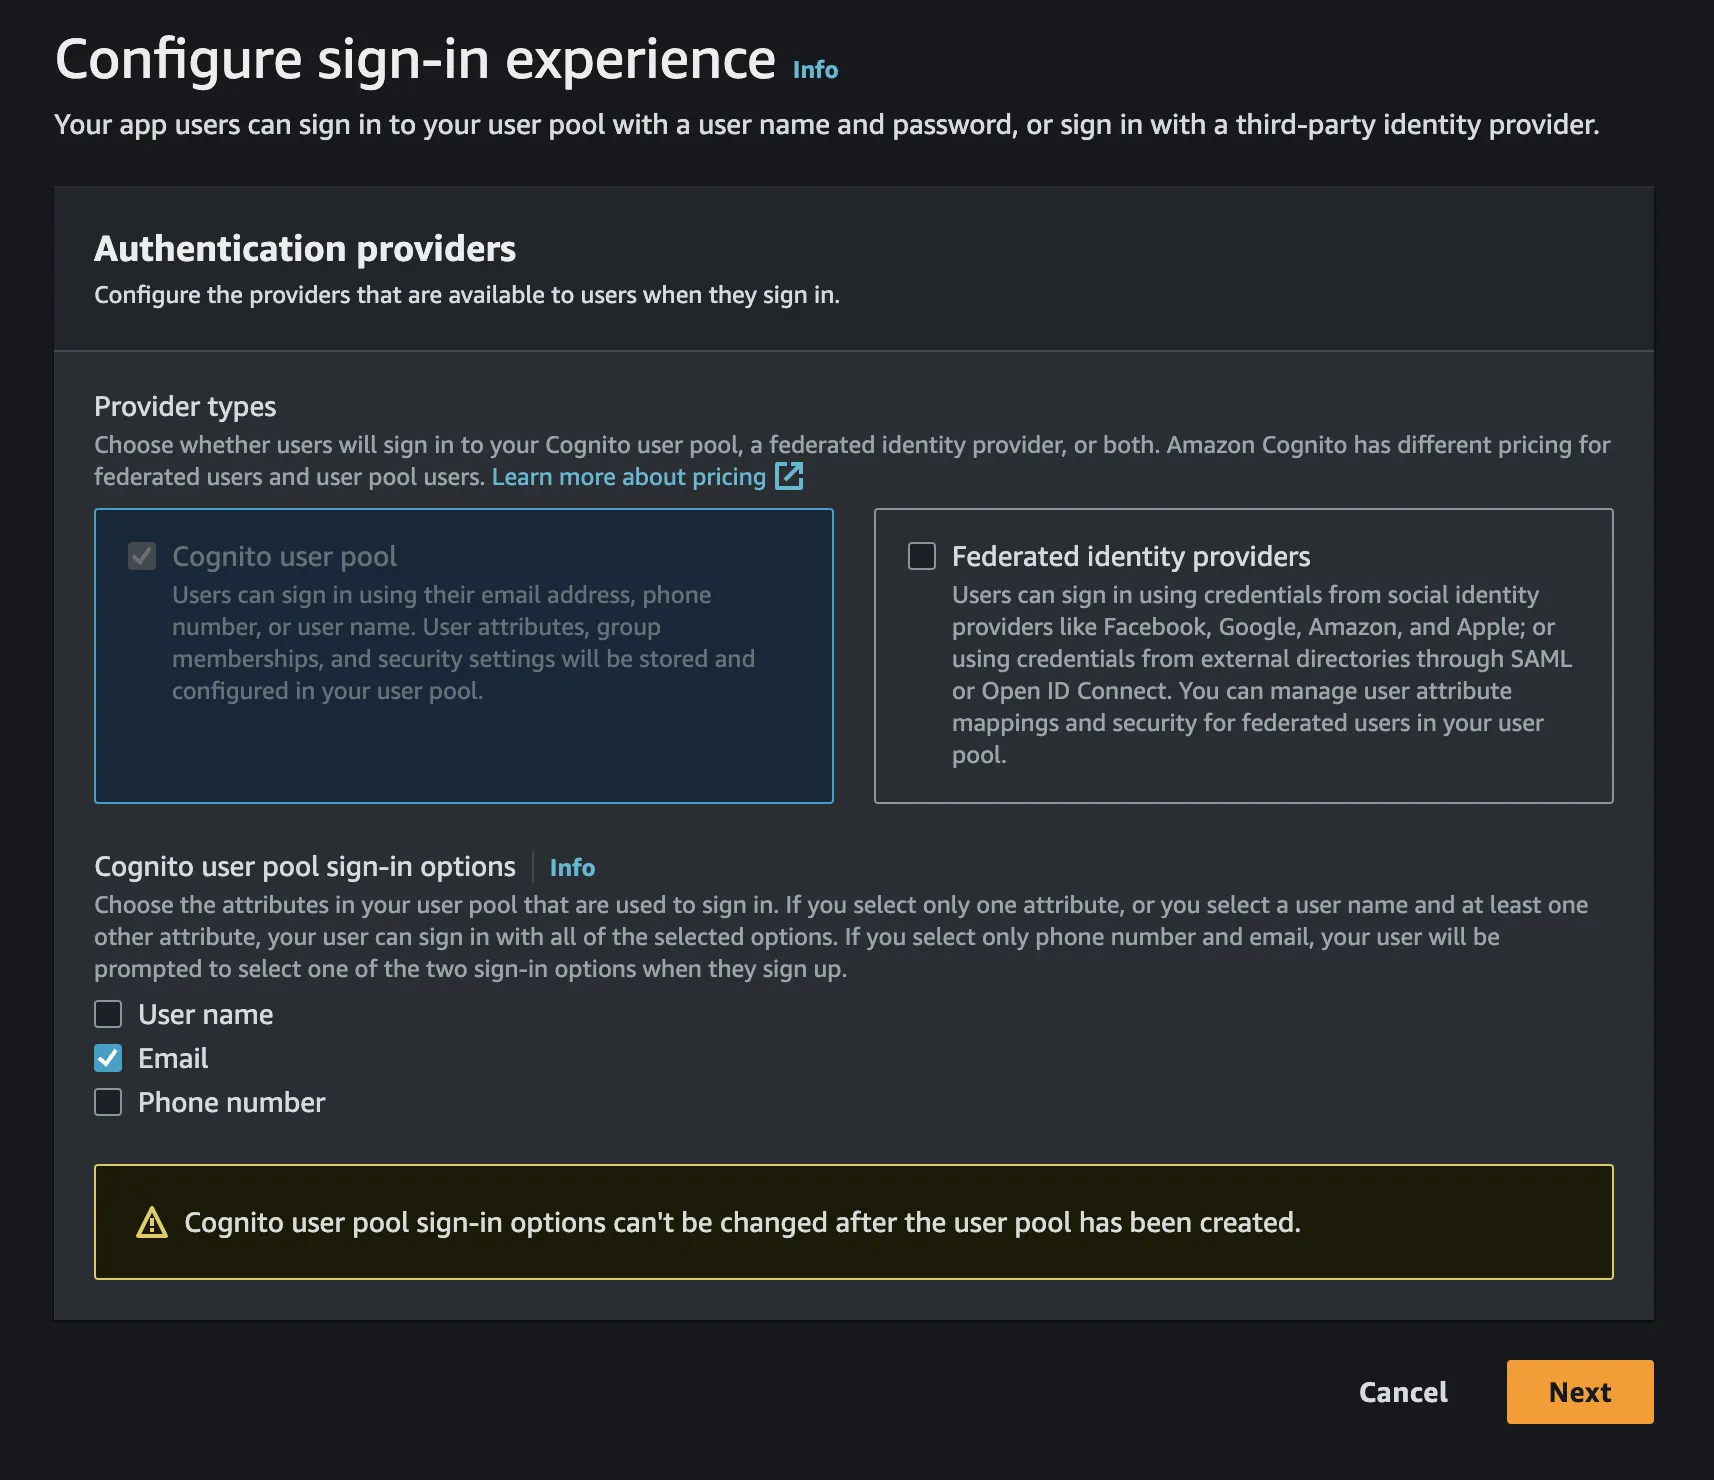
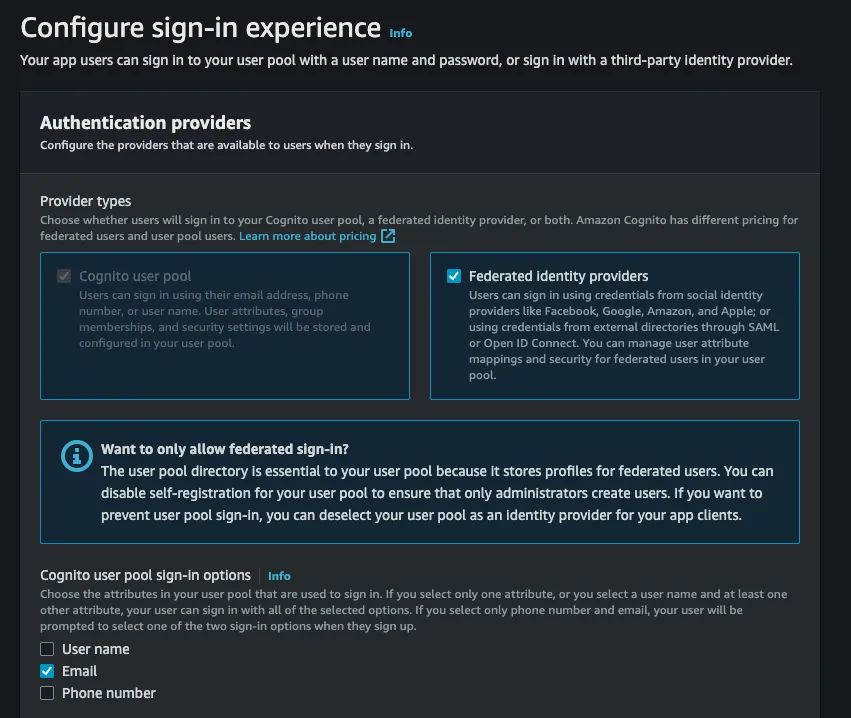
Create user pool. - Select
Provider typesto be onlyCognito user pooland sign-in options to be whatever suits your use case (I chose email):
- Follow through the next steps setting up your password policy, MFA, User account recovery and Sign-up experience as you desire.
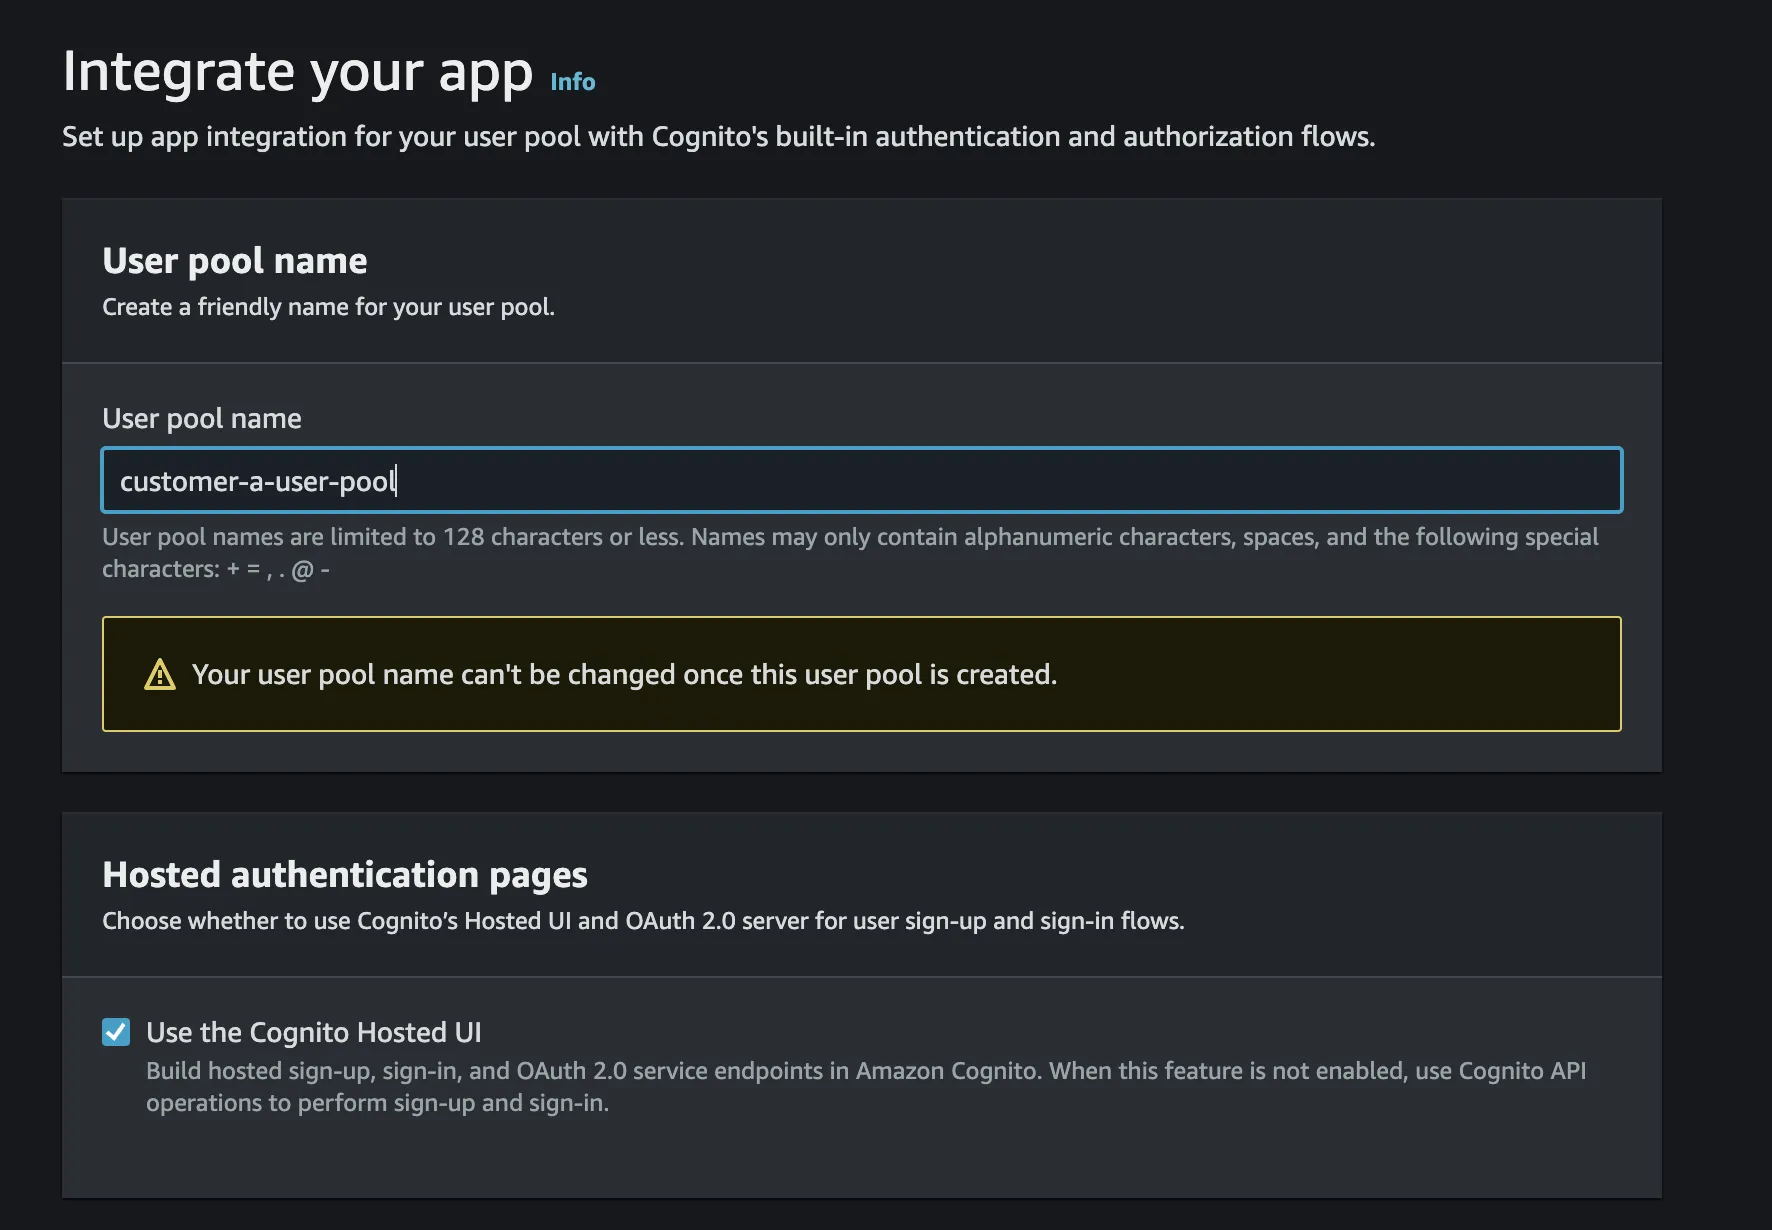
- On the
Integrate your apppage enter your desired user pool name. - Tick
Use the Cognito Hosted UI
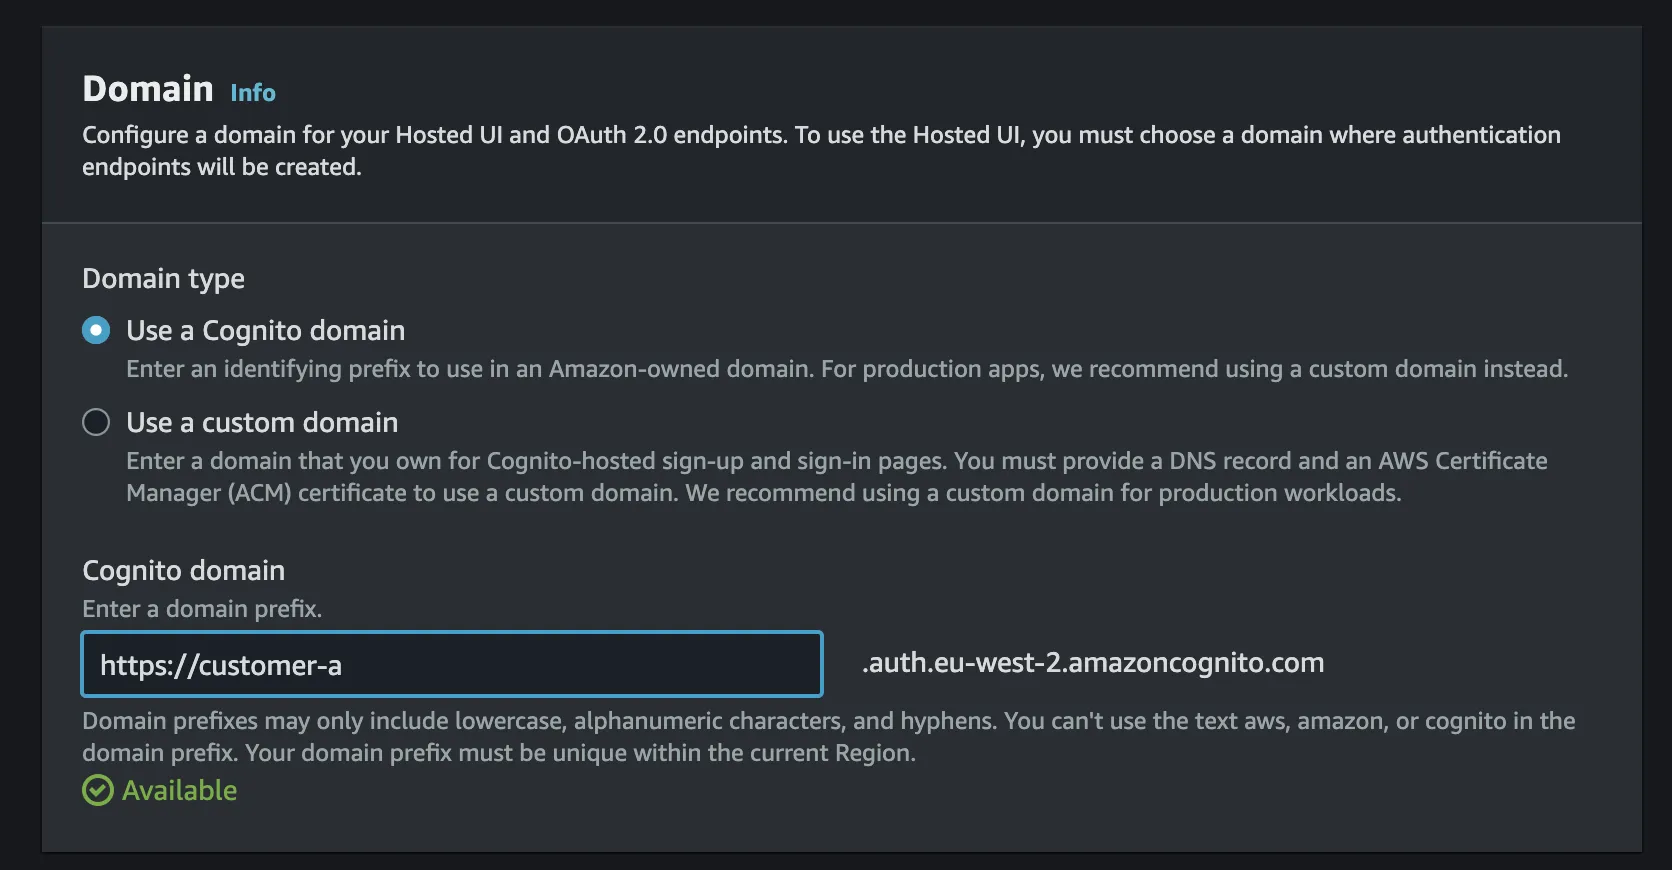
- Select the domain setup you want but using a cognito domain is fine if you don't have a custom domain.
- Set up the client app as follows:
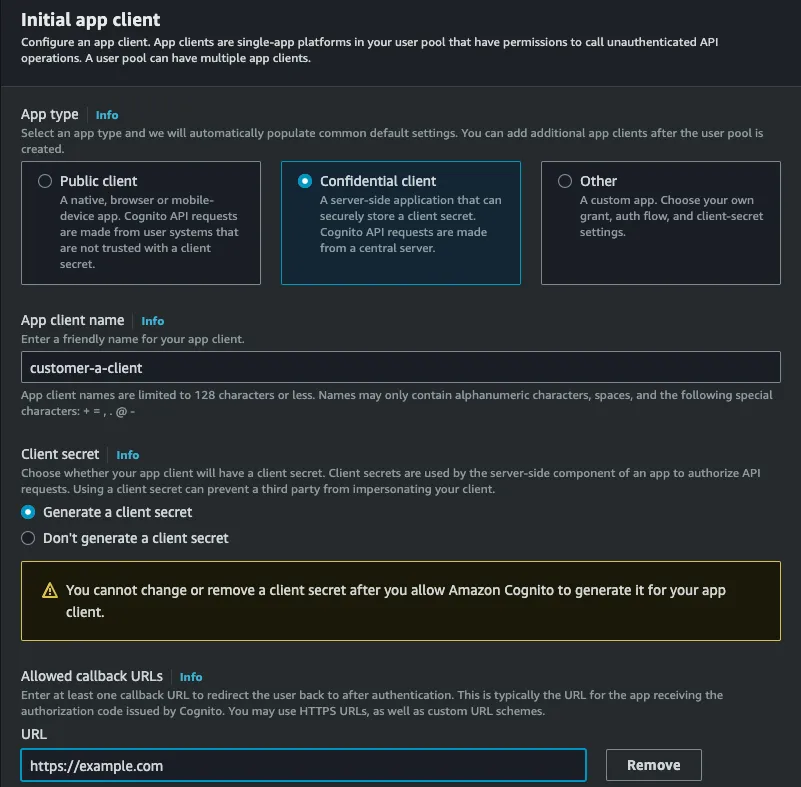
Notice here I have generated a client secret - in this case we need a secret to use this client later as an identity provider. If you don't include it at setup time then you will have to create a new client as this cannot be changed after creation.
Also for now I have entered a placeholder allowed callback url of
https://example.com but we will come back to change this later.- In the
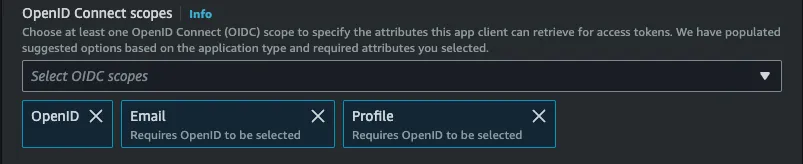
Advanced app client settingsyou can leave everything as it is except adjust the scope as follows:
- Review and create your user pool!
- Let's get a user added to this customer's user base when we are still in the area. Keep note of the user's details as you will need them later of course.
Let's set up the "Product" Cognito user pool, i.e. the instance that your product will interact directly with.
- Head to AWS Cognito and click
Create user pool - On the
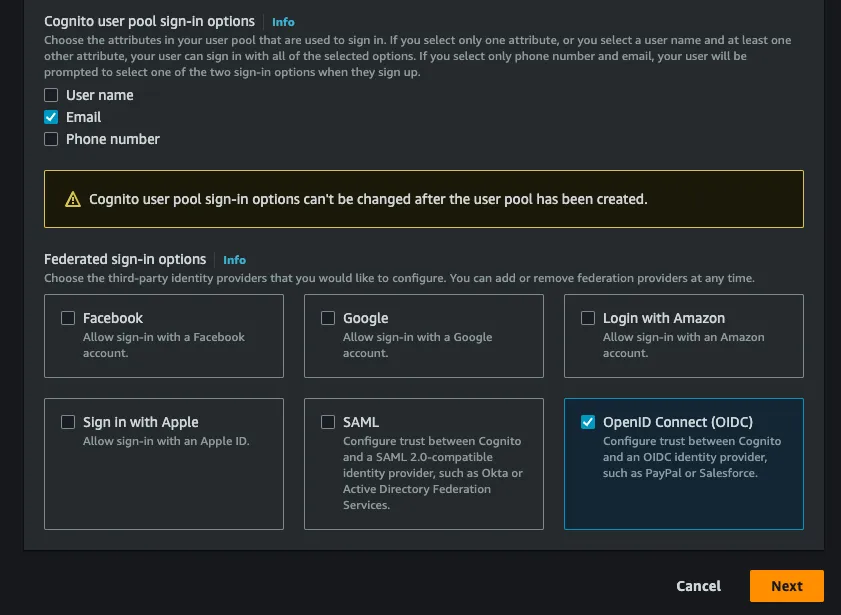
Configure sign-in experiencescreen selectFederated identity providersas an option and the sign-in options whatever suits you:
- For
Federated sign-in optionstickOpenID Connect (OIDC)
- Follow through the next steps setting up your password policy, MFA, User account recovery and Sign-up experience as you desire.
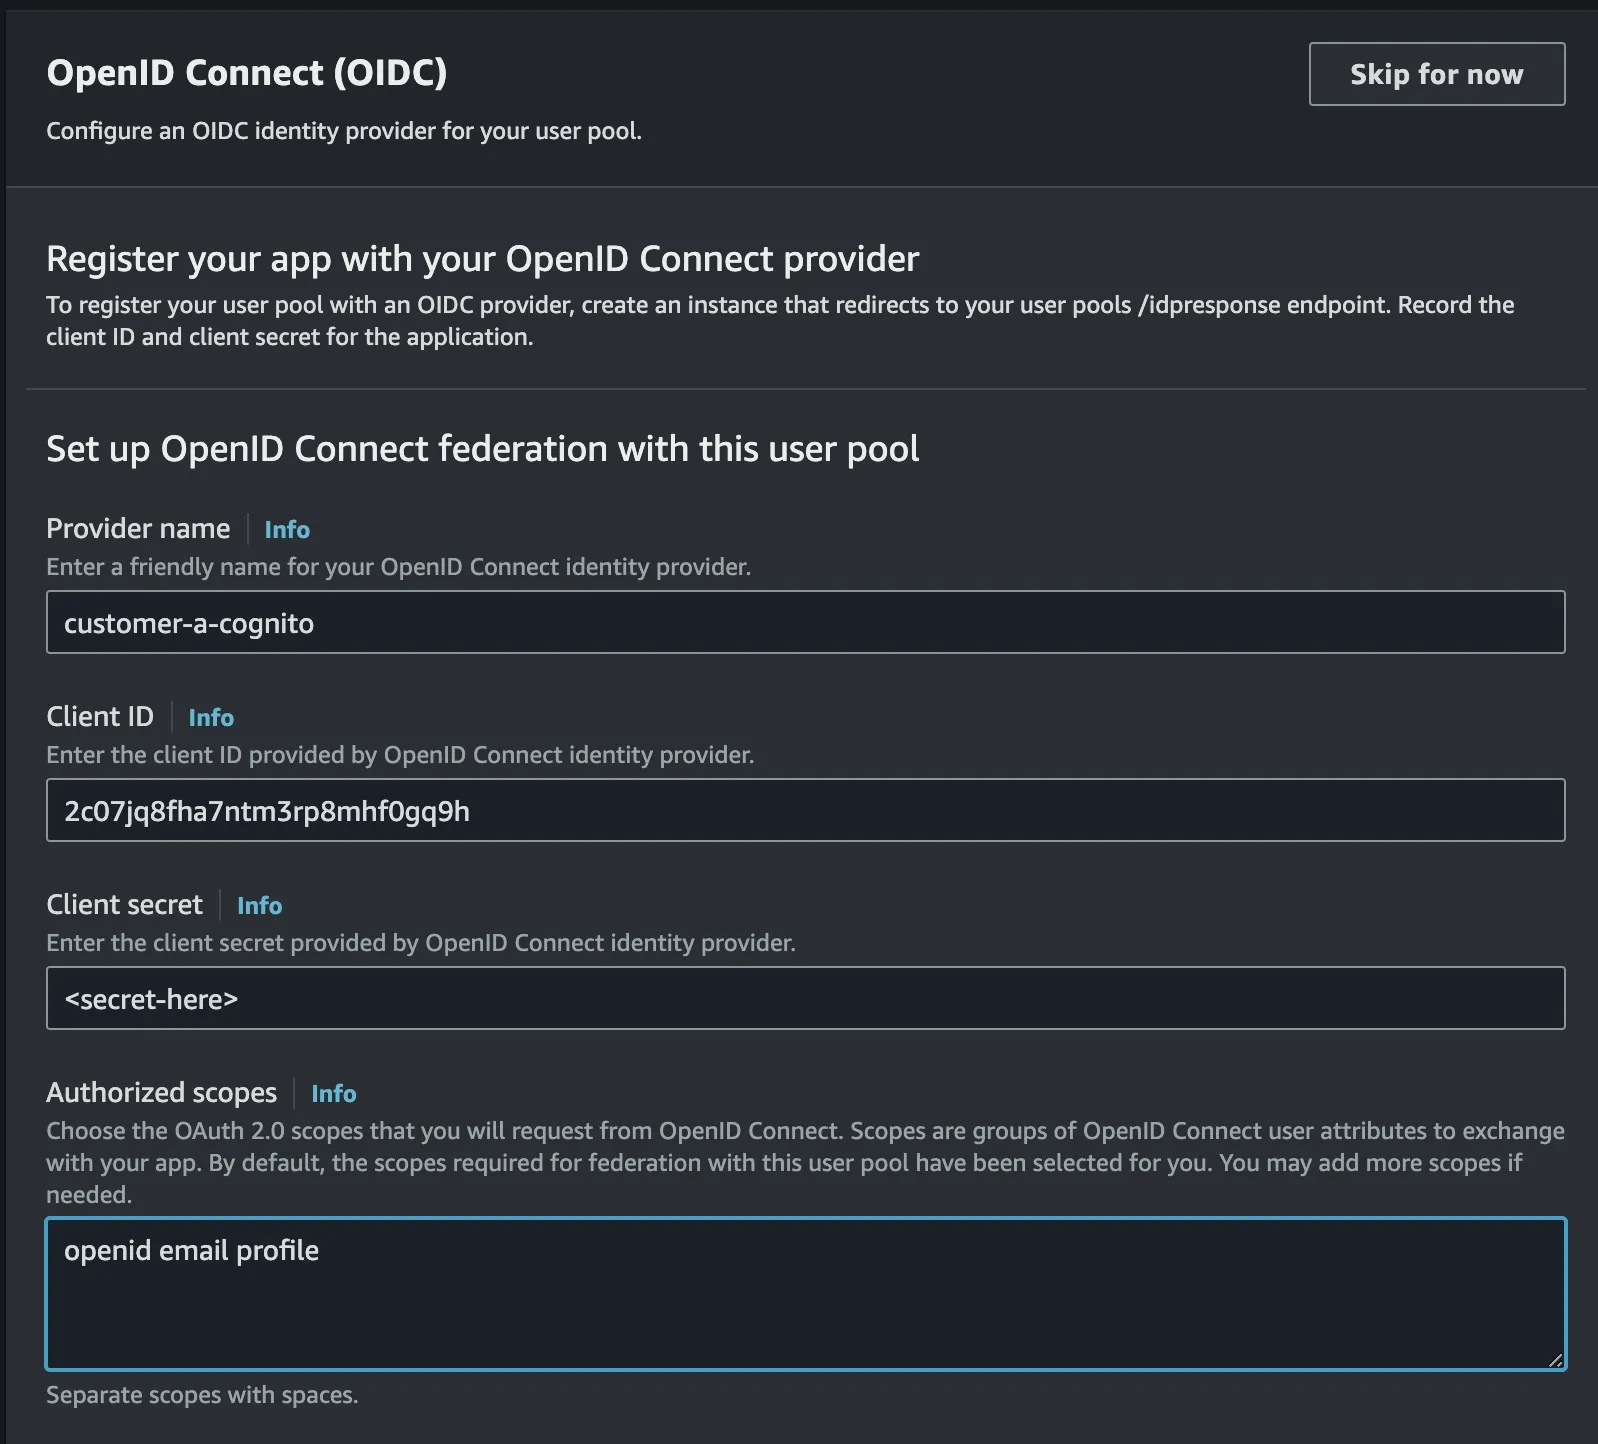
- Next you will be presented with a
Connect federated identity providersscreen - this is where the magic happens. Here fill in the client id and client secret from your customer's user pool's app client. (i.e. the client app we created in the steps above)
You'll find those details in the
App Integration tab of your Customer's user pool and then selecting the client you created: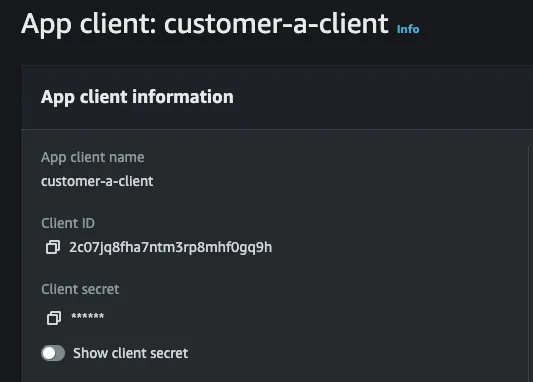
Enter them as follows (where the provider name will be what is displayed to the user in the hosted UI later):
- Keep
Attribute request methodasGET - Setup the issuer url where the url will be:
https://cognito-idp.{region}.amazonaws.com/{customerUserPoolId}
- Add the
emailattribute andemail_verifiedas shown here:
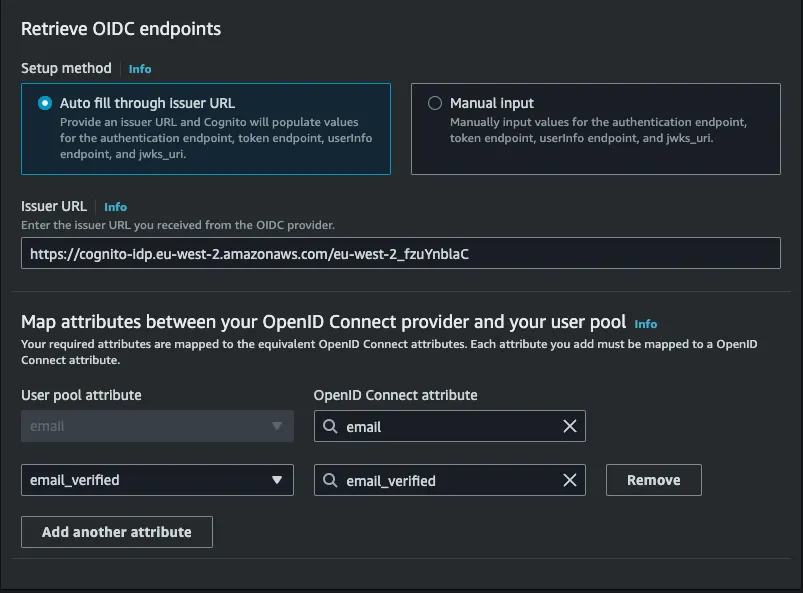
You can add as many other attributes as you want or need here. Each attribute in a user pool with match exactly to the same attribute in the other user pool, logically.
- Name your user pool, for example,
product-user-pool. - Setup your app client as you require. It is not required at this point to generate a client secret for this user pool. You can add one if you want but I wouldn't recommend it if you plan to use this user pool in a webapp or mobile app.
- In the advanced settings, ensure the following:
Set the
Identity providers to include your newly created IDP: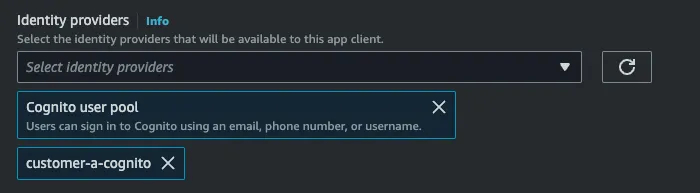
If you do not want the user to be able to log in directly to your product user pool via the hosted UI, here you can remove the option of Cognito user pool and have the IDP as the only option.
Set the scopes to match what we set in the other user pool and in the Identity Provider:
- Review and create your second user pool!
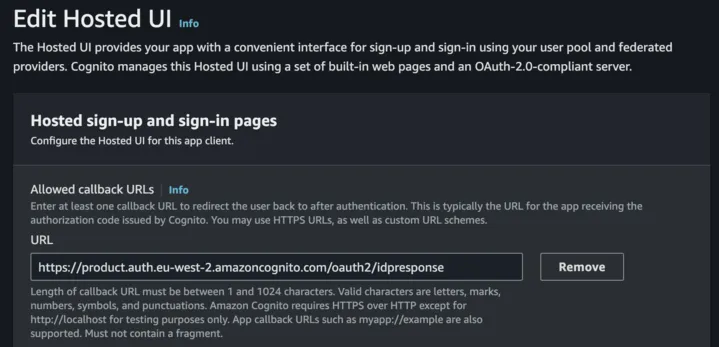
- One last step, we need to go to the Customer user pool and adjust the allowed callbacks for the client.
- Head to the
App integrationtab and then click into your client and go to the hosted UI settings. - Set the allowed callbacks to be the following:
https://{productCognitoDomain}/oauth2/idpresponse
Now if you head to the Hosted UI of the Product user pool you will see this:

If you click on the button to login to the customer's user pool you will see this:

And if you look at the url you can see you are on the customer's user pool hosted UI.
You can now log in with the details you set up earlier in the customer's user pool. You are then redirected to the product user pool's redirect url, authenticated and all. Magic. 🪄
Thanks to Daniel Kim and his original post which you can read here: Using Cognito User Pool as an OpenID Connect Provider