Odoo is an open-source, self-hosted ERP business suite with modules for accounting, CRM, sales, purchasing, Point of Sale, E-Commerce, project management, inventory, and more. This guide explains how to install Odoo on Ubuntu 22.04. Now How to Install Odoo 16 on Amazon EC2
In this lab, you will need to create an EC2 instance using an SSH keypair. The following steps outline creating a unique SSH keypair for you to use in this lab.
Sign into the AWS Management Console and open the Amazon EC2 console. In the upper-right corner of the AWS Management Console, confirm you are in the desired AWS region.
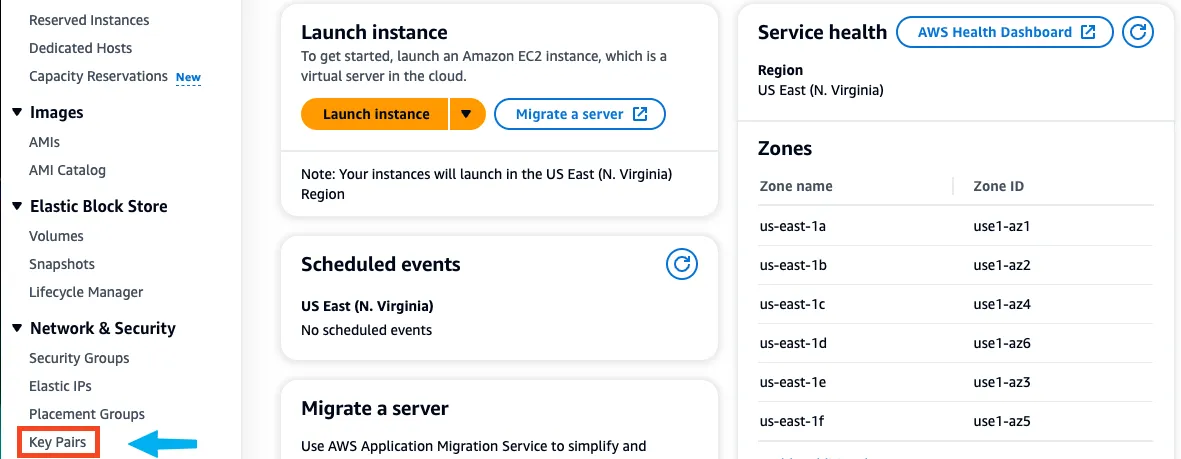
Click on Key Pairs in the Network & Security section near the bottom of the leftmost menu. This will display a page to manage your SSH key pairs.
Type Name Key Pair into the Key Pair Name: text box and click Create key pair button. For Windows users, please select ppk for file format.
The page will download the file Name Key Pair.ppk to the local drive. Follow the browser instructions to save the file to the default download location. Remember the full path to the key pair file you just downloaded.
2. Launch a Web Server Instance
We will launch an Amazon Linux 2 instance, will display information about our instance. Before that select Region what you want.
Click on EC2 Dashboard near the top of the leftmost menu. And Click on Launch instances.
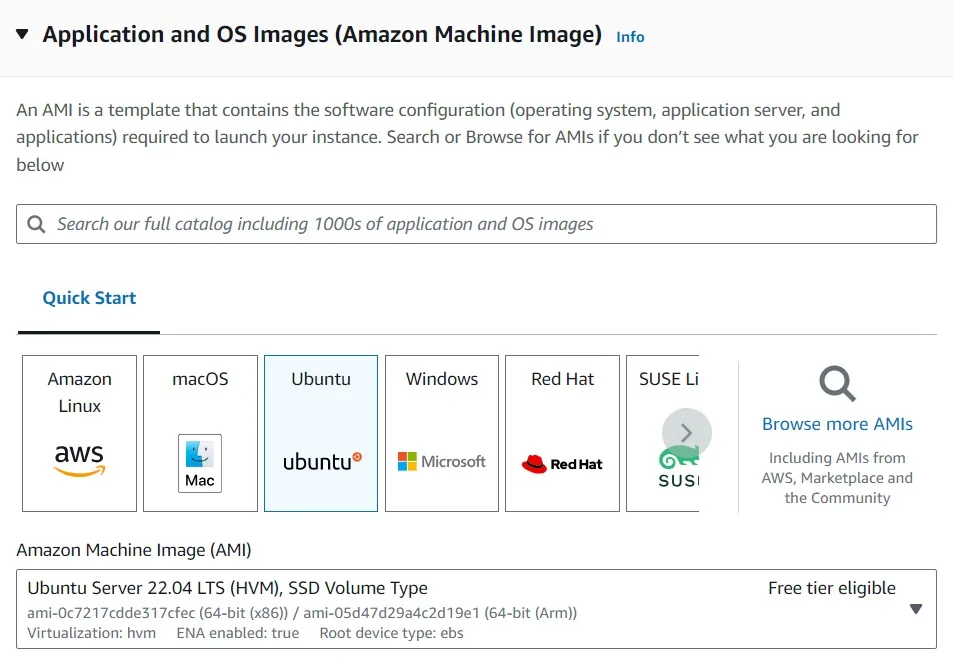
In Name, put the value Odoo. And check the default setting for Amazon Machine Image below.
Select Application and OS Imane in Instance Type. Select Ubuntu 22.04
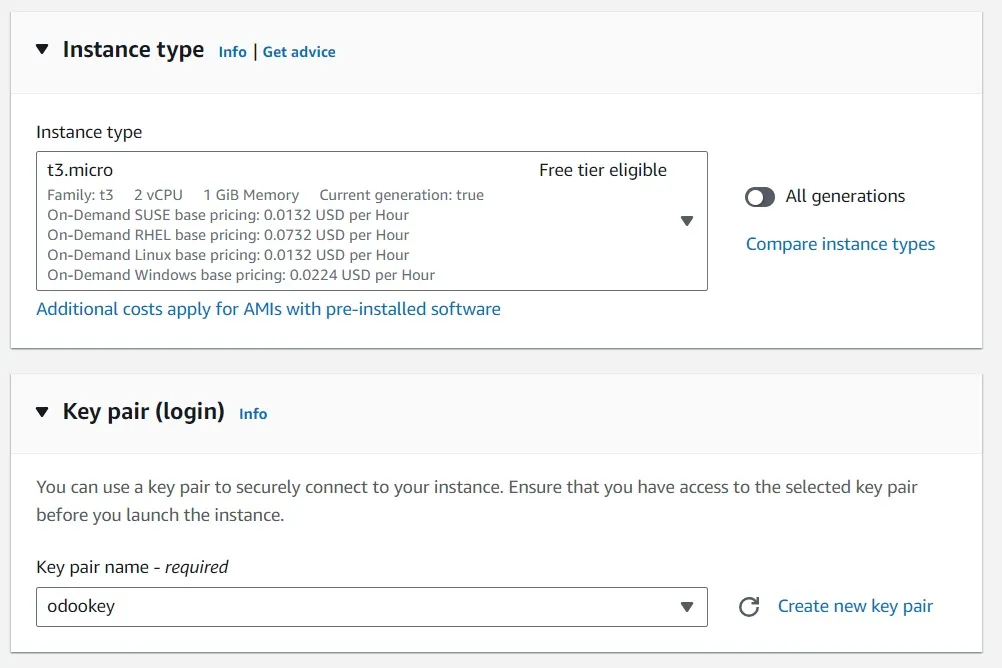
Select t3.micro in Instance Type & Select the key pair that you created in the beginning of this lab from the drop-down.
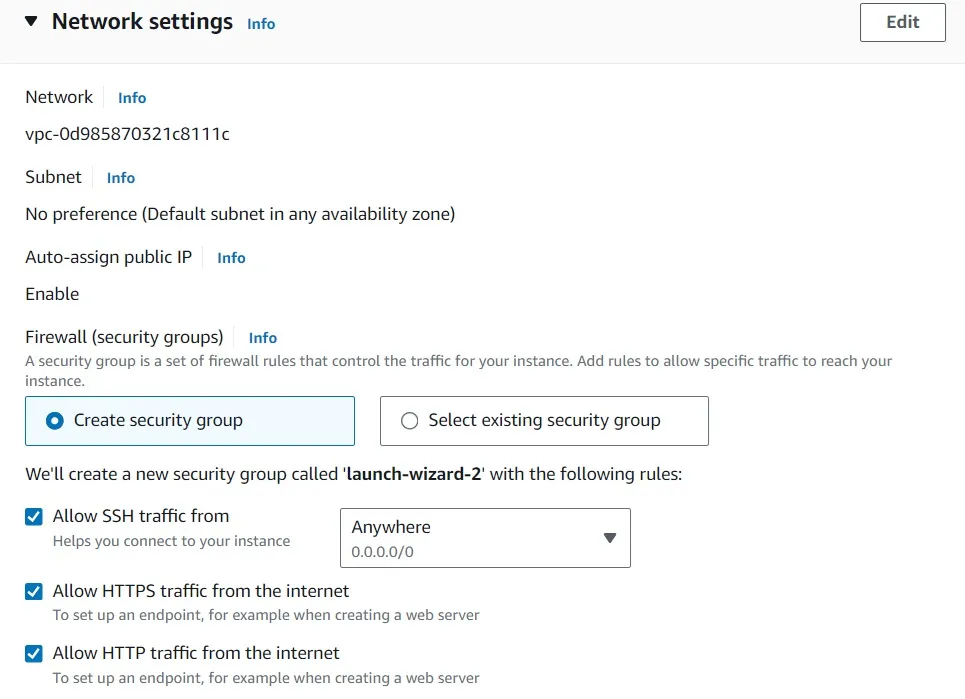
Click the Edit button in Network settings to set the space where EC2 will be located. Check default VPC and subnet. Auto-assign public IP is set to Enable. Right below it, create Security groups to act as a network firewall. Security groups will specify the protocols and addresses you want to allow in your firewall policy. For the security group you are currently creating, this is the rule that applies to the EC2 that will be created. After entering laucnh-wizard in Security group name and Description, select Add Security group rule and set HTTP to Type. Also allow TCP/80, allow TCP/443, Custom TCP/8069 for Web Service by specifying it.
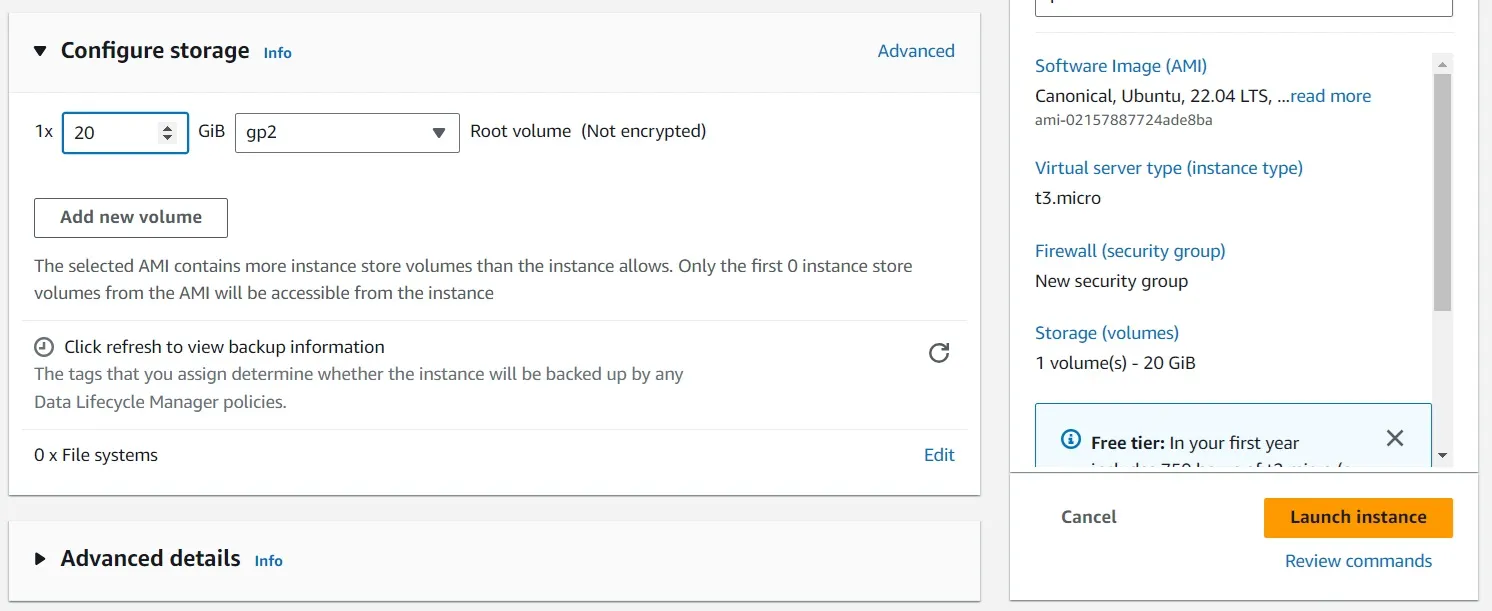
All other values accept the default values, expand by clicking on the Advanced Details tab at the bottom of the screen.
Click the View Instances button in the lower right hand portion of the screen to view the list of EC2 instances. Once your instance has launched, you will see your Web Server as well as the Availability Zone the instance is in, and the publicly routable DNS name. Click the checkbox next to your web server to view details about this EC2 instance.
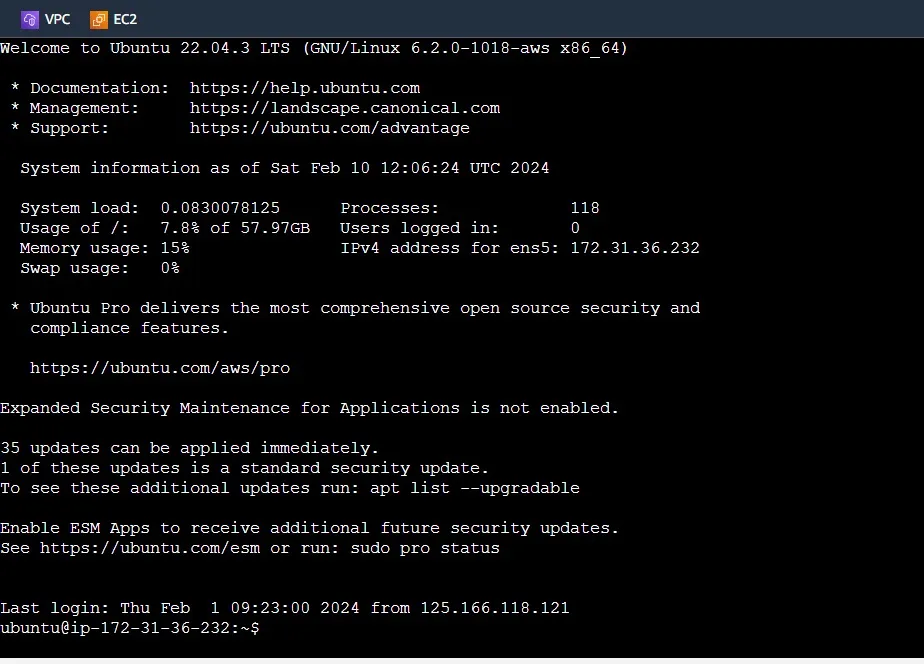
Connect Instance with ec2 instance connect
Update the system packages
Install Git
Install Pip.
Install other required dependencies.
Create a new odoo user.
Download and add PostgreSQL Repositories.
Install PostgreSQL.
Start the database server.
Enable the database server to start automatically on system boot.
Change the default PostgreSQL password.
Switch to the postgres user.
Create a database user named odoo.
Go to the PostgreSQL interactive shell.
Give the database user odoo permission to create databases.
Exit the interactive shell.
Return to the non-root example_user account.
Wkhtmltopdf is a group of open-source command-line tools for rendering HTML pages into PDF and other image formats. It enables Odoo to print PDF reports. Download Wkhtmltopdf from GitHub.
Install Wkhtmltopdf.
At the time of this writing, Odoo 17 is the latest version. Create a directory for Odoo and set the owner to the Odoo user.
Switch to the odoo user account.
Clone the Odoo 14 source code from GitHub to /opt/odoo/odoo directory.
Create a new Python virtual environment for Odoo.
Activate the virtual environment.
Install all required Python modules with pip3.
Deactivate the environment.
Create a new directory for 3rd party add-ons.
Switch back to your non-root example_user account.
Create a configuration file.
Add the following code to the file. Change StrongMasterPassword to a unique password.
Close and save the file.
Create a service unit file called odoo.service.
Add the following code to the file. Close and save the file.
Reload system daemon for changes to take effect.
Start the Odoo service.
Enable the service to start on system boot.
Check the service status.
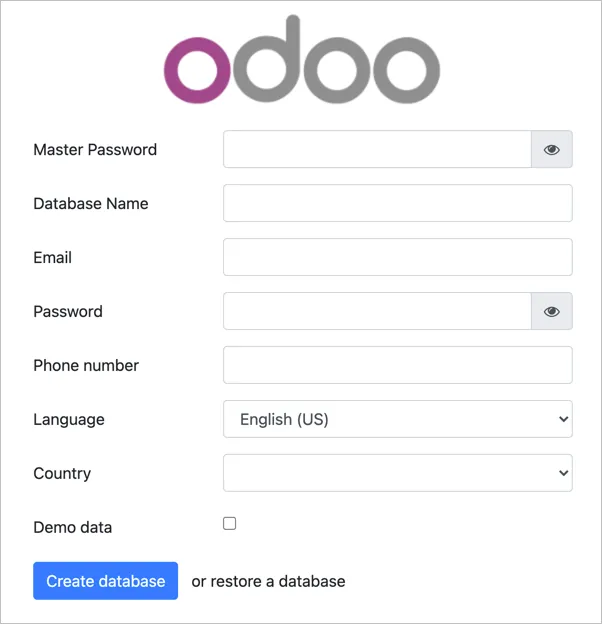
Access Web Interface. To access the Odoo web interface, navigate to your server's IP address at port 8069 in your web browser. For example, http:/DNS_Name:8069. You should see the database setup screen:
Enter the admin_password value you chose in /etc/odoo.conf for the Master Password field.
Enter the other information as desired for your installation.
Conclusion
You have installed Odoo. You can now access the Dashboard and configure it to begin managing your busines