logo
Menu

Build a contextual chatbot application using Amazon Q for Financial Services.

Discover how to leverage Amazon Q to build a powerful contextual chatbot for financial services, enhancing customer engagement and support.

Published Mar 28, 2024
Build a contextual chatbot application using Amazon Q for Financial Services.
In the realm of financial services, modern chatbots emerge as invaluable digital assistants, revolutionizing customer engagement and support on a 24/7 basis. Their widespread adoption owes to their capacity to swiftly address customer queries, handle multilingual conversations, and offer actionable insights into customer behaviors based on data analytics. Moreover, they present a cost-efficient solution for fostering customer interactions, scaling seamlessly with the expanding user base.
Harnessing the sophisticated natural language processing capabilities of large language models (LLMs), financial chatbots excel in comprehending and responding to diverse customer inquiries in a conversational manner. However, mere provision of basic responses falls short in establishing trust and delivering value. To truly excel as trusted financial advisors, chatbots must offer personalized, insightful responses tailored to individual users.
A key strategy for enhancing the conversational depth of financial chatbots involves integrating them with internal knowledge repositories and data systems. By tapping into proprietary enterprise data stored in internal knowledge bases, chatbots can contextualize responses according to each user's unique financial circumstances and preferences. For instance, they can suggest suitable financial products based on a customer's transaction history, explain complex financial concepts in user-friendly language, or offer account-related support by accessing specific customer records. This intelligent fusion of information, coupled with natural language understanding capabilities, empowers financial chatbots to deliver tangible business value across a spectrum of financial service scenarios.
In the realm of AI-powered chatbots, Amazon Q stands out as a game-changer, providing enterprises with a seamlessly integrated solution for efficient information retrieval and task automation. With its ability to analyze and generate accurate responses from enterprise data sources such as Amazon S3, Microsoft SharePoint, and Salesforce, Amazon Q ensures users receive comprehensive and reliable information. Its simplicity in deployment and management, coupled with configurable options for source selection and robust security measures, make it a versatile tool for enhancing productivity and streamlining workflows. Furthermore, its broad connectivity ensures effortless integration with various data sources, promising a holistic solution for businesses seeking to harness the power of AI in their operations.
Configuring an Amazon Q application
As the first step towards creating an Amazon Q chat application for your end users, you configure an Amazon Q application. Then, you can optionally enhance it by customizing the end user experience. After this, you select and create a retriever, and connect and configure the data sources.
To create an Amazon Q application, you can use either the AWS Management Console or the Amazon Q API.
  1. Sign in to the AWS Management Console and open the Amazon Q console at https://console.aws.amazon.com/amazonq/.
  2. For Create Amazon Q application, choose Get started.
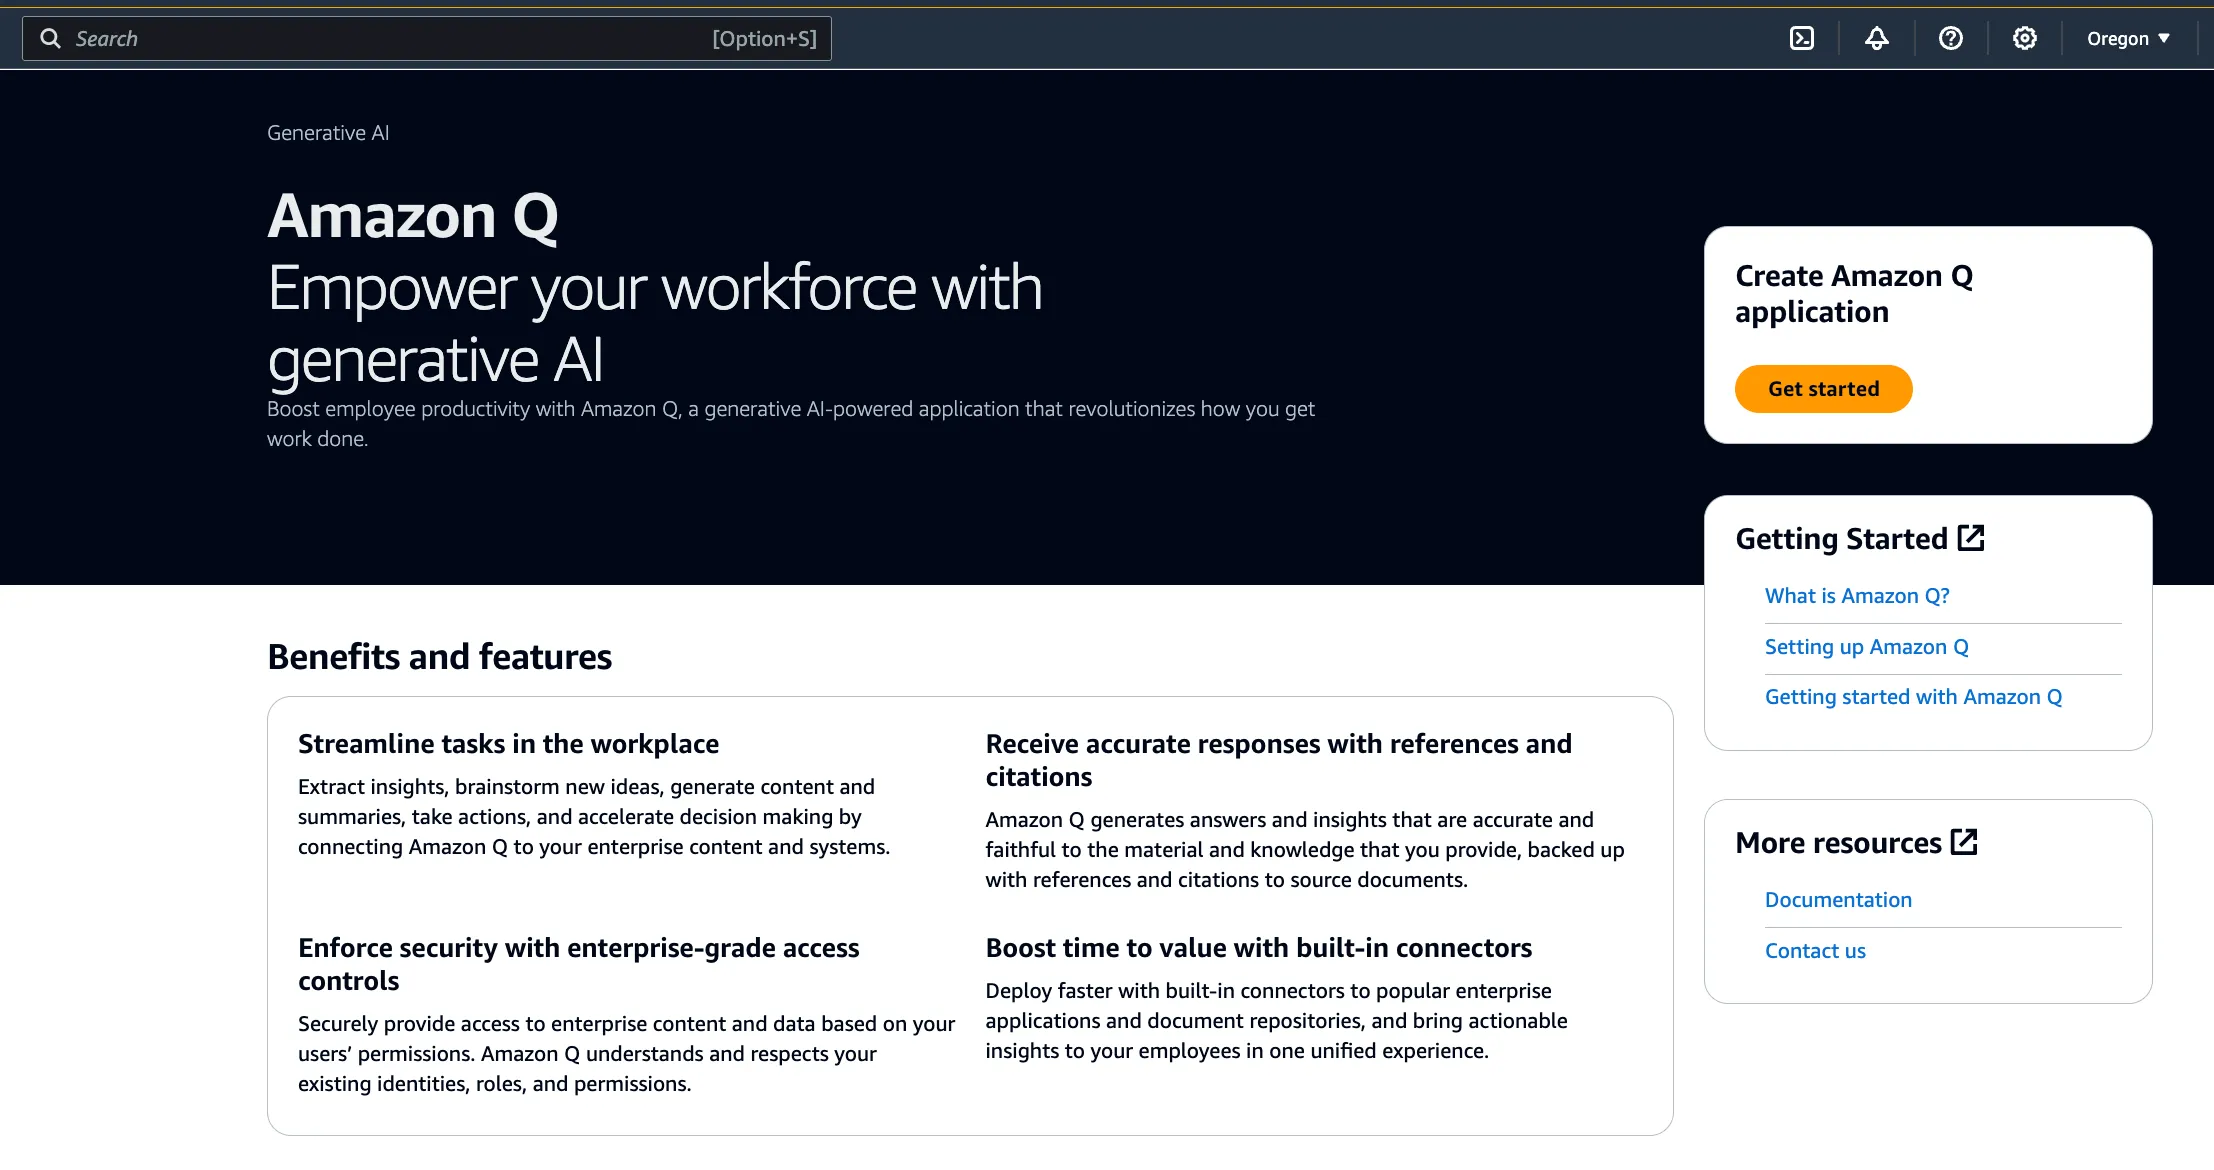
  3. Amazon Q
  4. For Applications, choose Create application.
  5. Applications page
  • For Application settings, enter the following information for your Amazon Q application:
    • Application name – A name for your Amazon Q application for easy identification.
    • Service access – An IAM role for Amazon Q to allow it to access the AWS resources it needs to create your application. You can choose to use an existing role or create a new role.
    • Service role name – A name for the service (IAM) role you created for easy identification on the console.
    • Encryption – Amazon Q encrypts your data by default using AWS managed AWS KMS keys. To customize your encryption settings, select Customize encryption settings (advanced). Then, you can choose to use an existing AWS KMS key or create a new one.
  • Tags – optional – To add tags to your Amazon Q application and web experience, select Add new tag. Then, enter the following information for each tag:
    • Key – Add a key for your tag.
    • Value - optional – An optional value for your tag.
  • To start creating your application, choose Create.
  • create application
Creating and selecting a retriever for an Amazon Q application
After creating your Amazon Q application, you create and select the retriever that will power your generative AI web experience. A retriever pulls data from an index in real time during a conversation. Amazon Q provides retrievers for Amazon Kendra indexes and also for a native index. You can choose between selecting an Amazon Q retriever or using an already configured Amazon Kendra index as a retriever.
select retriever
Upload your knowledge dataset to Amazon S3
We download the dataset for our knowledge base and upload it into a S3 bucket. This dataset will feed and power knowledge base. Complete the following steps:
Navigate to the Annual reports, proxies and shareholder letters data repository and download the last few years of Amazon shareholder letters.
On the Amazon S3 console, create a bucket and upload the files to the bucket.
Connecting data sources to an Amazon Q application
After you select a retriever for your Amazon Q application, you connect data sources to it. Select s3 as data source.
A data source connector is a mechanism for integrating and synchronizing data from multiple repositories into one container index. Amazon Q offers multiple data source connectors that can connect to your data sources and help you create your generative AI solution with minimal configuration.
data sources
  1. Name – Name your data source for easy tracking.
  2. Configure VPC and security group – optional – You can choose to use a VPC if your Amazon S3 bucket is not accessible through the public internet. If you so, you must add Subnets and VPC security groups as well.
  3. IAM role – Choose an existing IAM role or create an IAM role to access your repository credentials and index content.
  4. Sync scope, enter the following information:
    • Enter the data source location – The path to the Amazon S3 bucket where your data is stored. Select Browse S3 to find and choose your bucket.
    • Maximum file size - optional – The maximum file size value that Amazon Q will crawl. Amazon Q will only crawl files within the limit you define.
    • Advanced settings, enter the following information:
      • Metadata files prefix folder location - optional – The path to the folder in which your metadata is stored. Select Browse S3 to locate your metadata folder.
      • Access control list configuration file location - optional – The path to the location of a file containing a JSON structure that specifies access settings for the files stored in your S3 data source. Select Browse S3 to locate your ACL file.
    • Regex patterns – Add patterns to include or exclude documents from your index. All paths are relative to the data source location Amazon S3 bucket. You can add up to 100 patterns.
  • s3 configuration
  1. Sync mode, choose how you want to update your index when your data source content changes. When you sync your data source with Amazon Q for the first time, all content is synced by default.
    • Full sync – Sync all content regardless of the previous sync status.
    • New, modified, or deleted content sync – Sync only new, modified, and deleted documents.
  2. In Sync run schedule, for Frequency – Choose how often Amazon Q will sync with your data source.
  3. Tags - optional – Add tags to search and filter your resources or track your AWS costs.
  4. Field mappings – A list of data source document attributes to map to your index fields. Add the fields from the Data source details page after you finish adding your data source. You can choose from two types of fields:
    • Default – Automatically created by Amazon Q on your behalf based on common fields in your data source. You can't edit these.
    • Custom – Automatically created by Amazon Q on your behalf based on common fields in your data source. You can edit these. You can also create and add new custom fields.
  5. To finish connecting your data source to Amazon Q, select Add data source.
knowledgebase setting
As a next step from the Amazon Q application page, select the application you created and click on edit the application. In data sources , select the s3 bucket that has been configured in the previous step and click on sync now.
sync data sources
Previewing and customizing an Amazon Q web experience
After creating and enhancing your Amazon Q application, you can preview the Amazon Q web experience that you created for your end users in the AWS console. By previewing your web experience, you can test the features and enhancements that you configured for it.
preview web experience
chatbot
Congratulations, you have successfully created and tested a chatbot application using Amazon Q.
 

Comments