Multi-Region Networking on AWS
Master Multi-Region AWS Connectivity by diving into setting up Transit Gateway peering!
Published Mar 31, 2024
In this guide, we dive into constructing a secure, scalable, and resilient network infrastructure on AWS for a real estate startup focusing on transforming abandoned commercial spaces into residential apartments. With operations centered in New York City and San Francisco, the startup requires an AWS setup that supports high availability and seamless inter-region connectivity.
Before starting, ensure you have an AWS account as well as some familiarity with AWS services including VPC, EC2, Transit Gateway, and Route 53.
Start with setting up two VPCs, representing New York City and San Francisco.
- Navigate to the VPC Dashboard in the AWS Management Console.
- Create a new VPC named
nyc-vpcwith a CIDR block10.0.0.0/16.

- Switch your region to us-west in the AWS Console.
- Repeat the VPC creation process, this time naming the VPC
sf-vpcwith a CIDR block10.1.0.0/16.

For each VPC, create a public subnet and attach an internet gateway to enable external access.
- Public Subnets: Create
10.0.1.0/20innyc-vpcand10.1.1.0/20insf-vpc. - Internet Gateways: Attach a new internet gateway to each VPC for internet access.
AWS Transit Gateway simplifies networking across multiple VPCs and regions by acting as a network transit hub.
- Create a Transit Gateway named
US-Coastal-TGW-1with default route table association and propagation enabled, in the us-east-1 region, the another oneUS-Coastal-TGW-2in the us-west-1 region. - Create Transit Gateway Attachments for both VPCs, connecting them to the respective Transit Gateways.
- Create Transit Gateway Peering Attachment between the two Transit Gateways to enable inter-region communication.
- Update Route Tables in each VPC to route traffic through the Transit Gateway through the private subnets.
Attaching your Virtual Private Clouds (VPCs) to an AWS Transit Gateway (TGW) establishes a centralized hub to manage network traffic across your VPCs, enabling the east and west coast networks to communicate with each other. Here’s a simplified step-by-step guide on how to attach both VPCs to the Transit Gateway:
- Open the AWS Management Console and go to the VPC Dashboard.
- In the navigation pane, under Transit Gateway, select Transit Gateways.
If you haven't already created a Transit Gateway:
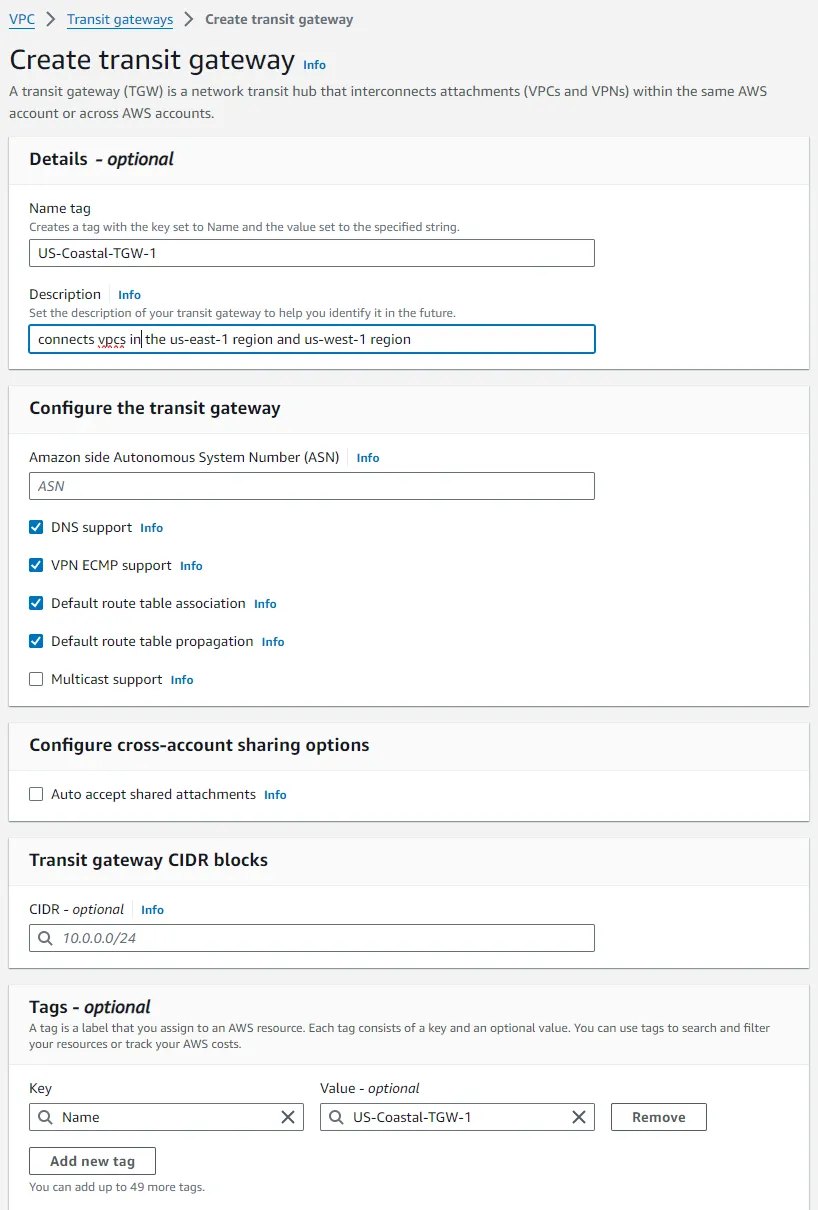
- Click Create Transit Gateway.
- Provide a Name tag and Description for your Transit Gateway, such as
US-Coastal-TGW-1. - Ensure Default route table association and default route table propagation are enabled to simplify routing.
- Click Create Transit Gateway.
- Repeat this process to create a Transit Gateway for the West Coast, e.g.,
US-Coastal-TGW-2.
For each VPC (NYC-VPC and SF-VPC):
- In the left navigation pane, under “Transit Gateway,” click on “Transit Gateway Attachments.”
- Click on the “Create Transit Gateway Attachment” button.
- In the attachment configuration:
- Attachment name tag: Give your attachment a meaningful name, like
NYC-VPC-Attachment. - VPC ID: Select the VPC you are attaching, starting with the NYC VPC.
- Subnet IDs: Choose one or more subnets within your VPC where the Transit Gateway will route traffic. It's best to select subnets across different Availability Zones for redundancy. Usually, this is done for private subnets.
- Repeat this process for the SF VPC, ensuring both are attached to the TGW.
- Repeat this process for the West Coast VPC, attaching it to the
US-Coastal-TGW-2.

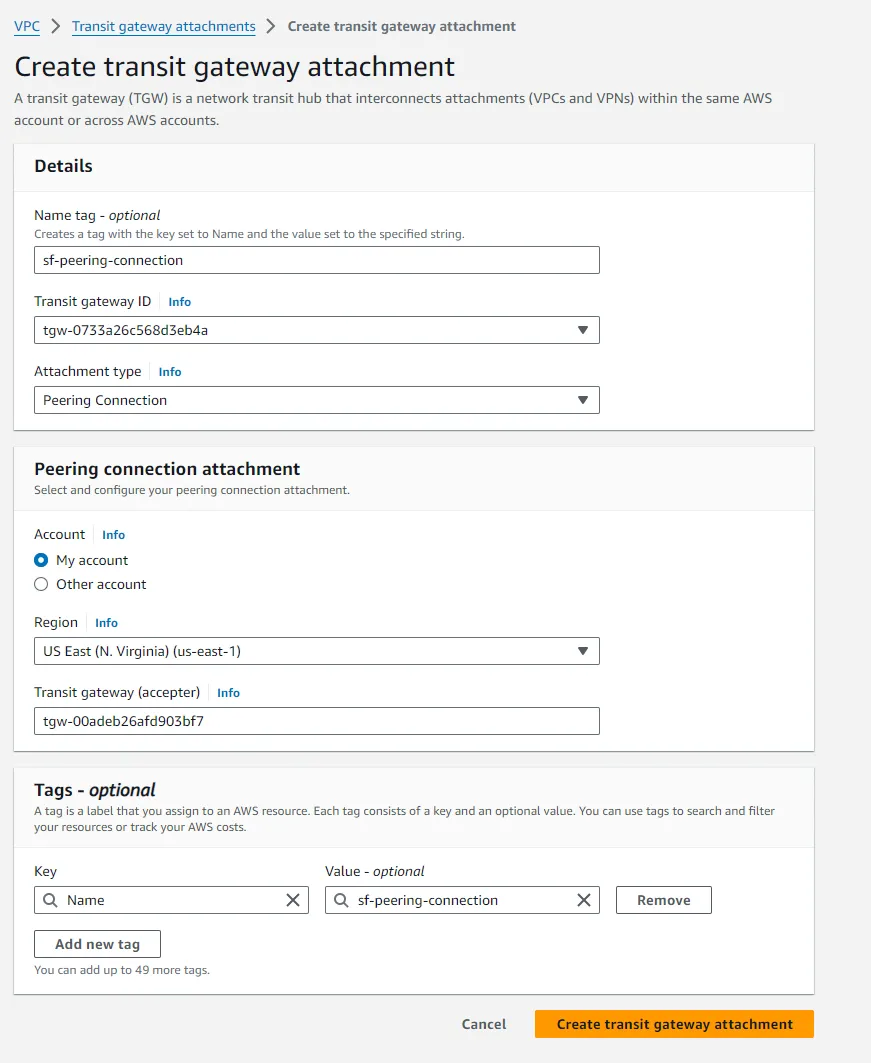
To enable inter-region communication between the Transit Gateways, you need to make a peering attachment:
- In the Transit Gateway Attachment dashboard, click on Create transit gateway attachment.
- Select Transit Gateway peering attachment.
- Choose the other Transit Gateway as the Acceptor and enter the ID of the transit gateway to peer with.
- Create the attachment.
- Switch to the other region to accept the peering attachment in the other Transit Gateway.

After adding the peering connection, you need to add a static route on your transit gateway route table to route traffic to the other region:
- Navigate to the Transit Gateway Route Tables associated with your Transit Gateway.
- Select the route table, then click on Routes > Create static route.
- Add route:
- CIDR: For the SF Transit Gateway, enter the CIDR block of the NYC VPC, and vice versa.
- Attachment: Select the Transit Gateway Peering Attachment.
- Save changes.
- Repeat this process for the other Transit Gateway. You should now have two routes on each transit gateway route table.

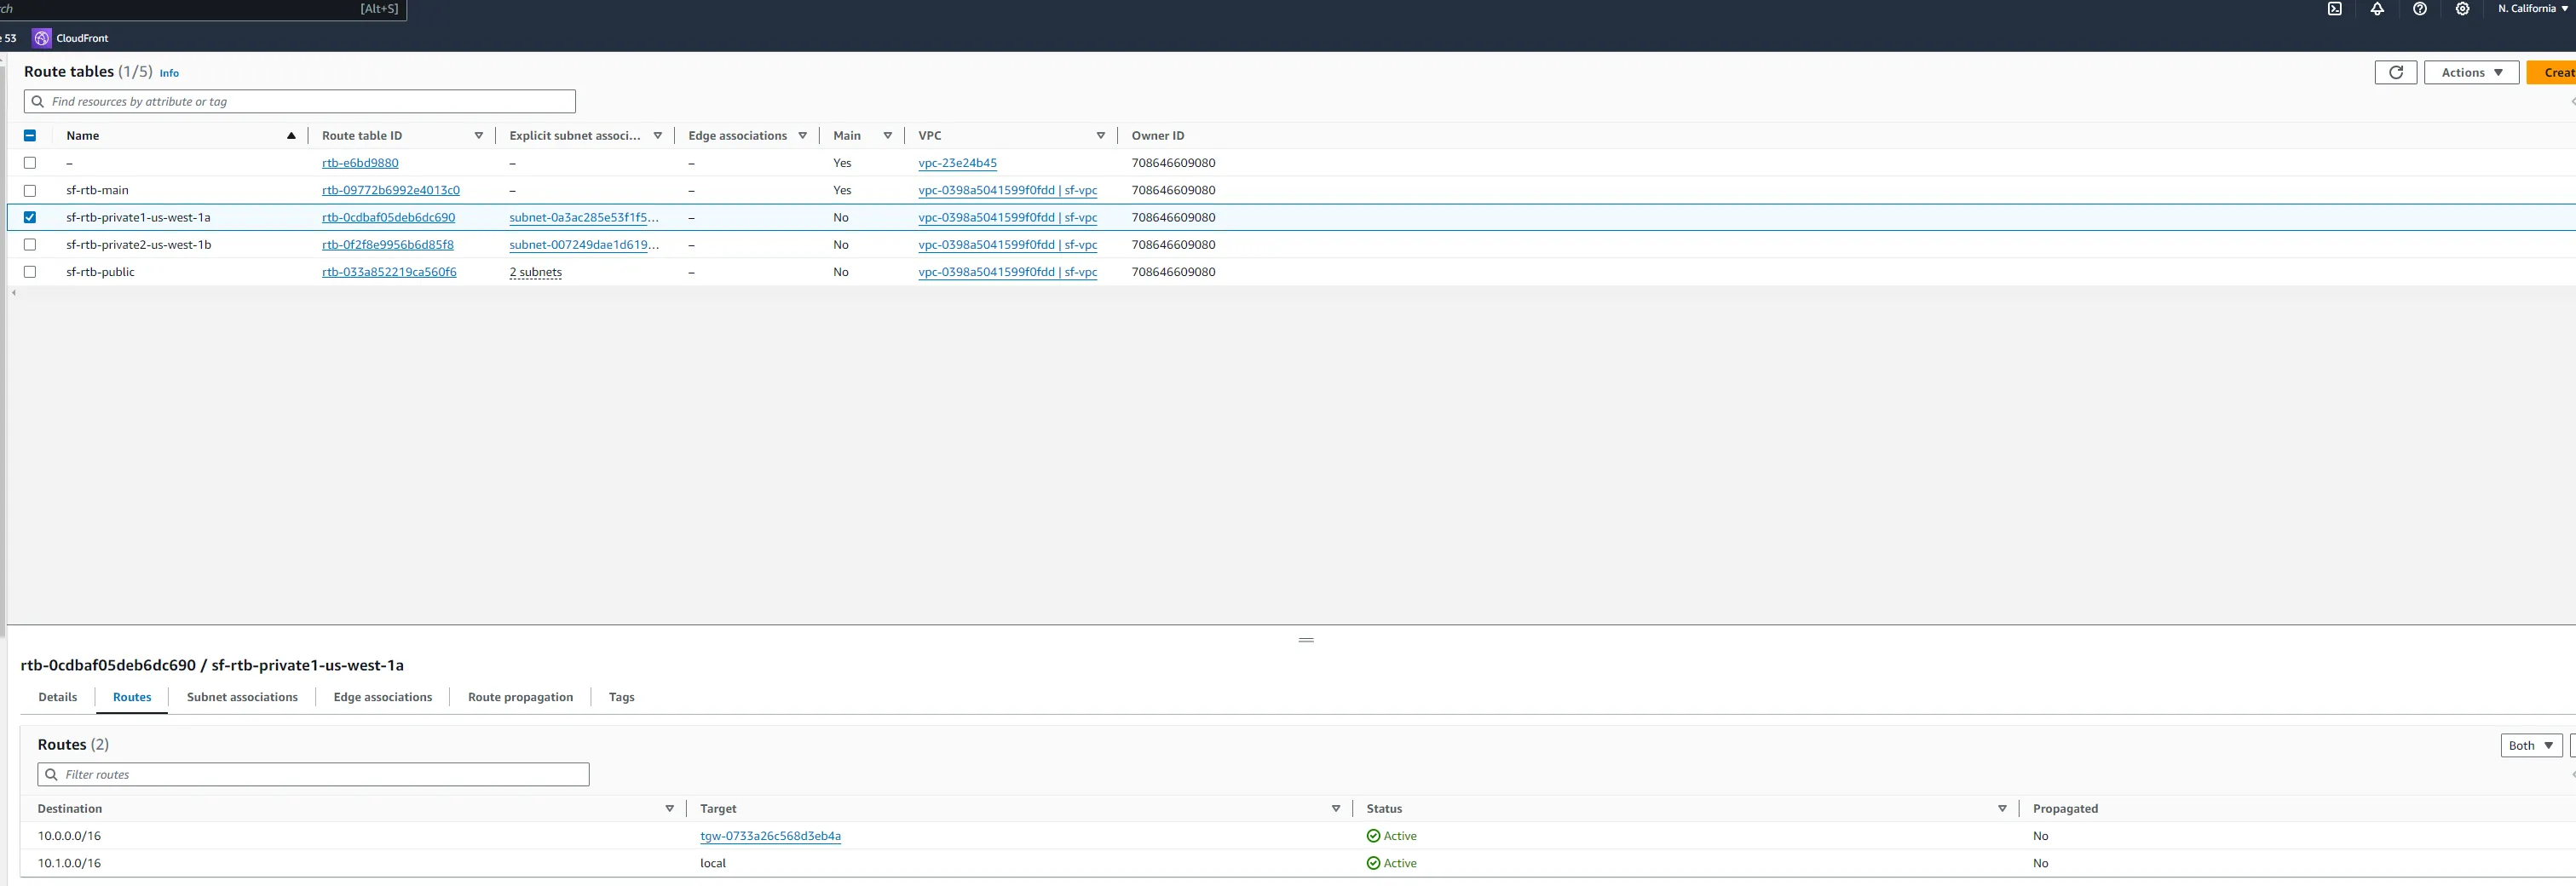
After finishing setting up the transit gateway and attachments, you need to update the route tables in each VPC to ensure traffic destined for the other VPC is routed through the Transit Gateway. We will be adding routs for our private subnets, we will use the tables that are associated with the private subnets.
- Navigate to the Route Tables associated with your VPCs.
- Select the route table, then click on Routes > Edit routes.
- Add route:
- Destination: For the SF VPC, enter the CIDR block of the SF VPC, and vice versa.
- Target: Select the Transit Gateway VPC attachment.
- Save changes.
To validate the setup, we will launch some EC2 instances in each VPC and test connectivity (e.g., ping or SSH) between the two instances across the Transit Gateway. You will notice the public instances cannot communicate with each other, but the private instances can.
Following these steps will establish a network bridge between your east and west coast networks, enhancing your startup's infrastructure with seamless inter-region connectivity on AWS.
Deploy an EC2 instance in each VPC to simulate application servers.
- Launch a Public EC2 instance in the
nyc-vpc, within the public subnet, configuring it as a web server. - Launch a Private EC instance in the
nyc-vpc, within the private subnet, for internal services. - Repeat for the
sf-vpc, ensuring both instances are in public and private subnets and can access one another.
- EC2 Instances: launch a public server in each instance and launch a private server in each instance. You can install Apache on the public servers.
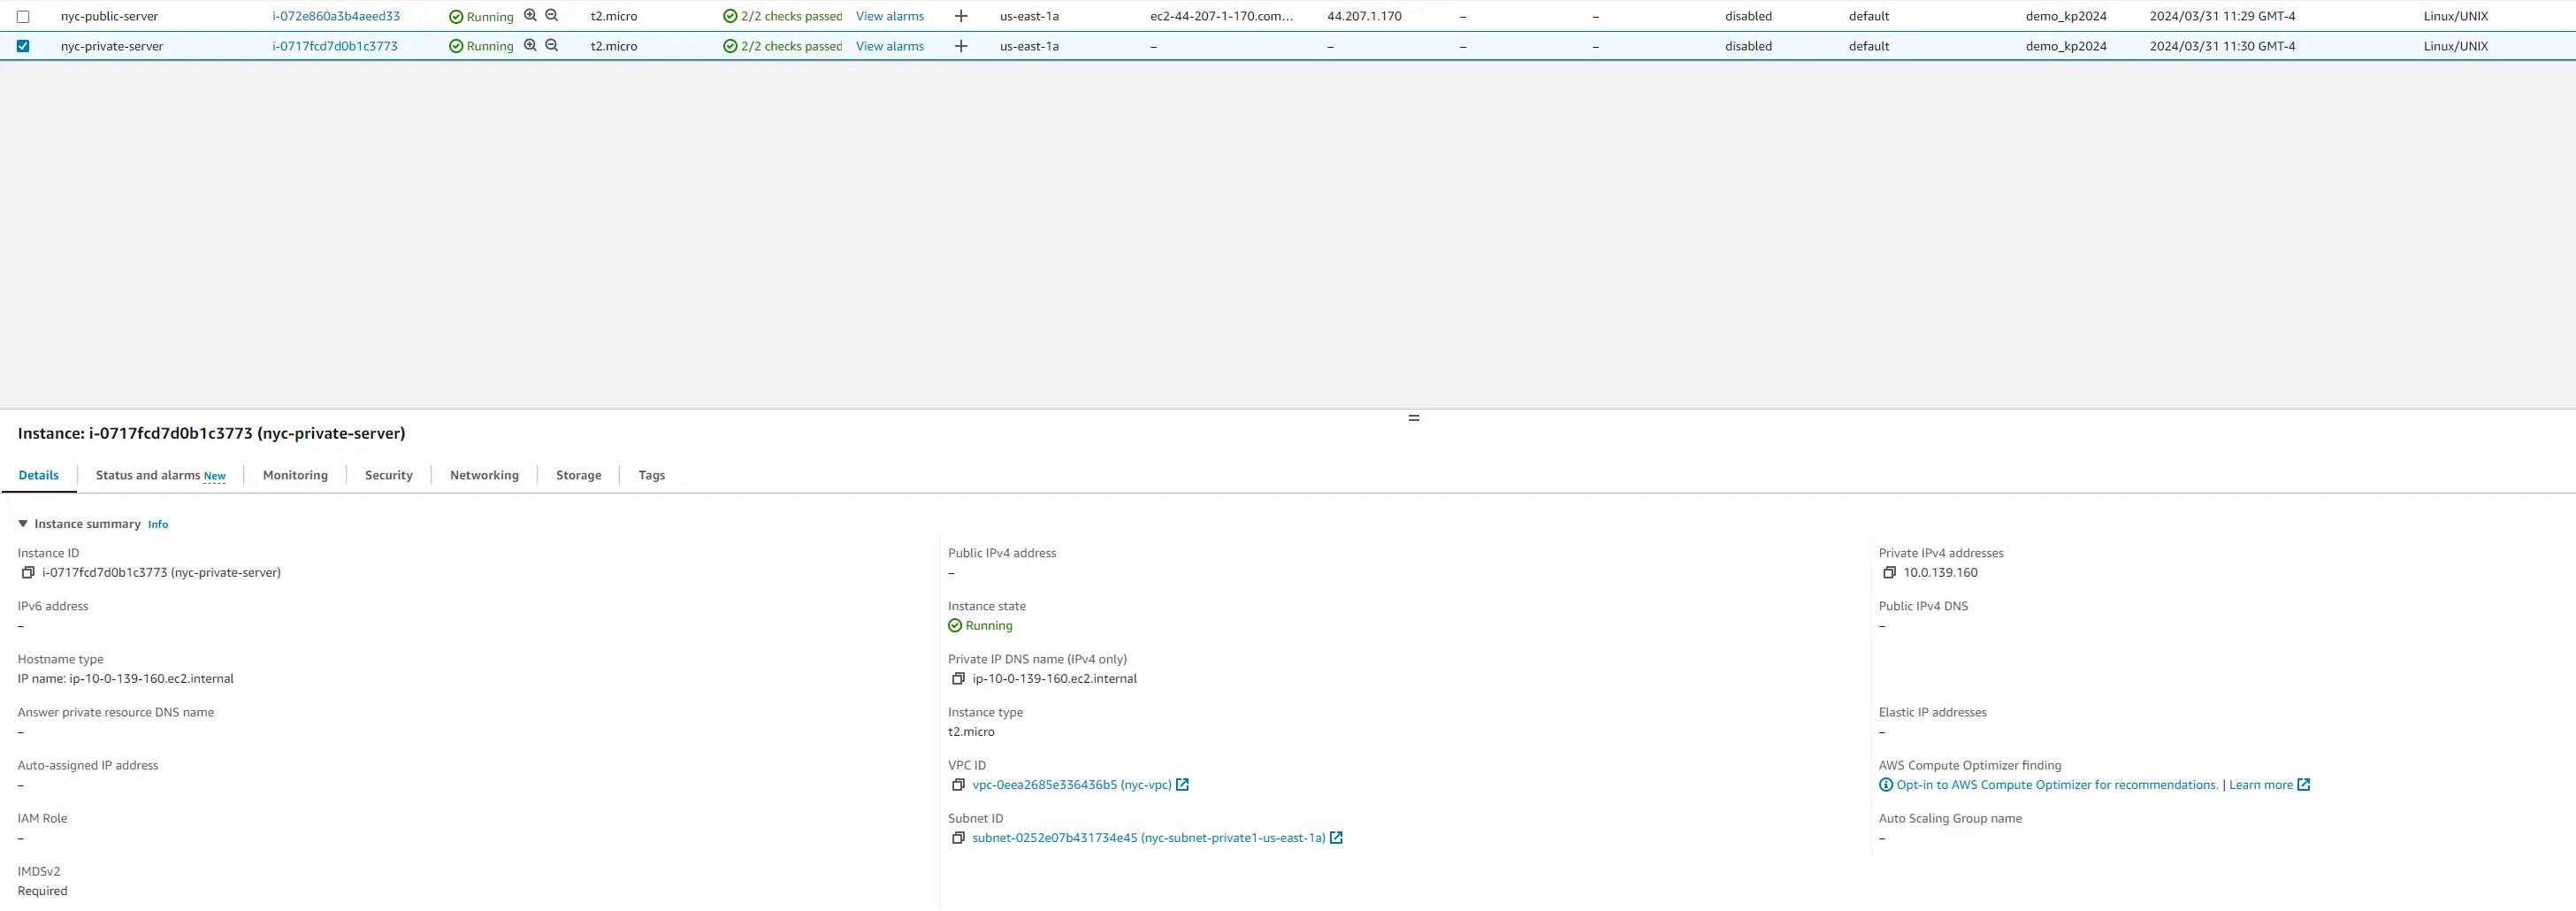
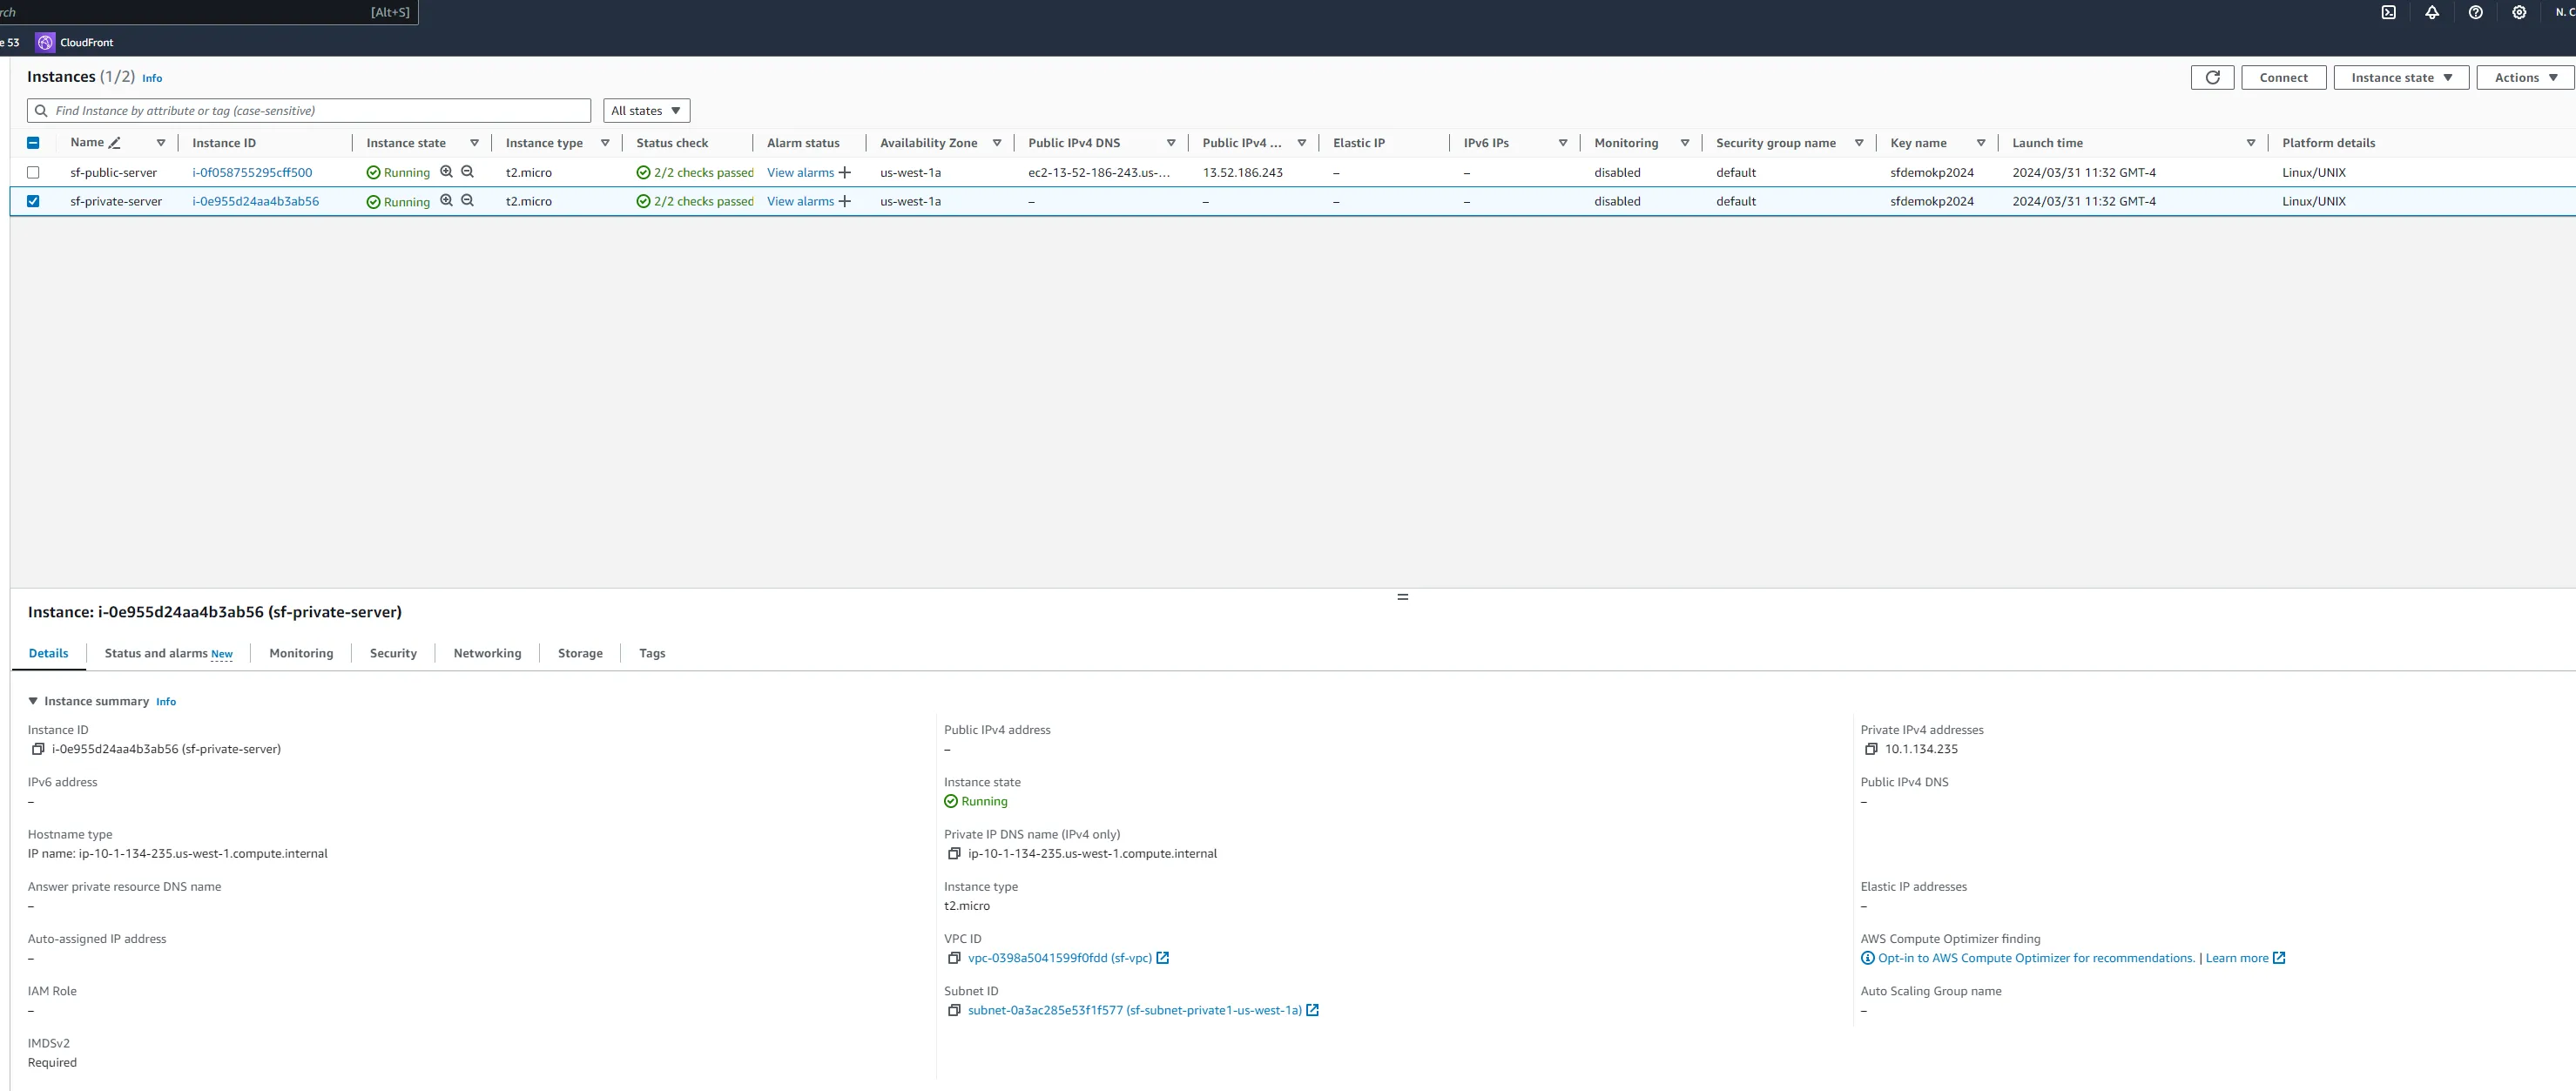
To ensure the network is correctly configured, verify that the instances can communicate across regions.
- SSH into the NYC instance using its public IP.
- Ping the San Francisco instance from the New York instance using the SF instance's private IP.
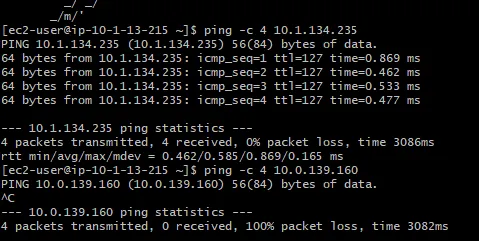

Amazon Route 53 ensures your domain's traffic is efficiently managed and directed using geolocation.
- Register a domain for your real estate startup, e.g.,
realestatestartup.com. - Create a hosted zone for your domain in Route 53.
- Create two record sets:
nyc.realestatestartup.compointing to the NYC VPC resources.sf.realestatestartup.compointing to the SF VPC resources.
- Set up DNS records for
nyc.realestatestartup.comandsf.realestatestartup.compointing to resources in the respective VPCs. - Test the DNS resolution by pinging the domain names from your local machine.
By completing these steps, the real estate startup has established a robust AWS network spanning New York City and San Francisco. This network foundation supports high availability and efficient inter-region connectivity, crucial for delivering a seamless user experience across the startup's digital platform.
