Everything you wanted to learn about the VPC!
This blog provides a comprehensive guide to setting up private networks on Amazon Web Services (AWS)
Published May 13, 2024
Imagine a public cloud as a building and a virtual private cloud as an apartment in that building. Though the building is a single unit, an apartment can only be accessed by the owner. This is how AWS reserves a space in its infrastructure to run code, store data, and host sites for a unique customer.
A virtual private cloud (VPC) is a secure, isolated private cloud hosted within a public cloud. VPC combines the convenience, reliability, and scalability of public cloud computing with the isolation of private cloud computing. As with the apartment example, it’s essential to secure entry into our cloud.
In this tutorial, we will learn how to
- create a VPC with a public and a private subnet
- configure security group rules for the private and public instances
- access the private instance through the public instance
In order to proceed, ensure that you have an AWS account.
Everything done in this tutorial is Free-Tier eligible.
Everything done in this tutorial is Free-Tier eligible.
VPC uses the following private IPv4 ranges:
10.0.0.0–10.255.255.255.255 (10.0.0.0/8)
172.16.0.0–172.31.255.255 (172.16.0.0/12)
192.168.0.0–192.168.255.255 (192.168.0.0/16)
172.16.0.0–172.31.255.255 (172.16.0.0/12)
192.168.0.0–192.168.255.255 (192.168.0.0/16)
This is our architecture:

The first step is to create the VPC and the subnets. Go to the VPC console in your preferred AWS region and Click “Create VPC”.
Watch this video to see this in action!
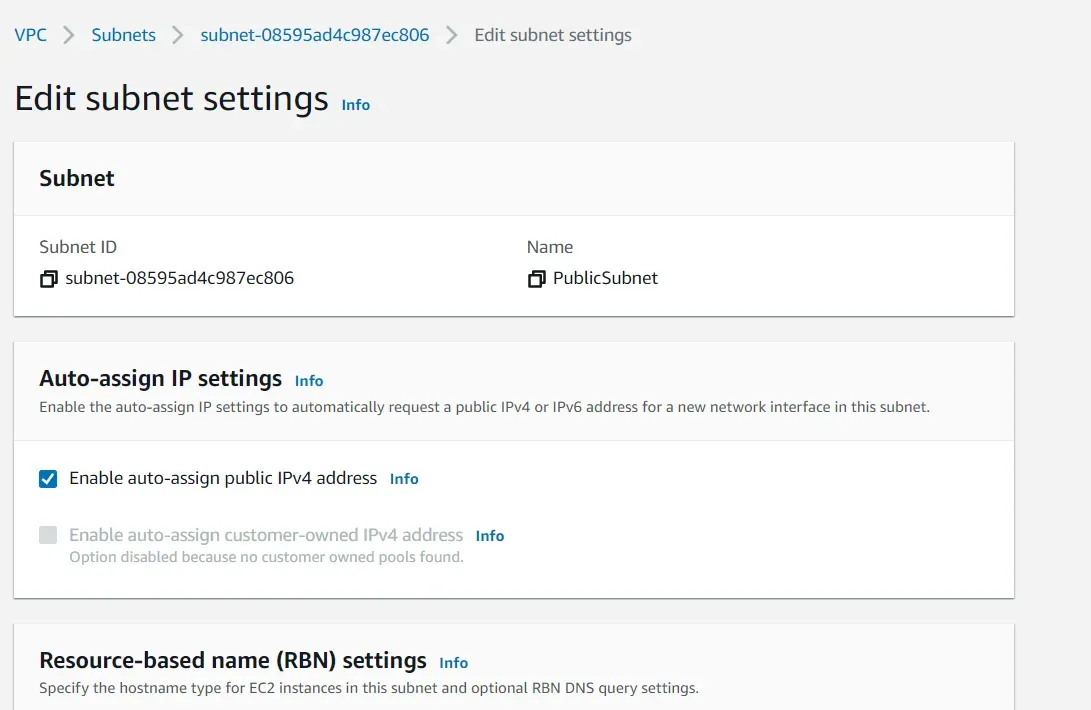
Make sure to enable your public subnet to assign public IPs.
Create an Internet Gateway and connect it to your VPC.

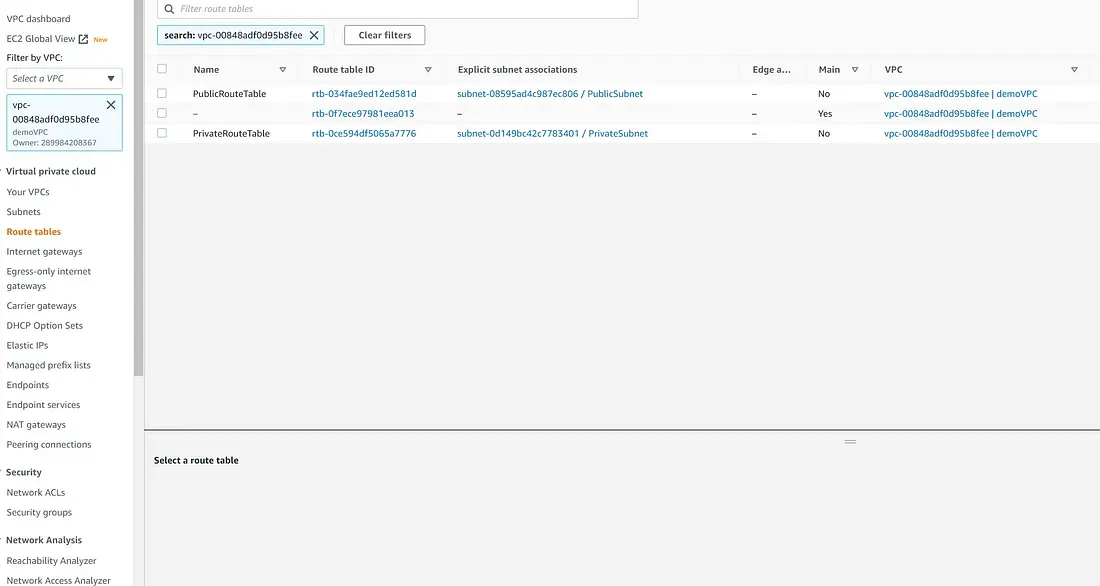
Create the public and private Route Tables and associate the public and private subnets respectively.
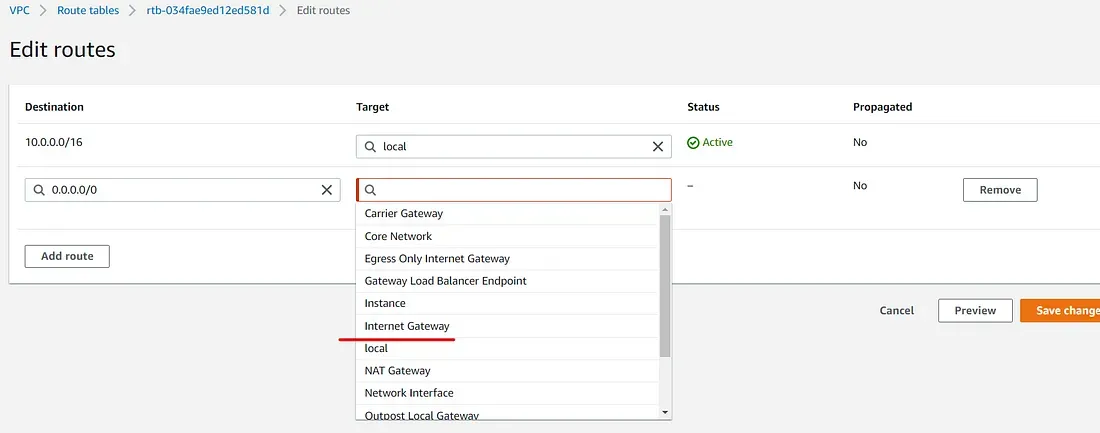
Add a route for the public route table to enable the Internet Gateway to provide access to the internet.
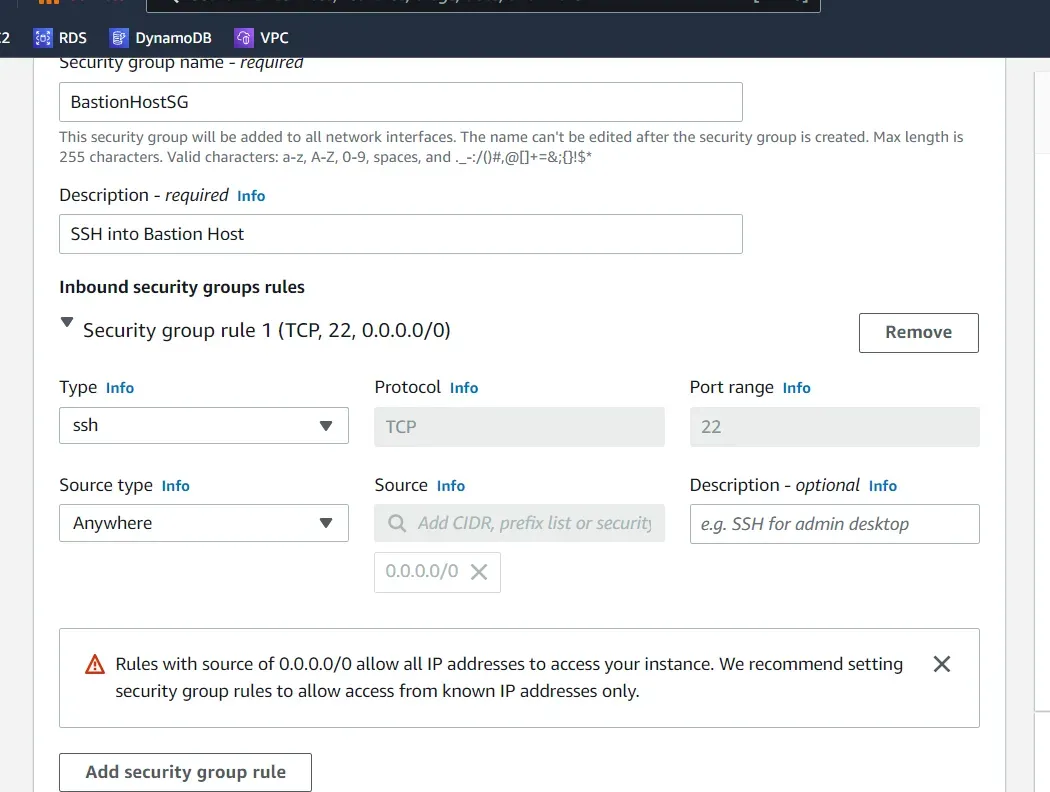
Launch an EC2 instance in your public subnet and configure the security group as follows:

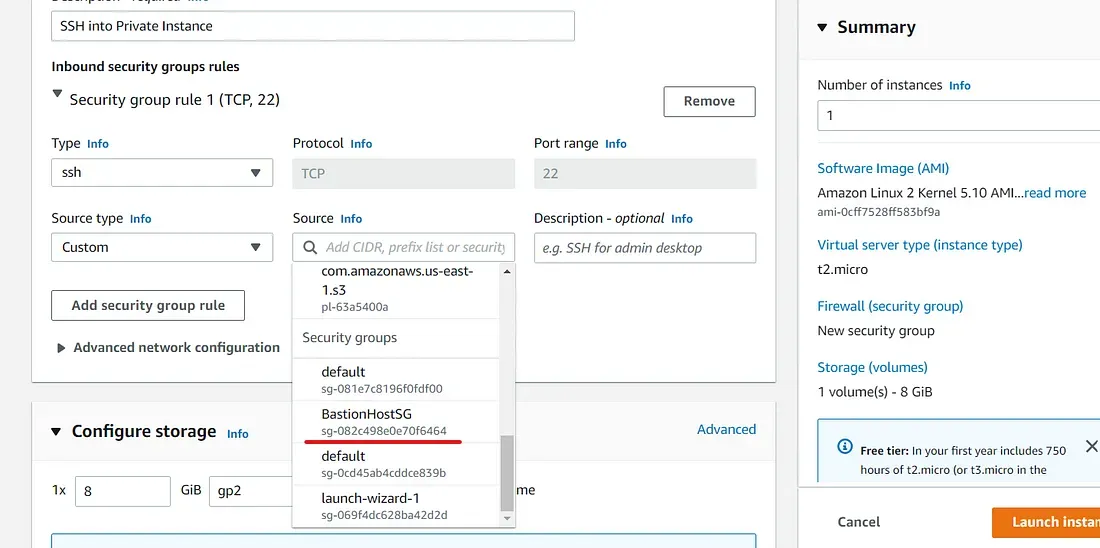
Similarly, launch an EC2 instance in your private subnet and configure the security group.
Remember to download the key-pair file.
Remember to download the key-pair file.
SSH into the Public Instance (Bastion Host) with EC2 Connect.
Copy the content of the key-pair file and paste it into a new file on the public instance with the following commands :
Remember to delete unnecessary resources at the end of the tutorial.
Thank you for reading! Please share your feedback, and stay tuned for more content like this!