How to connect EC2 instance with windows OS ?
You can build the connection from the EC2 instance to the local Windows OS system by following ways :
Published May 20, 2024
An Amazon EC2 instance isa virtual server in Amazon Web Services' (AWS) Elastic Compute Cloud (EC2) that allows users to run applications on the AWS cloud. EC2 instances come in different sizes and configurations of CPU, memory, storage, and networking resources.
Secure Shell (SSH) isa network protocol that allows users to securely access a computer over an unsecured network. It uses cryptography to authenticate and encrypt connections between devices. SSH is more secure than login IDs and passwords, which can be stolen in the middle.
To connect to an AWS EC2 instance from your local Windows terminal, you typically use SSH (Secure Shell) if it's a Linux instance or RDP (Remote Desktop Protocol) if it's a Windows instance. Here's how we can connect it :
- Open your Windows terminal (you can use Command Prompt or PowerShell).
- Use the
sshcommand followed by the username and the public IP address (or DNS name) of your EC2 instance. It should look something like this:
1
ssh -i your_key.pem ec2-user@your_ec2_public_ip
Replace
your_key.pem with the path to your private key file, ec2-user with your username (may vary based on the Linux distribution), and your_ec2_public_ip with the public IP address of your EC2 instance.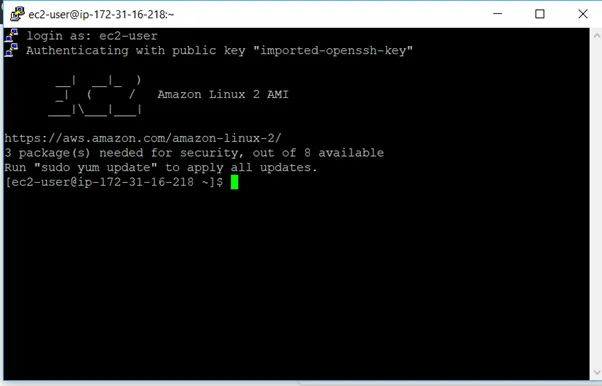
PuTTY is a free and open-source terminal emulator, serial console and network file transfer application. It supports several network protocols, including SCP, SSH, Telnet, rlogin, and raw socket connection. It can also connect to a serial port

To connect to an AWS EC2 instance using PuTTY, you'll need the private key file (.pem) associated with your EC2 instance. Here's a step-by-step guide:
- If you haven't already, download PuTTY and PuTTY gen from the official PuTTY website: [PuTTY Download Page](https://www.chiark.greenend.org.uk/~sgtatham/putty/latest.html).
- PuTTY uses a different key format (.ppk) compared to the PEM key used by AWS. You need to convert your PEM key to the PuTTY-compatible PPK format using PuTTYgen.
- Open PuTTYgen, click on "Load", and select your PEM key file.
- Click on "Save private key" to save the key in PPK format. Keep this file handy as you'll need it for the connection.
- Open PuTTY.
- In the "Session" category on the left-hand side, enter your EC2 instance's public IP address or DNS hostname.
- In the "Connection" -> "Data" category, enter your username (usually `ec2-user` for Amazon Linux or `ubuntu` for Ubuntu instances) in the "Auto-login username" field.
- In the "Connection" -> "SSH" -> "Auth" category, browse and select the .ppk private key file you generated earlier.
- Optionally, you can save this configuration by entering a name in the "Saved Sessions" field and clicking "Save".
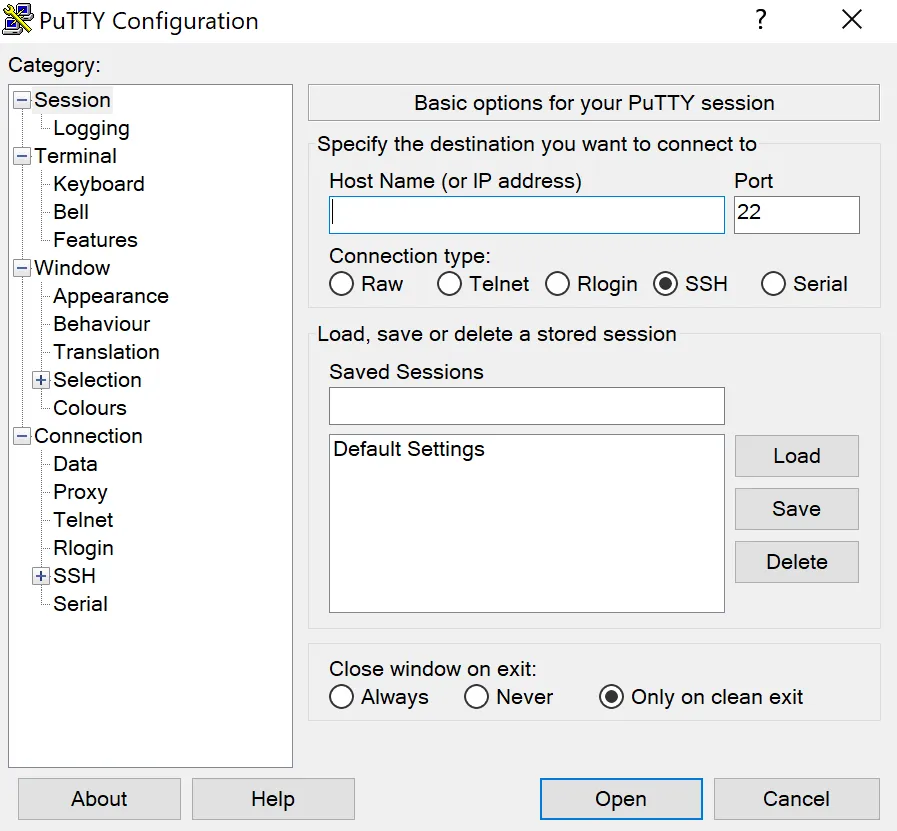
- Click "Open" to start the SSH session.
- If it's your first time connecting to the instance, PuTTY will ask if you want to save the server's host key. Click "Yes" to continue.
- Once connected, you should see a terminal window where you can interact with your EC2 instance just like you would in a local terminal.
That's it! You should now be connected to your AWS EC2 instance using PuTTY. Make sure your EC2 instance's security group allows SSH (port 22) traffic from your IP address.
MobaXterm isa Windows application that provides a toolbox for remote computing. It's designed for programmers, webmasters, IT administrators, and other users who need to handle remote jobs
To connect to an AWS EC2 instance using MobaXterm, you can use its SSH client feature. Here's a step-by-step guide:
- If you haven't already, download and install MobaXterm from the official website: [MobaXterm Download Page](https://mobaxterm.mobatek.net/download-home-edition.html).
- Log in to your AWS Management Console.
- Navigate to the EC2 dashboard.
- Locate the EC2 instance you want to connect to and note down its public IP address or DNS hostname.
- After installation, launch MobaXterm from your Start menu or desktop shortcut.
- In the MobaXterm interface, click on the "Session" button in the top-left corner.
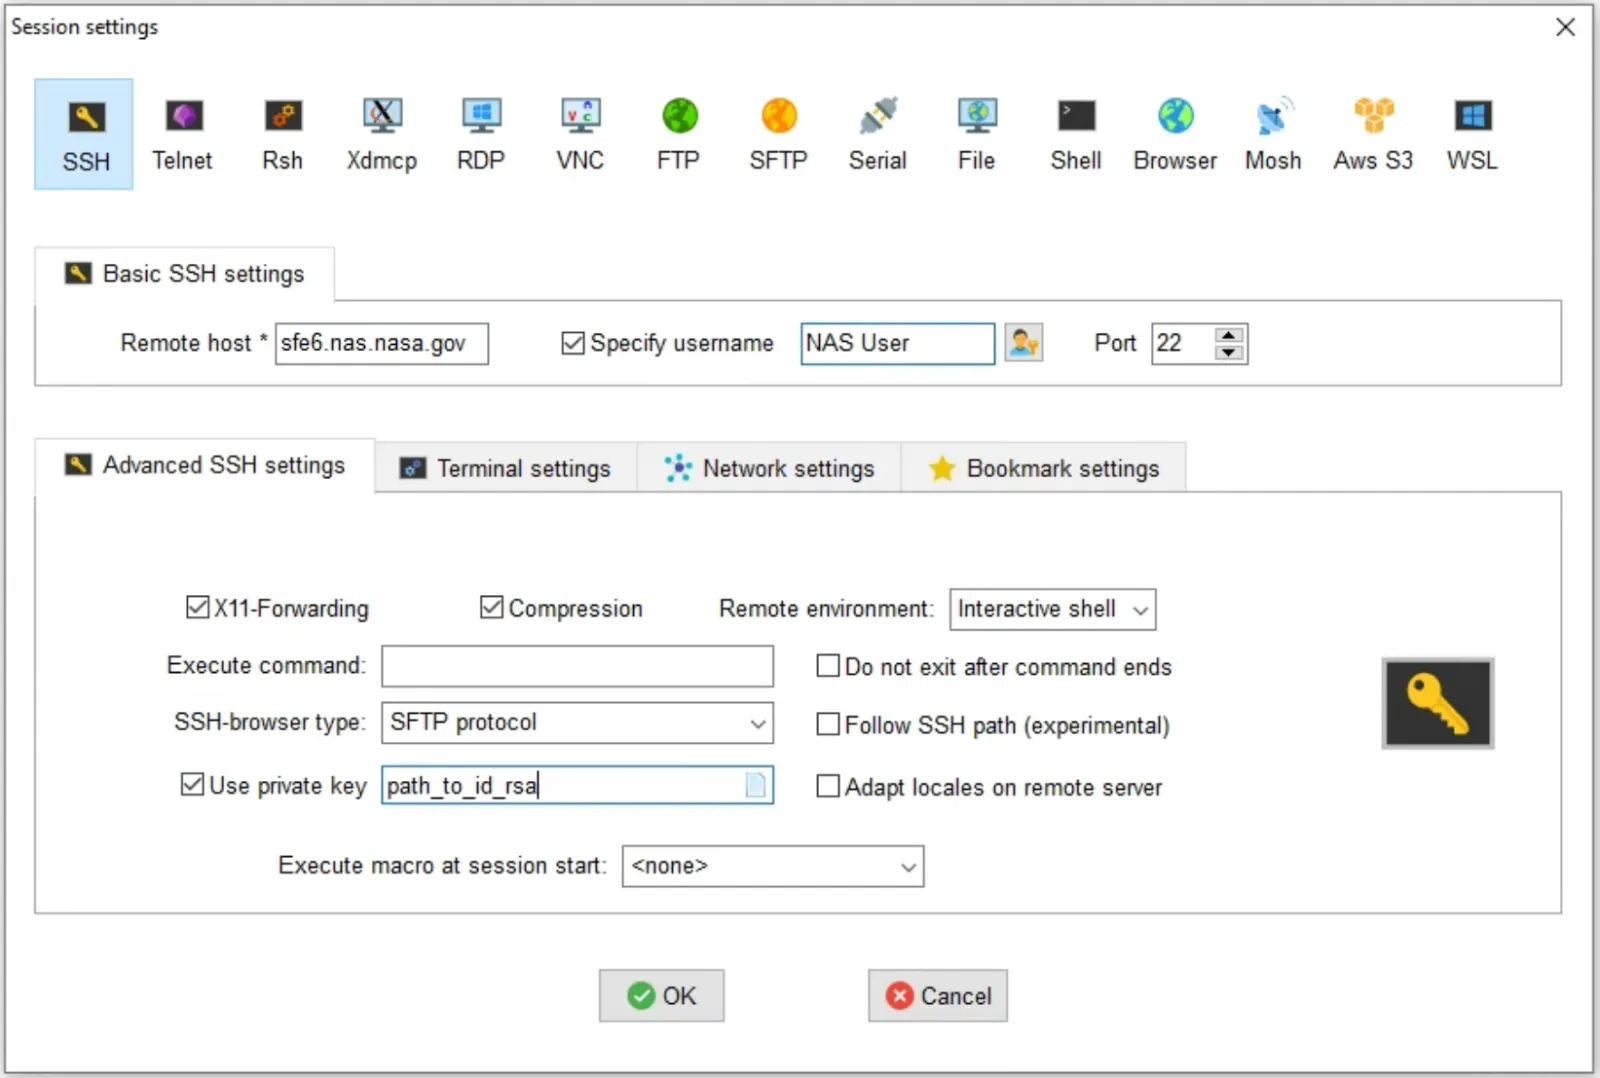
- In the session settings window, select "SSH" as the protocol.
- In the "Remote host" field, enter the public IP address or DNS hostname of your EC2 instance.
- In the "Specify username" field, enter the username you use to connect to your EC2 instance (e.g., `ec2-user` for Amazon Linux, `ubuntu` for Ubuntu instances).
- If you have a private key (.pem file), click on the "Advanced SSH settings" tab, then navigate to the "Use private key" section and select your private key file.
- After configuring the session settings, click on the "OK" button to initiate the SSH connection.
- If it's your first time connecting to the EC2 instance or if you haven't saved the host key before, MobaXterm will prompt you to confirm the host key fingerprint. Click "Yes" to continue.
- If you've configured SSH key-based authentication, MobaXterm will use your private key to authenticate. Otherwise, it will prompt you for the password associated with the username you provided.
- Once authenticated, you should be connected to your EC2 instance via SSH through MobaXterm. You can now use the terminal interface to execute commands on the remote server.
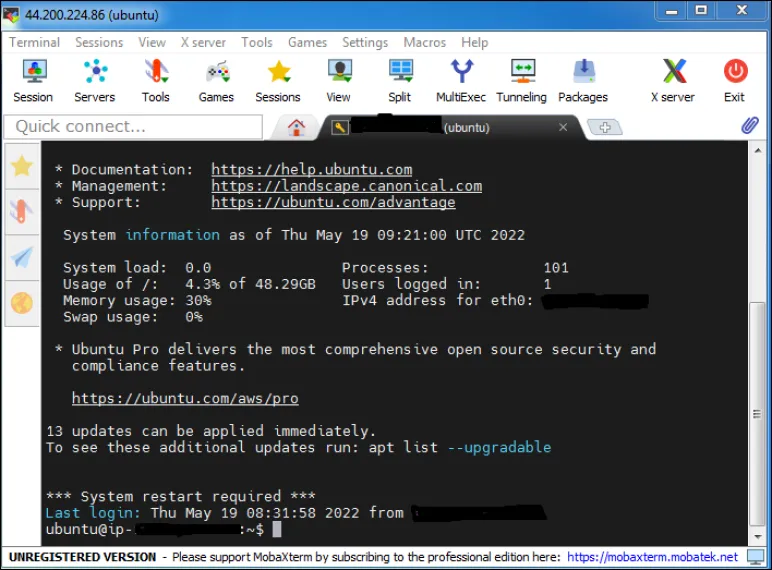
That's it! You have successfully connected to your AWS EC2 instance using MobaXterm. Ensure that your EC2 instance's security group allows SSH traffic from your IP address.
Connect with me : www.linkedin.com/in/ys5sh
Comments
Log in to comment