This community blog was co-written with my peer Lakshmi VP.
With Snowball Edge, customers have the choice of using either Windows image or Linux image to run their applications in their on-prem environment. The AWS Snow family of products are purpose-built devices in the AWS Hybrid Cloud solutions portfolio that provides computing at the disconnected edge.
To use an AMI on Snowball Edge devices, customers can either upload the image at the time of order from the region, or upload the image once they receive the device on-site (this is known as side-loading).
However, to run Windows based applications on Snowball Edge devices, Windows-based AMIs cannot be pre-loaded to Snow when ordering. Snow device supports a BYOL model for Windows so it has to be side-loaded only.
This community post covers the process of creating, sideloading, and launching a Windows AMI on Snowball Edge.
Prerequisites
For this walkthrough you will require:
A Snowball Edge device ordered through the AWS console
AWS OpsHub: a graphical user interface that you can use to manage your AWS Snowball devices.
The AWS Snowball Edge client: a standalone terminal application that customers can run on their local servers and workstations to manage and operate their Snowball Edge devices
A Windows operating system image with a corresponding license
A virtualization platform to build and boot Windows images. In this walkthrough we will be using VMware vSphere in Customer’s local environment (i.e, not running within AWS)
Building the image in VMware vSphere
To start, we need to build an Windows image with the right settings. For this example, we are using vSphere, but you can use any virtualization platform that supports custom image creation and allows you to boot the image to change internal settings.
1. Start vSphere on your local server or workstation (not running within AWS), and select create a new virtual machine.
Vmware create image
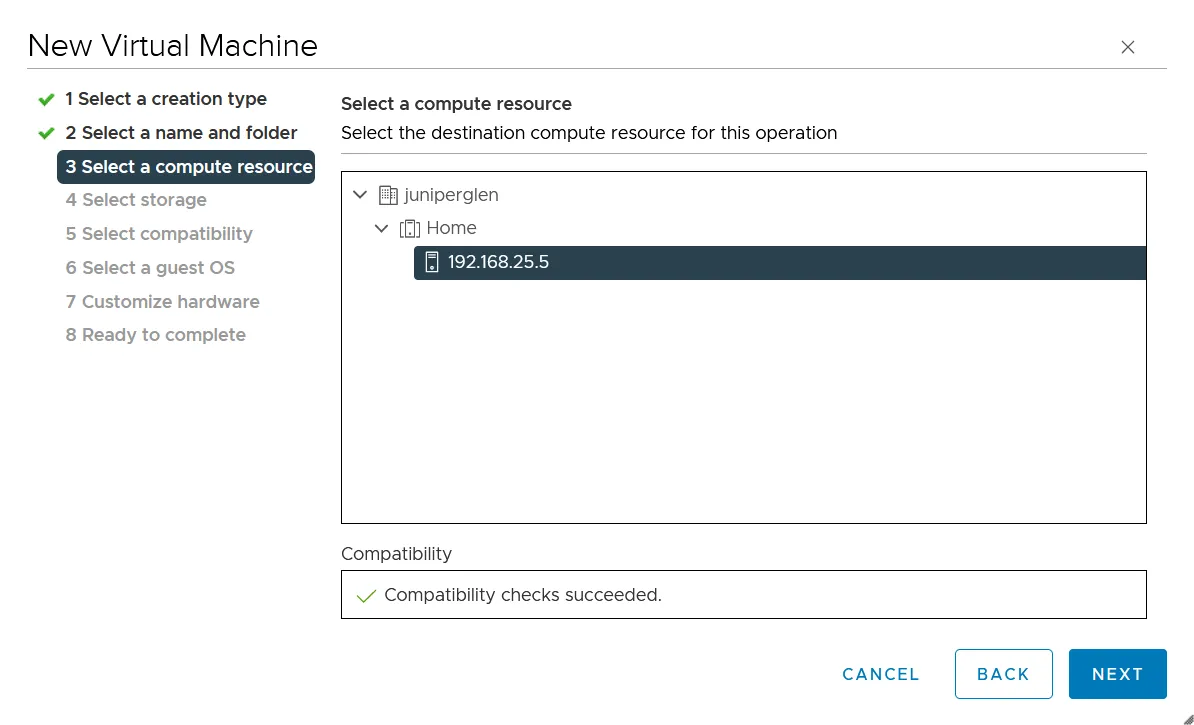
2. Select the host to run the virtual machine and select Next.
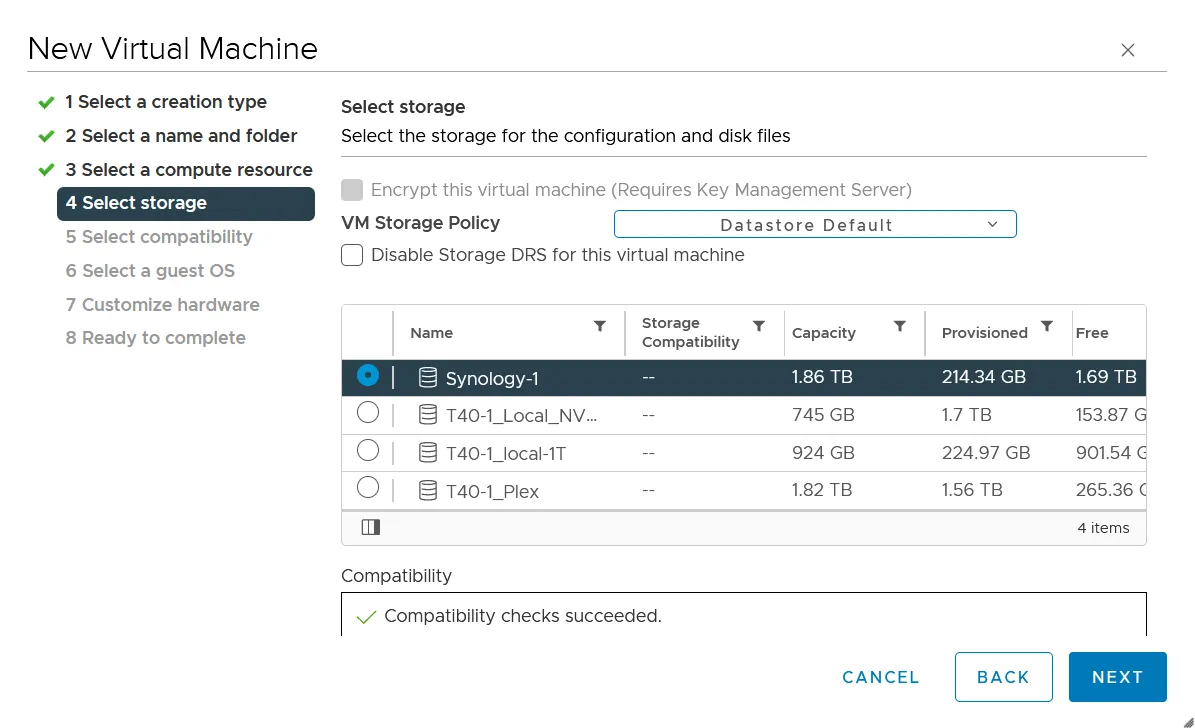
Select the data store and select Next.
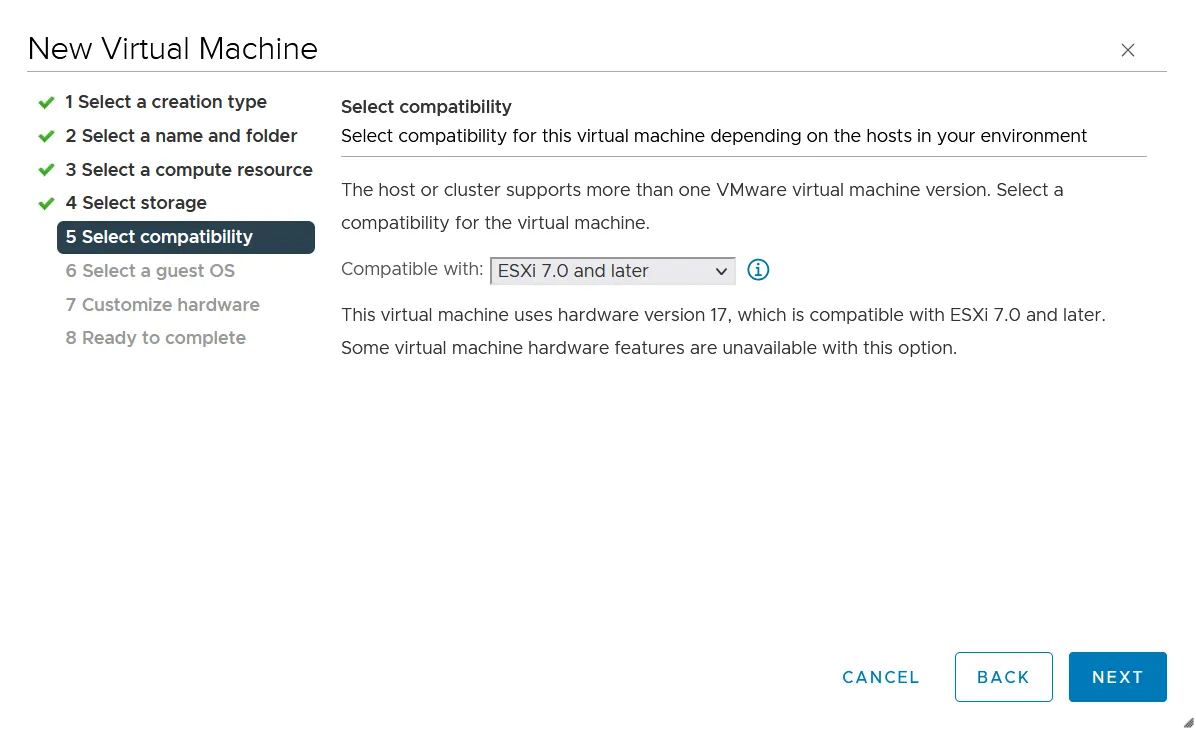
Select compatibility to ESXi 7.0 and later and select Next.
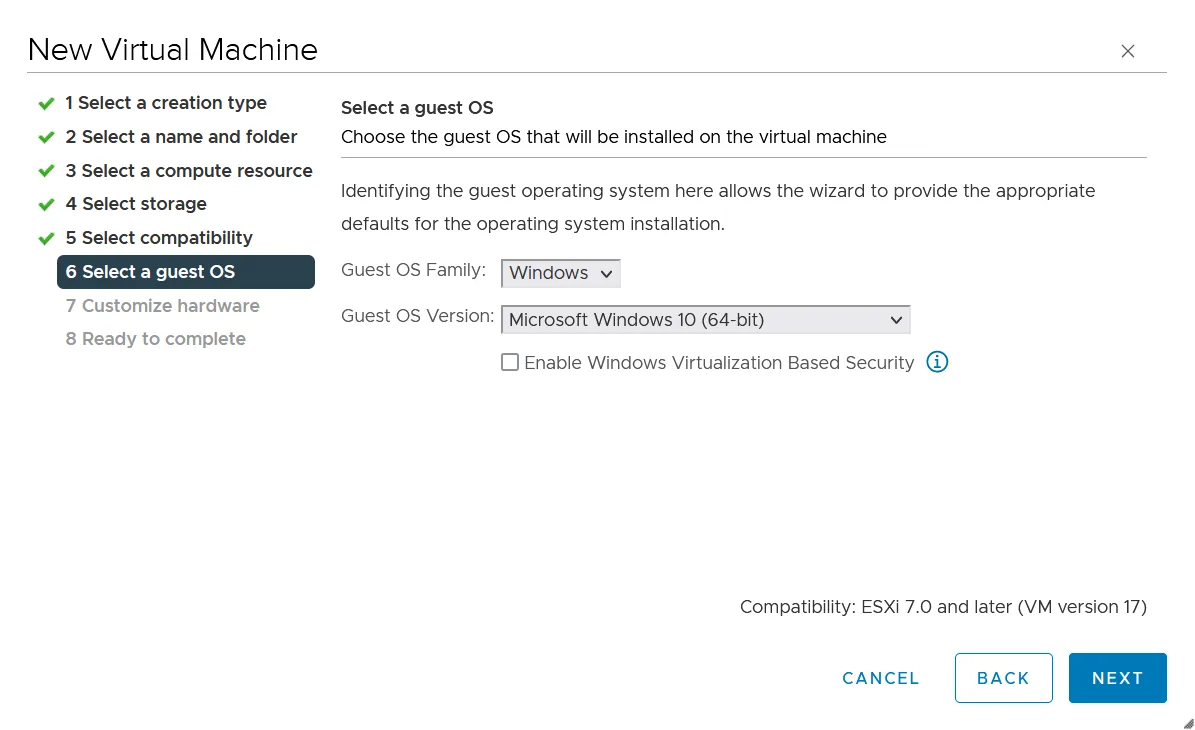
Select the Guest OS based on your image requirement. For this example, we will use Windows 10 64-bit. select Next
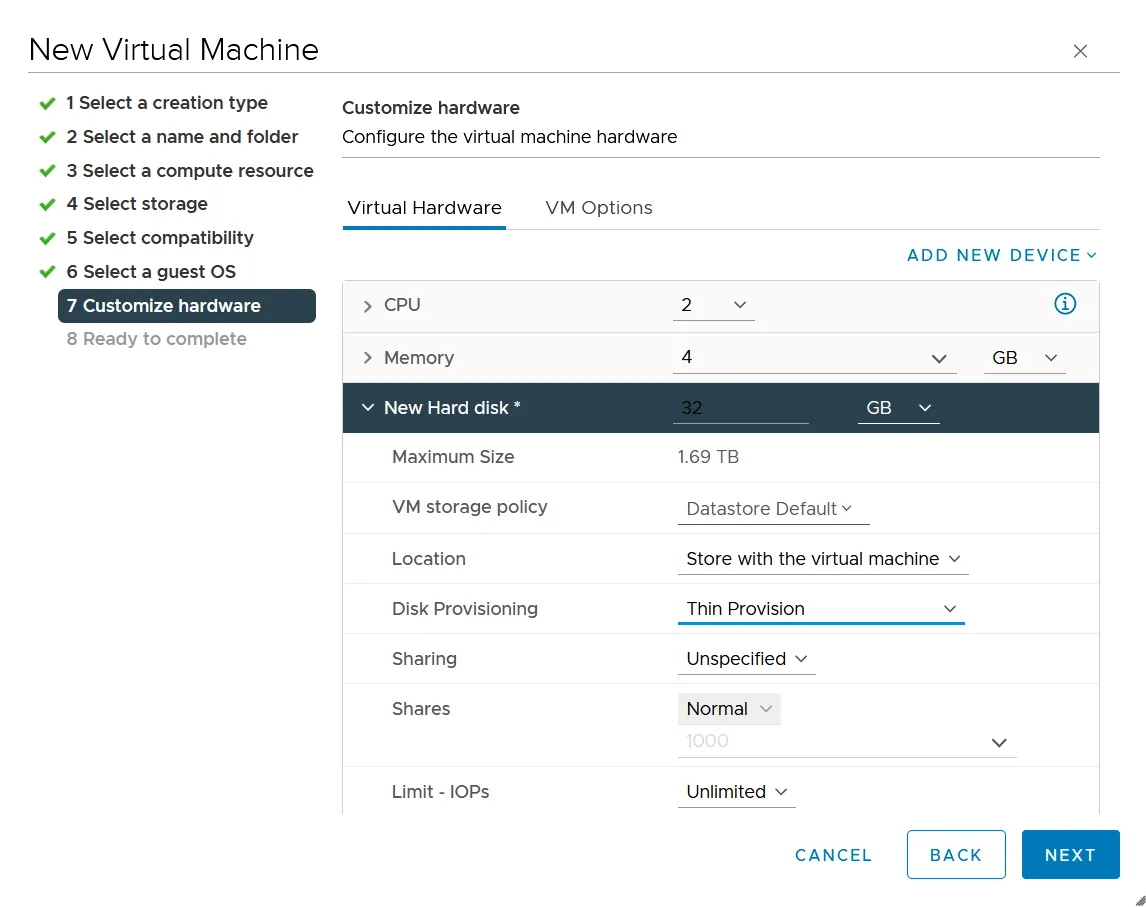
Within the customize hardware step: set the hard disk to Thin Provision and select Next.
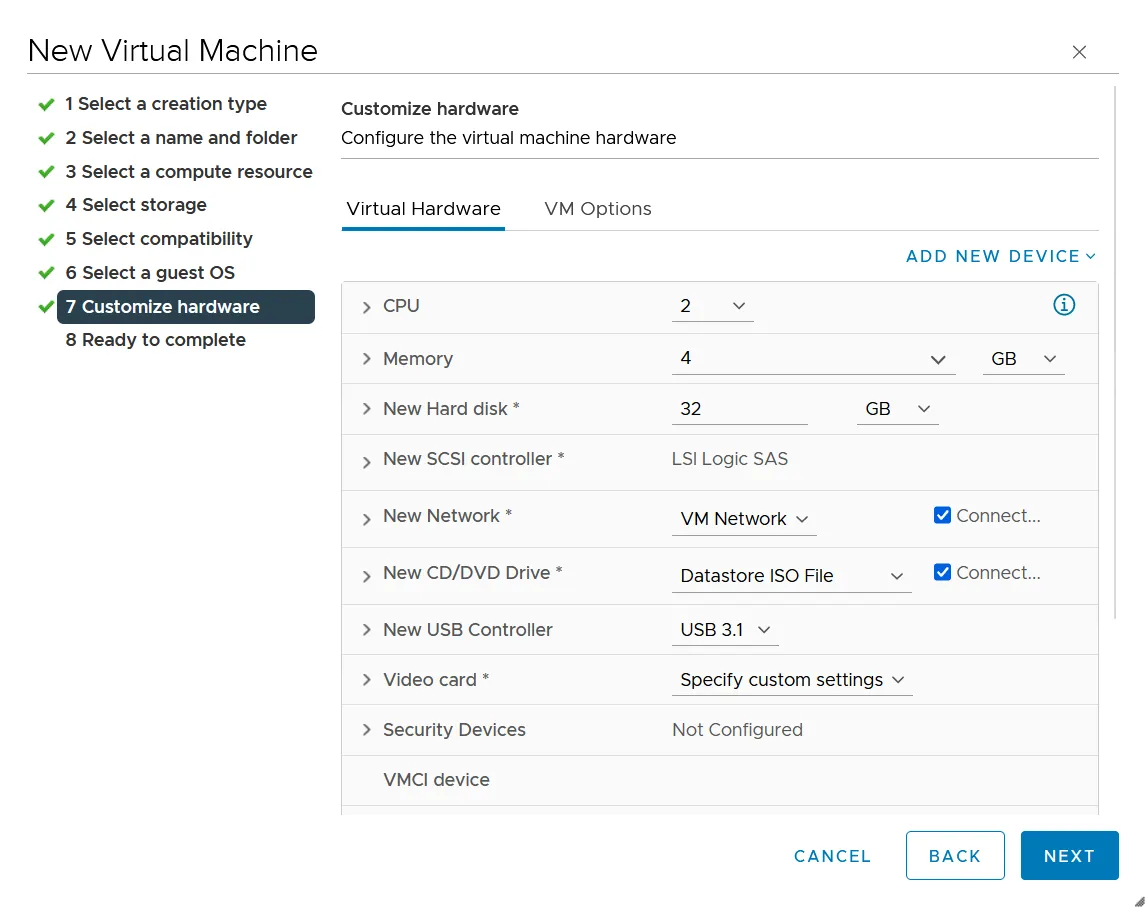
Set the CD/DVD drive to use the datastore ISO file with the Windows 10 installation media and select “Connect”.
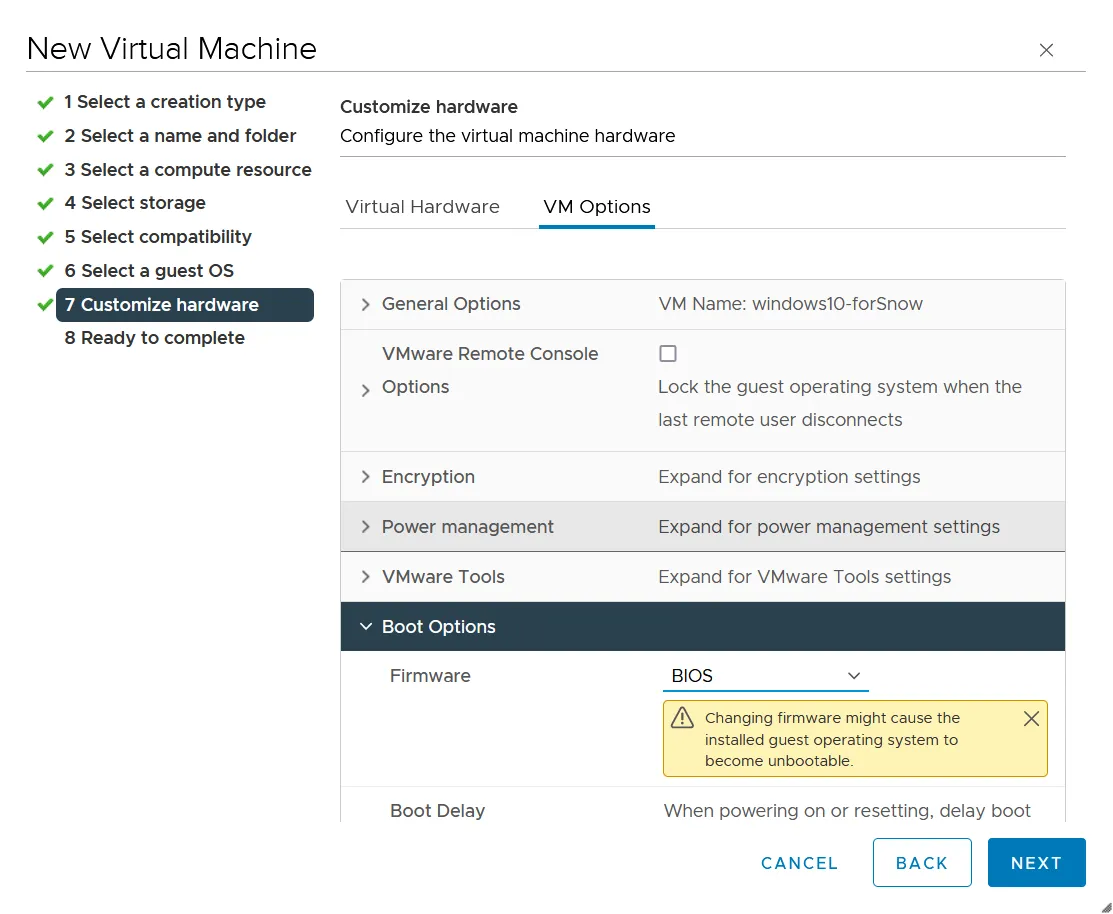
Select “Booting Windows Image and installing drivers "VM Options”, expand “Boot Options”, and change Firmware to BIOS. You can ignore the warning as this is a fresh install of the operating system. Select Next and then select Finish.
Booting Windows Image and installing drivers
Now that we have an image, we need to boot it and add some drivers so it can be used on a Snowball Edge device.
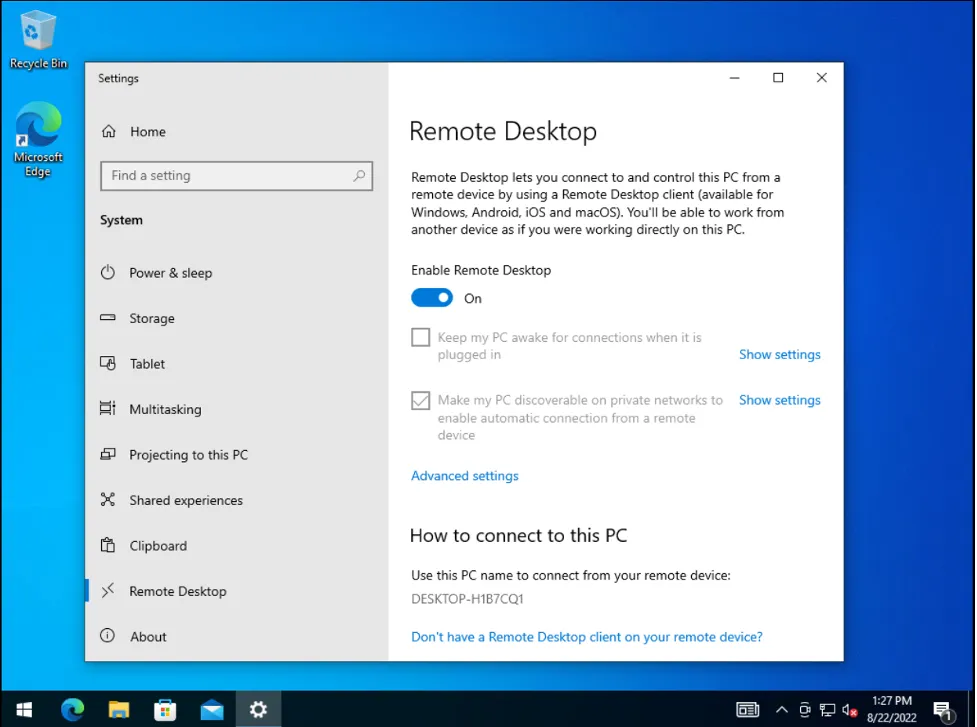
In Windows console of the virtual machine, browse to System Settings and turn “Remote Desktop” to On. (make sure you have a password set up for the account you want to use later)
Download the VirtIO drivers from this repository. Then right-click the downloaded .iso file and select Mount.
In your newly mounted CD/DVD drive, open the file name “virtio-win-gt-x64” and follow the installation instructions.
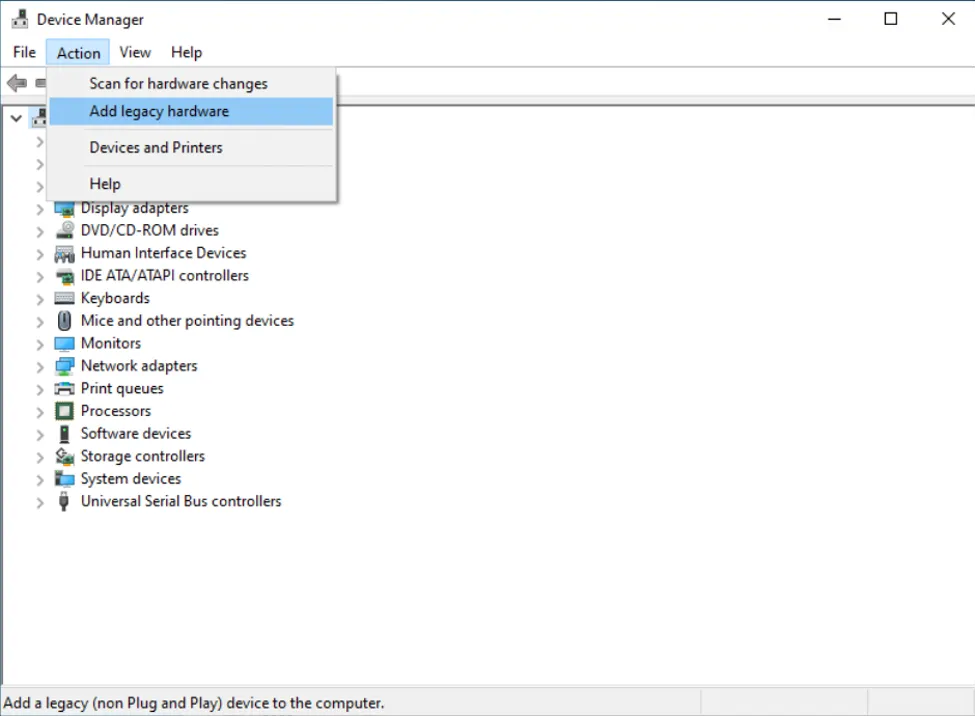
Open the Device Manager and select Add legacy hardware and select Next.
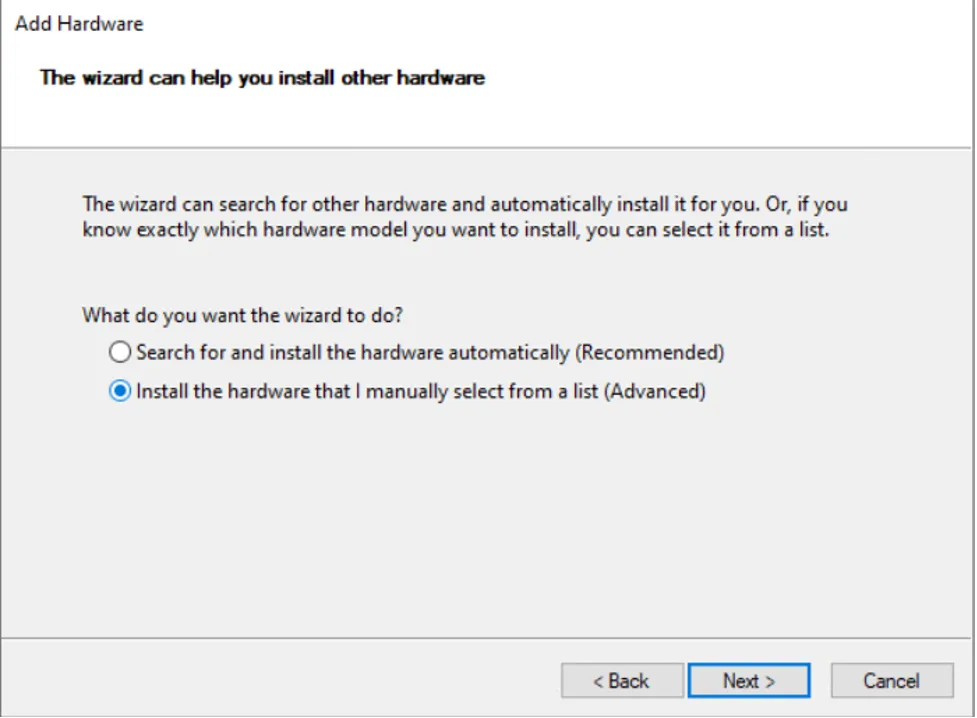
Select “Install the hardware that I manually select from a list (Advanced)” and select Next.
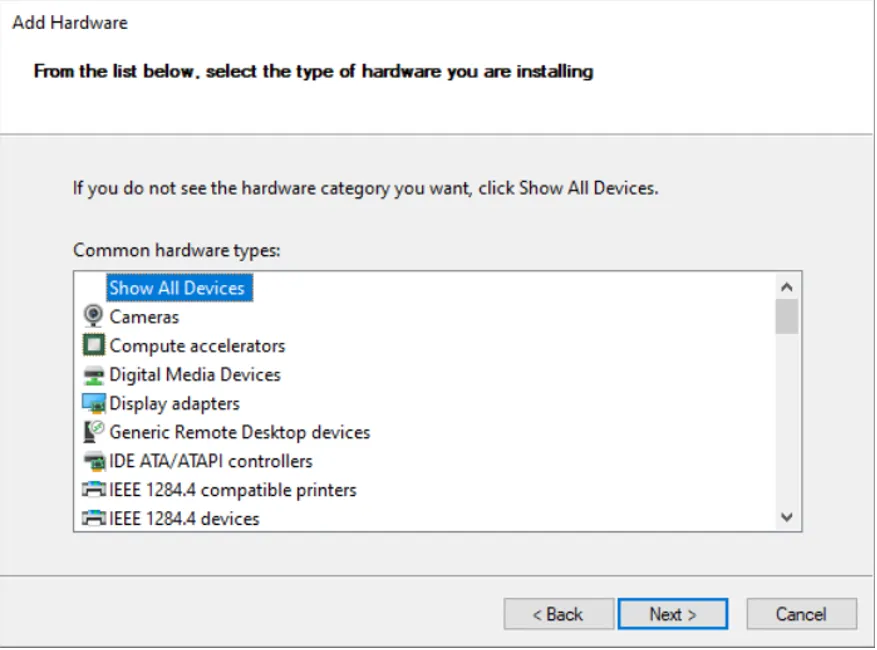
Select “Show all devices” and select Next.
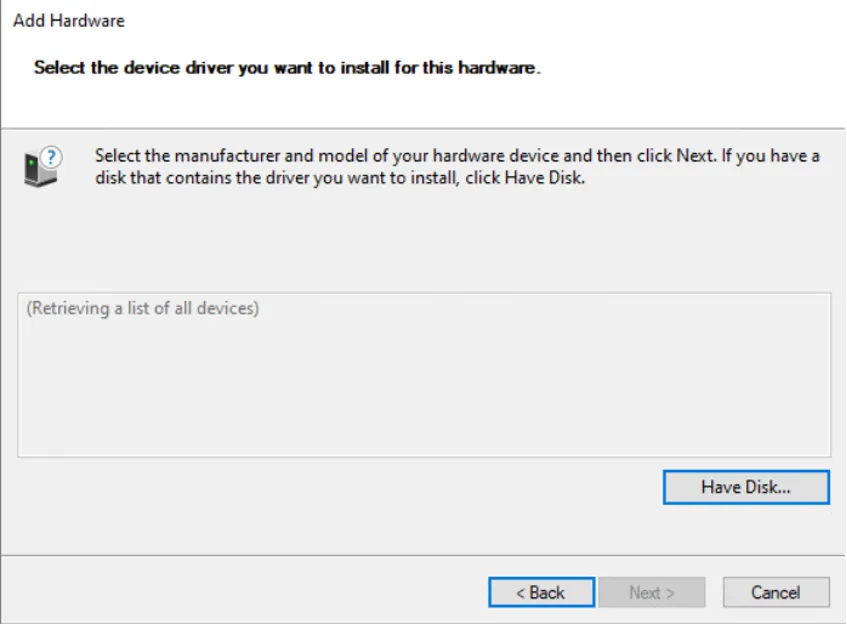
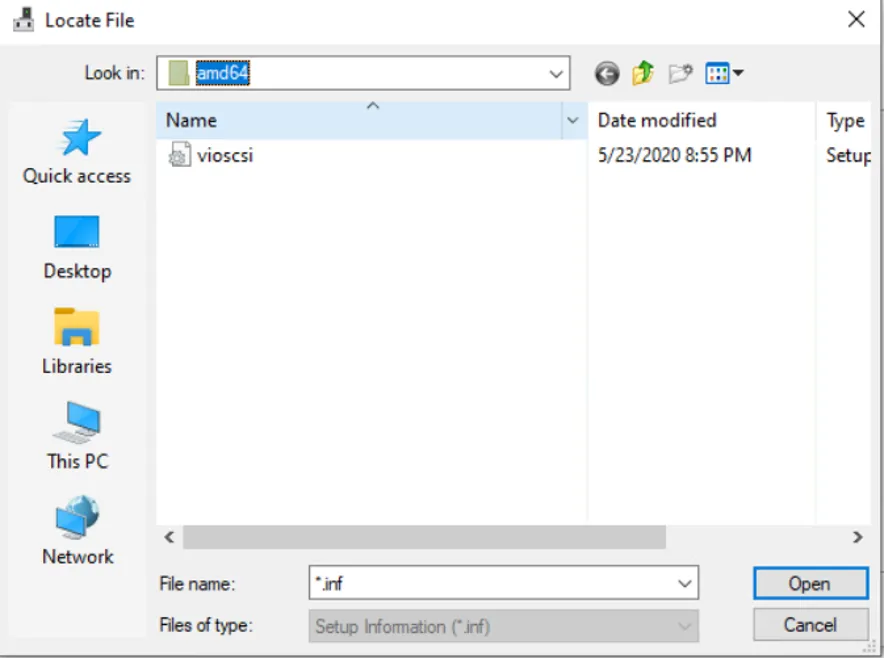
To manually select the driver, Select Have Disk.
Browse to [mounted Windows ISO drive]\vioscsi\w10\amd64 and select the vioscsi.inf file and select Open.
Select OK then select Next.
Select Next and then Close.
Perform the same steps as above in this section to install the NetKVM drivers from [mounted ISO drive]\NetKVM\w10\amd64\netkvm.inf ]
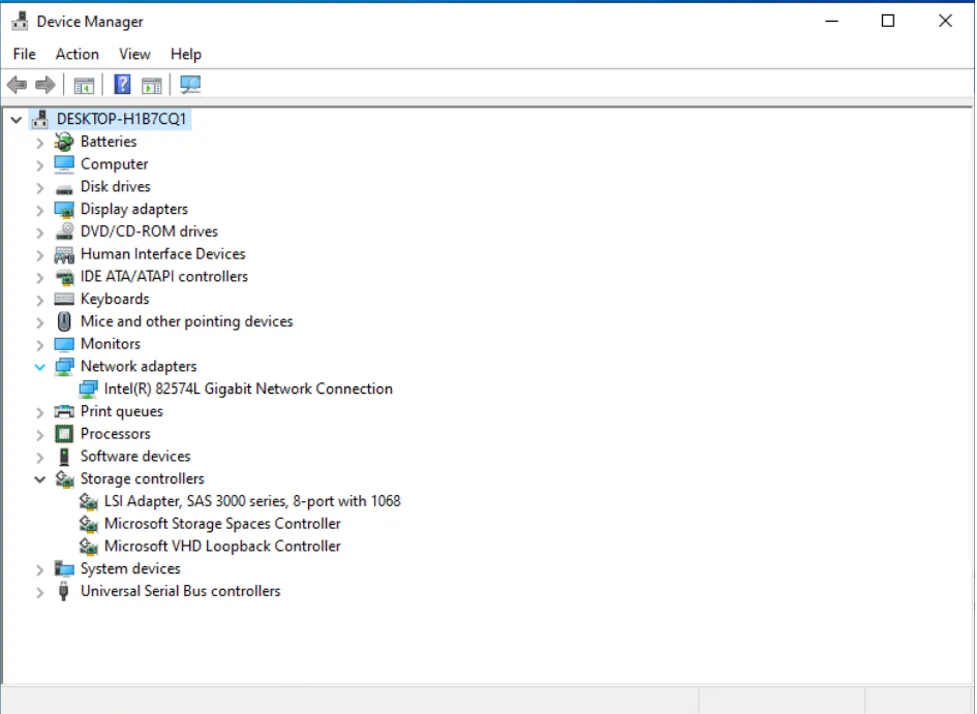
Goto Device Manager in Windows, right-click “Red Hat VirtIO Ethernet Adapter” and select Uninstall.**** Follow the same process to uninstall the “Red Hat VirtIO SCSI pass-through controller” and unselect “Delete the driver software for this device".
Device manager should have no errors:
Installing Mellanox/Nvidia drivers, powering off and exporting image
In this section, we will install the required drivers from Mellanox and Nvidia (in case you have the SnowBall Edge with GPU), power off the virtual machine and export it to an OVF
Open the downloaded drivers file from Mellanox and follow the prompt to install.
This step is optional and only required if you have a Snowball Edge with GPU compute. Browse to Nvidia Tesla driver for Windows repository and download the drivers for your OS version. Install the Tesla drivers by opening the downloaded files and following the installation prompt.
Uninstall VMware Tools if they are installed. Instructions can be found on the VMware documentation site.
Power off the virtual machine by right-clicking the VM name, select Power, then Off.
Export the VM OVF: right-click on the VM, select Template, and then select Export OVF Template. We named our file Windows10-forSnow.vmdk.
Converting and uploading the image for use on a Snow device
In this section, you will convert the Windows image you created with the right drivers to a format that can be imported to the Snowball Edge device. We will also create a trust policy and role for the VM Import/Export functionality.
Convert the .vmdk file to .raw with the command : qemu-img convert -O raw Windows10-forSnow.vmdk Windows10.raw
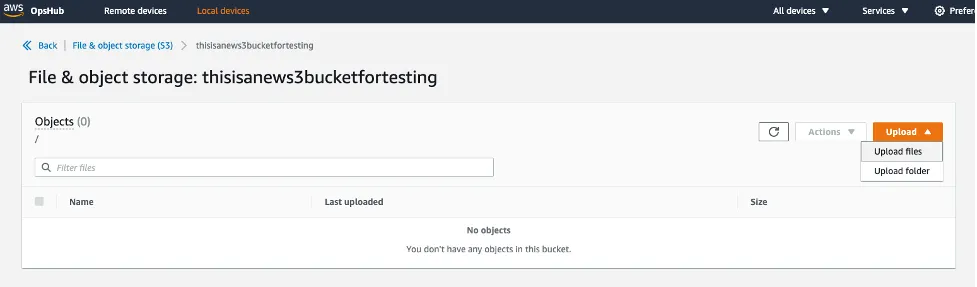
Upload the .raw file to the S3 bucket on your Snowball Edge using OpsHub. Browse to “File and Object Storage (S3)”, select the Upload button and then select Upload files.
Wait for the upload to complete.
Select “Users and Permissions (IAM) in Opshub, then select “policies, and then select “create policy” to create a trust policy for vmimport. Policy content should be:
Select “Users and Permissions (IAM) in Opshub, then select “policies, and then select “createRole” to create a role policy for VM Import:
Importing, registering and running the Windows image for use on a Snow device
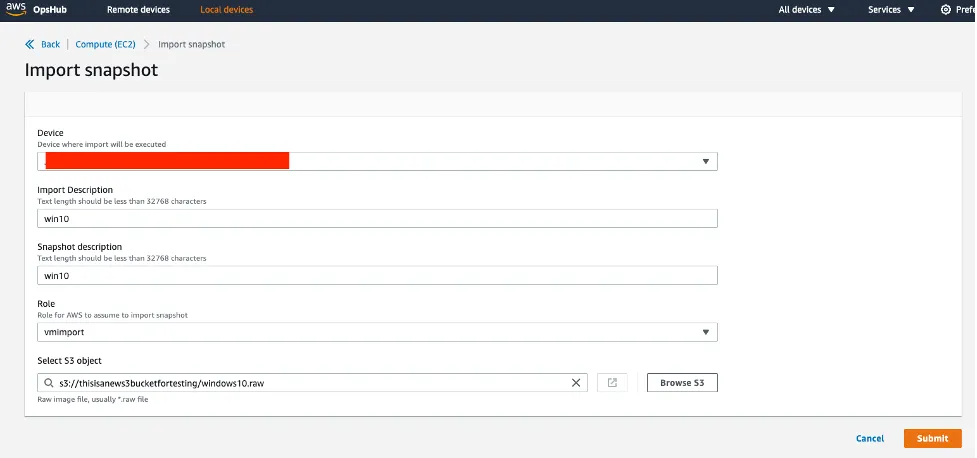
In this section you will import the Windows image snapshot from S3 bucket on your Snowball Edge, register it and finally launch the image.
1. Navigate to the EC2 area of OpsHub, select Snapshots and then select “Import snapshot”. Choose the vmimport role you created earlier and select the .raw file you uploaded earlier. Make note of the snapshot ID on the next screen.
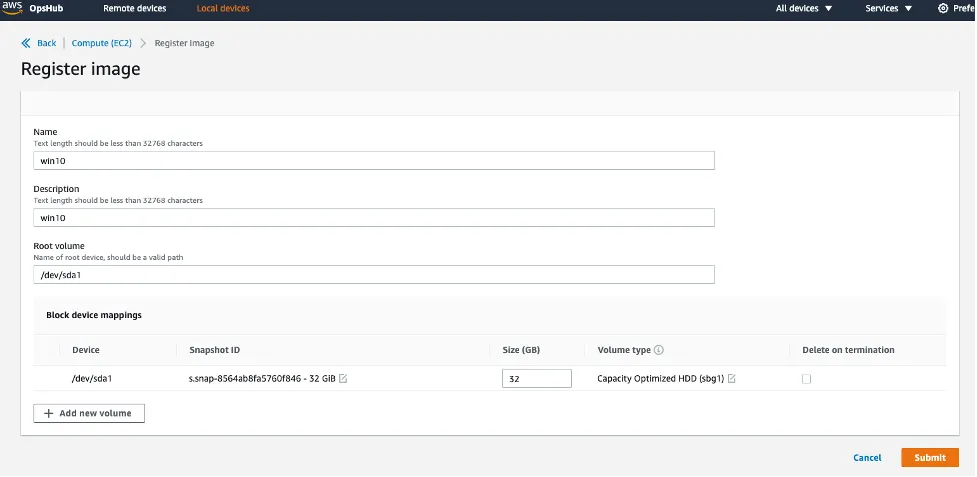
2. Still in the EC2 area in OpsHub, navigate to Images and select “Register image”. Change the Snapshot ID to the snapshot you created. Change the size to at least the size of the snapshot.
When complete, you should have the image available for deployment under the “Images” tab in the Compute (EC2) section of OpsHub.
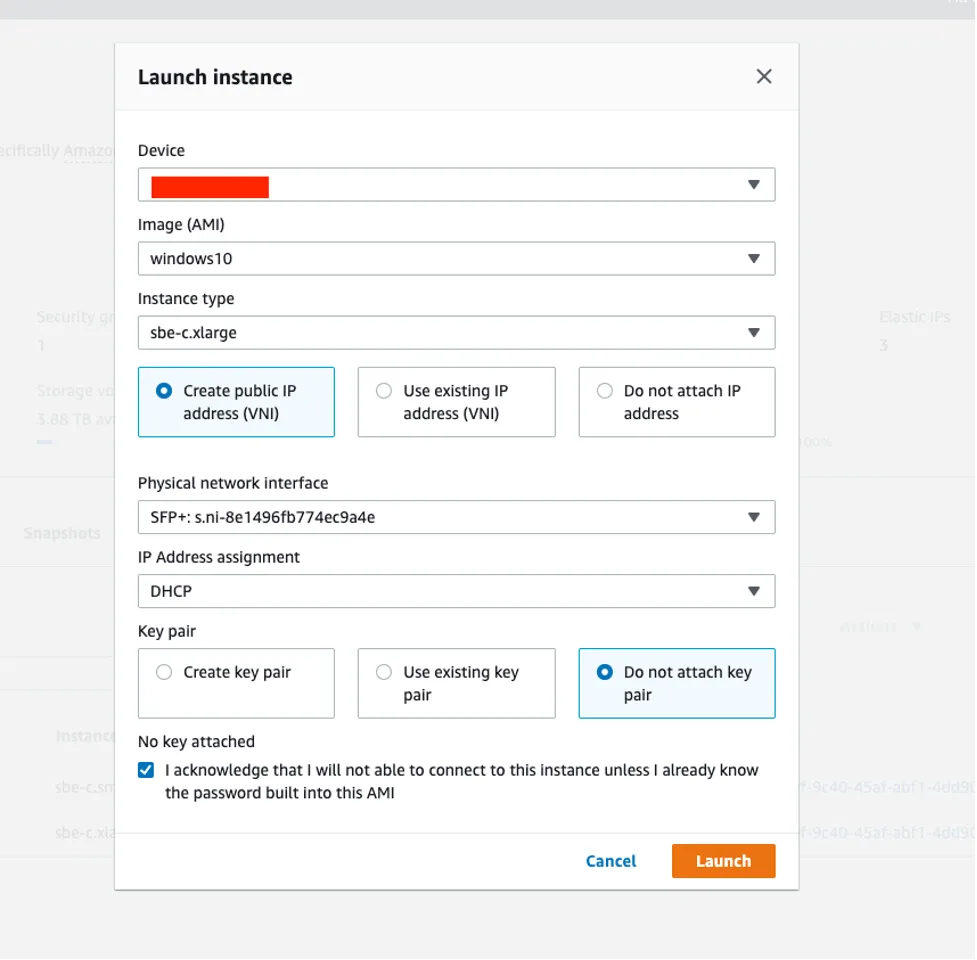
We can now navigate to Instances and select “Launch instance”. Select the options that apply to you and launch the instance. In this example, we are setting the instance type to sbe-c.xlarge and creating a new VNI to attach to this instance. We are not attaching a key pair because we know the local username and password.
After the instance launches and we verify the IP address, we will be able to RDP to it and start installing specific applications and services.
That's it! If you made it this far your Snowball Edge is now ready to start delivering Windows-based services to your edge location.
Any opinions in this post are those of the individual author and may not reflect the opinions of AWS.