*Deprecated*Build a Real-Time Asset Tracking Application with Amazon Location Service *Deprecated*
This web app will display an Amazon Location Service tracker's position ingested via MQTT.
Zach Elliott
Amazon Employee
Published Jul 31, 2023
Last Modified Jun 20, 2024
THIS POST IS OUTDATED. PLEASE REFER TO THE UPDATED POST HERE https://community.aws/content/2i9a3mWGOdvjWY27qK2EJXvNxnu/build-a-real-time-asset-tracking-application-with-amazon-location-service
THIS POST IS OUTDATED. PLEASE REFER TO THE UPDATED POST HERE https://community.aws/content/2i9a3mWGOdvjWY27qK2EJXvNxnu/build-a-real-time-asset-tracking-application-with-amazon-location-service
Asset tracking is critical to supply chain operations. Whether it is tracking trucks across the country or last mile deliveries around a neighborhood, knowing where your fleet is located can add business value around loss prevention, sustainability, and overall cost savings. In this tutorial, we will deploy a simple web application that shows an asset's current location, as well as historical location. We'll then use AWS IoT Core to simulate a vehicle, making use of the MQTT protocol, a lightweight messaging protocol designed for IoT use cases. We will cover how to:
- Use AWS Amplify to build a web application to display current and historical device locations on a map
- Configure Amazon Location Service trackers to store location data
- Connect Amazon Location Service with AWS IoT Core to ingest data from MQTT via the Iot Core Rules Engine
Before starting this tutorial, you will need the following:
- An AWS Account (if you don't yet have one, you can create one and set up your environment here).
| About | |
|---|---|
| ✅ AWS Level | 200 - Intermediate |
| ⏱ Time to complete | 45 minutes |
| 💰 Cost to complete | Free tier eligible |
| 🧩 Prerequisites | - AWS Account |
| 💻 Code Sample | Code sample used in tutorial on GitHub |
| 📢 Feedback | Any feedback, issues, or just a 👍 / 👎 ? |
| ⏰ Last Updated | 2023-05-10 |
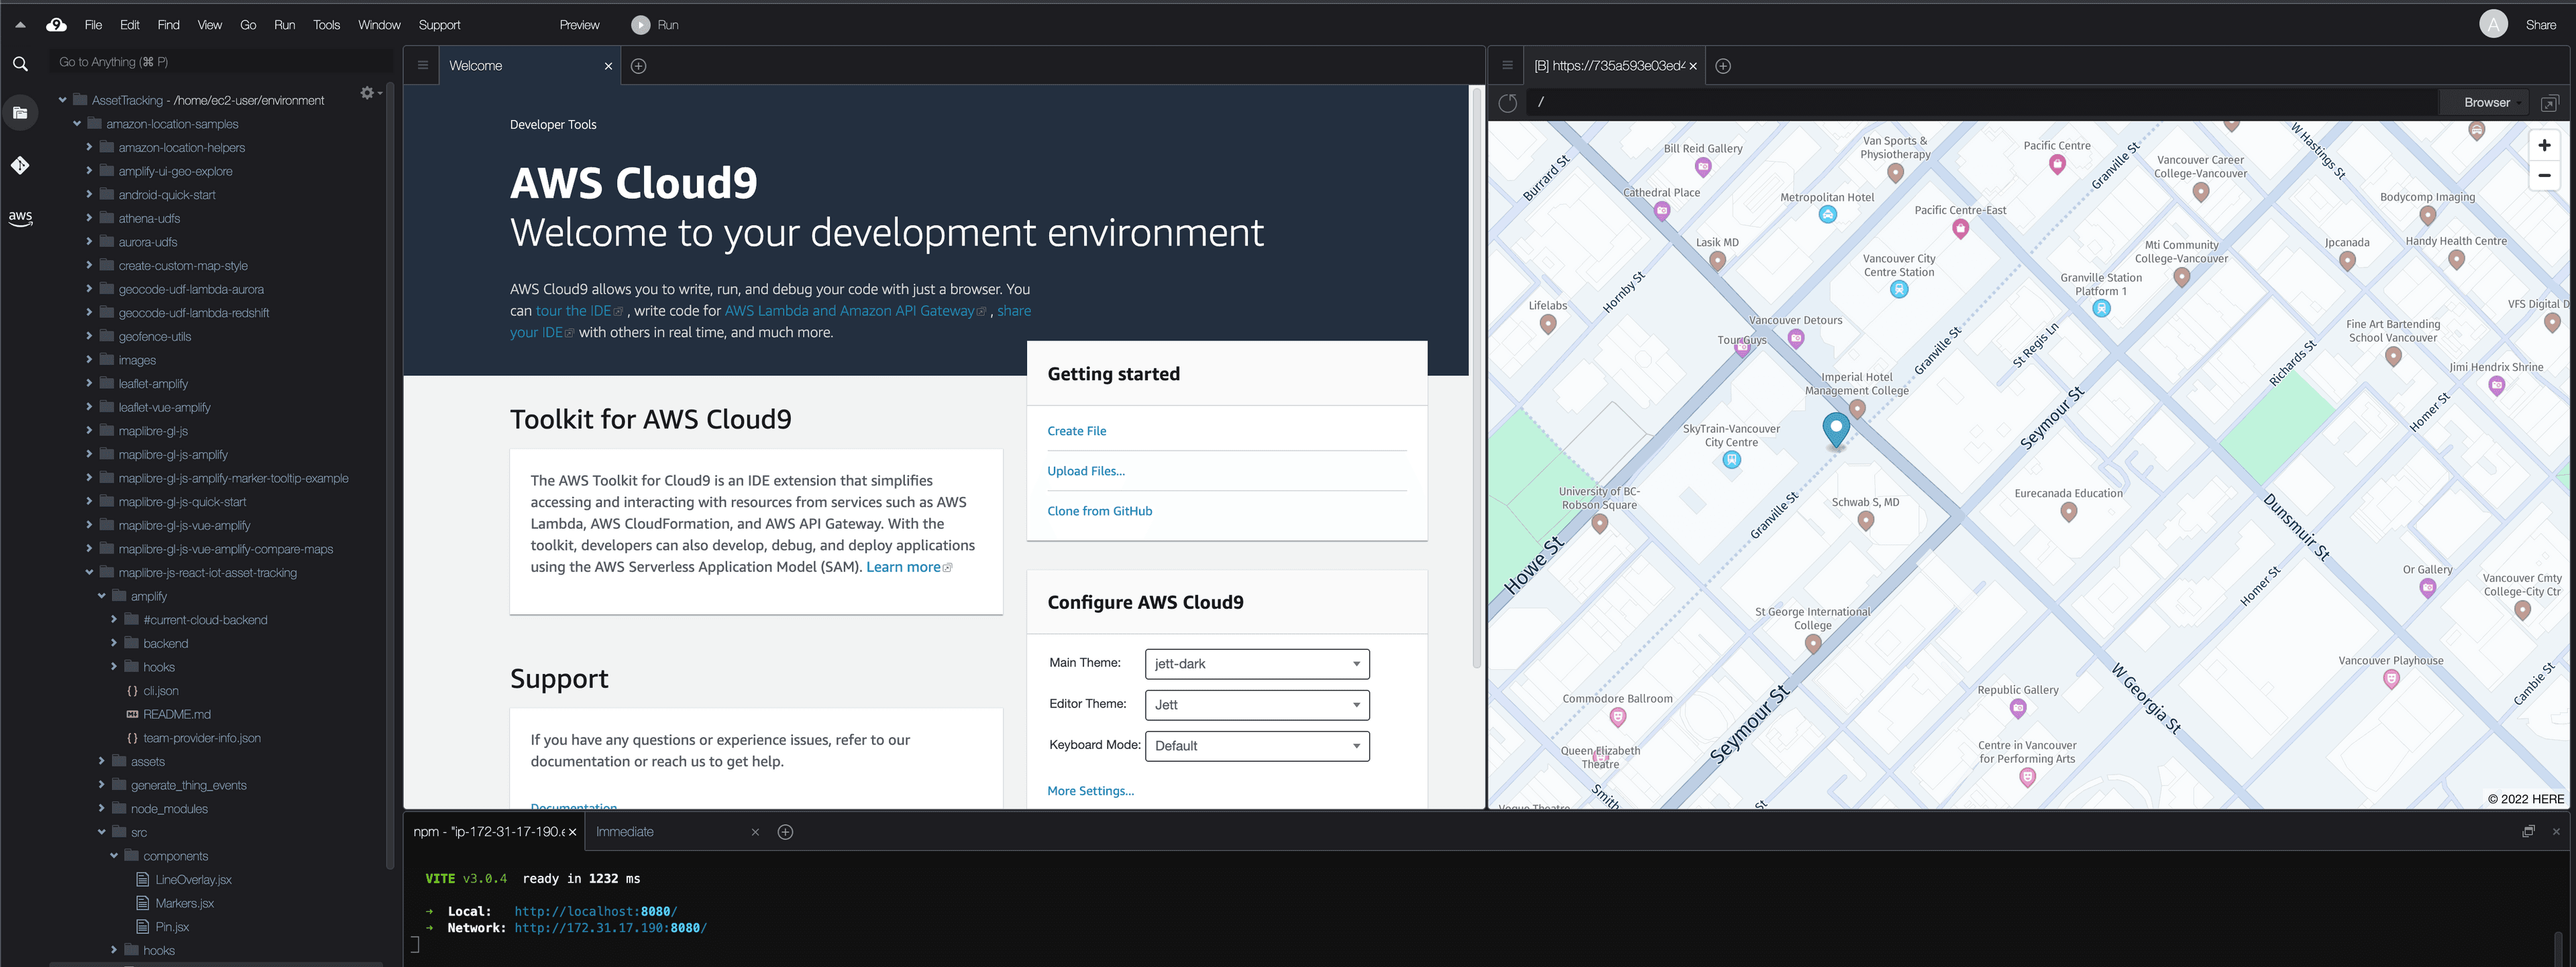
To deploy our asset tracking app, we will be using AWS Cloud9. Cloud9 is a cloud-based IDE that lets you write, run, and debug your code with just a browser. Using Cloud9 makes it easy to build and deploy applications while reducing the need for local development on builder workstations. Cloud9 also comes bundled with many AWS builder tools to get started developing quickly.
Navigate to the AWS Console and select Cloud9. Next select Create environment.

Set the instance type to
t3.small and provide a name. Select Create.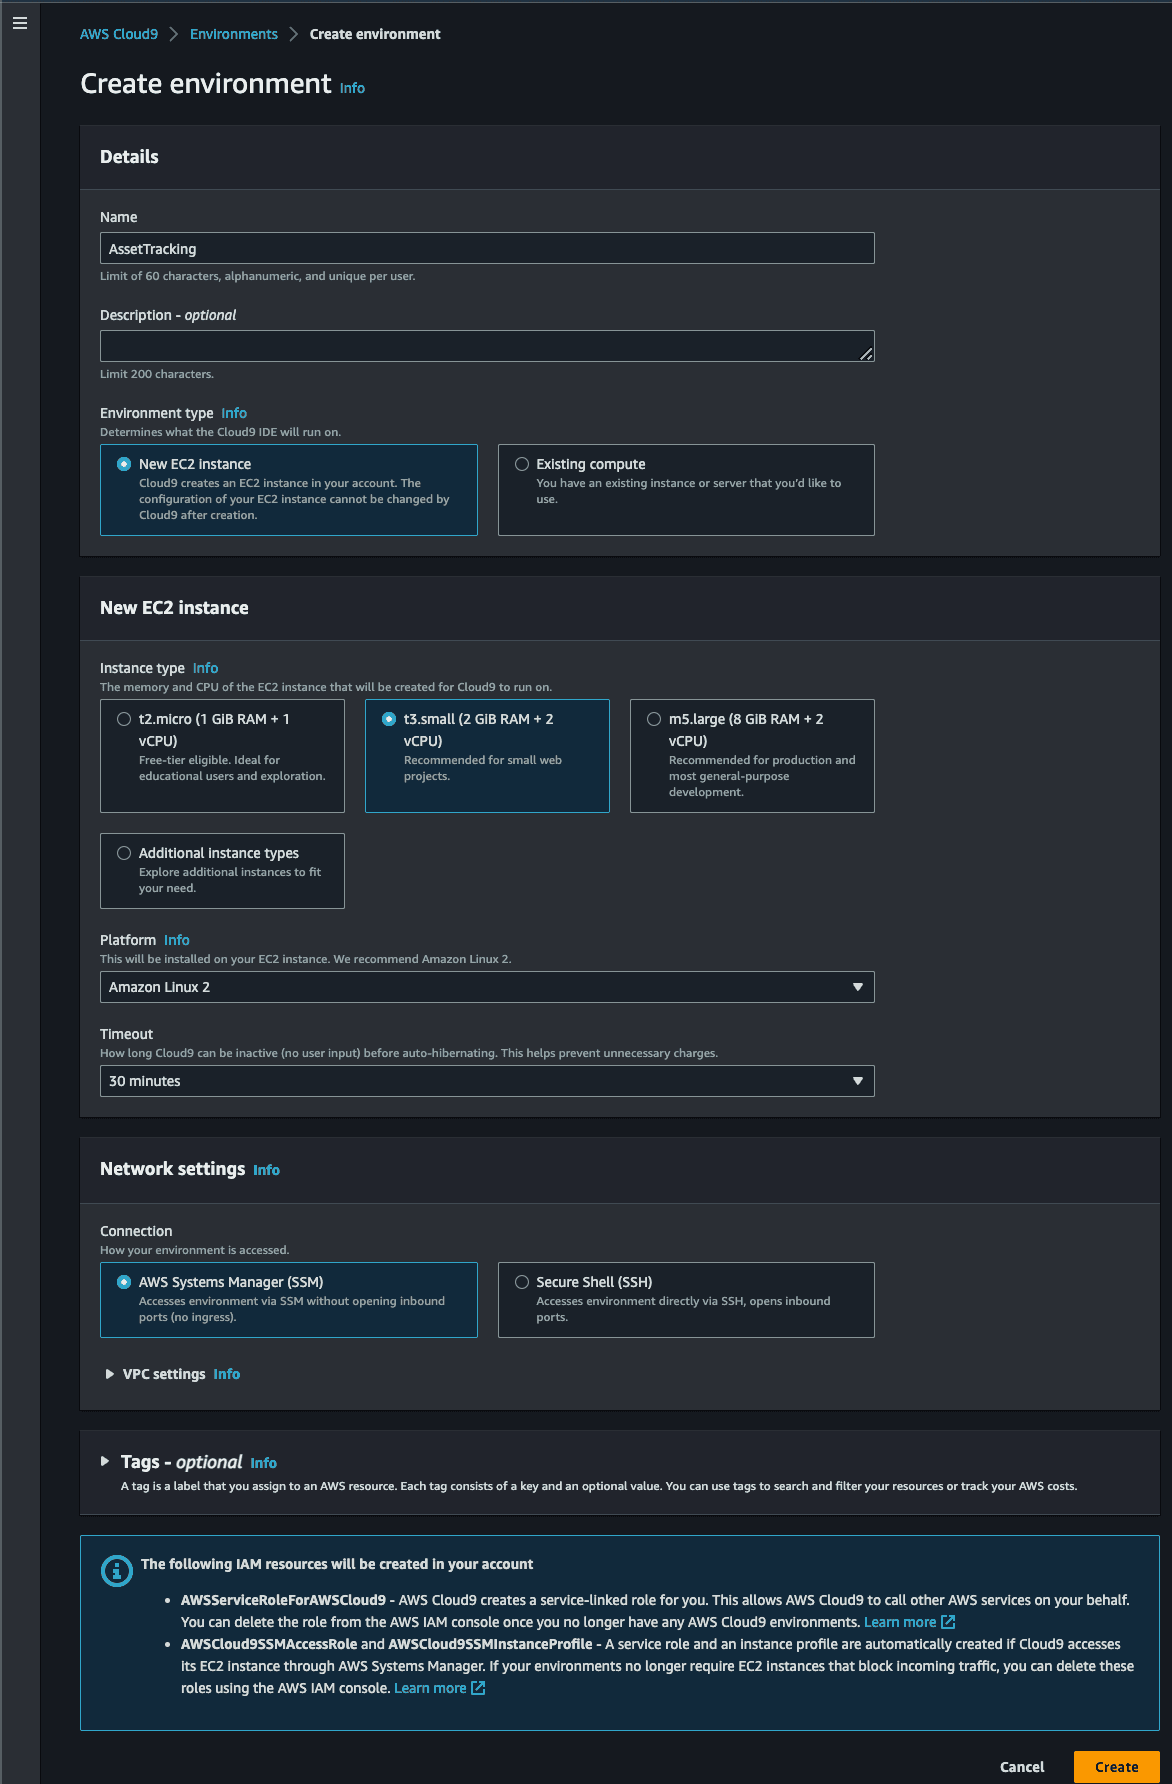
Once the Cloud9 instance has launched, we can begin deploying our app.
Now that the Cloud9 instance has been launched, we can download the code to build our application. From your Cloud9 terminal, clone the repo:
Next, navigate to the app directory:
Install our dependencies:
In order to configure Amplify, we need to set up an AWS Profile on the Cloud9 instance. To do this, enter the following command, making sure to replace the region with the region you are running the lab in. For example, for us-east-1:
Next we need to ensure Amplify is installed:
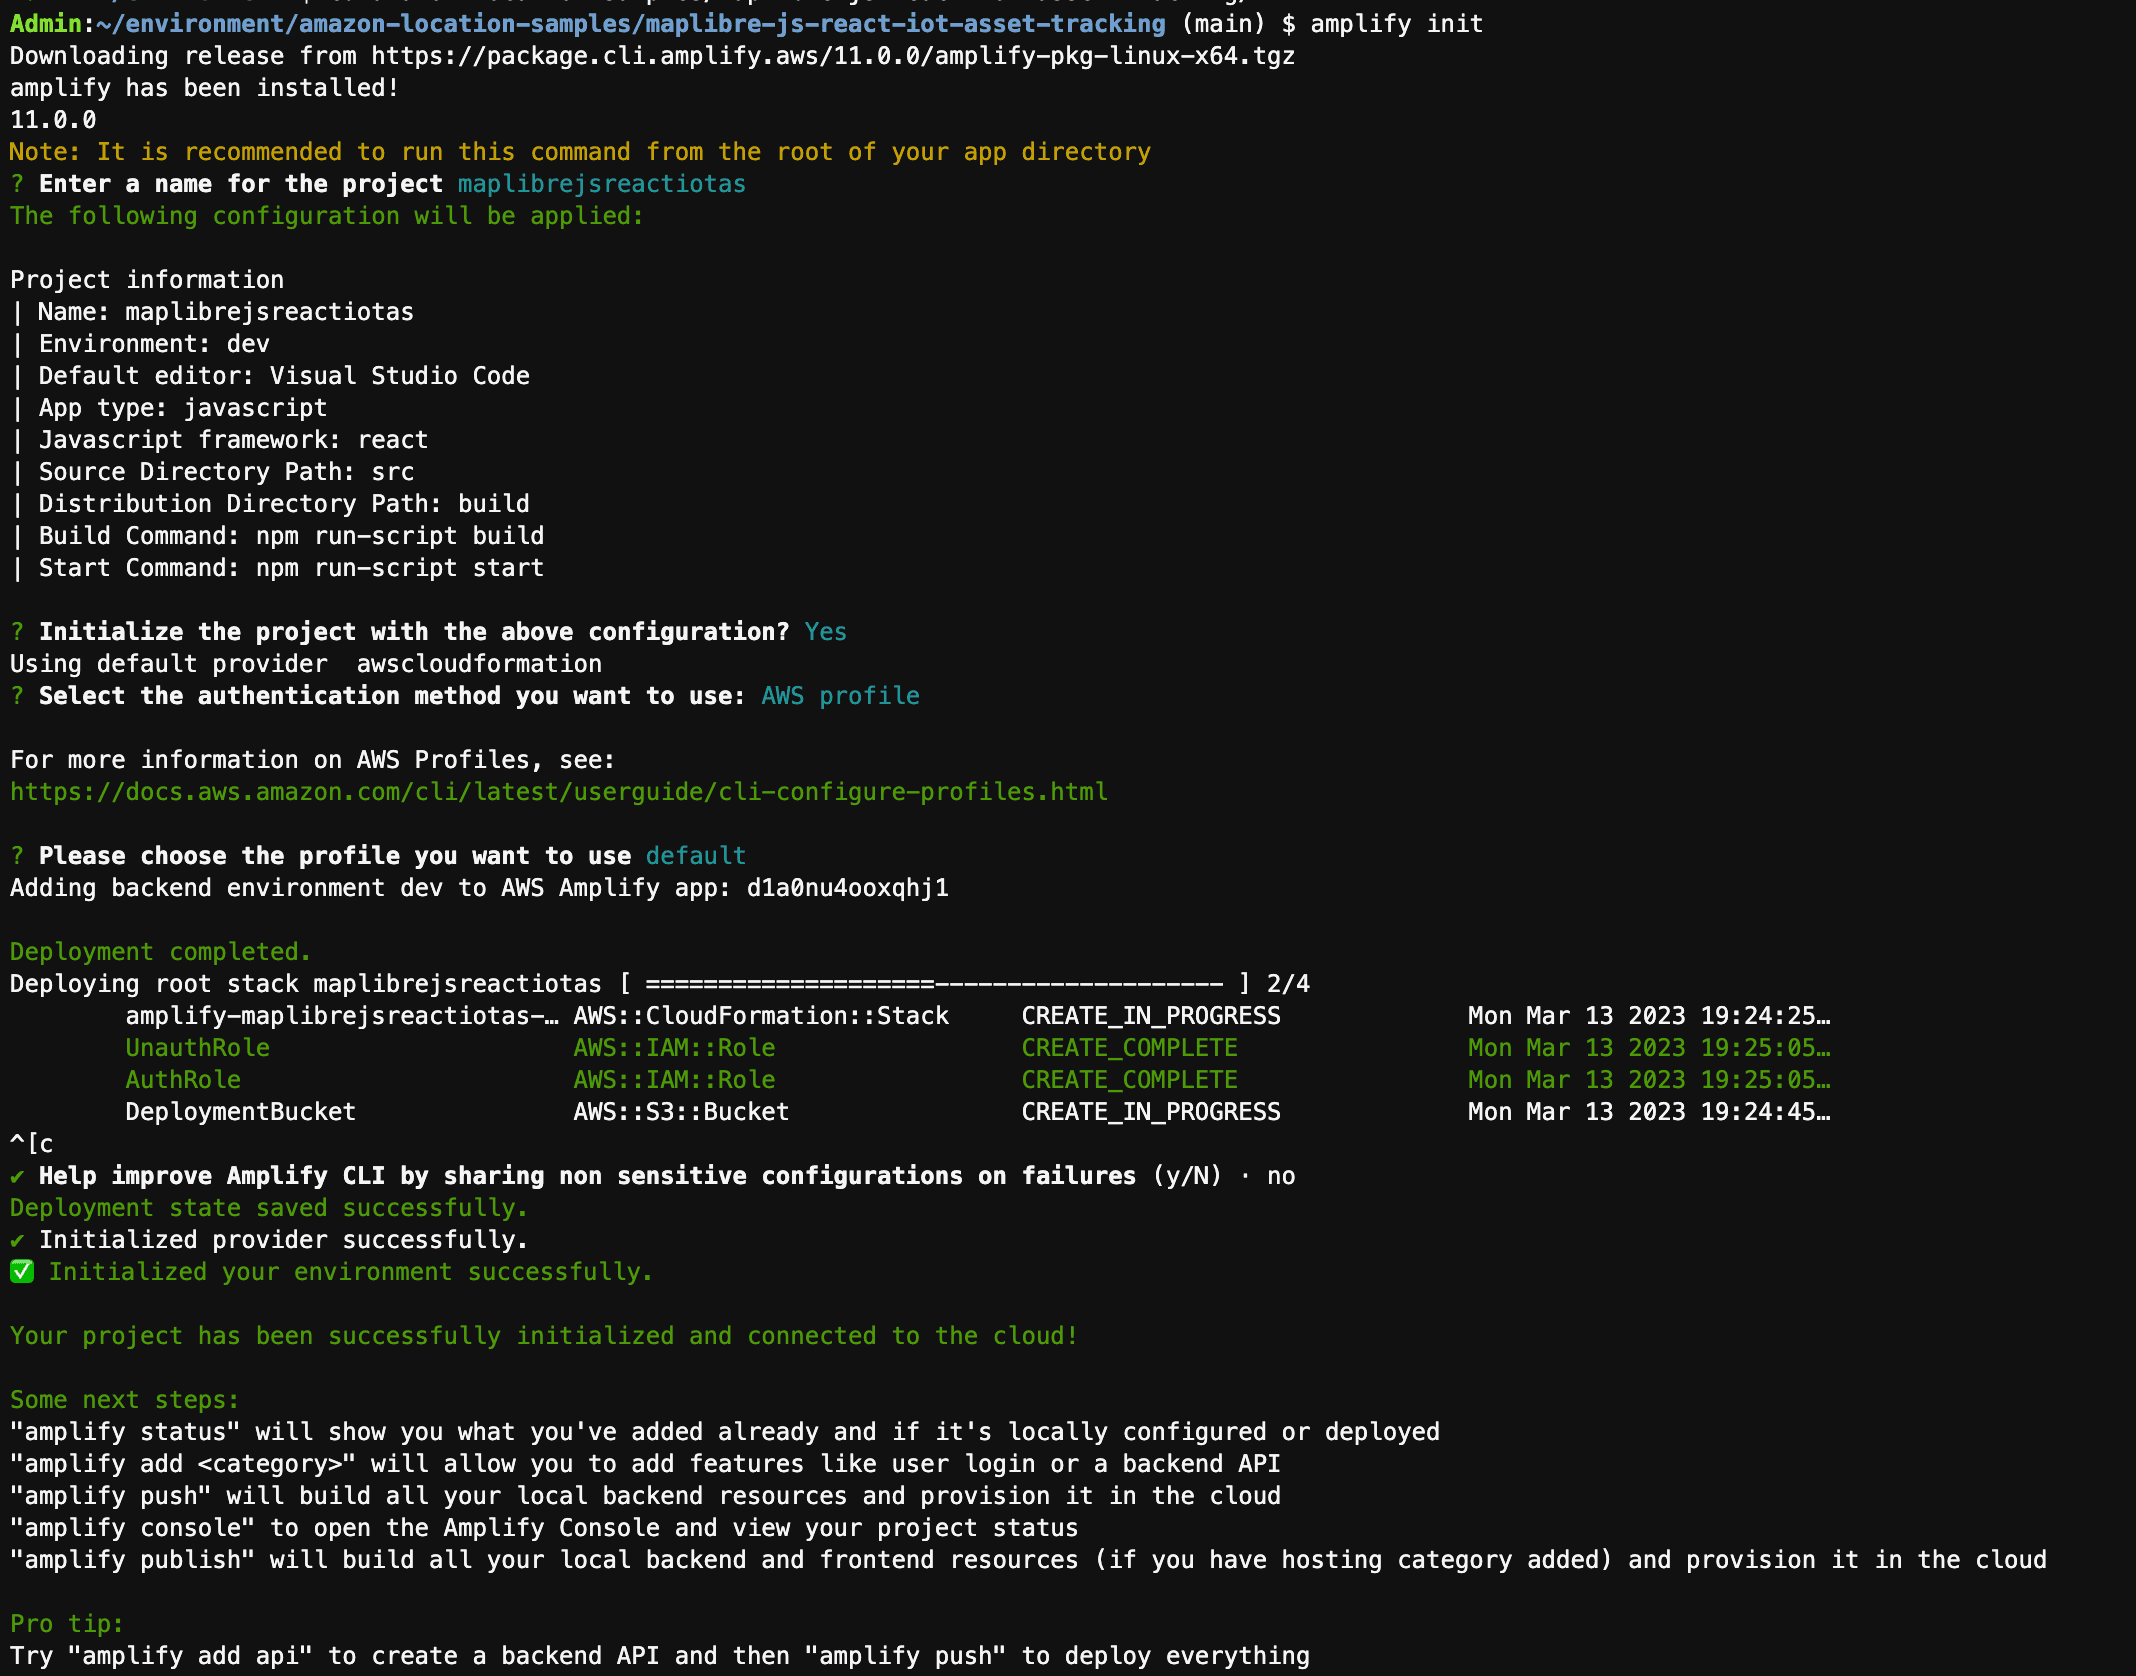
Now we can initialize our Amplify environment:
Accept the default options.
Now we can use AWS Amplify to add our Amazon Location Service resources:
And select the following options. Note we change the map data provider due to Terms of Service that require us to use the HERE data provider for asset tracking use cases. Also make sure to select
Authorized and Guest users when choosing who can access the map. If your app has authentication such as a login portal, you can choose that only authorized users can view the map resource. However for our application, we do not have a login, so unauthenticated users can access the map.
Before we push our Amplify configuration, we need to make one small change to allow our application to work with Amazon Location Service Trackers.

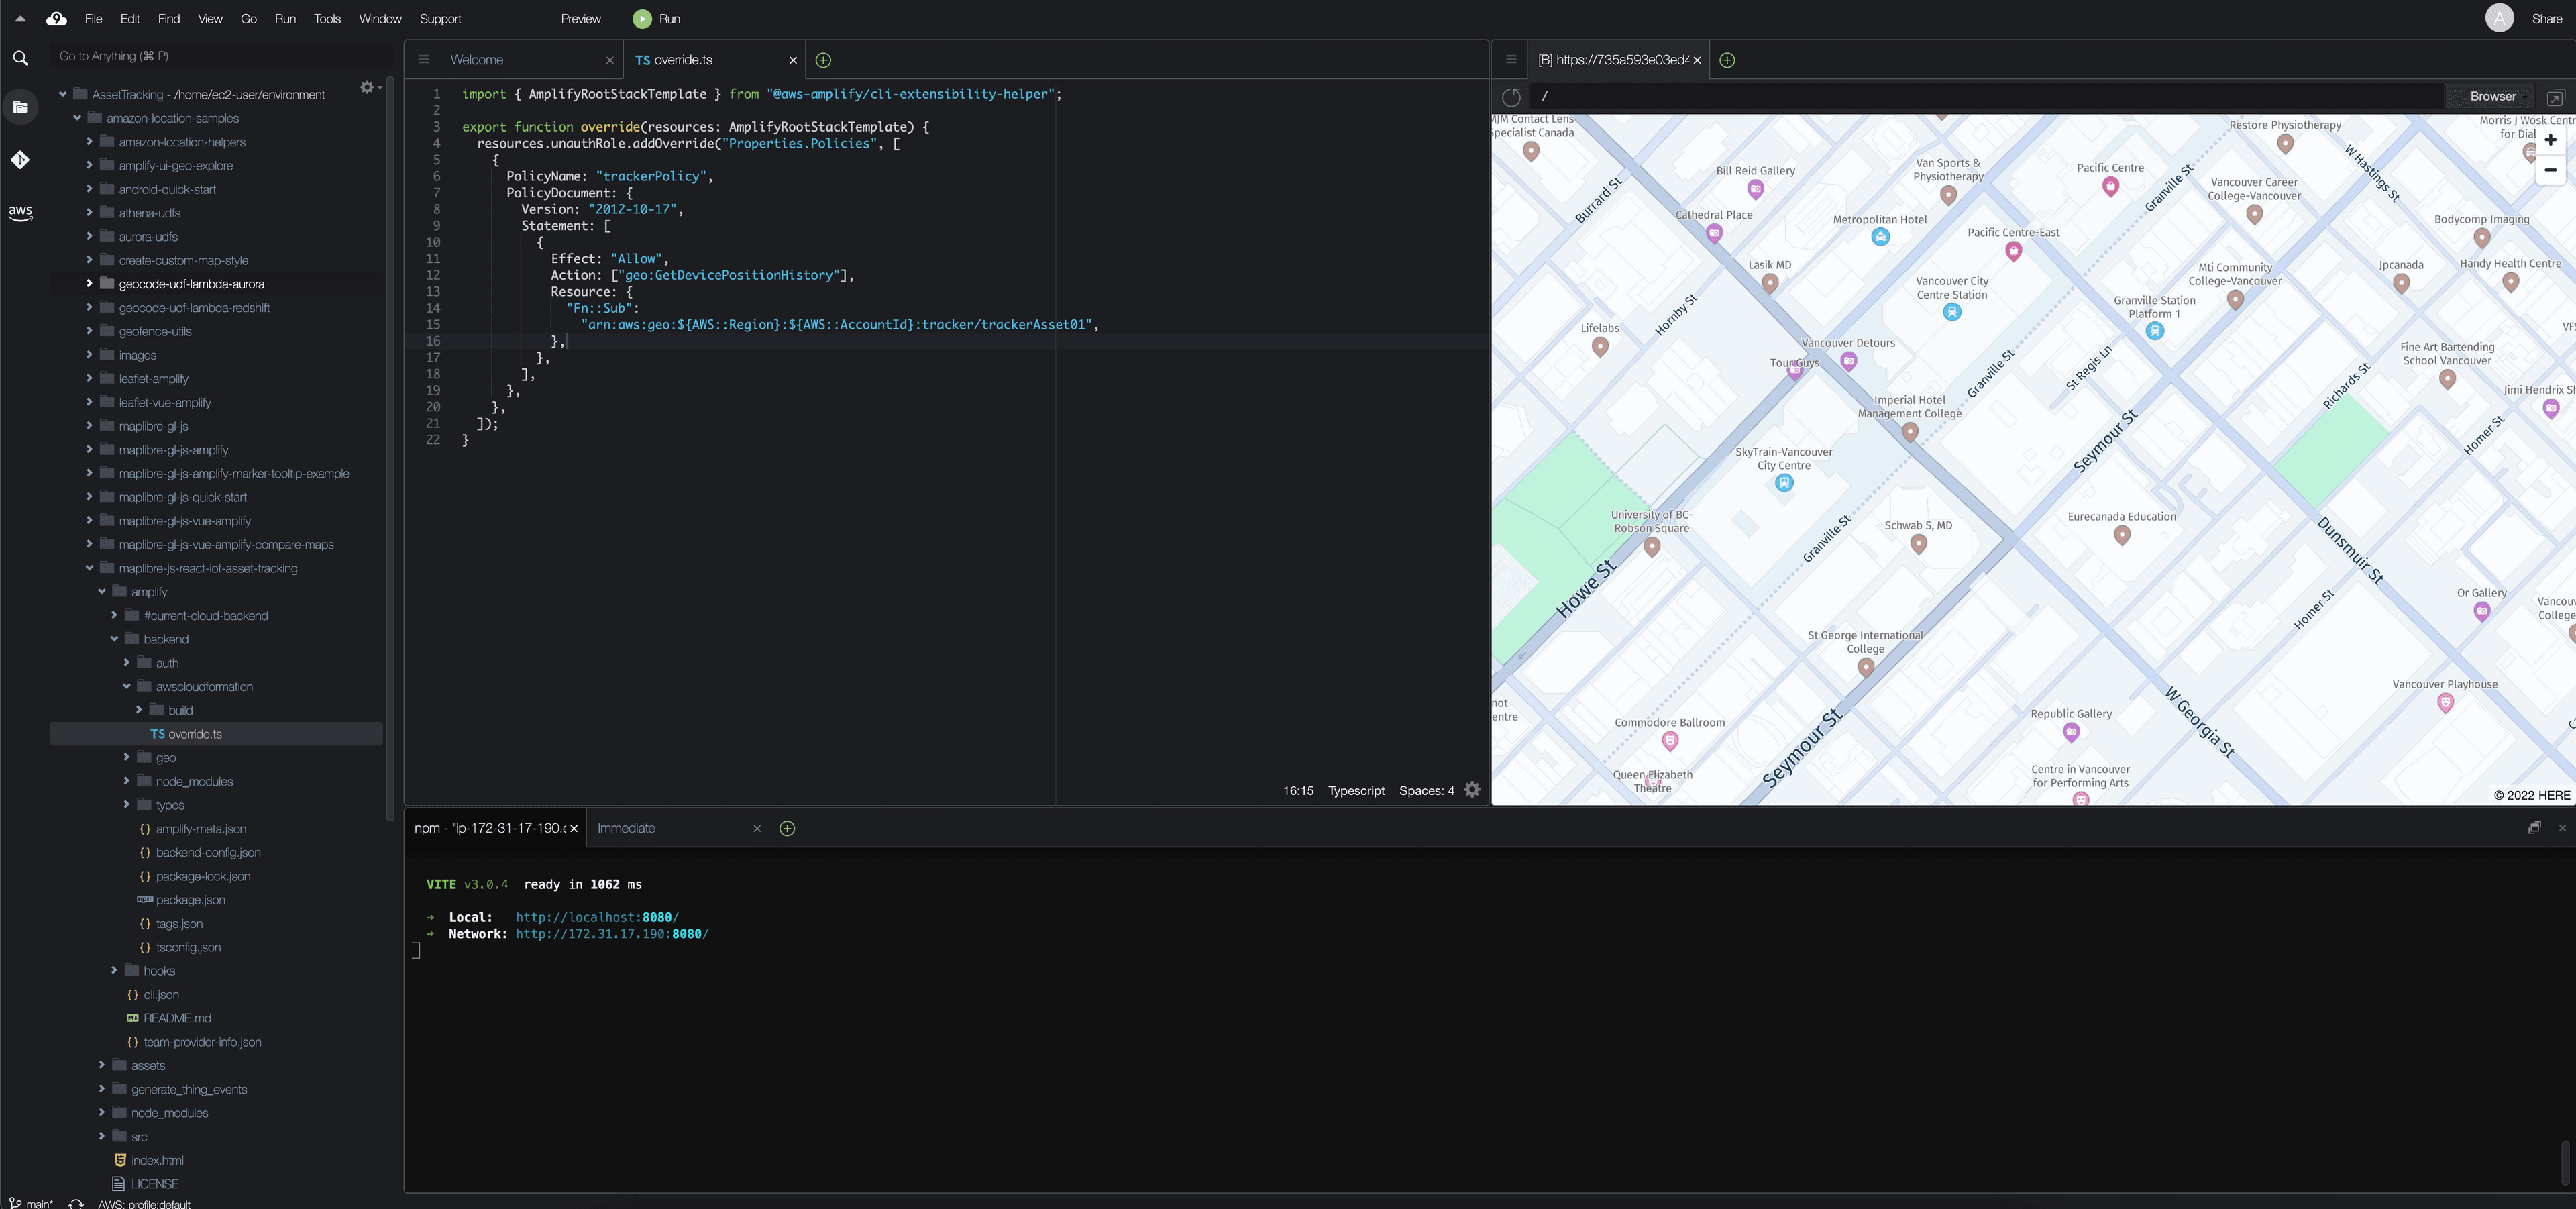
Now navigate to the
amplify/backend/awscloudformation/override.ts file that was just created, and replace the contents with the following:This will update the policy used by Amazon Cognito to display the tracker position on the map.
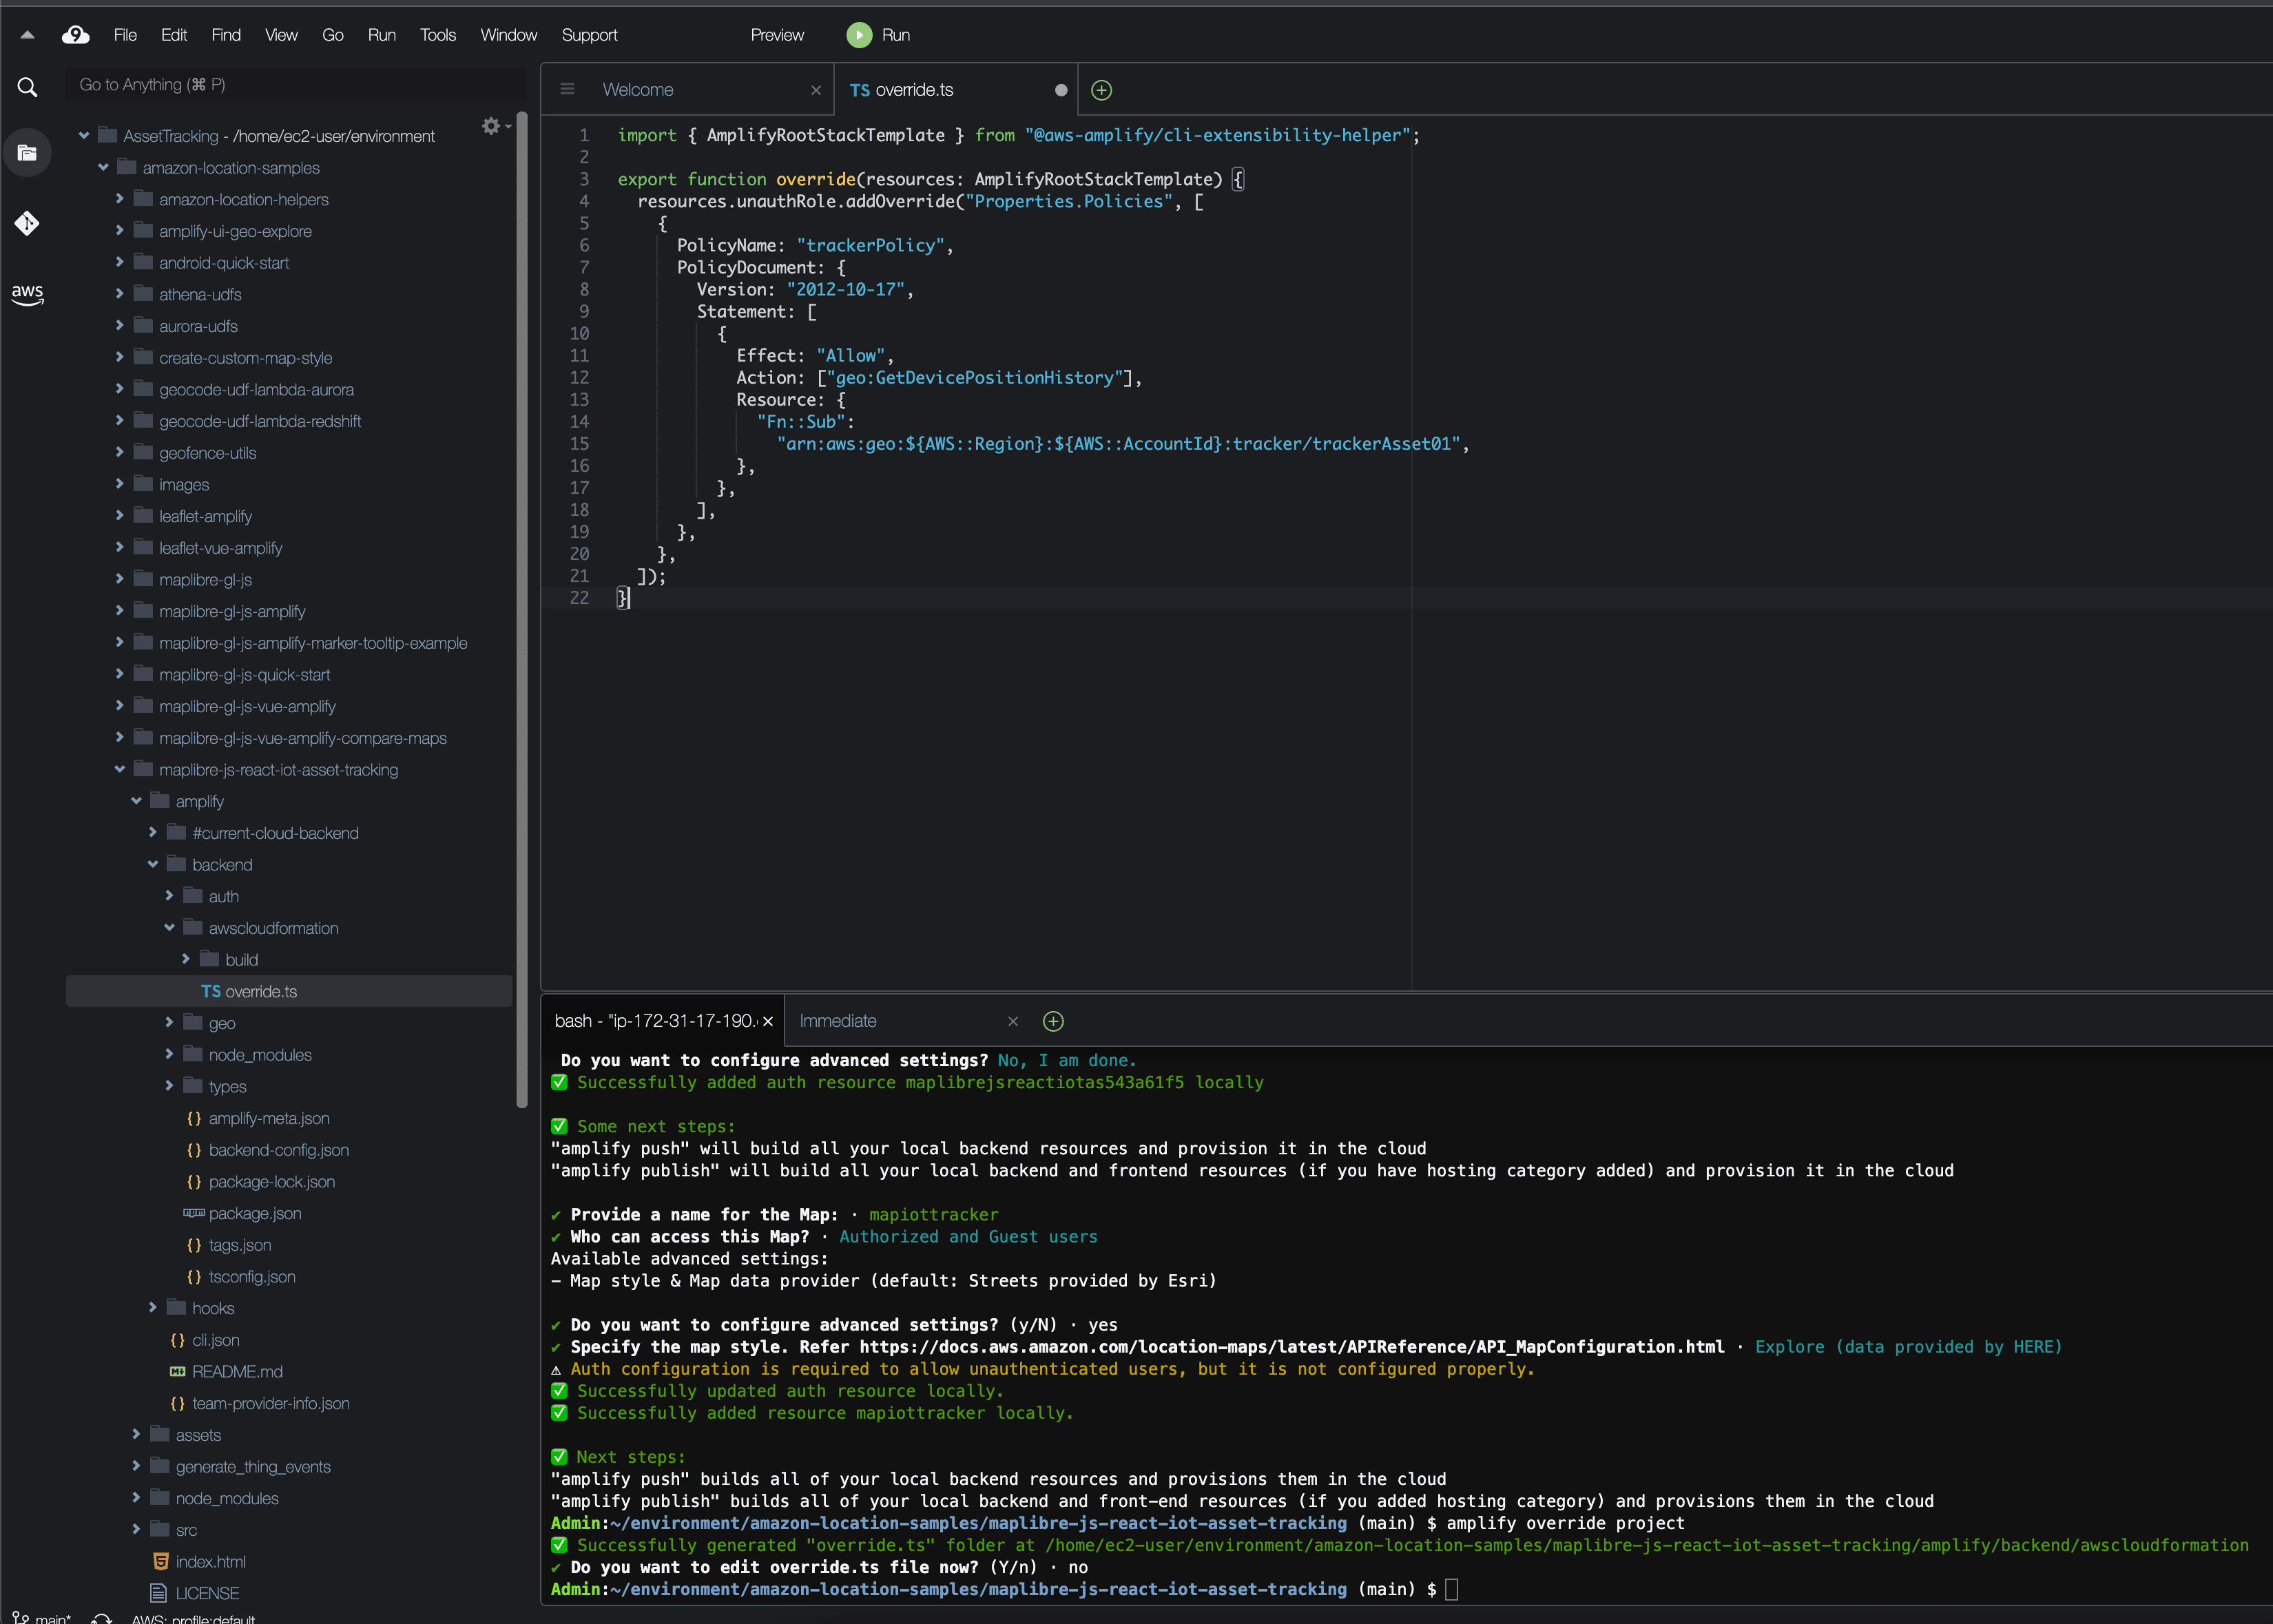
Save the
override.ts file and now we can push our Amplify configuration and create our resources in the cloud.Select
y for the options presented here:
Next start the application by running:
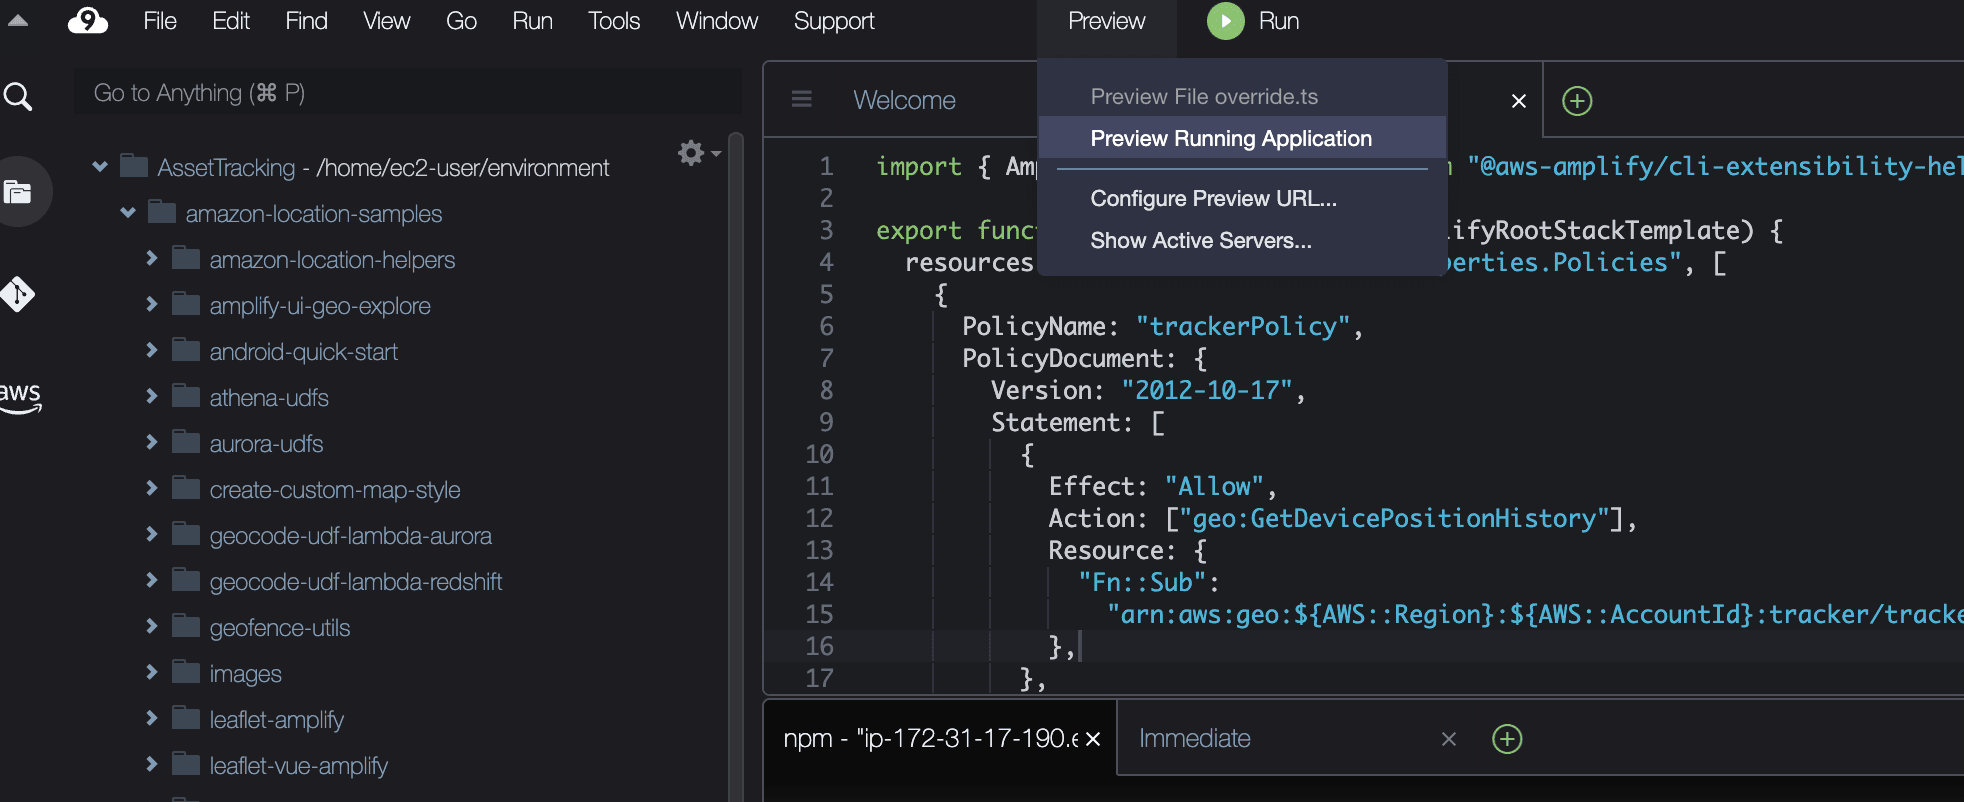
Keep
npm start running throughout this tutorial in order to keep the asset tracking app running.In your Cloud9, navigate to Run and then select Preview running application to view the app.
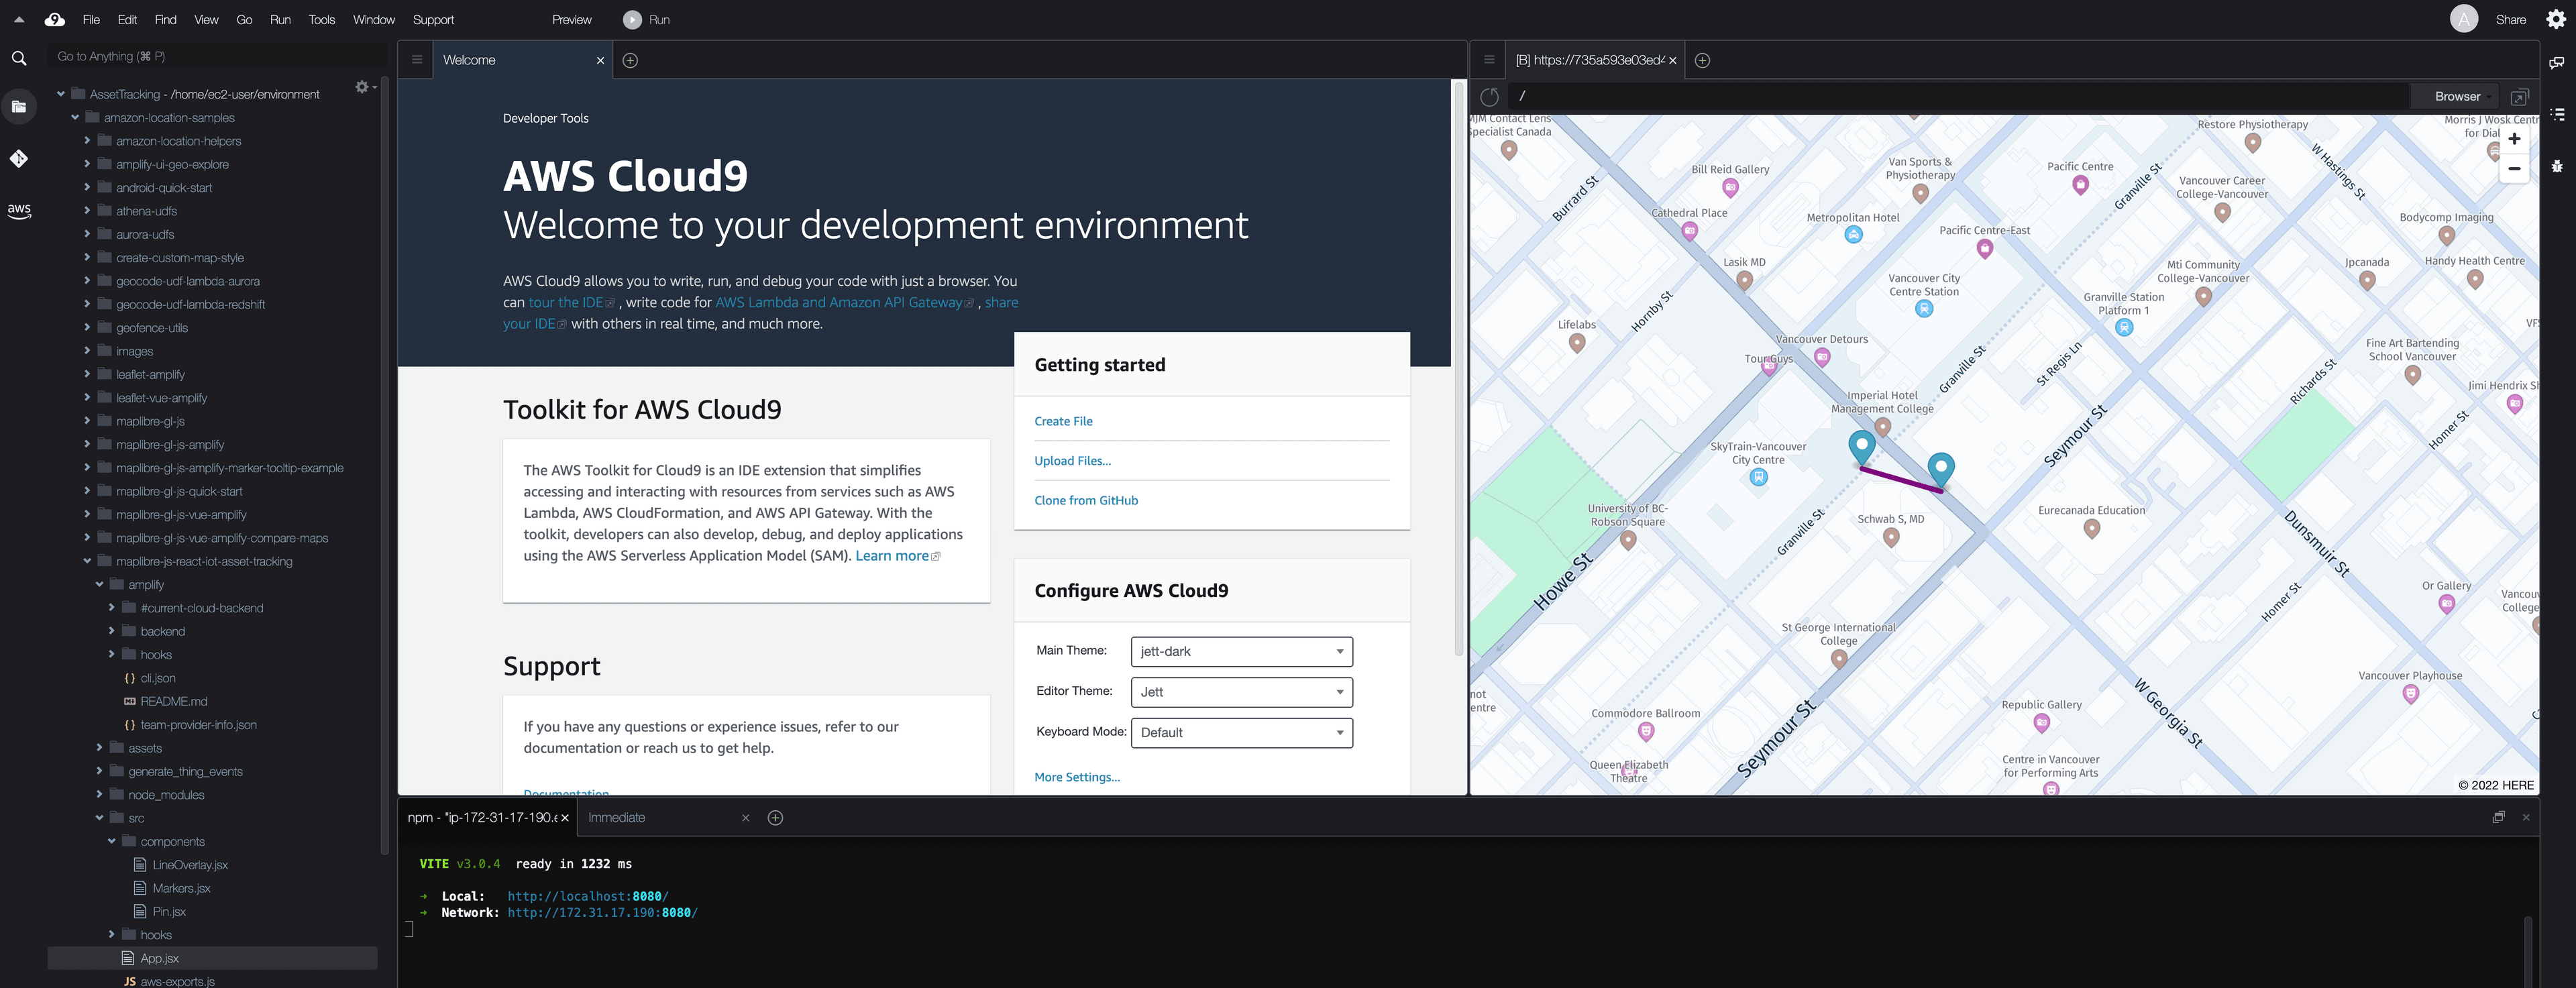
You should now see your application running inside Cloud9, like this.
Now that we have our Amazon Location Service resources configured and our web app up and running, we need to configure an IoT Rule to send MQTT events to our new Amazon Location Service Tracker. This rule will watch for messages on the
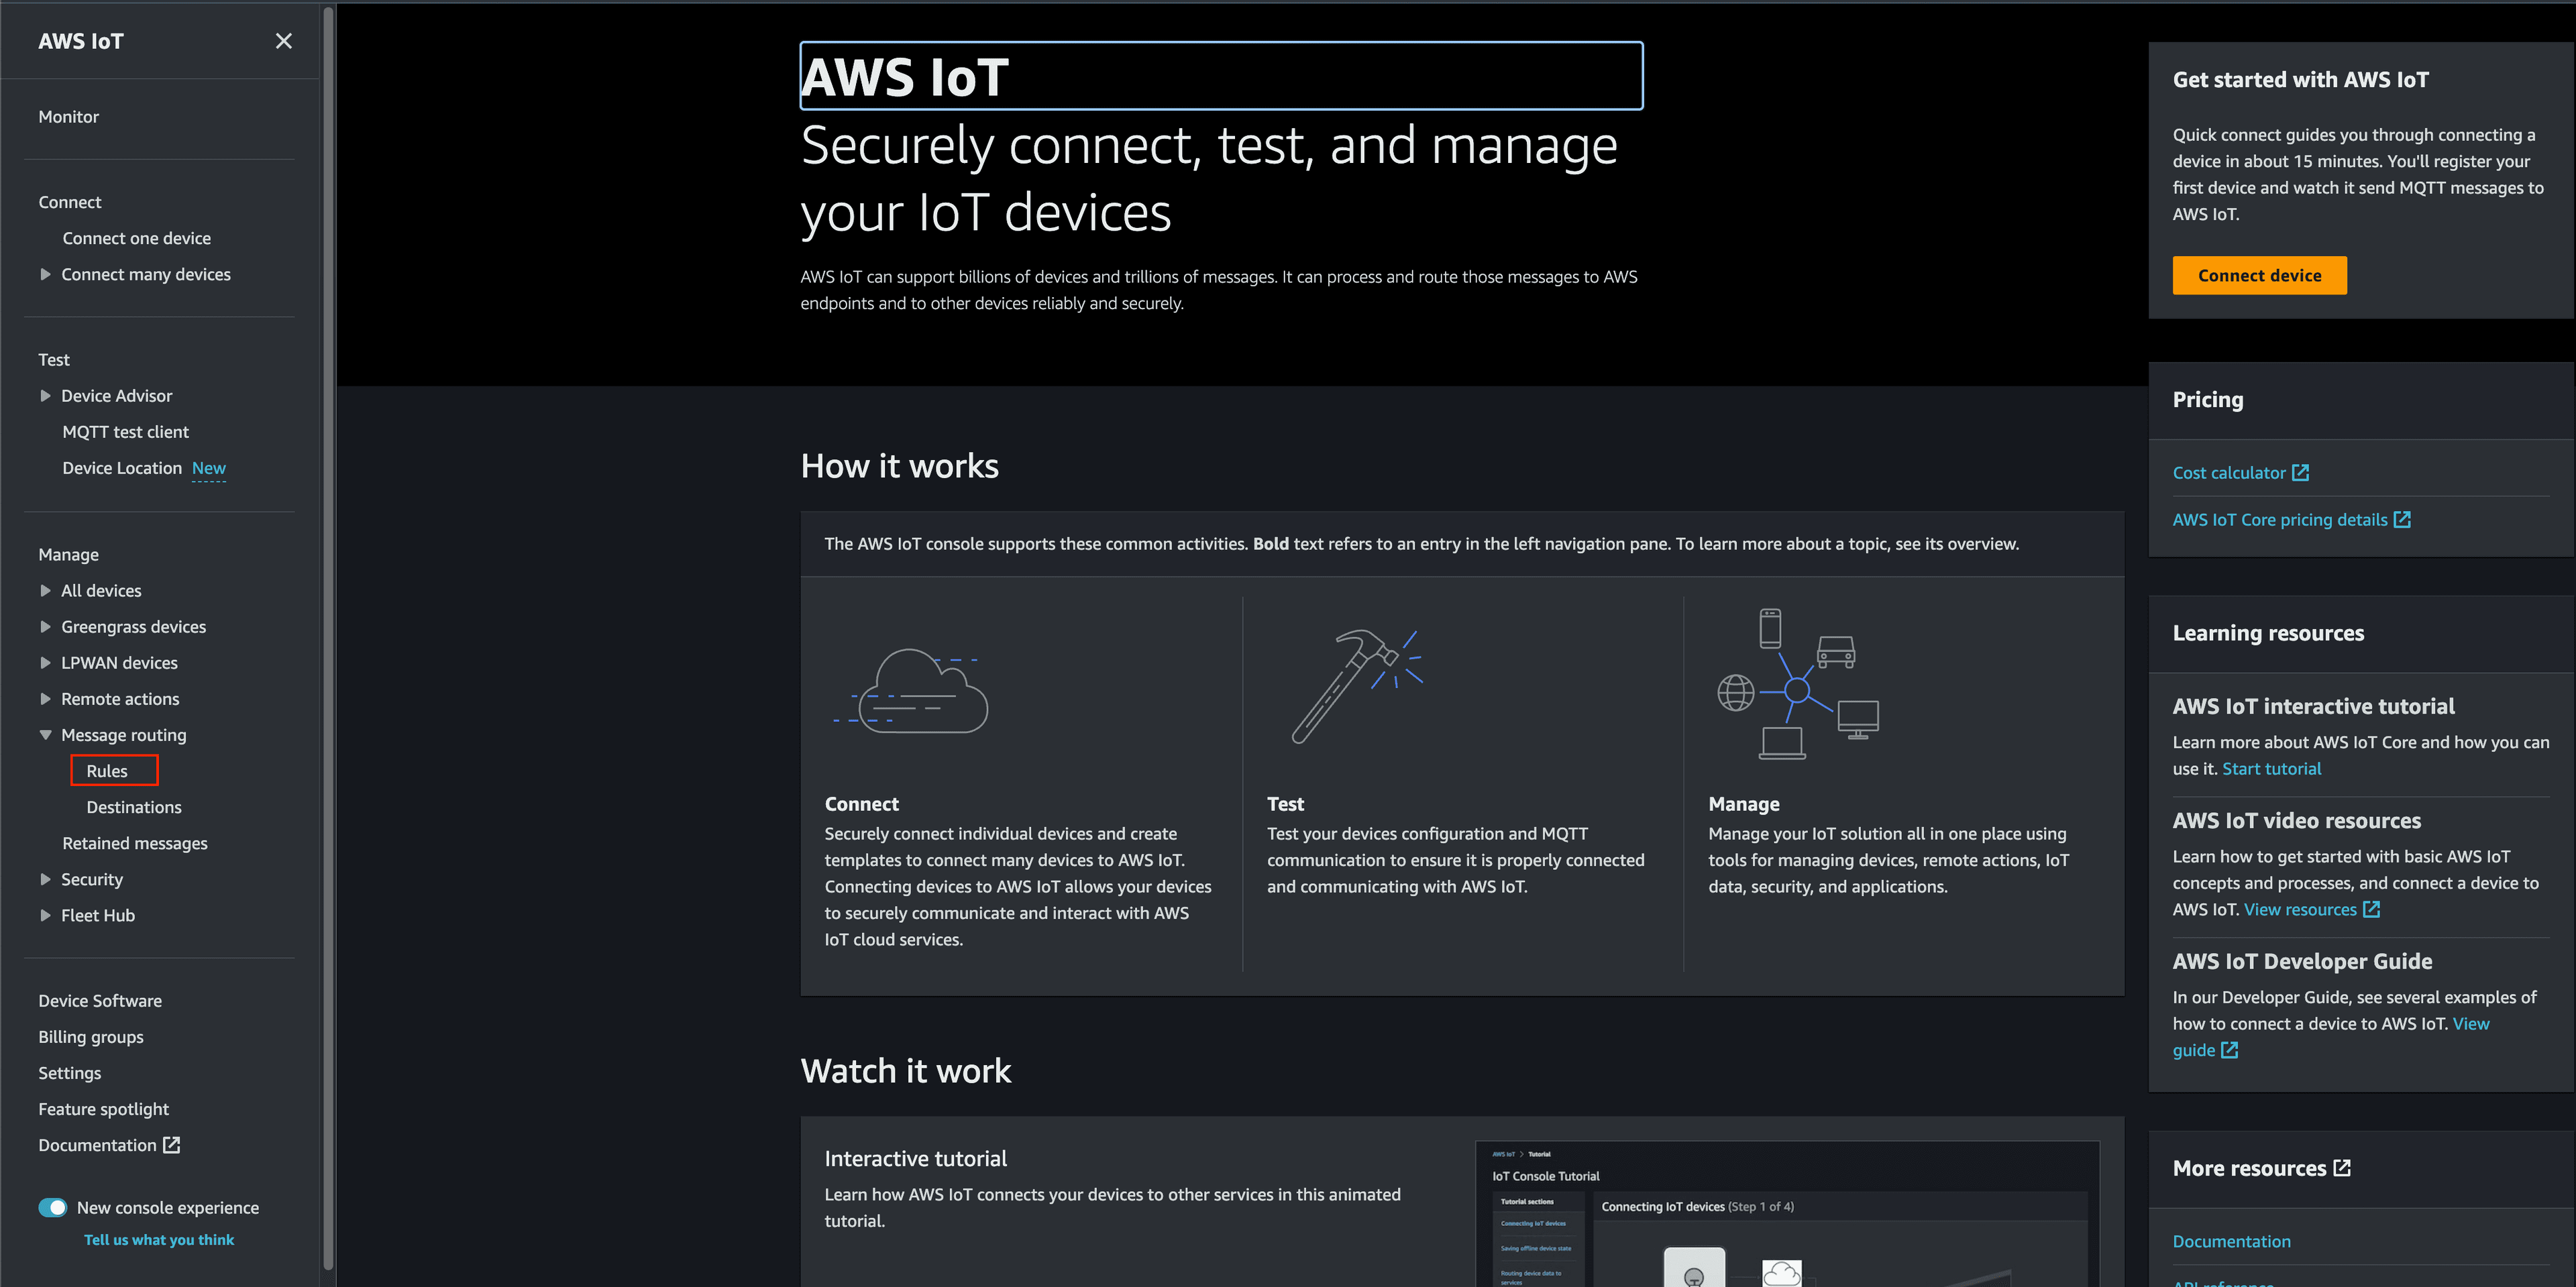
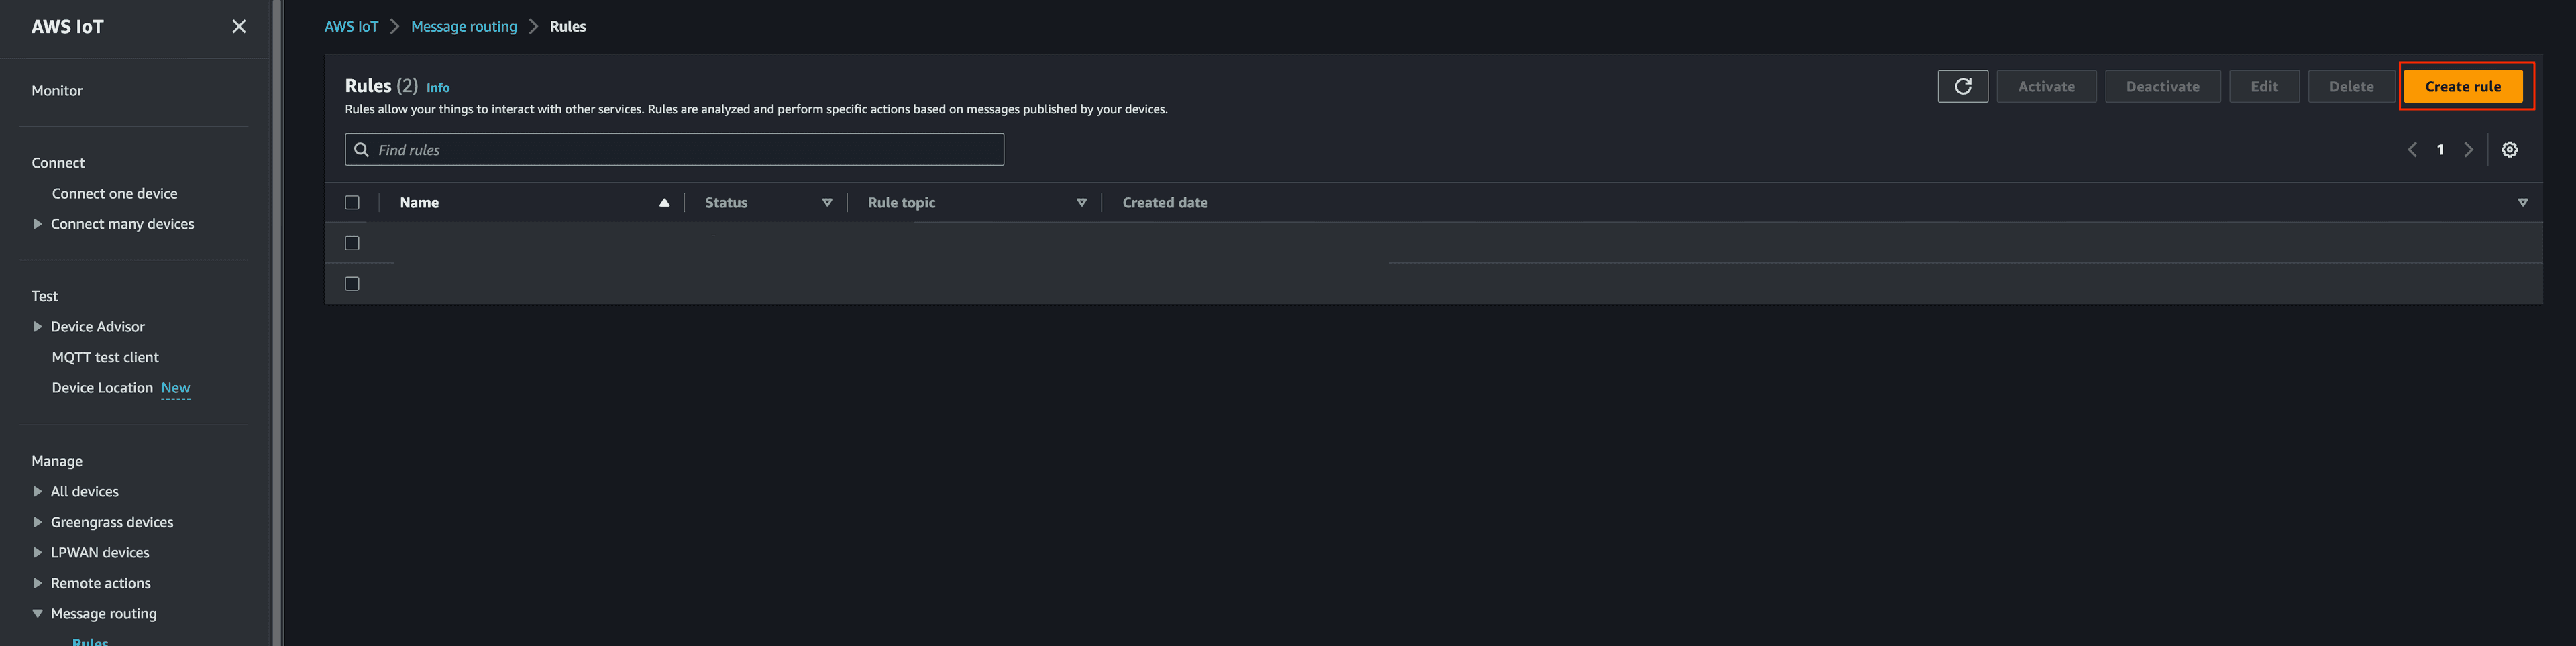
assets/tracker MQTT topic, parse the message, and send the location information to the AssetTracker Amazon Location Service tracker which updates the thing123 device that is displayed on the map.Navigate to the IoT Core Console, and click on Message Routing then Rules.
Click on Create Rule.
Now let's give our rule the name
AssetTrackingRule and click Next.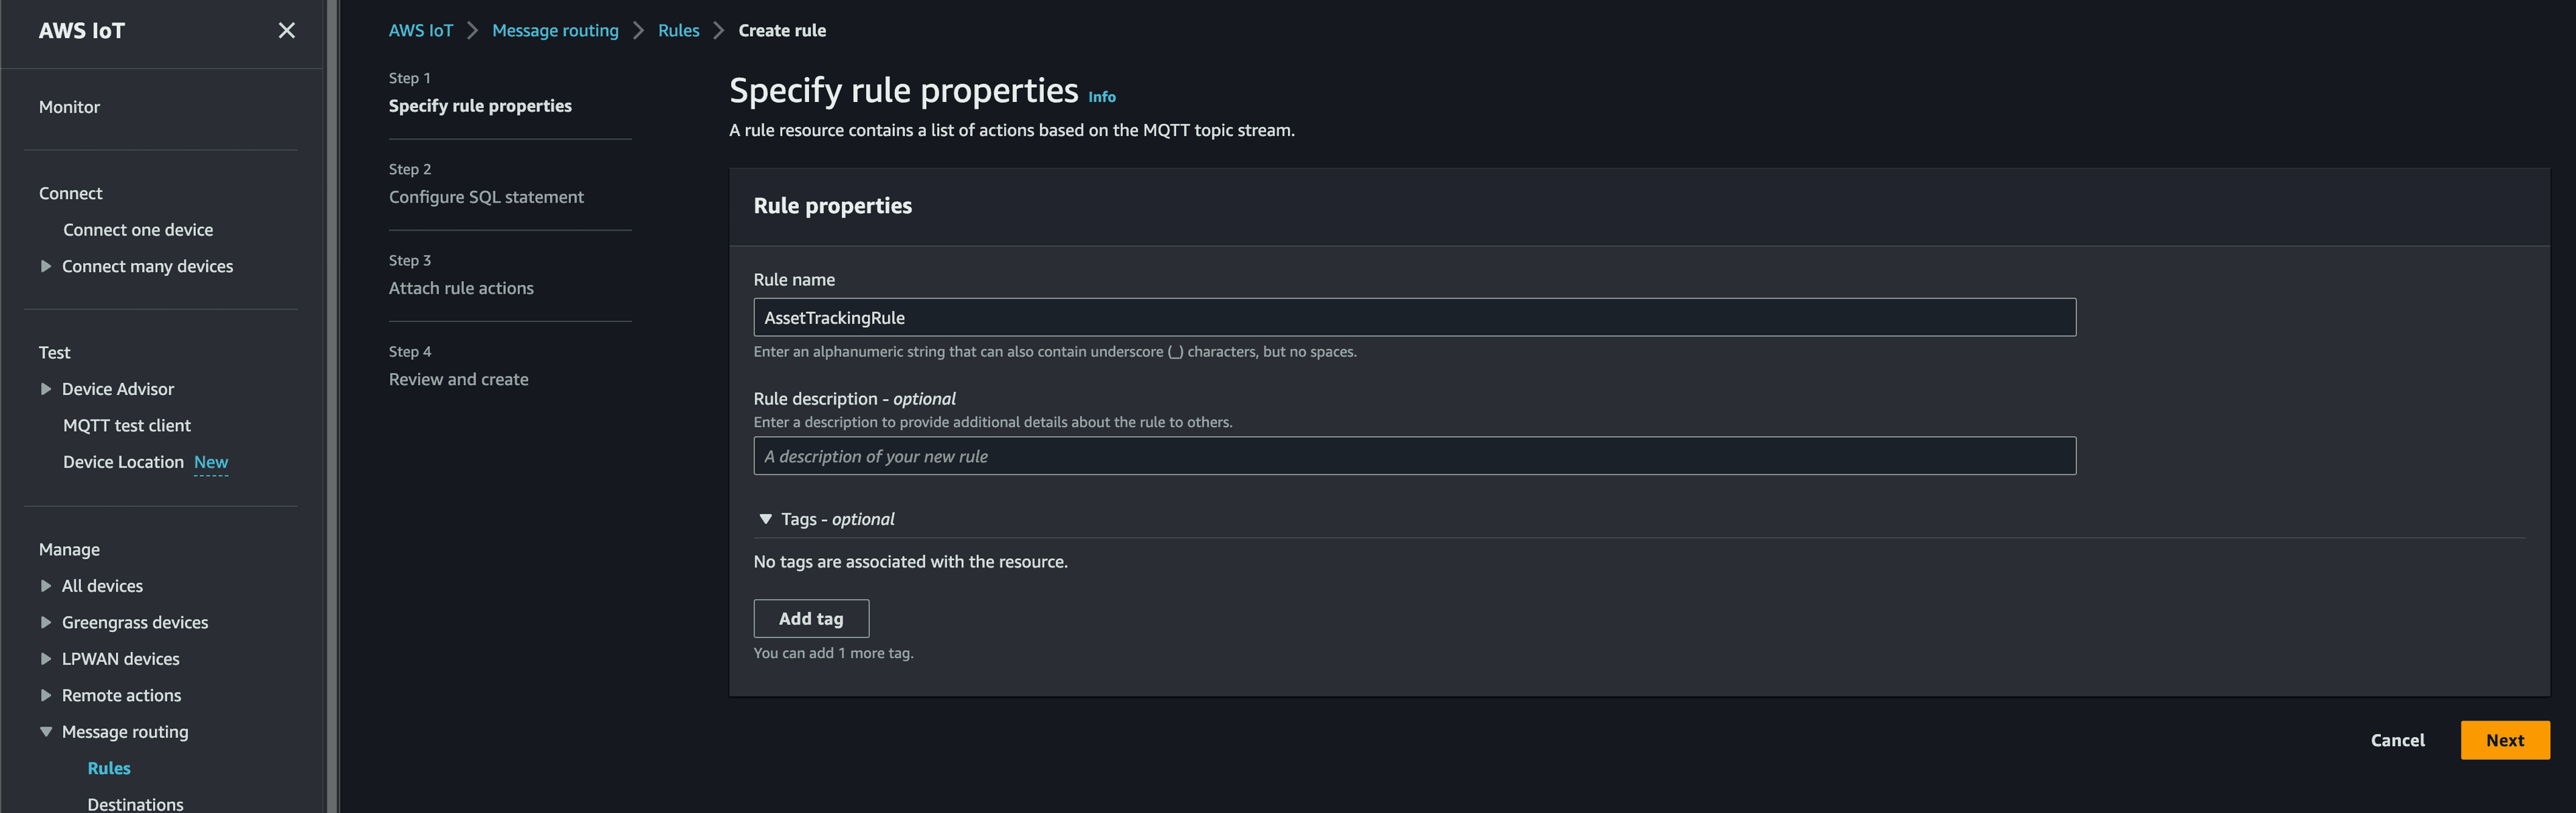
Now we need our SQL statement. We will be using the topic
assets/trackers. Enter SELECT * FROM 'assets/trackers'.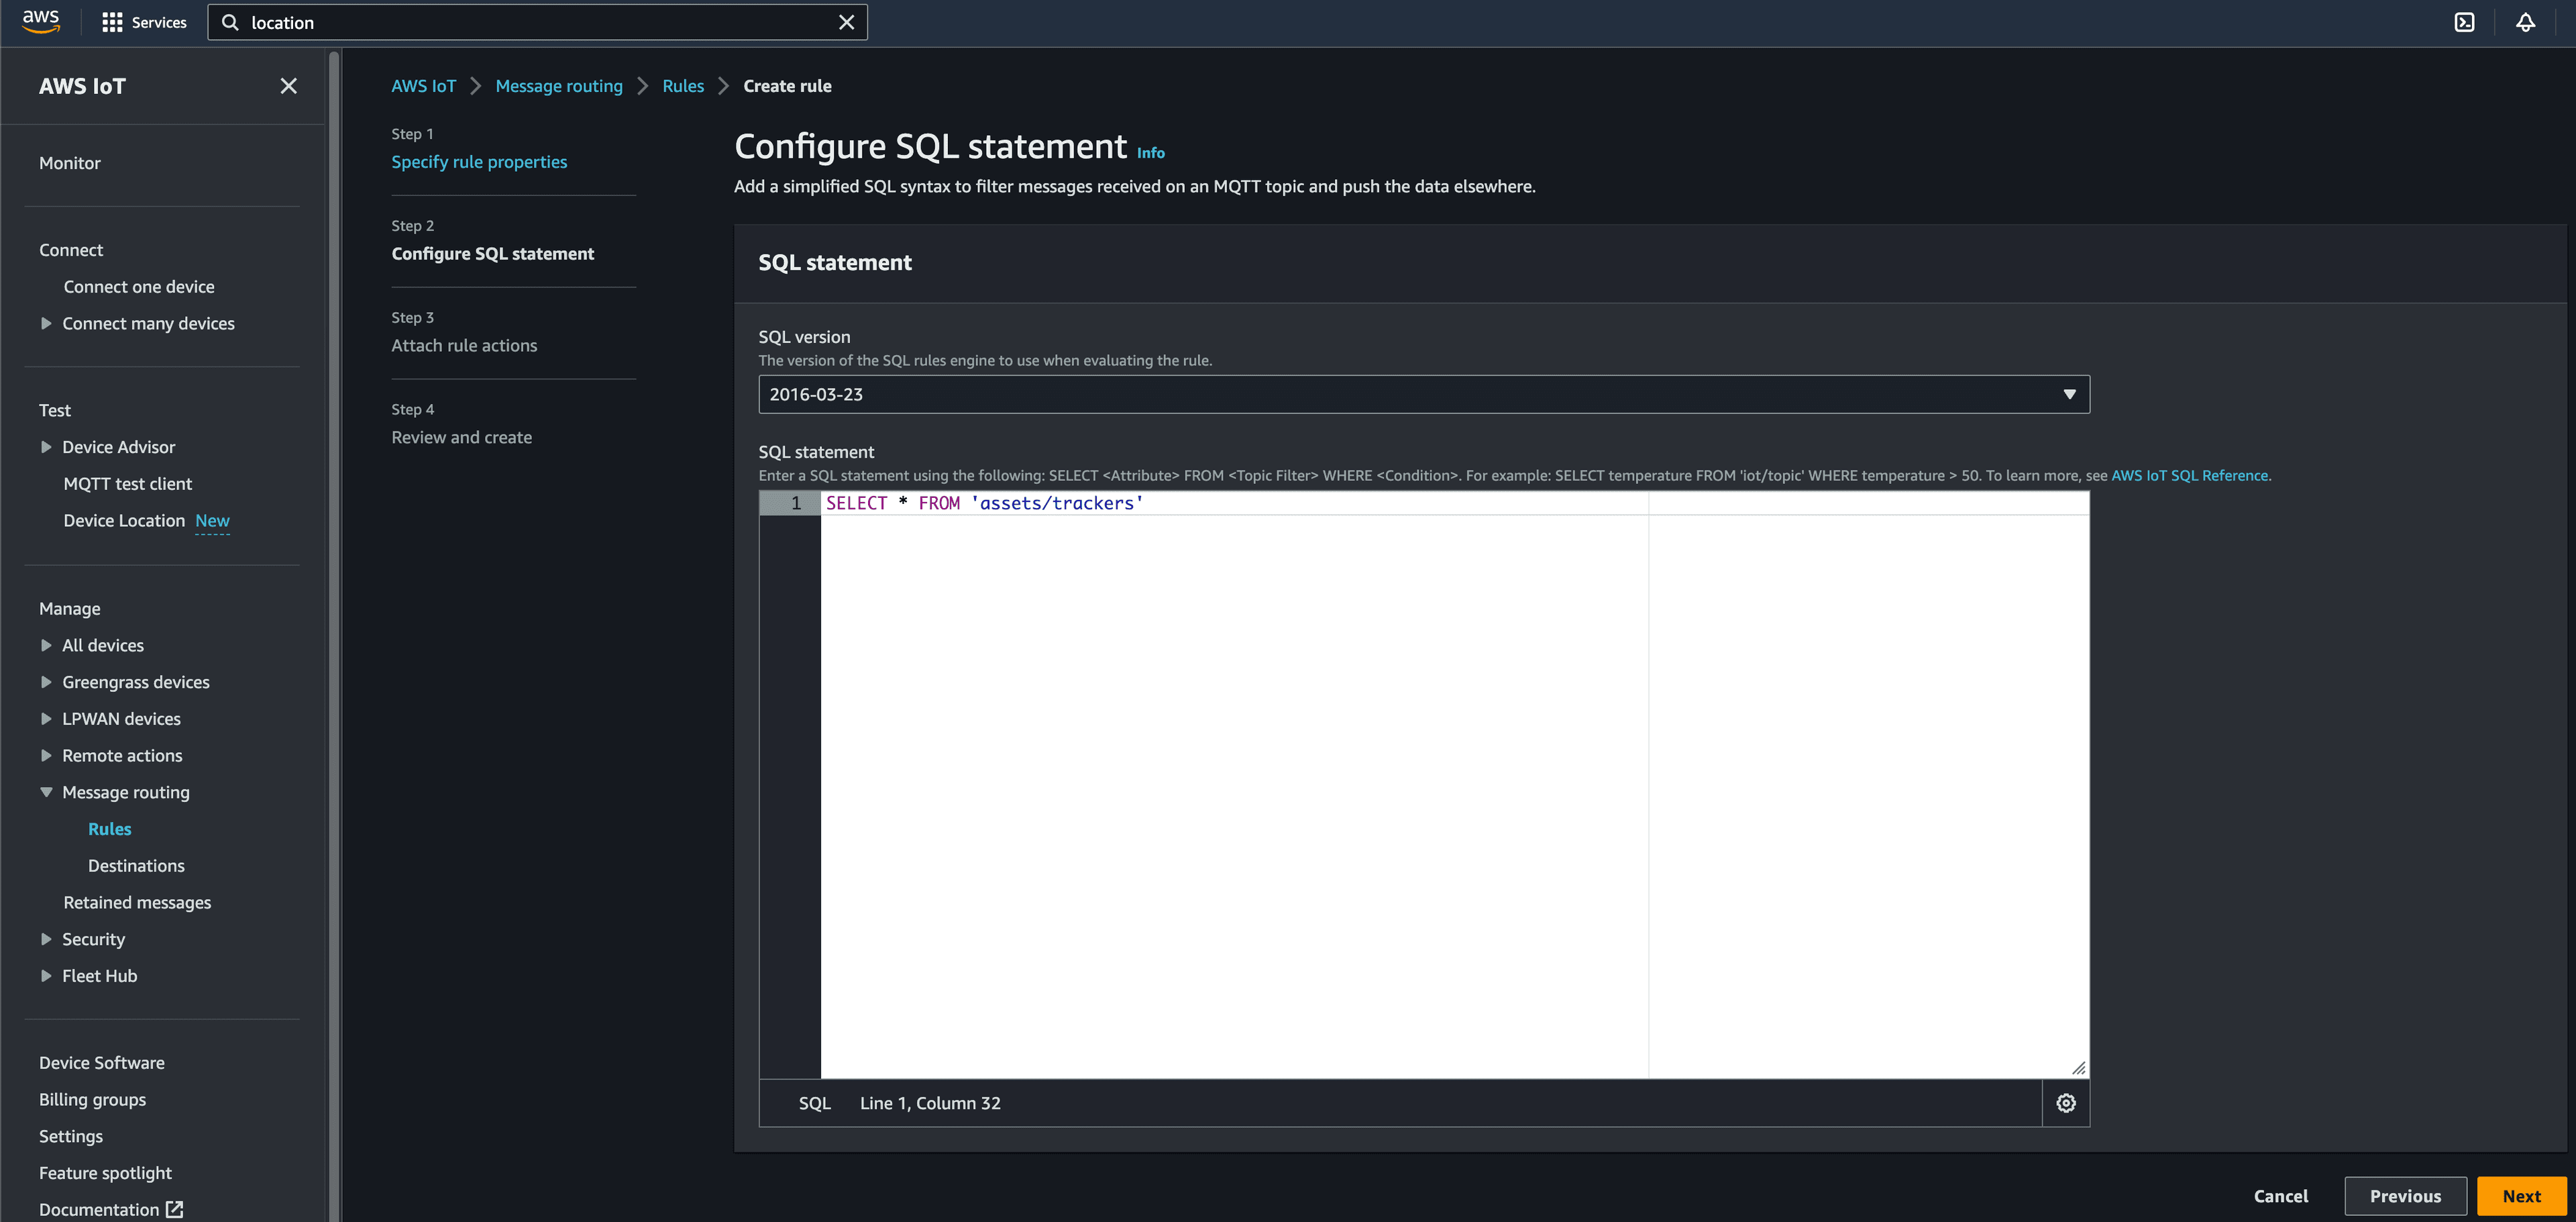
Then click Next.
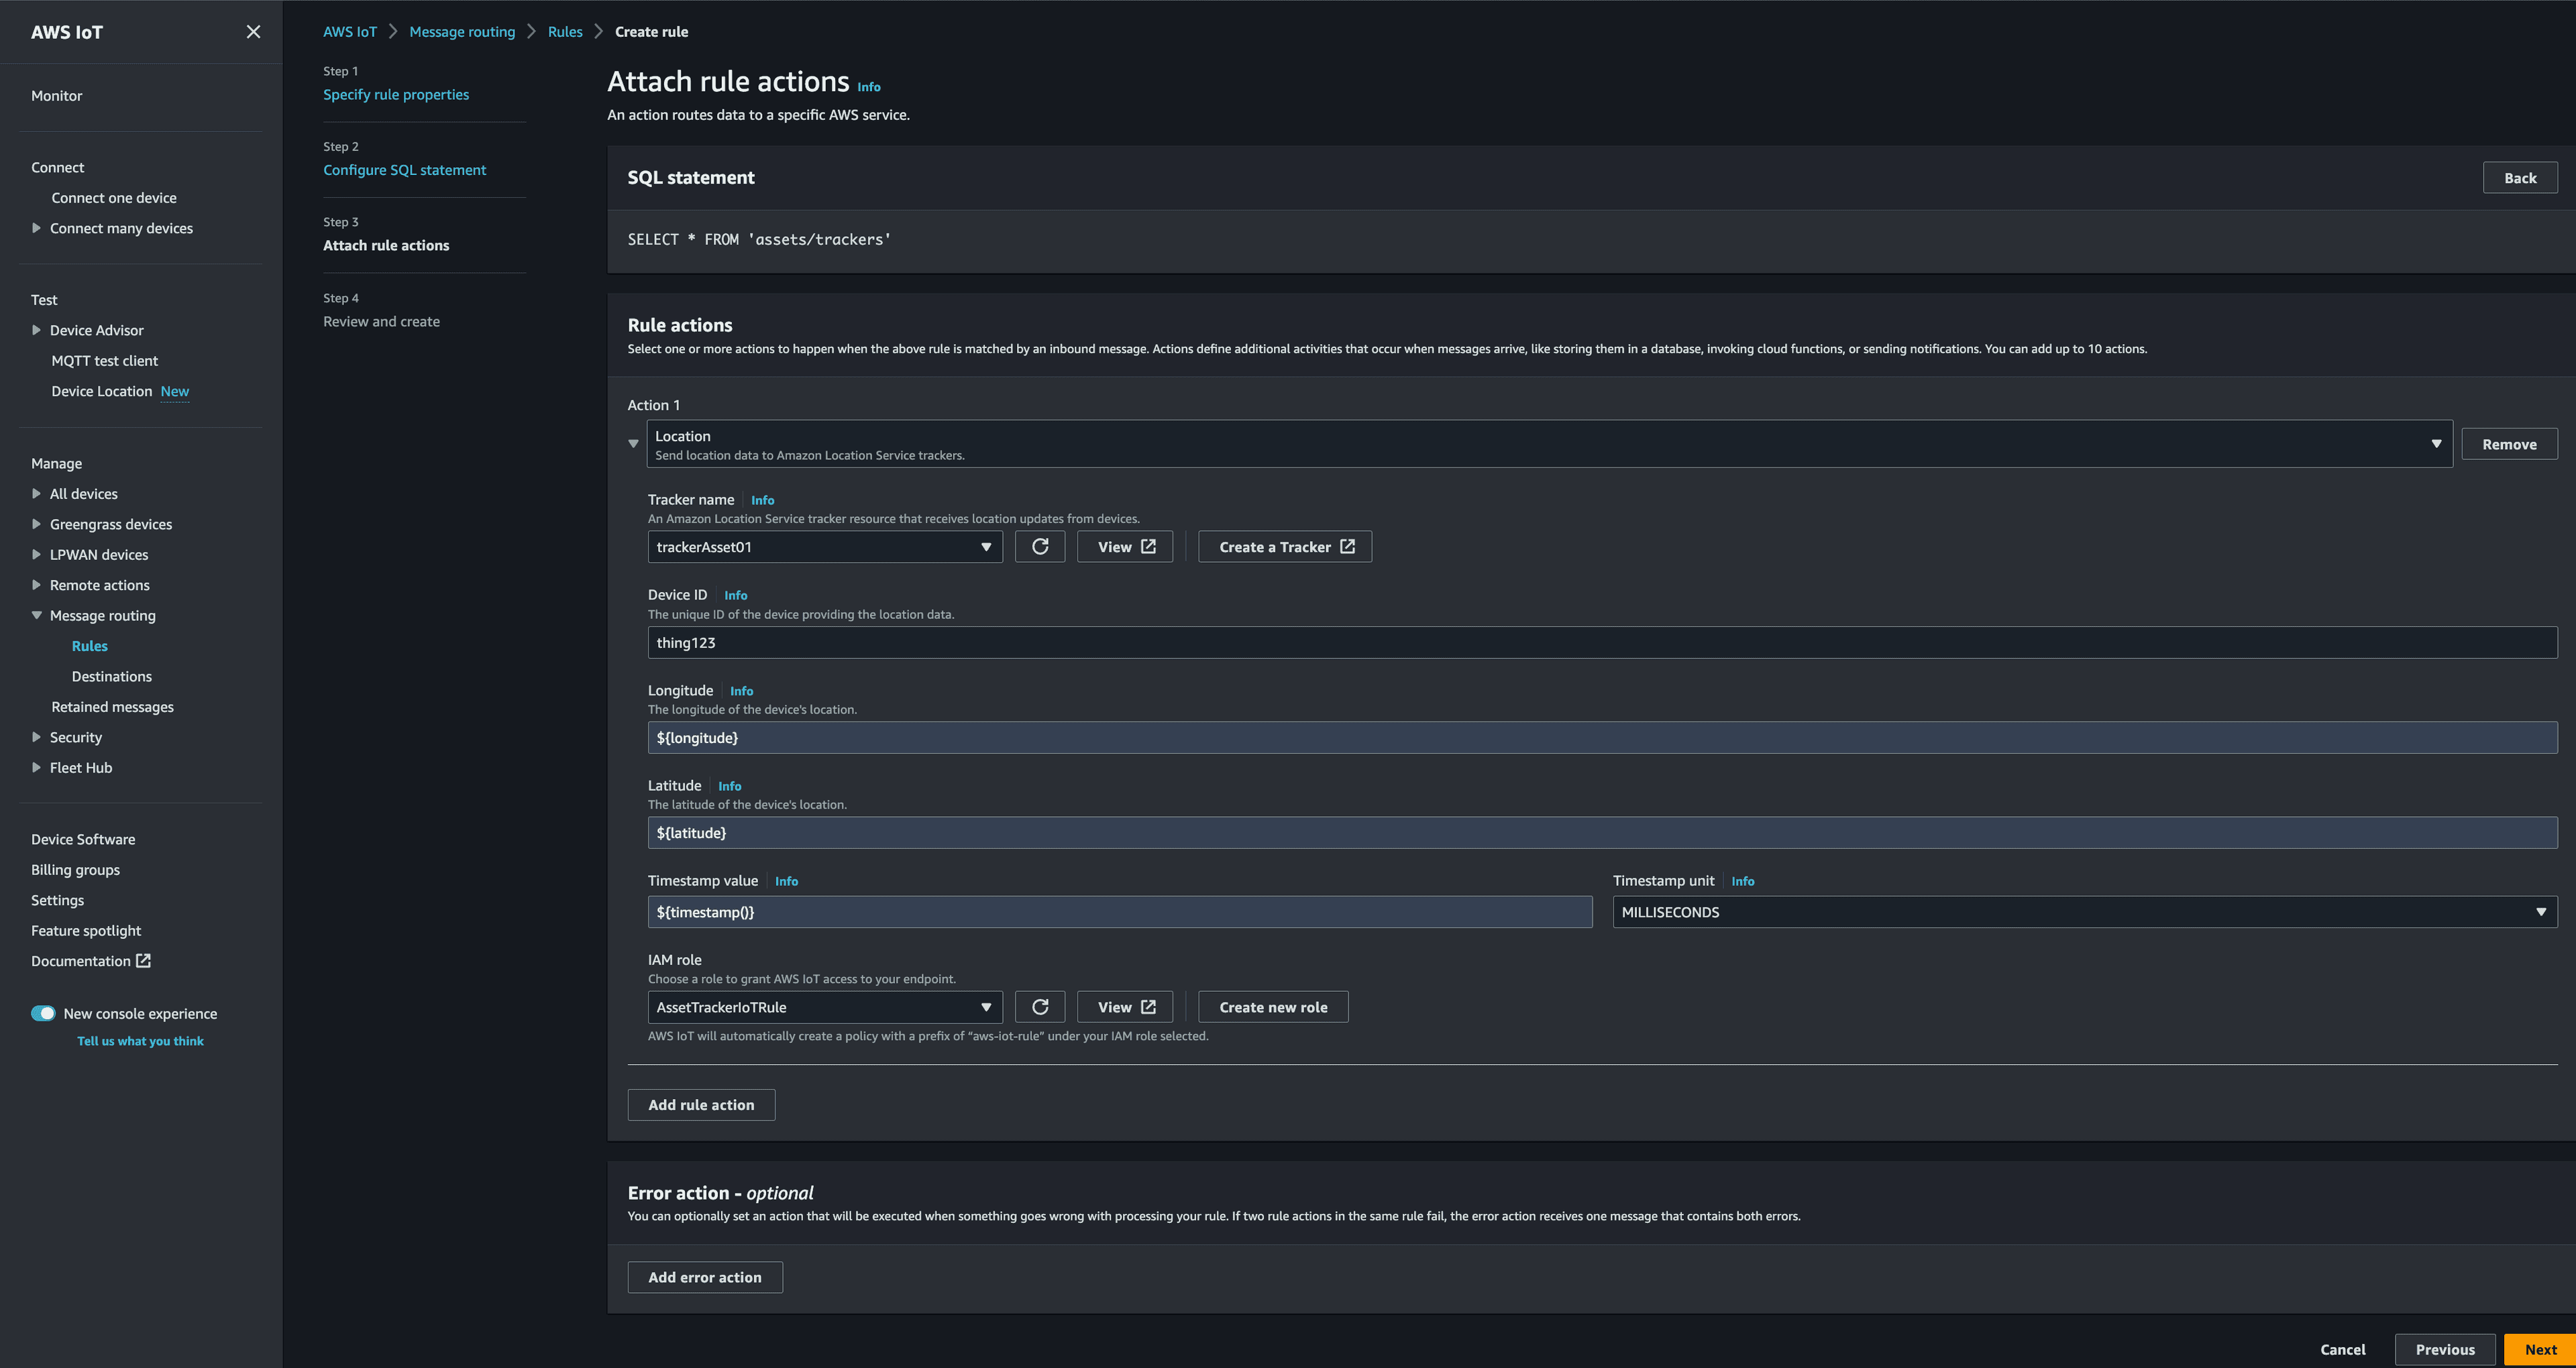
Now it's time to set up our Location Action. Select Location from the Choose an action dropdown.
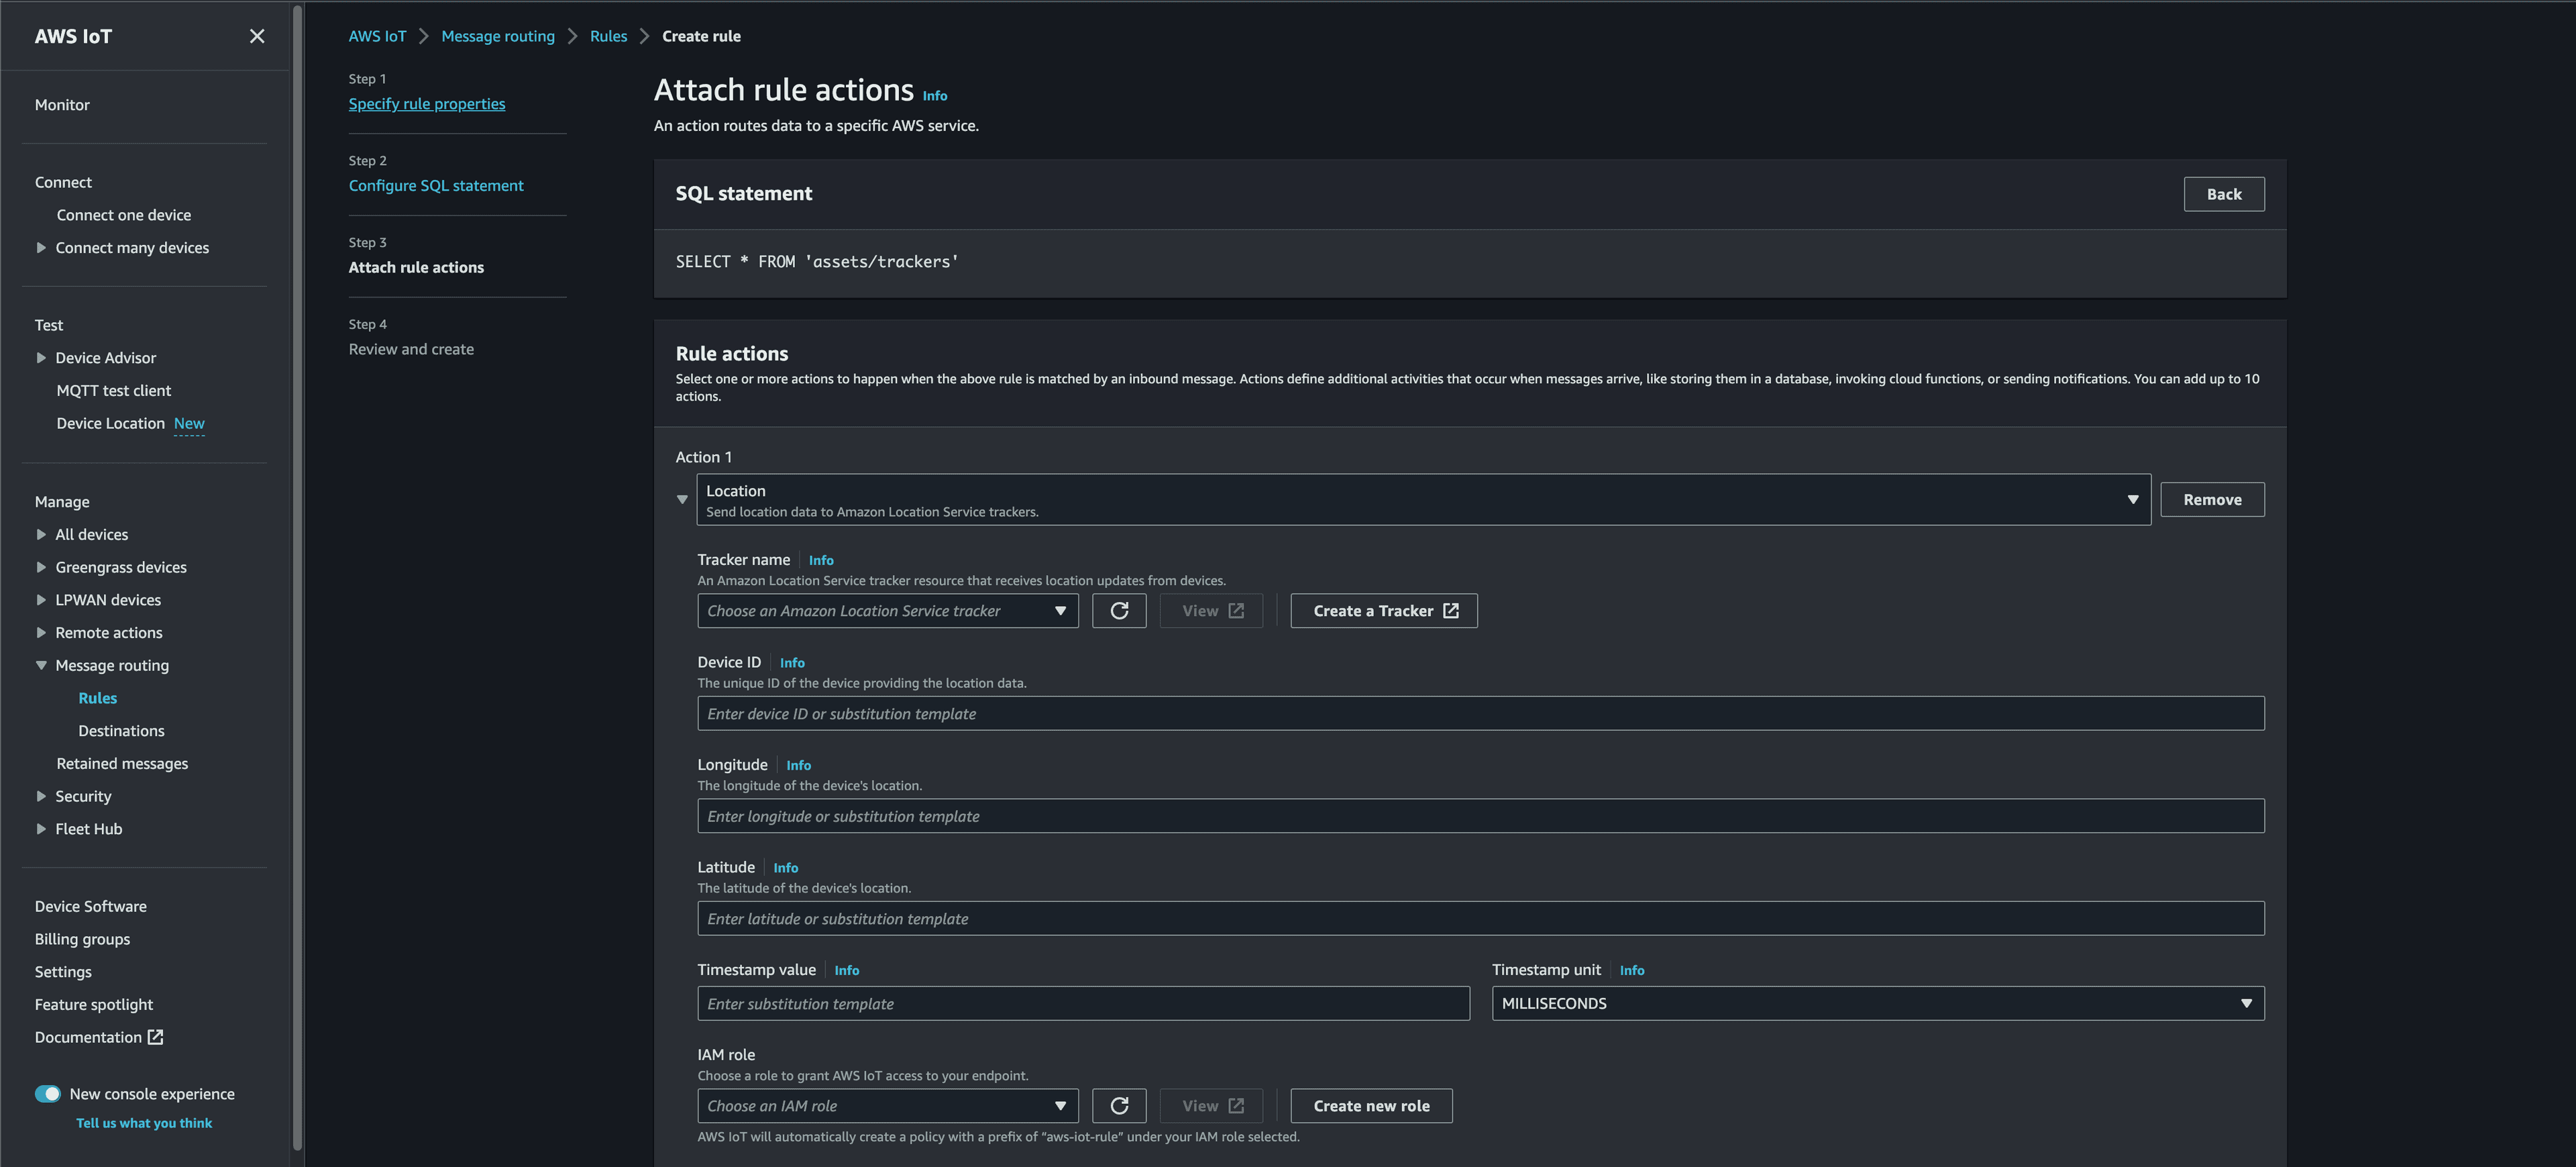
Select Create a Tracker and enter the name
AssetTracker.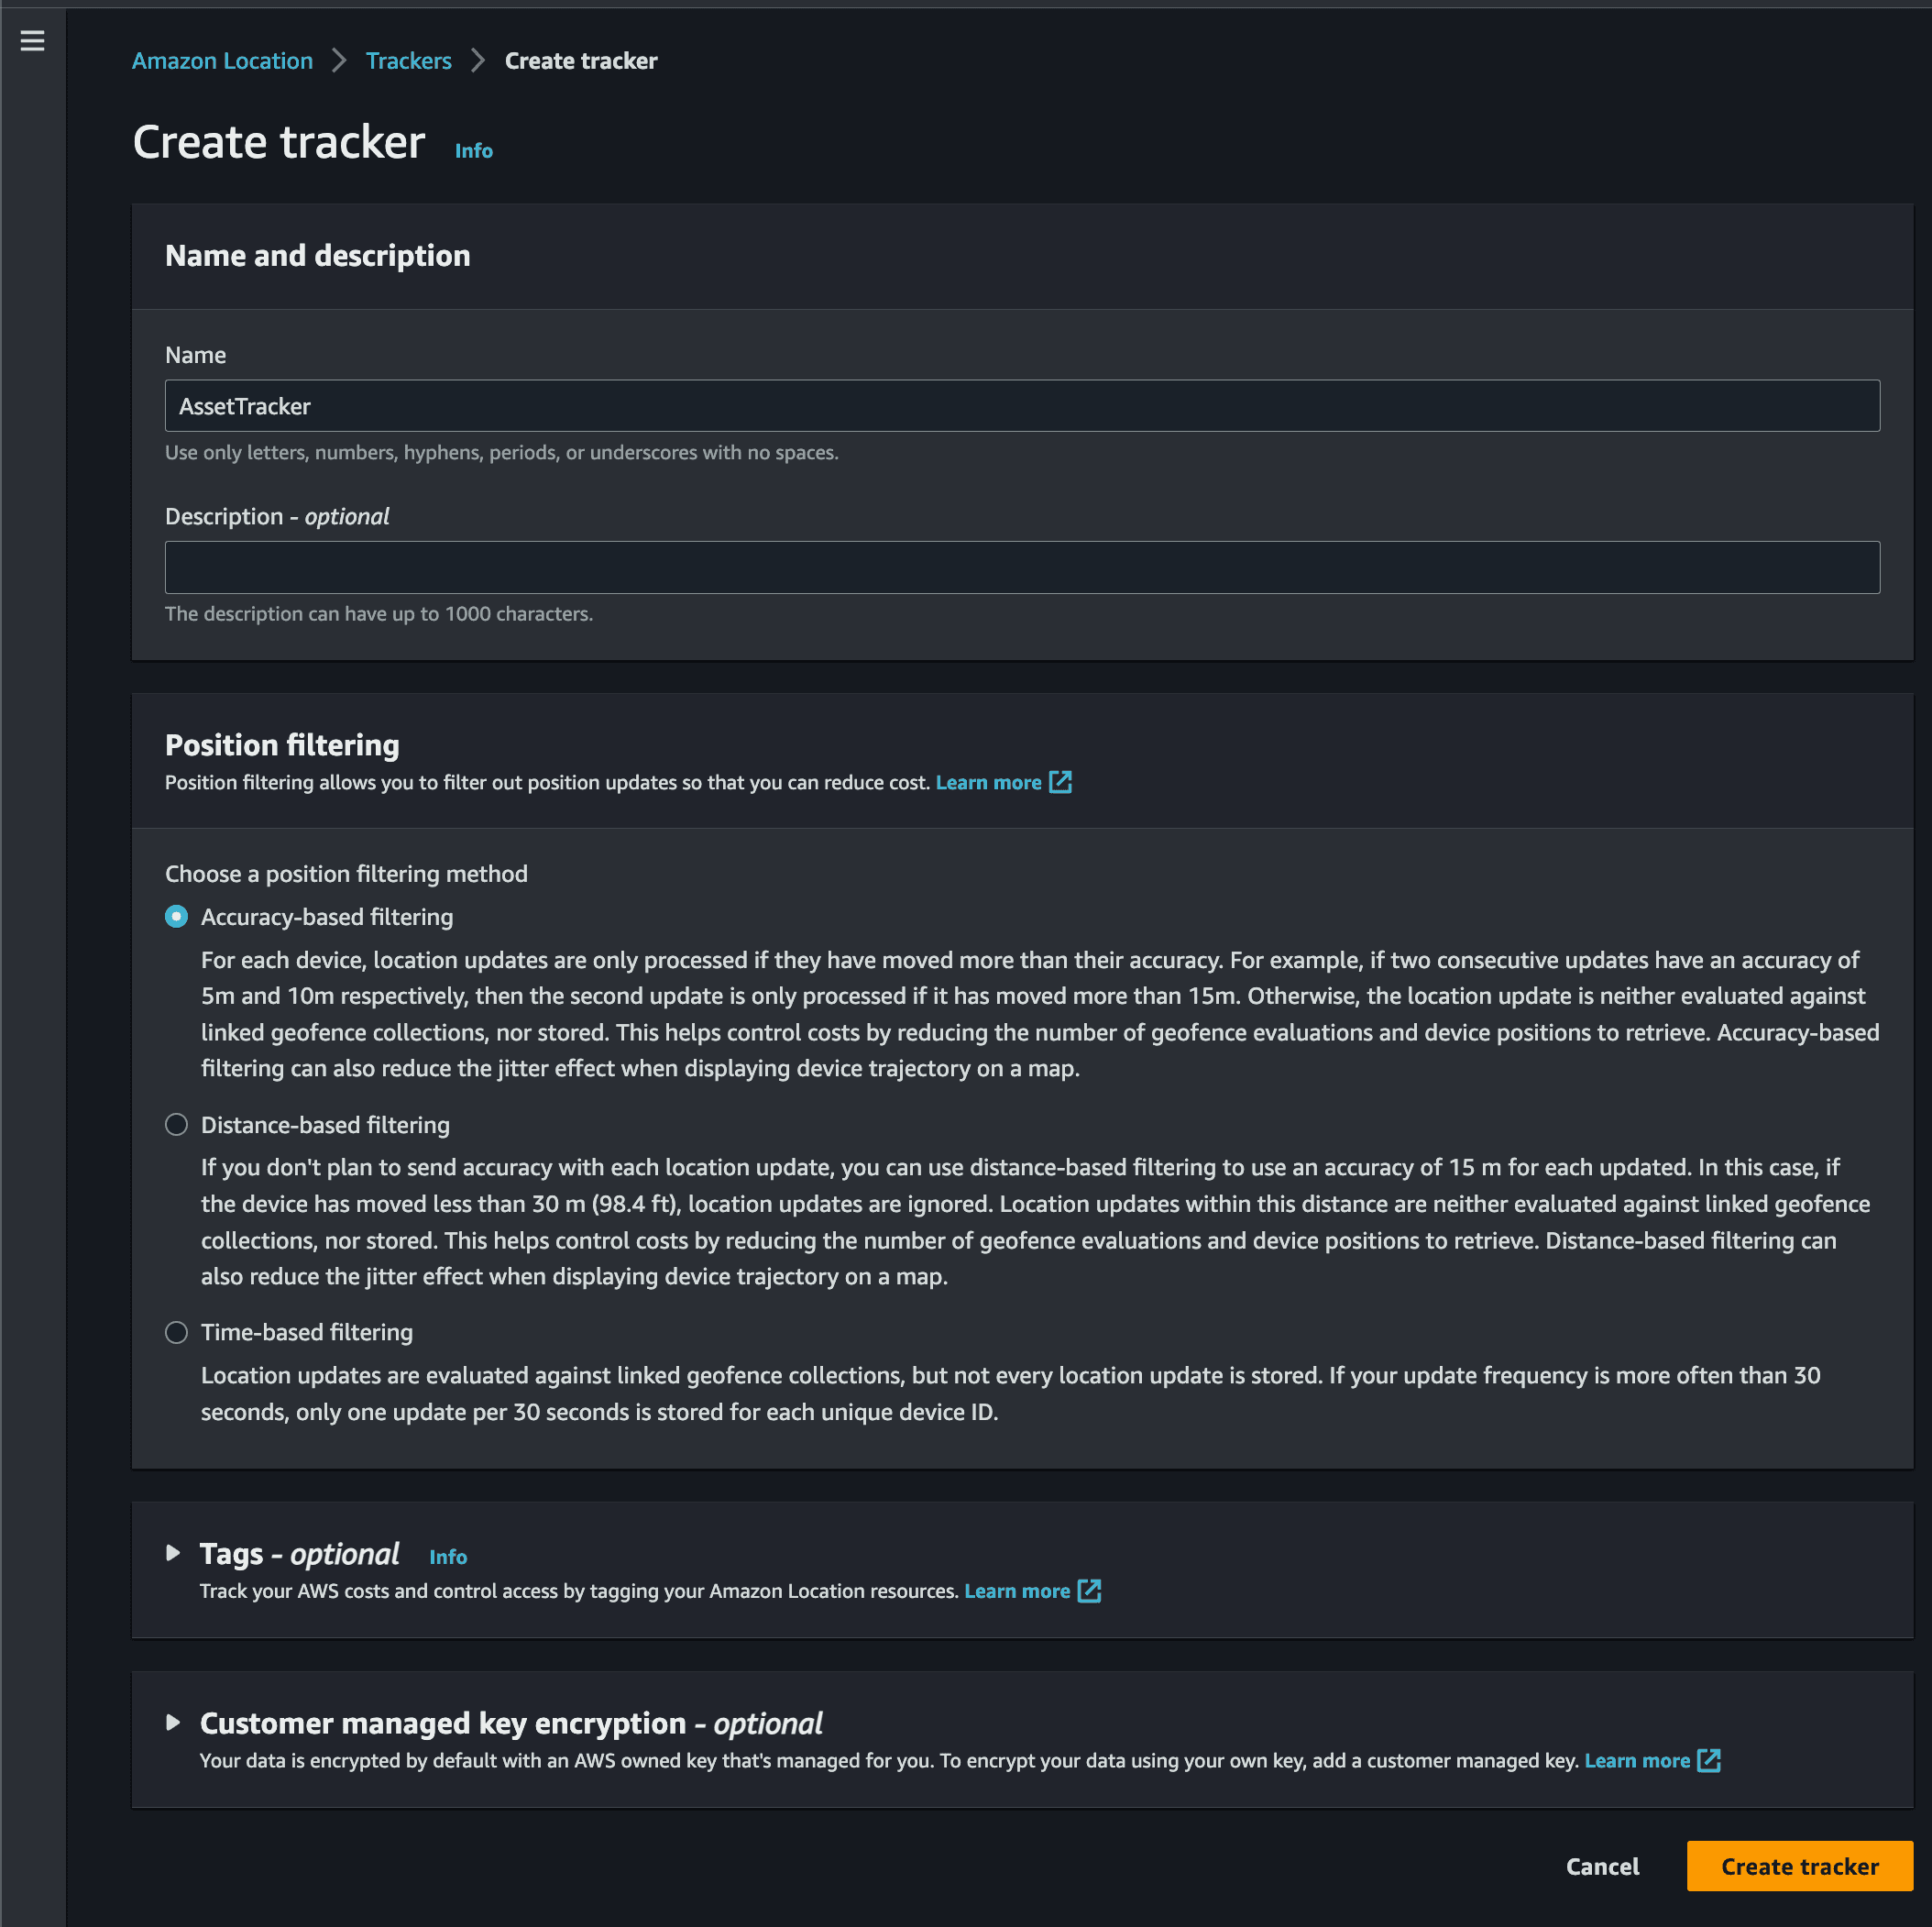
Select Create tracker.
Now we can configure mapping of our payload to the rule. In order to do this, we will use substitution templates in IoT Core. Select trackerAsset01 for the Tracker name dropdown, then, for each field, copy/paste the following values:
Device ID:
thing123Longitude:
${longitude}Latitude:
${latitude}Timestamp value:
${timestamp()}Finally, we need to create a new IAM Role that will give IoT Core Rules Engine permissions to update the Amazon Location Service Tracker resource. Click Create new role, give it the name
AssetTrackerIoTRule and click Create.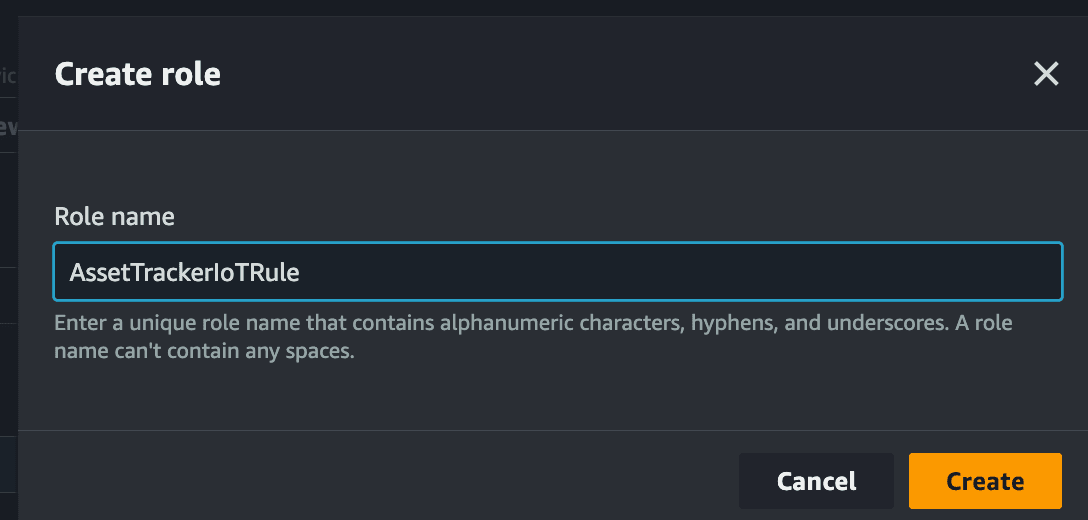
Our configuration should look like this.
Select Next.
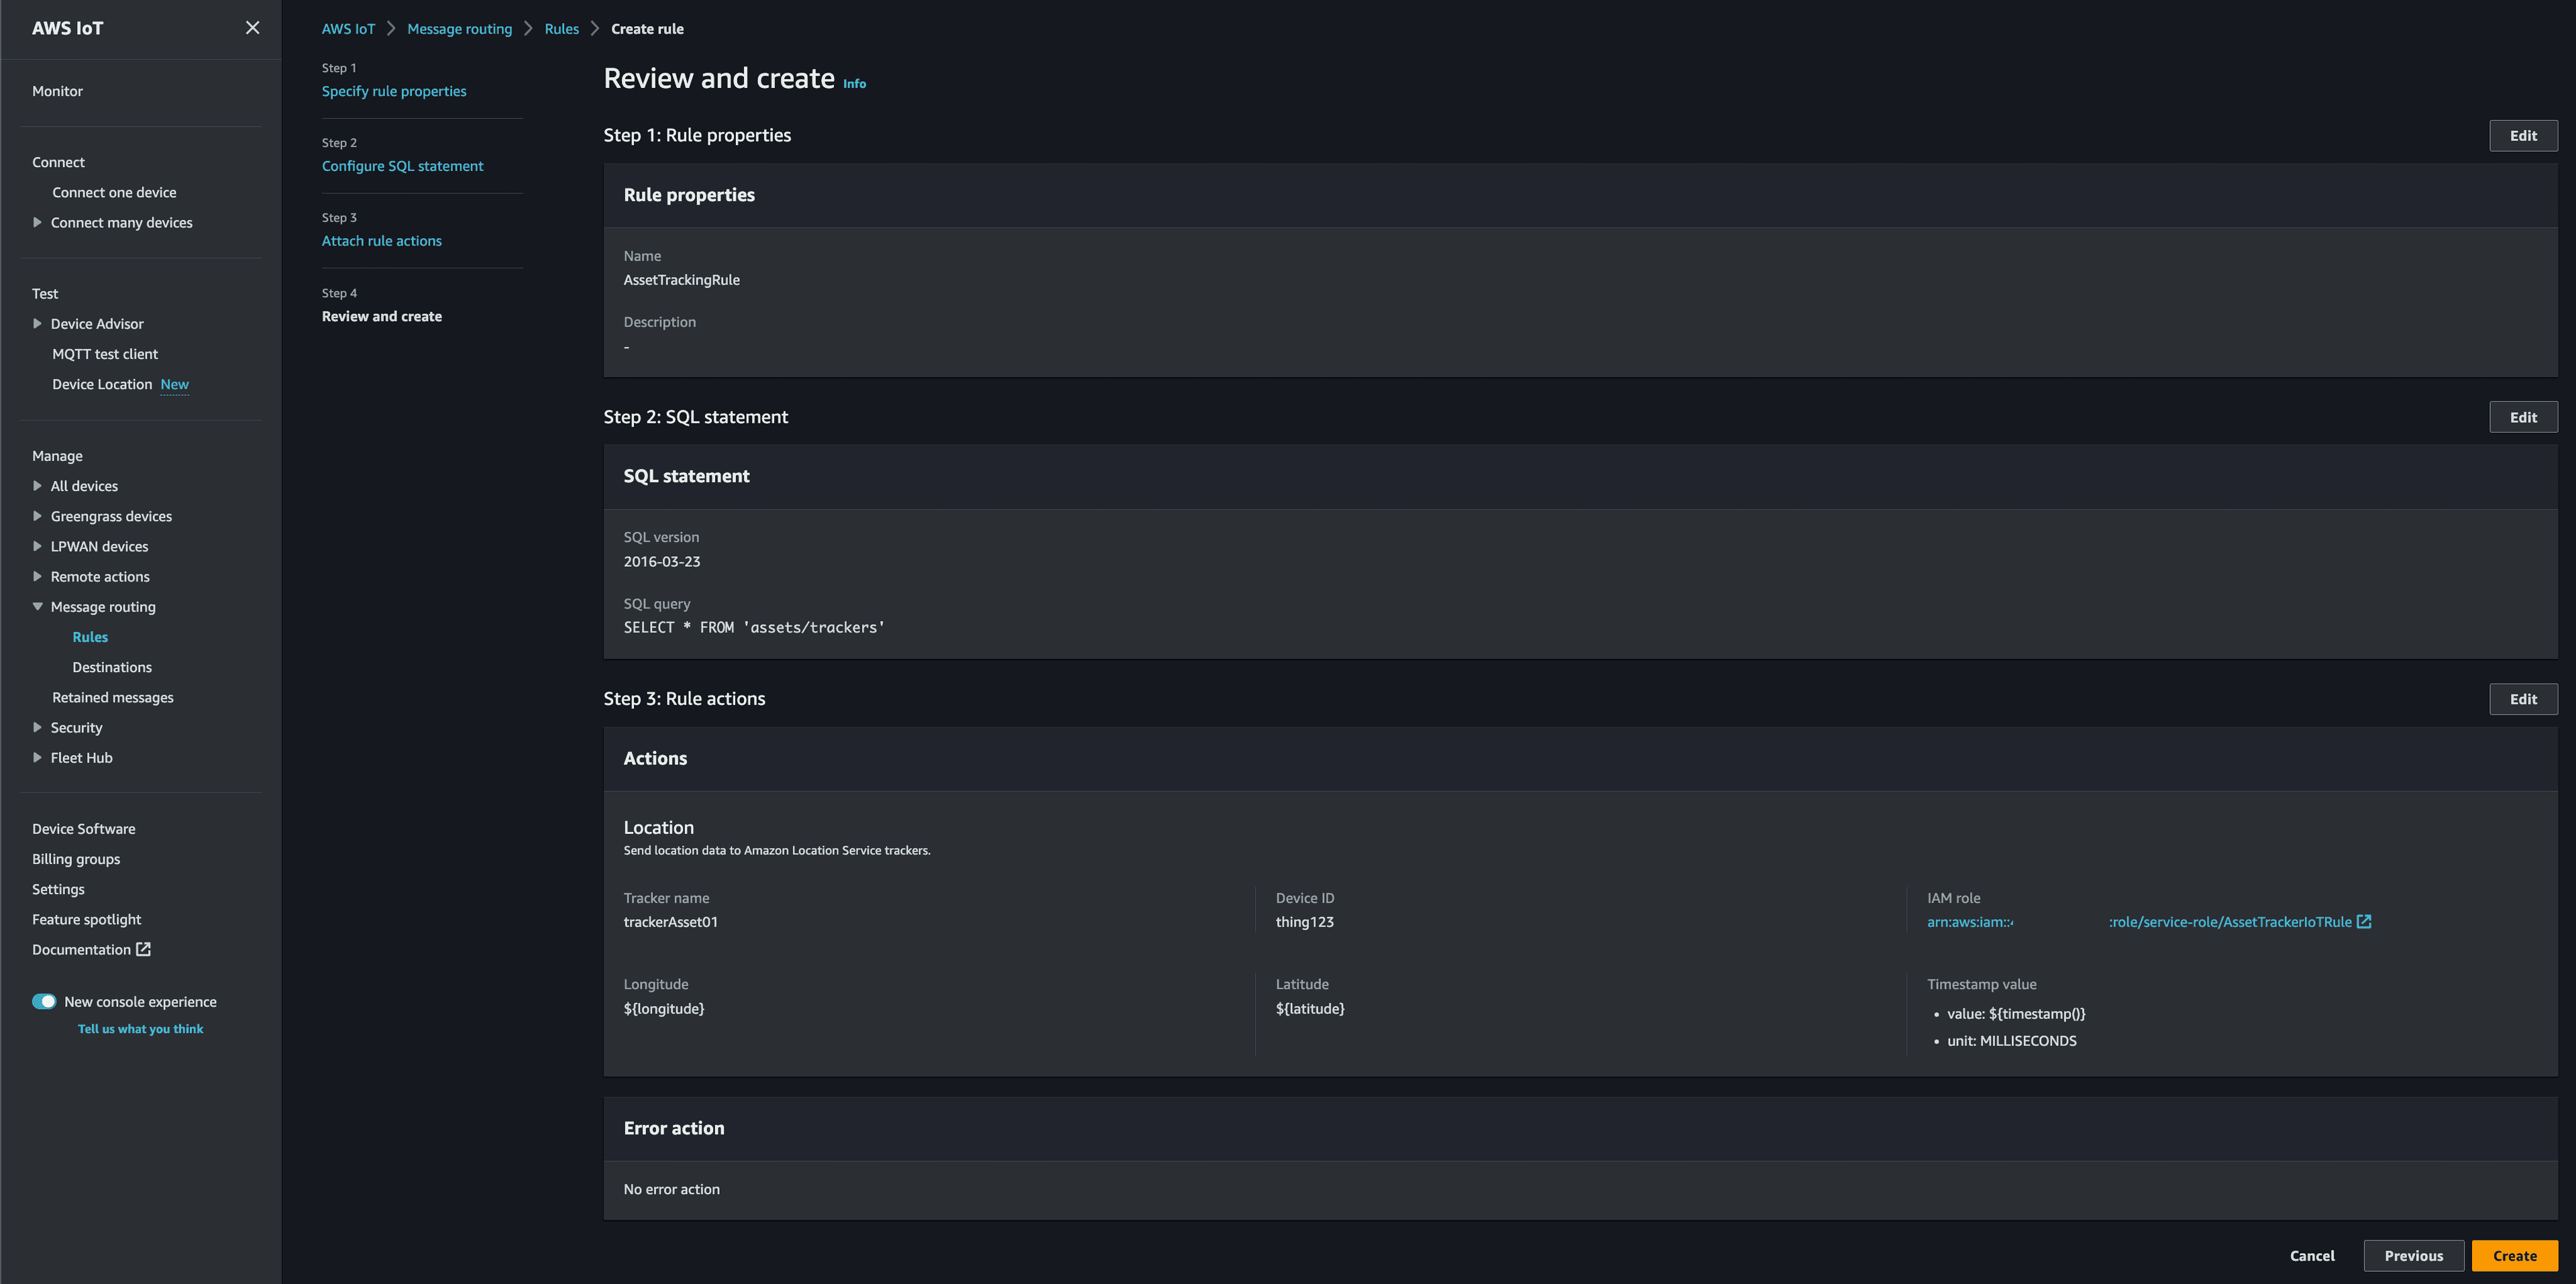
Now select Create.
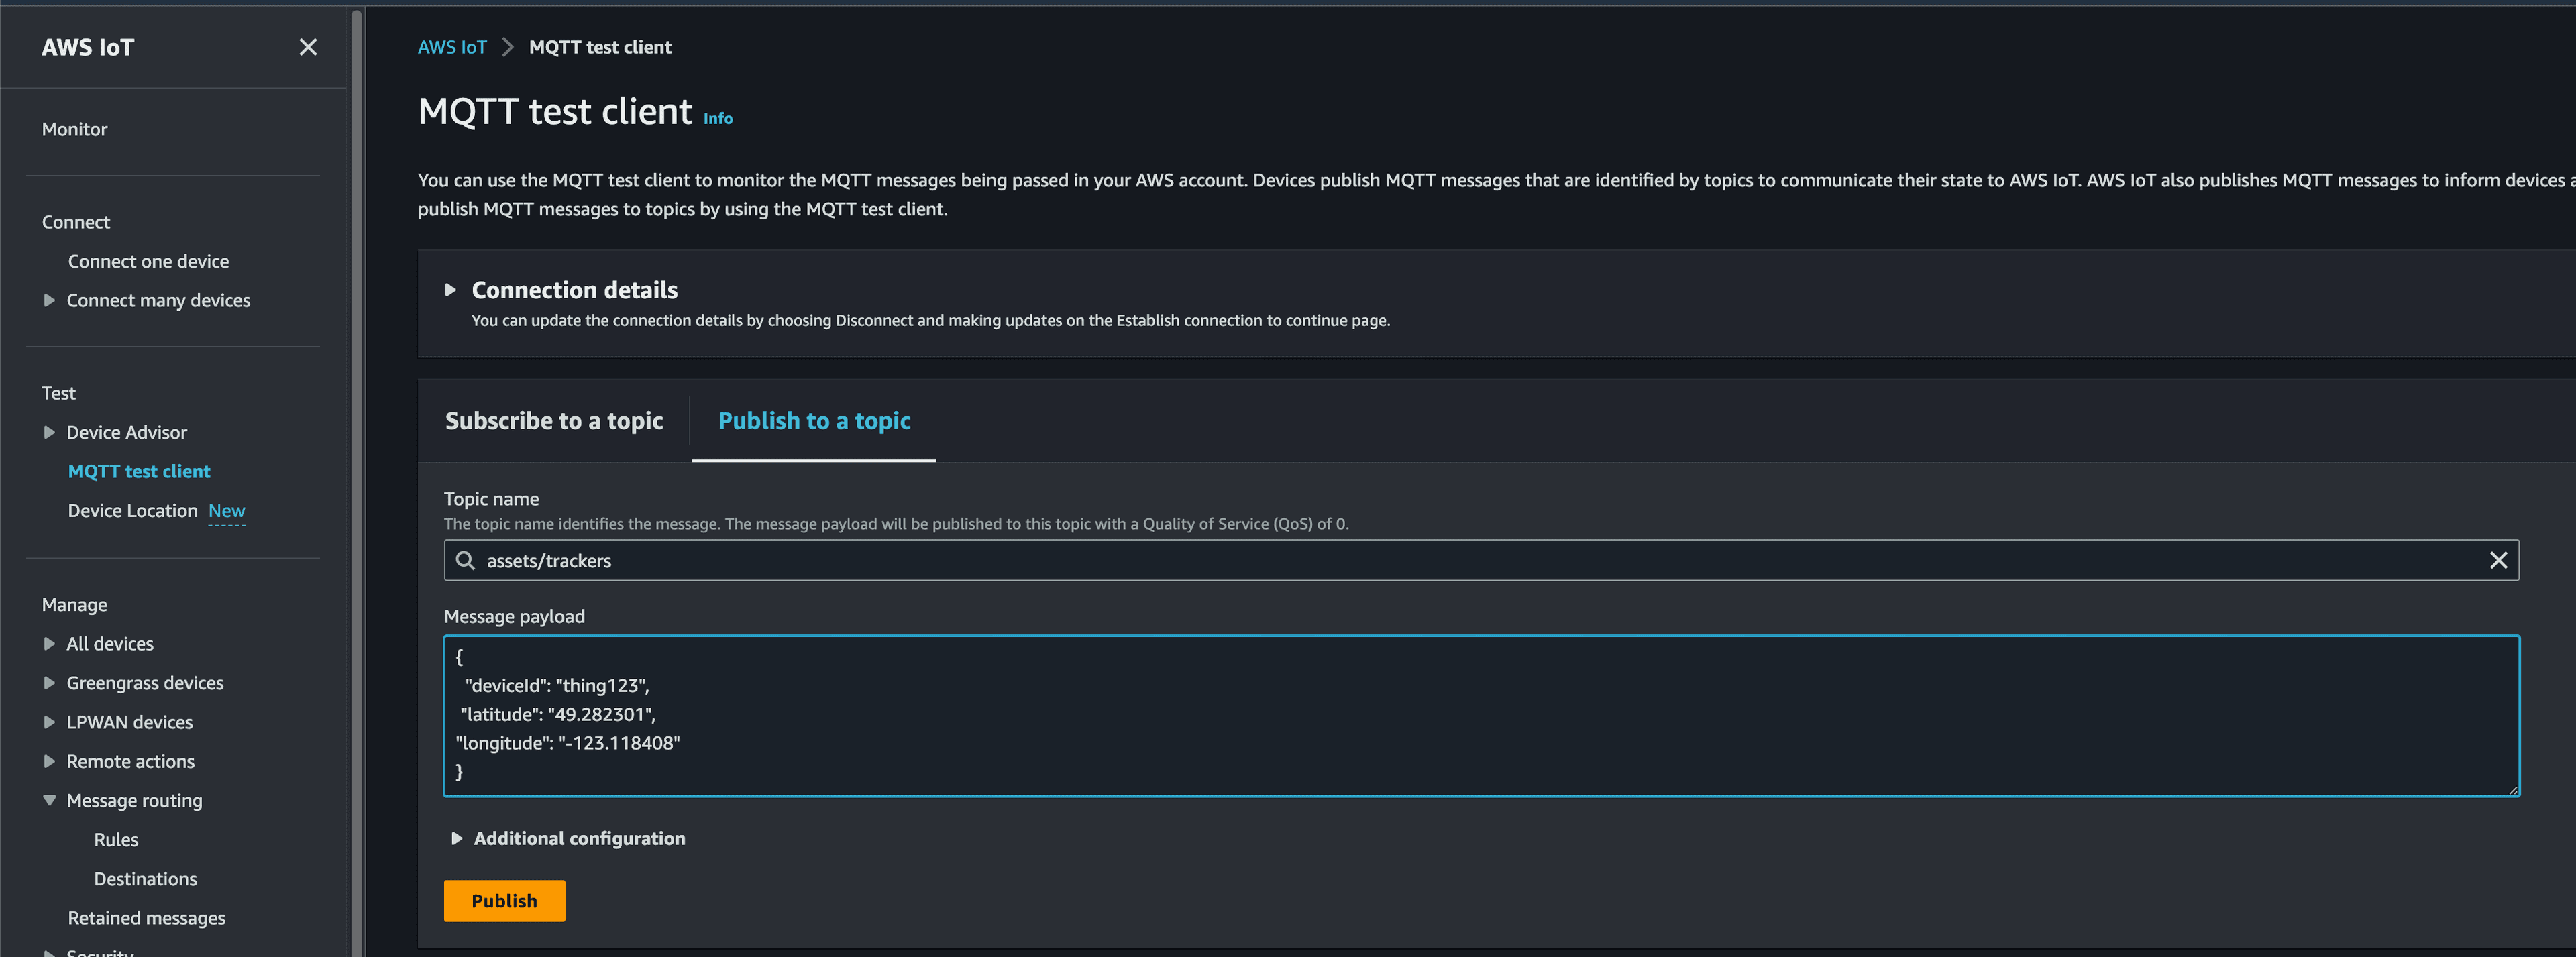
Now that we've created our IoT Core Rule, we can start sending messages.
Now we will send a device location to AWS IoT Core and our MQTT Topic. This simulates a message that would come from an IoT Device such as an asset tracker.
From the IoT Core console, navigate to MQTT test client and select the Publish to a topic tab.
For the Topic name enter
assets/trackerEnter the following in Message payload to send our first point:
Then select Publish.
Navigate back to Cloud9 and your running application. Refresh the application and you should see the point on the map.
Now let's enter another point. In the MQTT test client enter the following, then select Publish:
Refresh the page and you will see a second pin, with a line connecting it with the previous point.
In order to remove resources created as part of this tutorial, we need to complete the following steps.
In order to avoid incurring charges from our Cloud9 Instance, we need to delete the environment. Follow the steps here to remove the
AssetTracking environment.Navigate to the Amazon Location Service console, select Trackers, select
trackerAsset01, and select Delete, confirming you wish to delete it.Navigate to the IoT Core Console, select Message Routing and Rules. Select
AssetTrackingRule and select Delete, confirming you wish to delete it.Now that you've built an asset tracking solution, think about ways to send location information to AWS IoT Core. If you're interested in physical asset tracking devices, check out the AWS Partner Device Catalog or if you are interested in setting up more simulated devices at scale, check out the IoT Device Simulator Solution provided by AWS, which has the ability to simulate a moving device. Finally if you want to learn more about how the web app is built, check out the Amplify Geo documentation.
Congratulations! You just built a simple asset tracking app using AWS Amplify, Amazon Location Service, and AWS IoT Core. If you enjoyed this tutorial, found any issues, or have feedback us, please send it our way!
Any opinions in this post are those of the individual author and may not reflect the opinions of AWS.