Get Started with Amazon SageMaker Data Wrangler Image Preparation
Learn how to use Amazon SageMaker Data Wrangler's image preparation feature to process image data while writing minimal code.


Set Up Your Amazon SageMaker Studio Domain & Dataset
Import Data into a SageMaker Data Wrangler Flow
Image Preparation Step: Corrupt Images
Image Preparation Step: Enhance Contrast & Resize Images
Image Preparation Step: Custom Transform
Export the Prepared Image Data to Another S3 Bucket
Imagine you’re working with state and local governments to respond as quickly as possible to traffic accidents. You’re working to build a machine learning (ML) model that can identify accidents from traffic footage to dispatch first responders to arrive on site. Your efforts are extremely important as they will save lives!
To do this, you’ll need to prepare lots of images to train and build your ML model. But you’re probably not too excited about having to write hundreds of lines of code. Maybe you’re more familiar working with tabular data or aren’t comfortable using libraries that process images. Fortunately, Amazon SageMaker Data Wrangler can help. Data Wrangler reduces the time it takes to aggregate and prepare image data for ML from weeks to minutes. You can use its single visual interface to prepare these images without writing a single line of code. But if the data scientist in you still wants to write some code, Data Wrangler can still help with that, too.
In this tutorial, we will use Amazon SageMaker Data Wrangler to prepare image data for use in an image classification model. The data preparation tasks will be an essential step toward building a model that can recognize, and subsequently respond to, traffic accidents on the road.
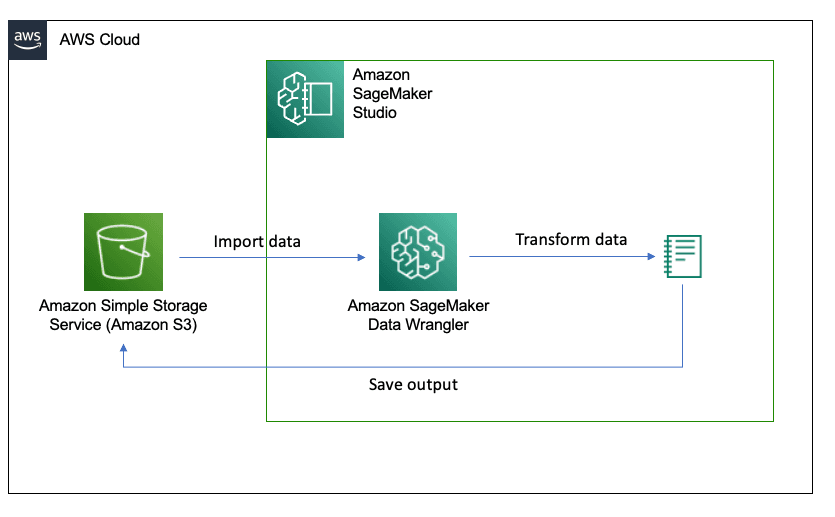
The preceding diagram shows the tutorial's workflow. Once you set up your Amazon SageMaker Studio domain, you will download images of automobile crashes captured from CCTV and upload them into an Amazon S3 bucket. Then you will import these images into Amazon SageMaker Studio to process them.
Why do we need to pre-process images? For the purpose of building an accurate machine learning model, we want to enhance the quality of the images, extract relevant features (like outlines of an automobile), and standardize the data. These are all essential steps to preparing our image data, getting them into a suitable format, and enabling the machine learning model to learn from the data.
For the image preparation steps in Data Wrangler, we'll first handle corrupt or defective images in the dataset. This removes unsuitable images in training our machine learning model. Then we'll enhance the contrast to extract relevant features and resize images to standardize them. Lastly, we'll apply a custom transform to improve the model's ability to detect edges within the images.
Once the transformation steps are complete, we'll export the prepared images to another Amazon S3 bucket. We'll execute the job to process the images. Lastly, we'll clean up the environment so we don't incur charges after we're done.
Before starting this guide, you'll need an AWS account. If you don't already have an account, follow the Setting Up Your AWS Environment guide for a quick overview.
In this tutorial, we will use Amazon SageMaker Studio to access Amazon SageMaker Data Wrangler image preparation and processing.
Amazon SageMaker Studio is an integrated development environment (IDE) that provides a single web-based visual interface where you can access purpose-built tools to perform all machine learning (ML) development steps, from preparing data to building, training, and deploying your ML models.
If you already have a SageMaker Studio domain in the US West (Oregon) Region, follow the SageMaker Studio set-up guide to attach the required AWS IAM policies to your SageMaker Studio account, then skip Step 1, and proceed directly to Step 2.
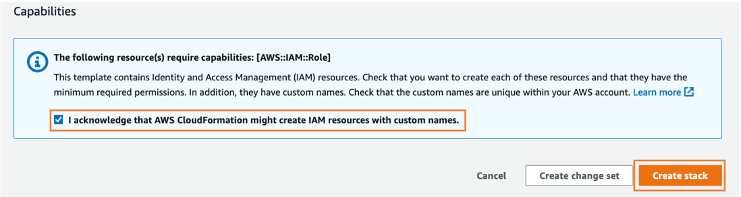
If you don't have an existing SageMaker Studio domain, continue with Step 1 to run an AWS CloudFormation template that creates a SageMaker Studio domain and adds the permissions required for the rest of this tutorial.
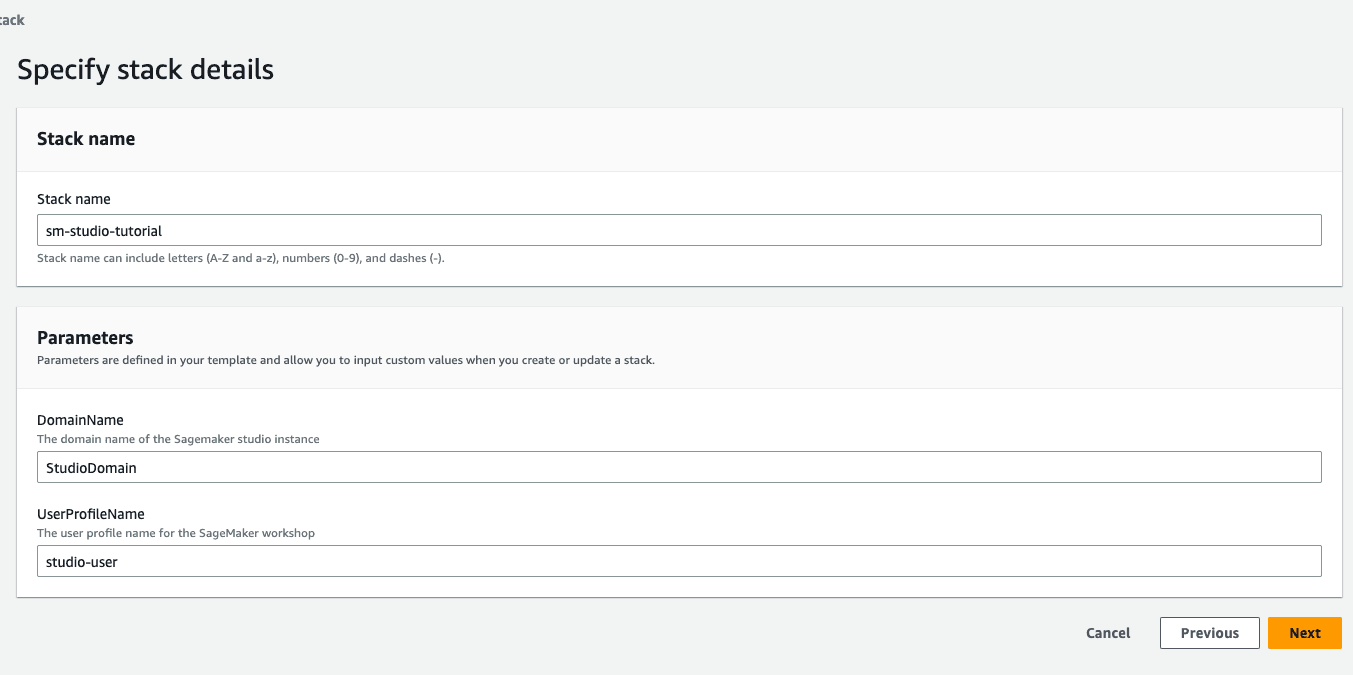
Step 1: Choose the AWS CloudFormation stack link. This link opens the AWS CloudFormation console and creates your SageMaker Studio domain and a user named studio-user. It also adds the required permissions to your SageMaker Studio account. In the CloudFormation console, confirm that US West (Oregon) is the Region displayed in the upper right corner. The stack name should be sm-studio-tutorial and should not be changed. This stack takes about 10 minutes to create all the resources.
This stack assumes that you already have a public VPC set up in your account. If you do not have a public VPC, see VPC with a single public subnet to learn how to create a public VPC.
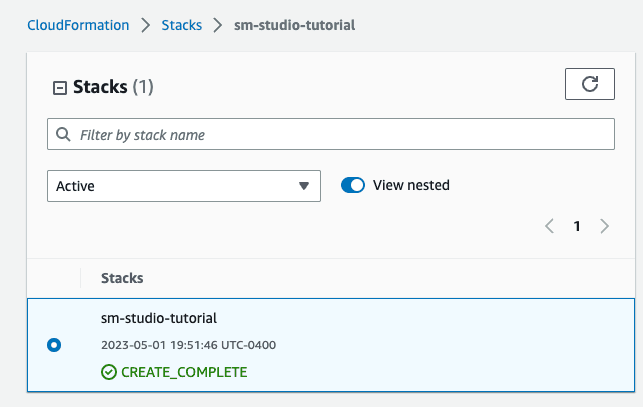
Step 2: When the stack creation completes, you can proceed to uploading some images to an Amazon S3 bucket. Don't worry, we'll get some image files from Kaggle in just a few moments.
SageMaker Studio automatically creates an Amazon S3 bucket within the same Region as the Studio domain. Let's go there now.
We'll place our image files in Amazon S3 so that we can access these images from SageMaker Studio. Amazon S3 is a great place to store images files because it is durable, highly available, and inexpensive! Search for “S3” in the Management Console search bar to navigate to Amazon S3.

You will find a bucket with the name sagemaker-studio-xxxxxxxx. Select that bucket to upload files.

Step 3: Download the files in this sample dataset and unzip the contents. Sample dataset contain CCTV footage data of accidents and non-accidents available from Kaggle. The dataset contains frames captured from YouTube videos of accidents and non-accidents. The images are split into train, test, and validation folders.
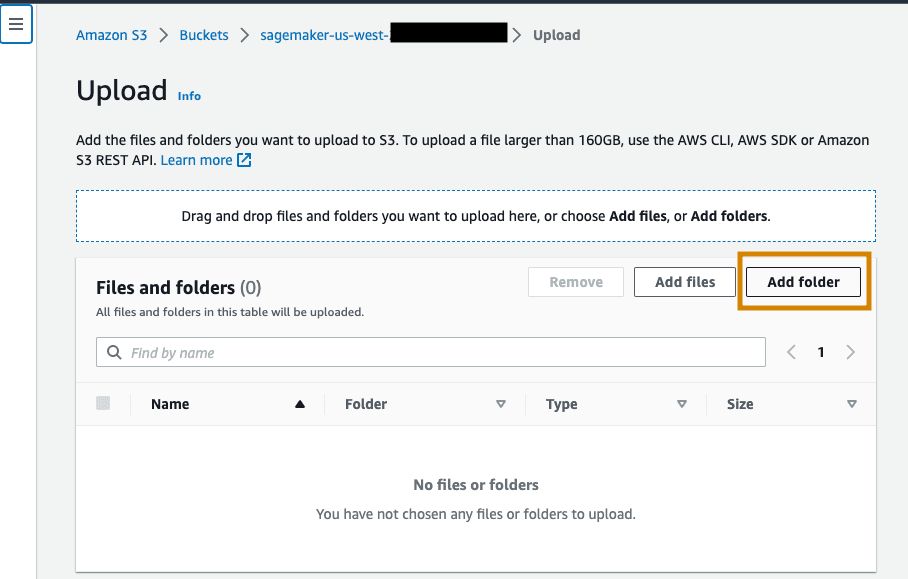
Upload the unzipped contents of the folder by selecting Add folder.
You're all set up! We have Amazon SageMaker studio set up and our images saved in Amazon S3. Next, let's begin working processing our images using Amazon SageMaker Data Wrangler.
In this section, you'll initiate a new Data Wrangler flow within the SageMaker Studio domain. You can use this flow to prepare image data without writing code using the Data Wrangler user interface (UI).
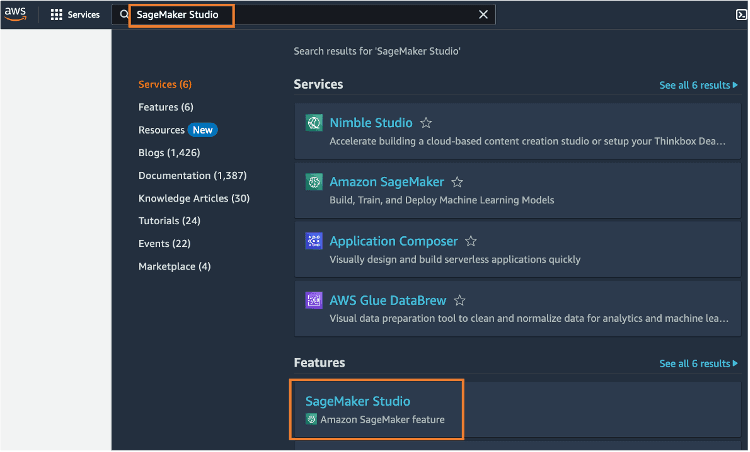
Step 4: Let's first go to SageMaker and get it started. Enter SageMaker Studio into the console search bar, and then choose SageMaker Studio.
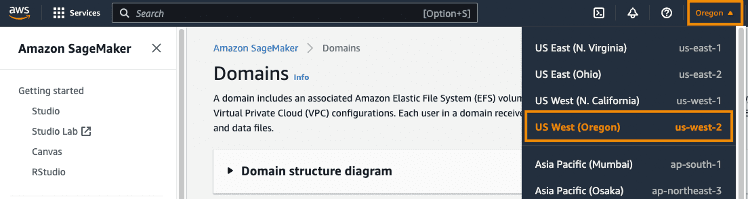
Choose US West (Oregon) from the Region dropdown list on the upper right corner of the SageMaker console. We're choosing this Region because this is the Region where we deployed our CloudFormation template in the previous section.
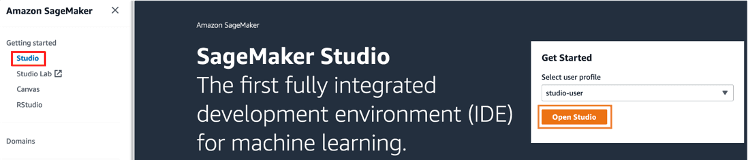
Step 5: To launch the app, select Studio from the left console and select Open Studio using the studio-user profile.
You'll see SageMaker Studio creating the application, which can take a moment to load. Take this time for a short break!
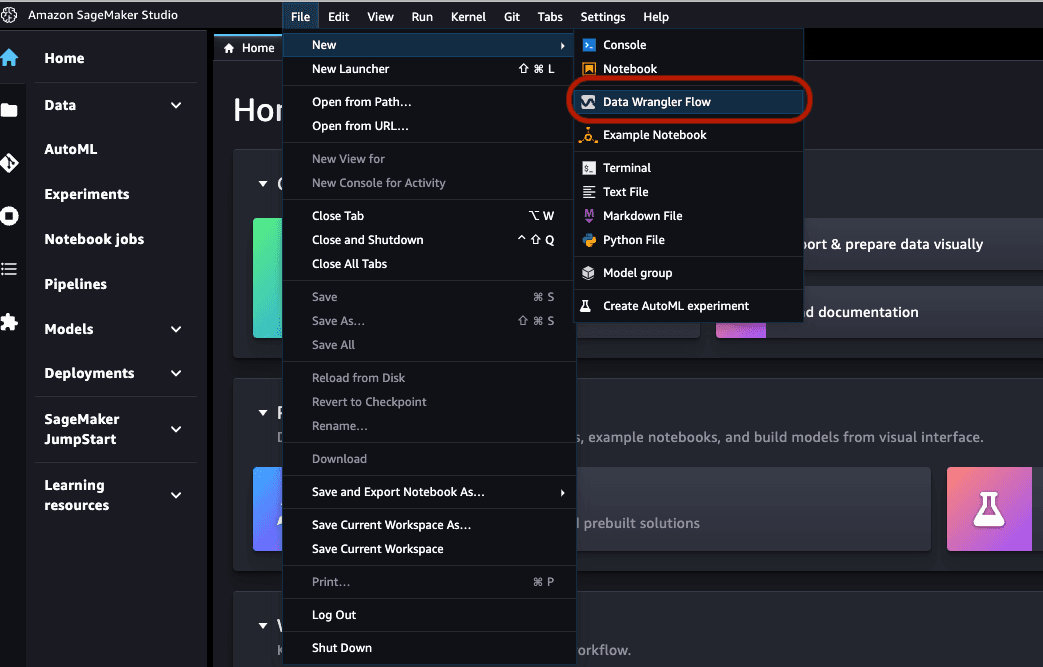
Once it's done, open the SageMaker Studio interface. On the navigation bar, choose File, New, Data Wrangler Flow.
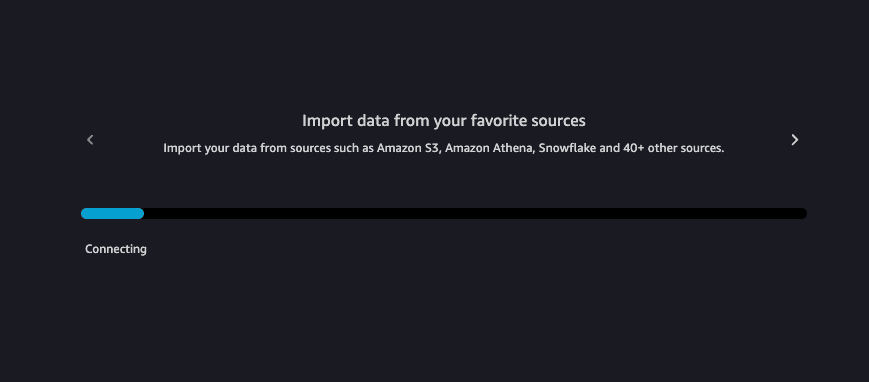
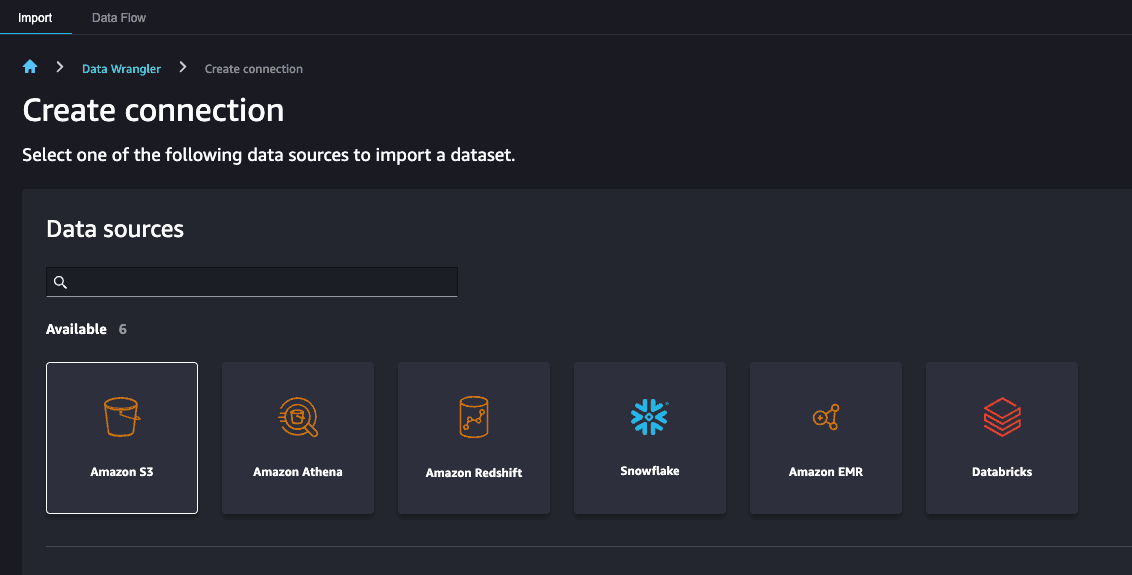
It will take a moment for Data Wrangler to load, but while that's going, notice that you can connect Data Wrangler to multiple data sources. Since we saved our images in Amazon S3, we'll be using that as our data source.
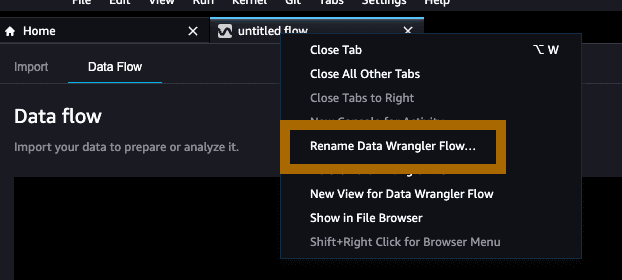
Once Data Wrangler completely loads, you can right-click the flow tab and rename your flow. Rename to whatever you like, or something like car_creash_detection_data.flow.
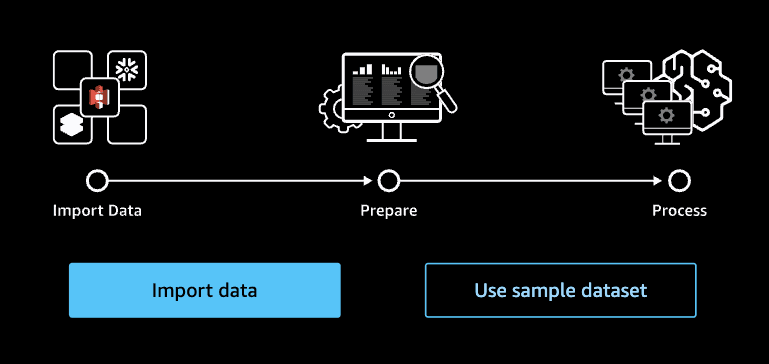
Step 6: We have a flow and we have data in S3. Let's bring data into our flow. Select import data to begin loading data in the flow.
Select Amazon S3 as the data source and navigate to the Amazon S3 bucket containing the image dataset from the section before.
Navigate through the folder prefixes toward the data/train prefixes and select the accident prefix. On the right-hand side, under ‘Details’, choose image as the file type. Select Import.
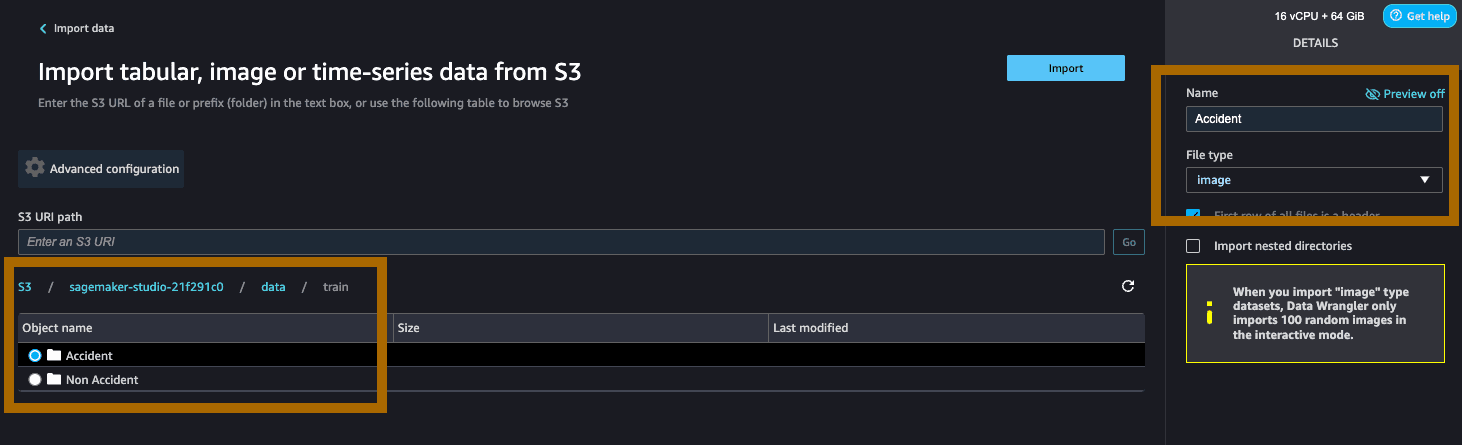
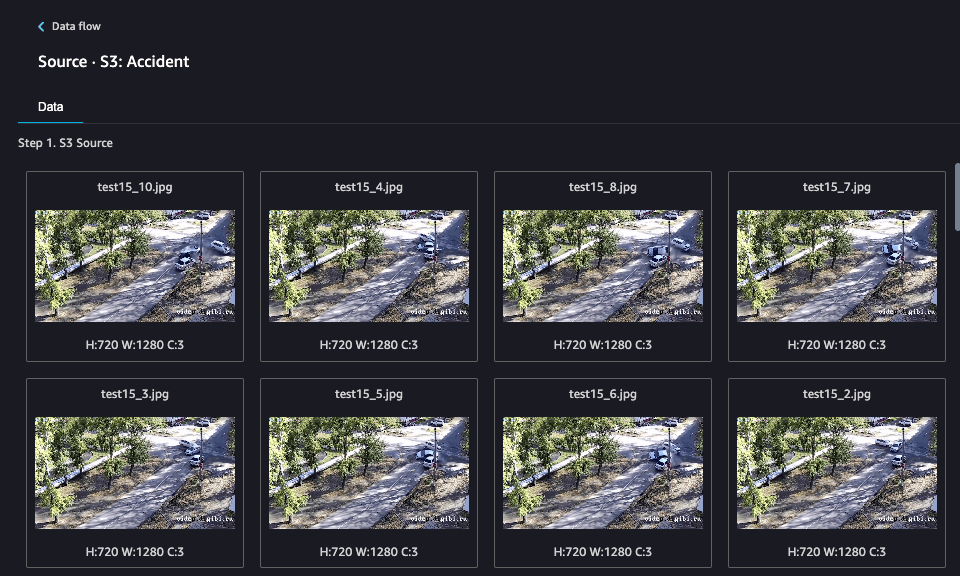
If you noticed, Data Wrangler only imports 100 random images. This makes sense because you'd be here all day if it imported everything, and even longer if you had more images! After a moment, Data Wrangler will display the images in the UI.
Step 7: We have our data in our flow. We can now transform our data to build an accurate model. In this section, you'll use Amazon SageMaker Data Wrangler built-in transformations to run a series of image transformations steps. Hopefully this helps you become familiar with Data Wrangler’s image transformation capabilities. Image data transformation is one way to build a more robust model – augmenting your data image not only increases the size of your training set, but also helps the model generalize better.
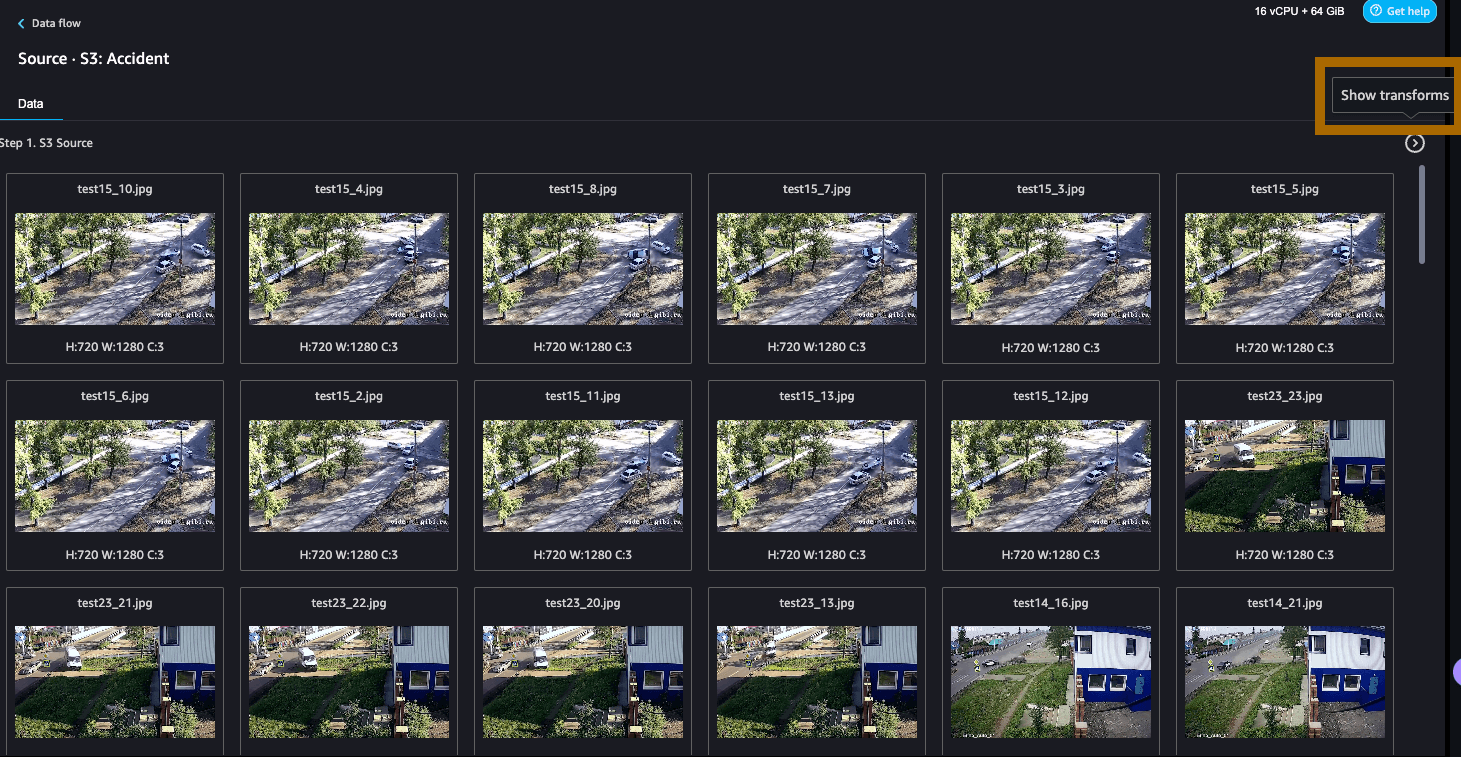
If you cannot see the option for Add step, select the > icon to show transforms
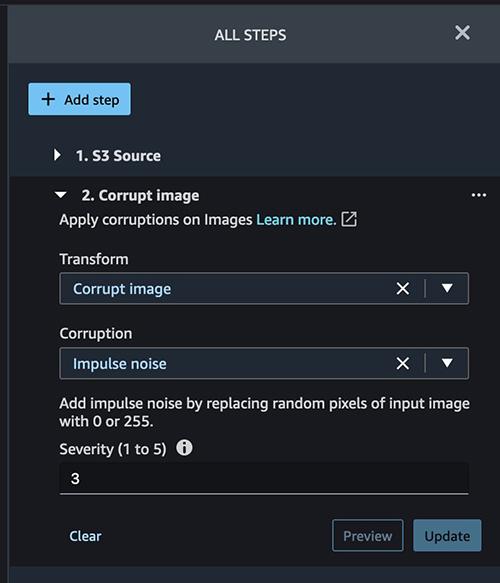
Select Add step and then Corrupt image.
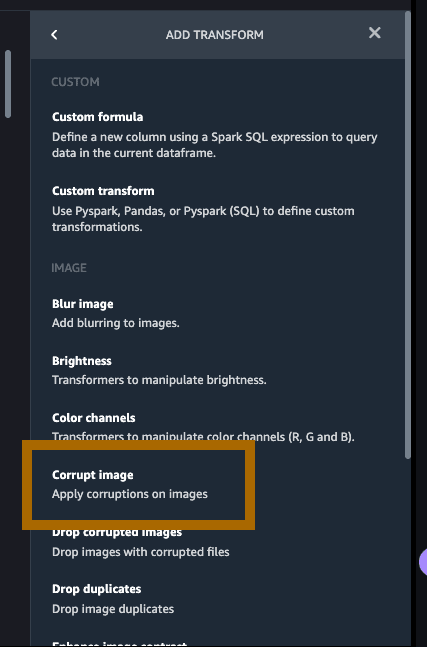
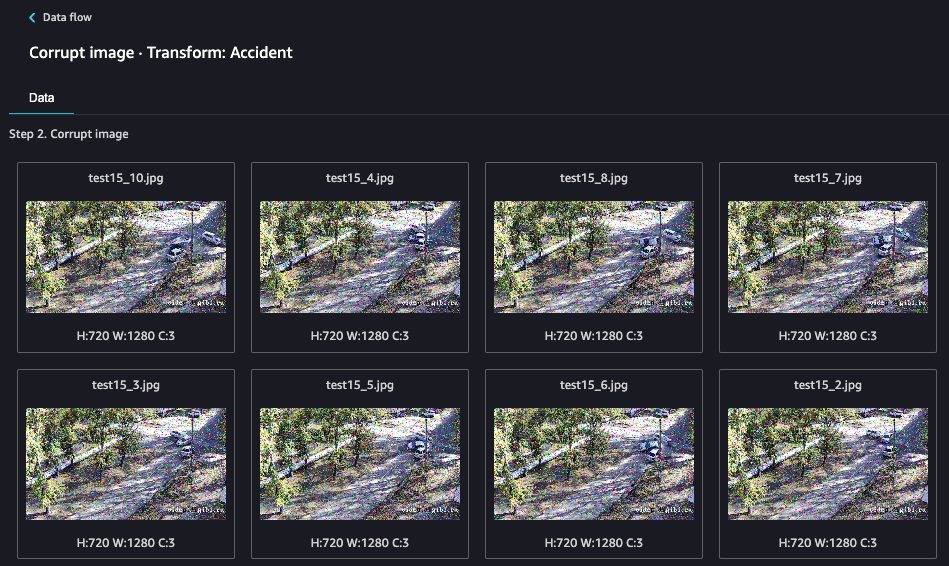
We're intentionally corrupting the images here to train our model to detect accidents even when it sees corrupt images in the real world. Impulse noise is often also known as salt-and-pepper noise which is a term used when images have dark spots, broken pixels, and otherwise sudden disturbances in image quality. Let's set the Corruption set to impulse noise and a severity of 3. Click on Preview and then Add.
After a moment the step will complete. This helps to train our model since not all images data are in beautiful 4K resolution.
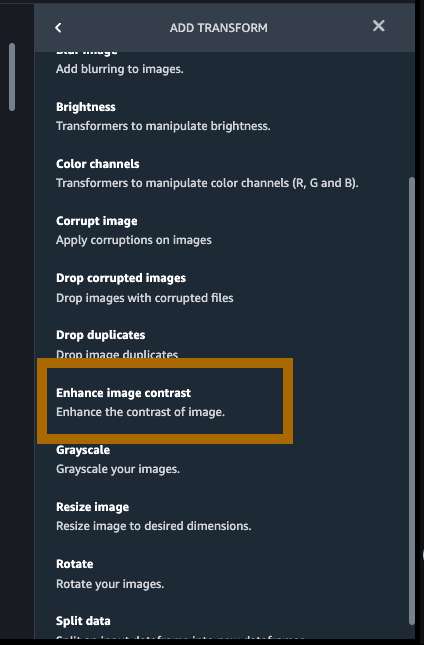
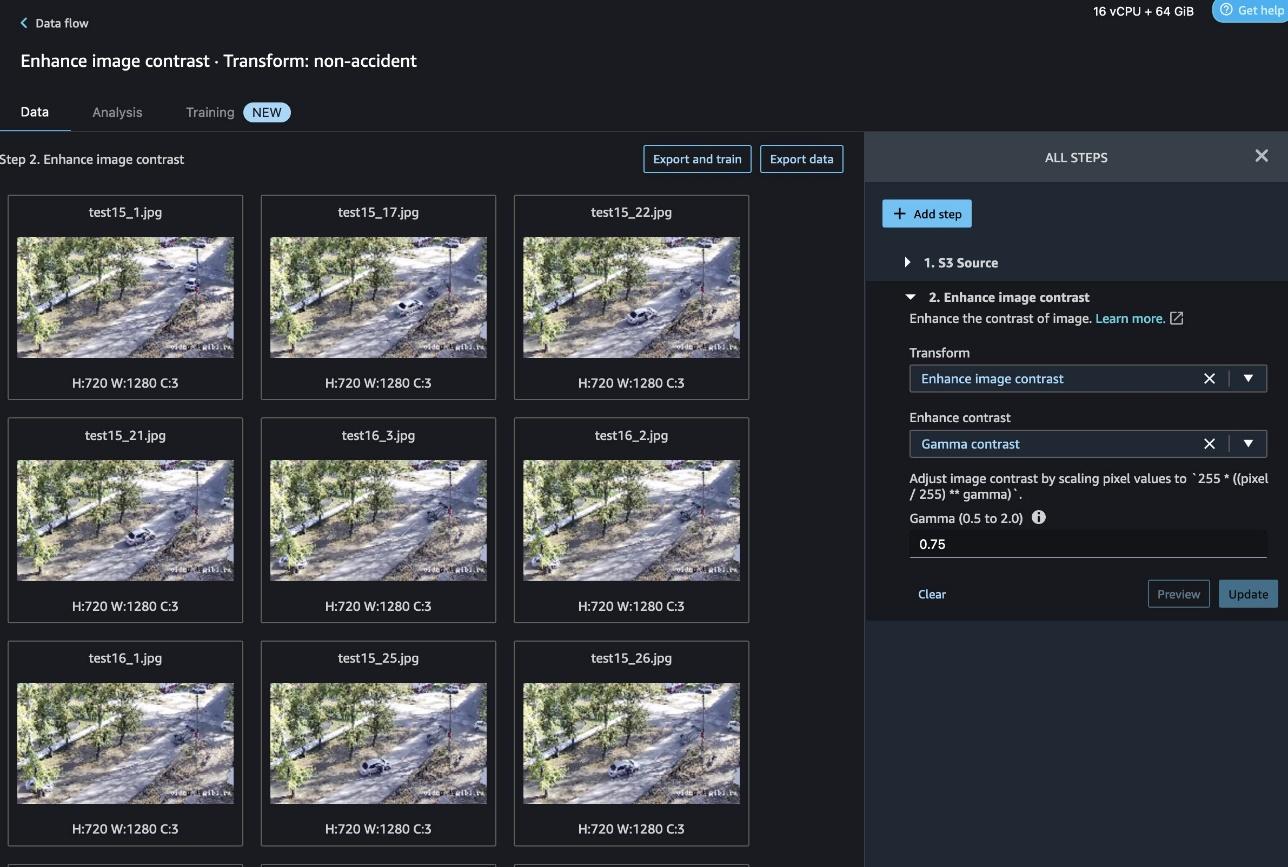
Step 8: In the next stage of our image transformation, you'll enhance the contrast and resize the images so that they are consistent. You may not be doing these steps in every use case, but these are examples of built-in transformations Data Wrangler provides to improve your image dataset. Enhancing the gamma contrast controls the overall brightness of an image. Resizing images, on the other hand, is something we all do quite often when taking our pictures. Reducing the size of an image can make it easier to share. It can also improve the image quality by discarding unnecessary pixels.
Select Add step to Enhance image contrast.
Choose Enhance Contrast > Gamma contrast and set the Gamma to 0.75, and then Preview and Add.
Add another step to Resize image.
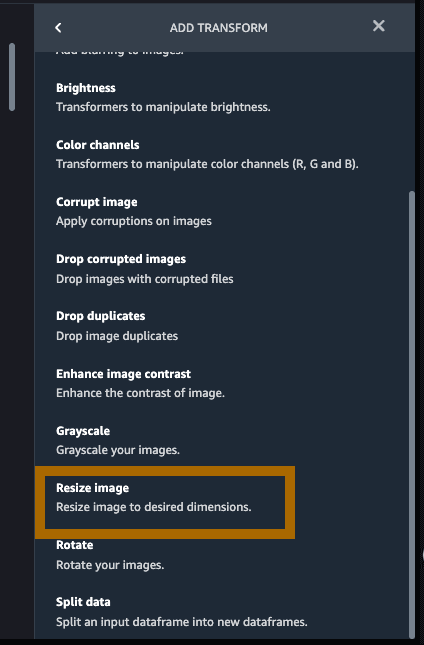
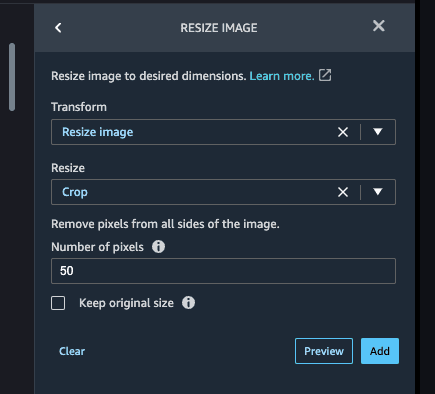
Choose Resize > Crop to crop the images by 50 pixels from each size of the images. Select Preview to see the changes to the image, then select Add. Doing so will essentially resize the images from 720 x 1280 to 620 x 1180.
Select Add.
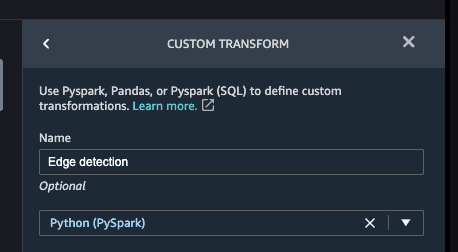
Step 9: Here, we’ll use a custom transformation to finish our image preparation. So far, you've been using Data Wrangler's built-in transformations to improve your image dataset without writing any code. However, the built-ins available today may not be enough to meet your use case. If you can’t find a built-in transform that meets your needs, then you can use custom transform for your image preparation workflows. In this case, we can't find a built-in transform for better edge detection, so we'll write our own.
Select Add step then Custom transform.
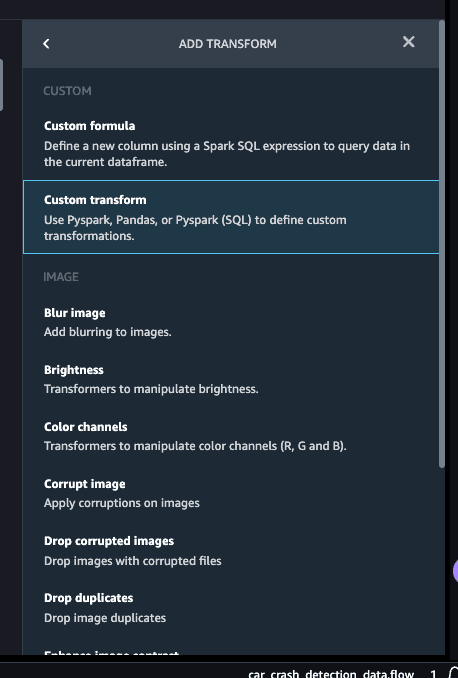
Give your custom transform a name like ‘Edge detection’, and select Python (PySpark).
Paste in the below Python code into the custom transform code snippet.
1
2
3
4
5
6
7
8
9
10
# A table with your image data is stored in the 'df' variable
import cv2
import numpy as np
from pyspark.sql.functions import column

def my_transform(image: np.ndarray) -> np.ndarray:
# To use the code snippet on your image data, modify the following lines within the function
HYST_THRLD_1, HYST_THRLD_2 = 100, 200
edges = cv2.Canny(image,HYST_THRLD_1,HYST_THRLD_2)
return edges
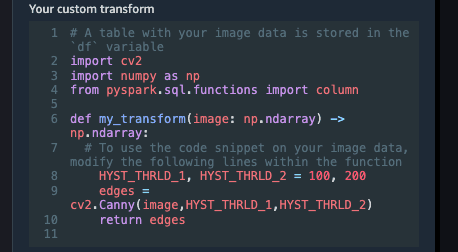
We’re using the Canny edge detector to better reveal the structure of objects in an image. We do this by detecting the outline of objects within the image. Select Preview to see the changes to the image, then select Add.
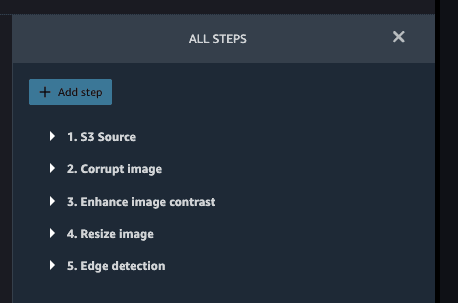
You should now see all the steps within the image preparation flow.
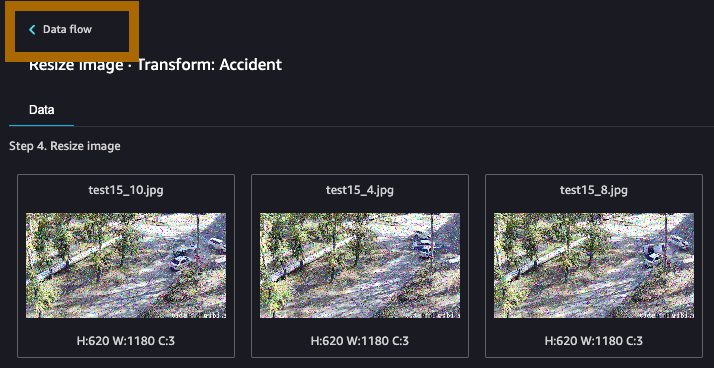
Step 10: In this step, you'll finalize your transformations to output the results of our flow to an Amazon S3 bucket.
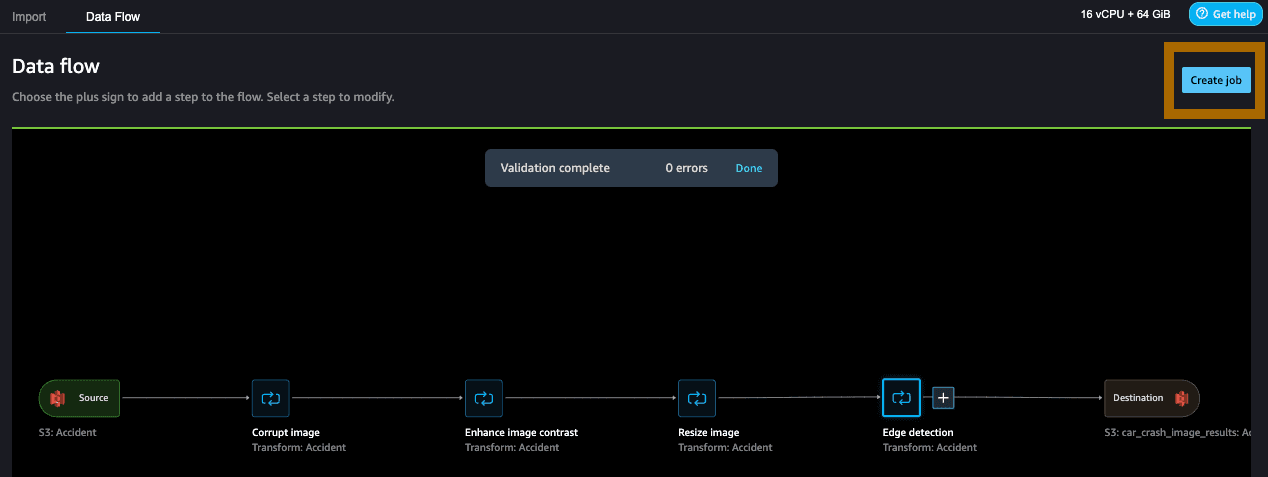
Select Data flow to go back to the flow.
You can visualize your flow that outlines each of the steps you defined. Select the + icon add the results to a destination in S3.
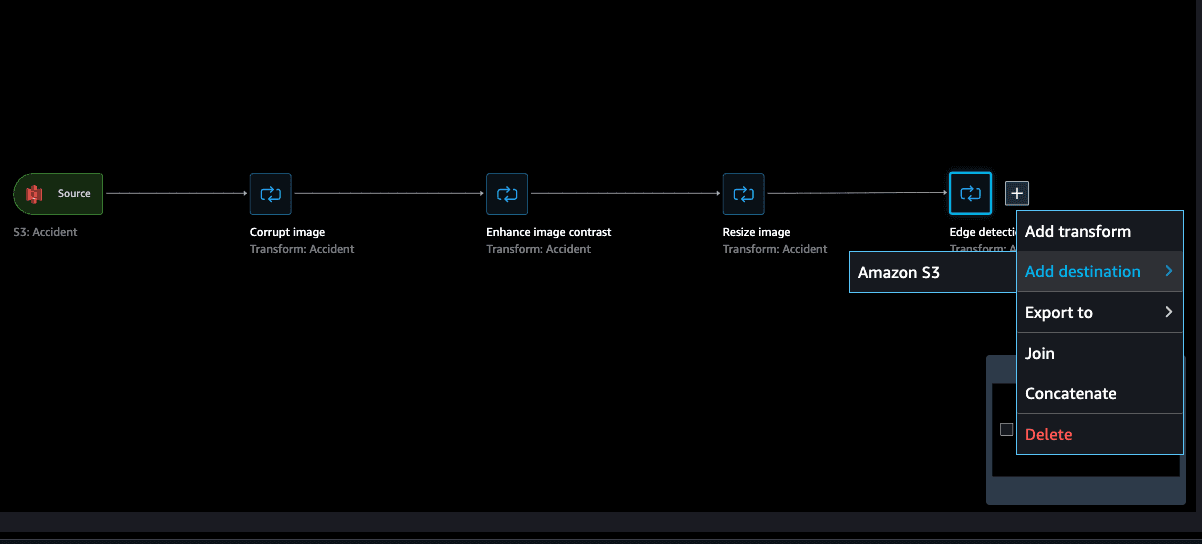
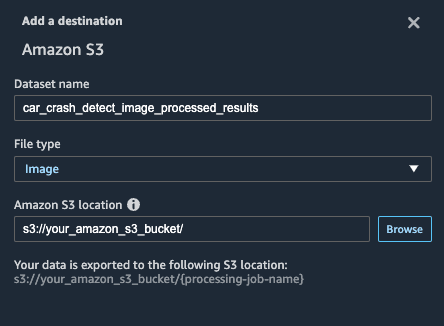
Give your dataset a name. Set the file type as image, and provide an Amazon S3 location to save the file(s). Select Add destination.
You’ve completed the entire flow from transformation and saving the output to Amazon S3. Now you can Create job to run the entire flow from beginning to end.
Step 11: Finally, we'll run our image processing flow with Data Wrangler and save the results to a designated Amazon S3 bucket. This is a job that can be triggered by an event, by a schedule, or manually. This makes all that we've built so far repeatable and scalable.
Create a job by providing a job name. We can leave the other options as blank. Select Next.

On the next page, select the instance types and count for SageMaker to spin up on your behalf to run the job. You can change additional configurations, but we’ll use the default.
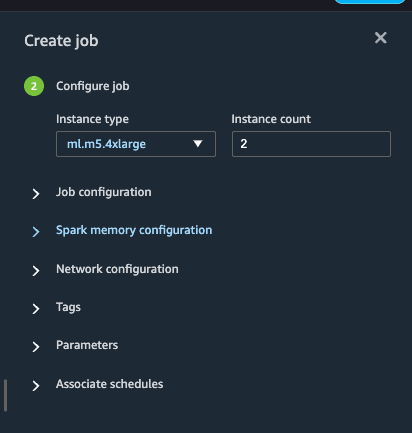
Finally, select Create.
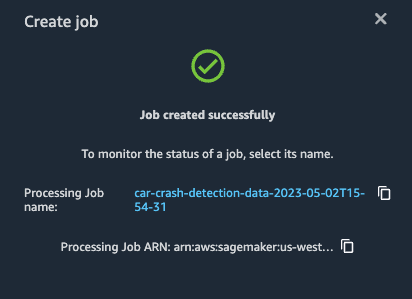
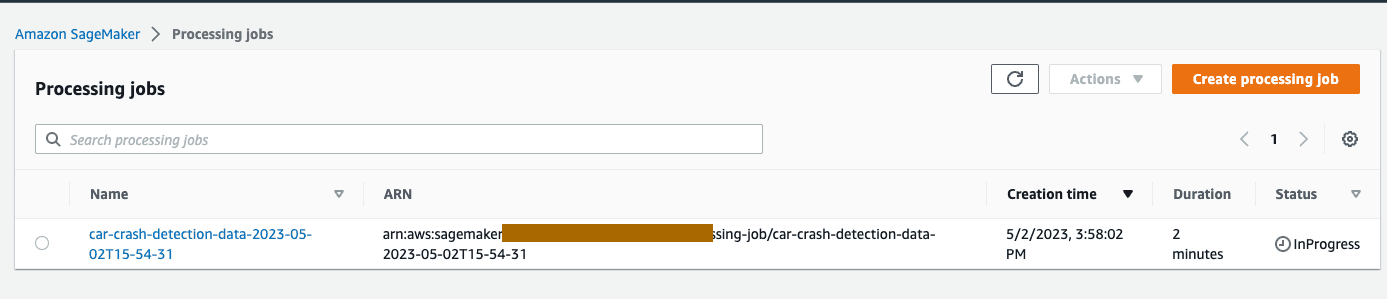
We can monitor the job from Amazon SageMaker > Processing in AWS console by referring to the processing job name and/or job ARN. Processing the job will take around 7 minutes to complete as we are processing the entire data set.
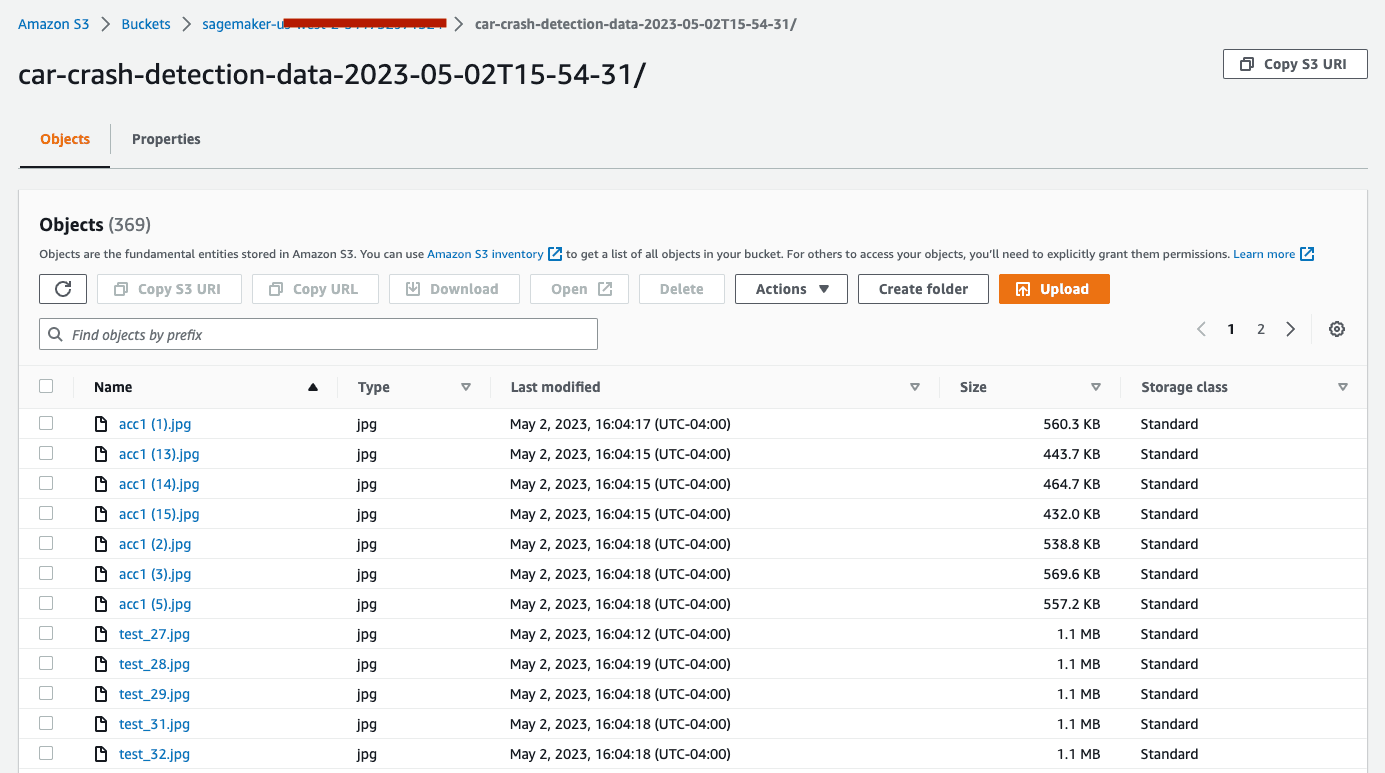
Once the job completes, we can view the results in the Amazon S3 bucket you specified.
Congratulations! You completed the tutorial to prepare image data using little to no code with Amazon SageMaker Data Wrangler!
It is a best practice to delete resources that you no longer need so that you don't incur unintended charges.
To delete the S3 bucket, open the Amazon S3 console. On the navigation bar, choose Buckets, sagemaker-studio-xxxxxxxxx, and then select the checkbox next to the dataset and the results from the output.
On the Delete objects dialog box, verify that you have selected the proper object to delete and enter permanently delete into the Permanently delete objects confirmation box.
Once this is complete and the bucket is empty, you can delete the sagemaker-studio-xxxxxxxxx bucket by following the same procedure again.

The Data Wrangler kernel used for running the flow in this tutorial will accumulate charges until you either stop the kernel or perform the following steps to delete the apps. For more information, see Shut Down Resources in the Amazon SageMaker Developer Guide.
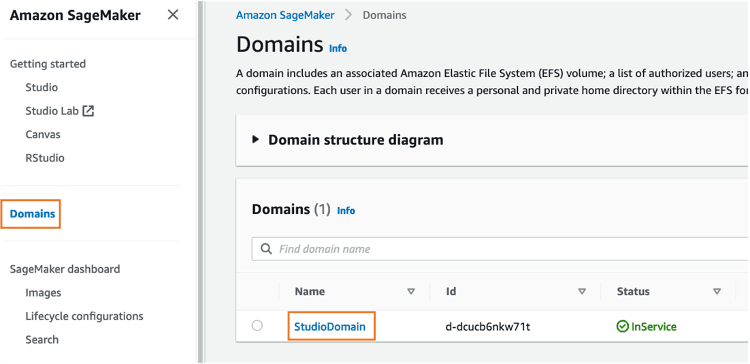
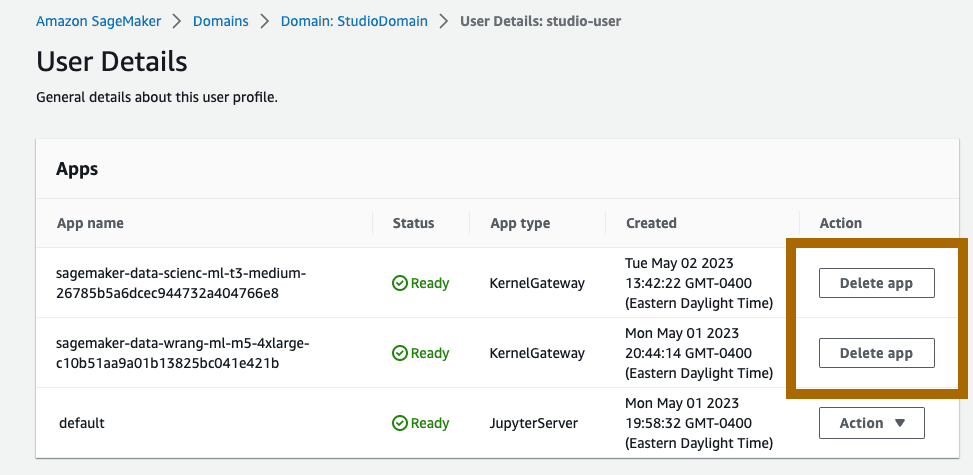
To delete the SageMaker Studio apps, do the following: On the SageMaker console, choose Domains, and then choose StudioDomain. From the User profiles list, select studio-user, and then delete all the apps listed under Apps by choosing Delete app. To delete the JupyterServer, choose Action, then choose Delete. Wait until the Status changes to Deleted.
If you used an existing SageMaker Studio domain in Step 1, skip the rest of Step 5 and proceed directly to the conclusion section.
If you ran the CloudFormation template in Step 1 to create a new SageMaker Studio domain, continue with the following steps to delete the domain, user, and the resources created by the CloudFormation template.
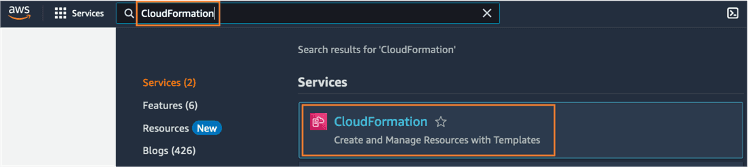
To open the CloudFormation console, enter CloudFormation into the AWS console search bar, and choose CloudFormation from the search results.
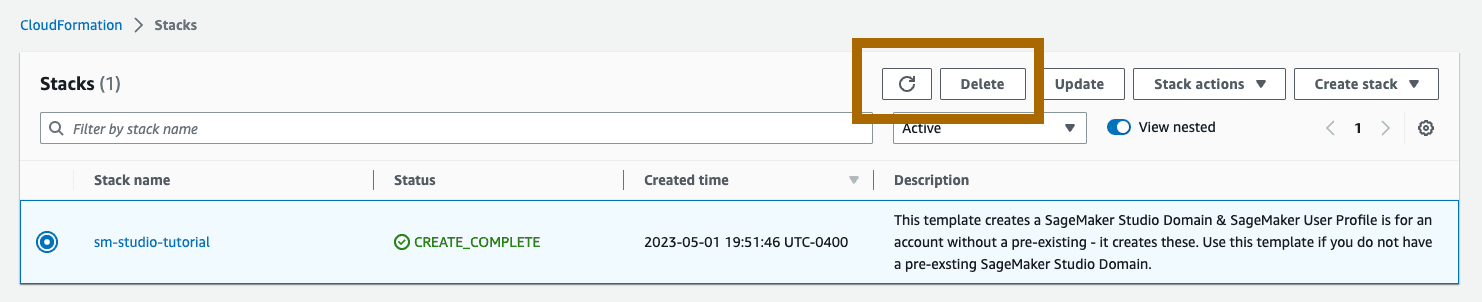
Open the CloudFormation console. In the CloudFormation pane, choose Stacks. From the status dropdown list, select Active. Under Stack name, choose sm-studio-tutorial to open the stack details page.
On sm-studio-tutorial stack details page, choose Delete to delete the stack along with the resources it created in Step 1.
Congratulations! You have finished the tutorial on preparing image data using Amazon SageMaker Data Wrangler.
In this tutorial, you used Amazon SageMaker Data Wrangler to prepare image data using both built-in and custom transformations. You saved your steps as a Data Wrangler flow and executed the job to save the output to an Amazon S3 bucket.
SageMaker Data Wrangler is one feature of a broad set of capabilities within Amazon SageMaker. You can explore how to create an end-to-end image preprocessing, model building and tuning, and model deployment pipeline by integrating SageMaker Data Wrangler with Amazon SageMaker Autopilot. Check out this blog to see how. You can also learn more about Amazon SageMaker's broad set of features that meet various use cases for data scientists and business analysts. Happy building!
If you enjoyed this tutorial, found any issues, or have feedback for us, please send it our way!.