We use essential cookies and similar tools that are necessary to provide our site and services. We use performance cookies to collect anonymous statistics, so we can understand how customers use our site and make improvements. Essential cookies cannot be deactivated, but you can choose “Customize” or “Decline” to decline performance cookies.
If you agree, AWS and approved third parties will also use cookies to provide useful site features, remember your preferences, and display relevant content, including relevant advertising. To accept or decline all non-essential cookies, choose “Accept” or “Decline.” To make more detailed choices, choose “Customize.”
Customize cookie preferences
We use cookies and similar tools (collectively, "cookies") for the following purposes.
Essential
Essential cookies are necessary to provide our site and services and cannot be deactivated. They are usually set in response to your actions on the site, such as setting your privacy preferences, signing in, or filling in forms.
Performance
Performance cookies provide anonymous statistics about how customers navigate our site so we can improve site experience and performance. Approved third parties may perform analytics on our behalf, but they cannot use the data for their own purposes.
Allowed
Functional
Functional cookies help us provide useful site features, remember your preferences, and display relevant content. Approved third parties may set these cookies to provide certain site features. If you do not allow these cookies, then some or all of these services may not function properly.
Allowed
Advertising
Advertising cookies may be set through our site by us or our advertising partners and help us deliver relevant marketing content. If you do not allow these cookies, you will experience less relevant advertising.
Allowed
Blocking some types of cookies may impact your experience of our sites. You may review and change your choices at any time by selecting Cookie preferences in the footer of this site. We and selected third-parties use cookies or similar technologies as specified in the AWS Cookie Notice.
Your privacy choices
We display ads relevant to your interests on AWS sites and on other properties, including cross-context behavioral advertising. Cross-context behavioral advertising uses data from one site or app to advertise to you on a different company’s site or app.
To not allow AWS cross-context behavioral advertising based on cookies or similar technologies, select “Don't allow” and “Save privacy choices” below, or visit an AWS site with a legally-recognized decline signal enabled, such as the Global Privacy Control. If you delete your cookies or visit this site from a different browser or device, you will need to make your selection again. For more information about cookies and how we use them, please read our AWS Cookie Notice.
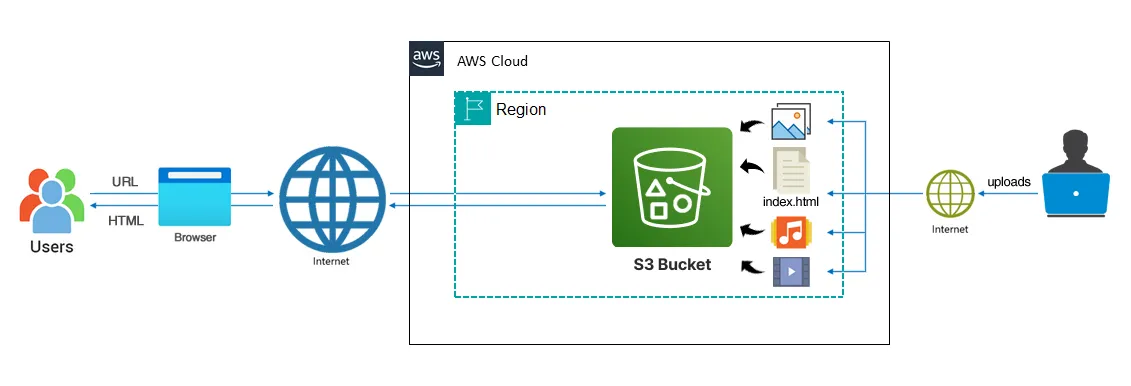
— Architecture Diagram of Hosting my Professional Resume Website in an AWS S3 Bucket (picture by author)
After spending a very long time designing and creating my professional resume website I wanted to show it to the world, but how?! 😱
In this guide, you will embark in a journey to understand the different terminologies, discover the different types of hosting and how to choose a solution that fits your needs.
This is the first part of the series of 4 parts, where I start with the simplest solution.
Part 2 covers some improvements that can be achieved with Amazon CloudFront.
Part 3 shows the final enhancements using Amazon Route 53.
The last part shows how to build the infrastructure used here with the Terraform — IaC.
And if this is the first time you are hearing about “static”, “hosting”, “AWS”, and “S3 Bucket”, don’t worry. I have written some articles (links below) you can refer to for clarifications.
Table of Contents
Prerequisites
Static vs Dynamic Websites
Types of Web Hosting
Amazon Web Services (AWS)
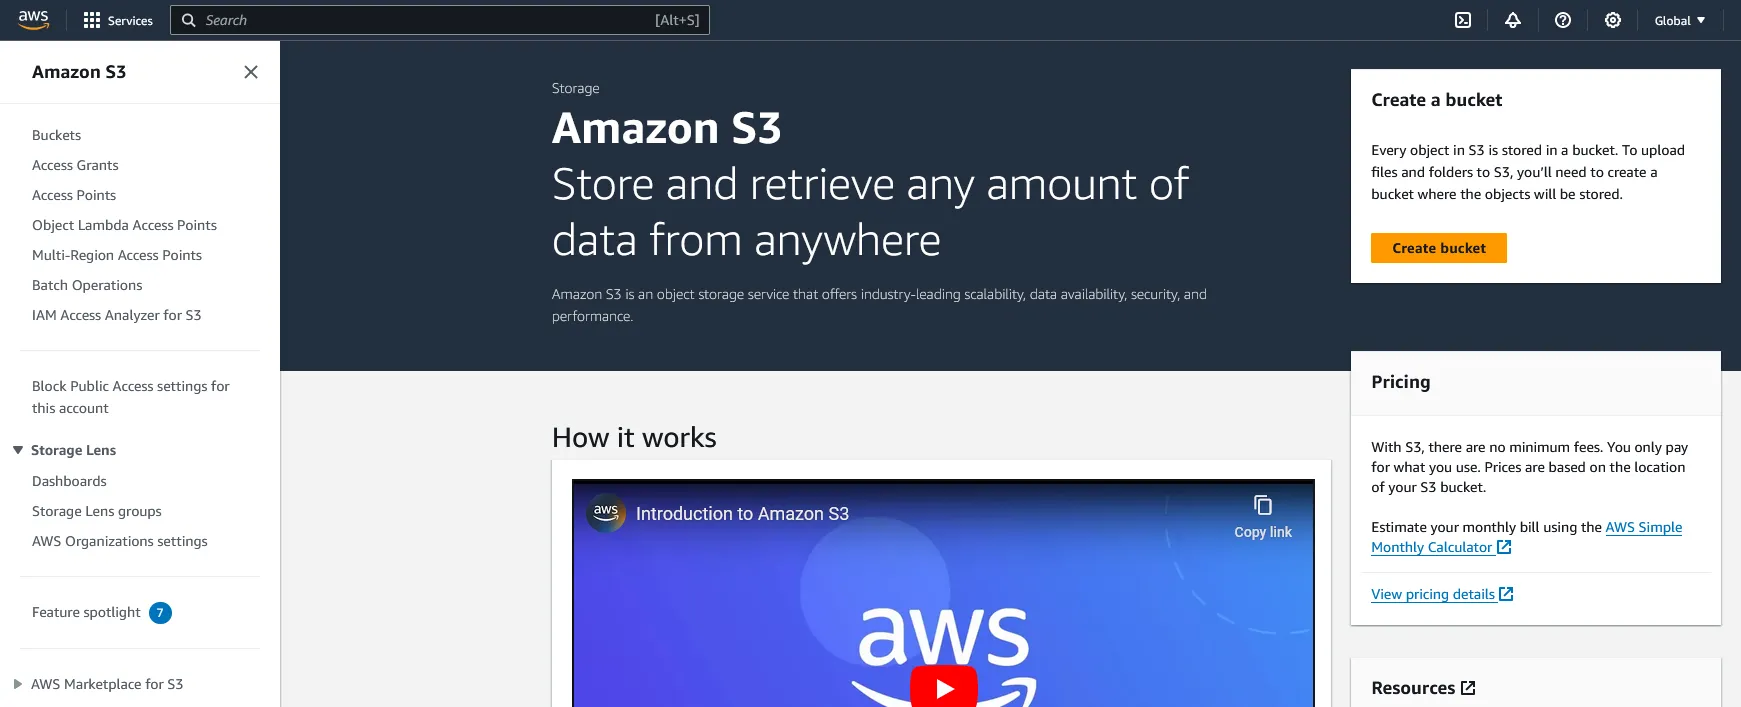
Amazon Simple Storage Service (Amazon S3)
My Solution using Amazon S3 – Step 1: Creating my S3 bucket – Step 2: Enabling static website hosting – Step 3: Securing my S3 bucket through IAM policies – Step 4: Uploading web files to my S3 bucket – Step 5: Testing my website endpoint
Prerequisites
To follow along this guide, please make sure the following requirements are met:
AWS account: You can sign up here and follow this tutorial to set it up.
A static website. — you can refer to my github repository for my website
In my case, based on the article I wrote above and because my resume doesn’t need to be updated frequently, the best option is to create it as a static website.
Types of Web Hosting
In the digital age, where online presence is the linchpin of success, the importance of a robust website cannot be overstated. Yet, amidst the meticulous design, compelling content, and strategic SEO efforts, one often overlooked aspect that can significantly impact a website’s performance is the choice of web hosting.
Check out the article below for more details on the different types of web hosting services.
Amazon Web Services (AWS) is the world’s most comprehensive, evolving cloud computing platform provided by Amazon that includes a mixture of infrastructure-as-a-service (IaaS), platform-as-a-service (PaaS) and packaged-software-as-a-service (SaaS) offerings. AWS services offers over 200 fully featured services from data centers globally.
Amazon.com Web Services launched its first web services in 2002 from the internal infrastructure that Amazon.com built to handle its online retail operations. In 2006, it began offering its defining IaaS services. AWS was one of the first companies to introduce a pay-as-you-go cloud computing model that scales to provide users with compute, storage or throughput as needed.
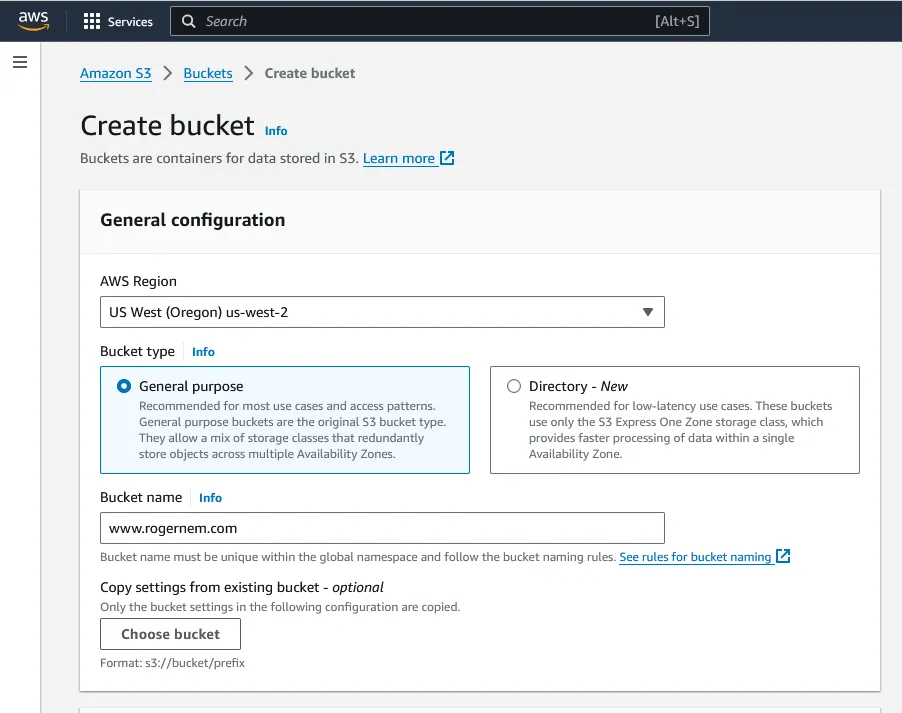
4. Choose a Region that is geographically close to you to minimize latency and costs, or to address regulatory requirements. The Region that you choose determines your Amazon S3 website endpoint.
— Create Bucket (picture by author)
NOTE: The name of an S3 bucket is unique GLOBALLY but a bucket is always created in the region you specify and never leaves that region until you transfer its objects to another one.
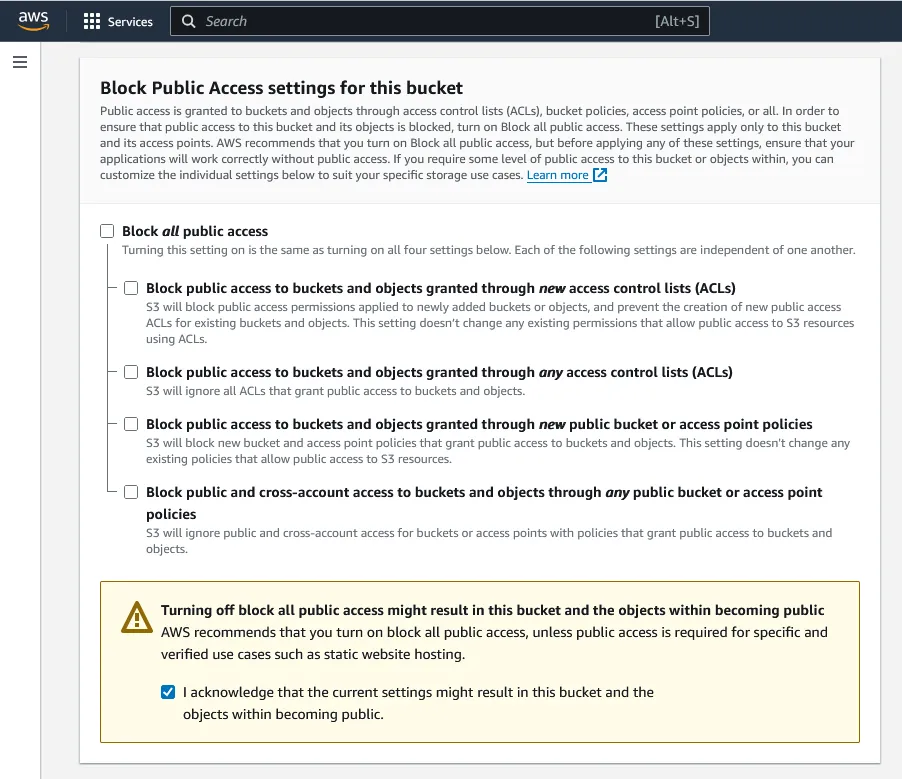
5. Under “Block Public Access settings for this bucket” section, uncheck the “Block all public access” checkbox and accept the acknowledgement.
(picture by author)
NOTE: Since you are going to host a website in this S3 Bucket, this needs to be done to make the S3 bucket accessible to the public.
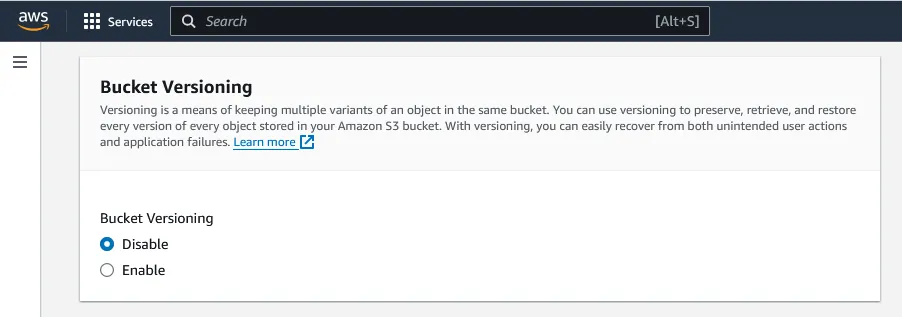
6. Select “Disable” for Bucket Versioning.
(picture by author)
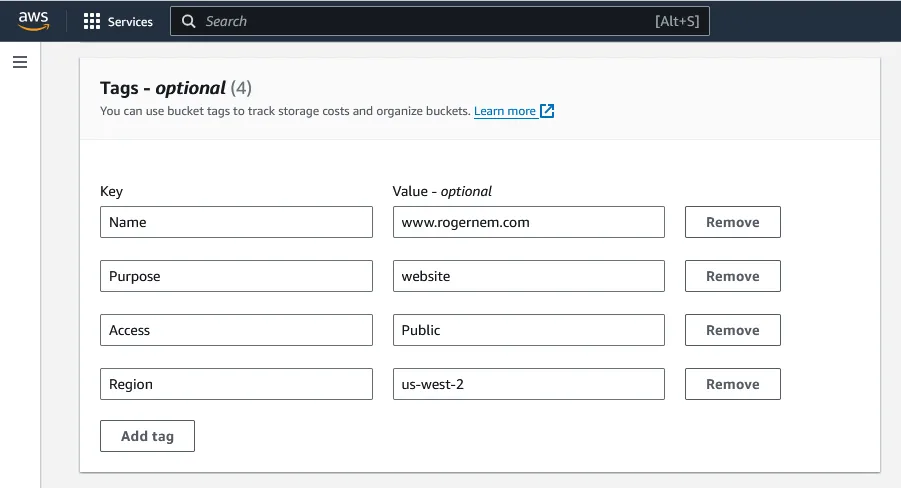
7. Optional: You can “Add tag” to your bucket for easy identification.
(picture by author)
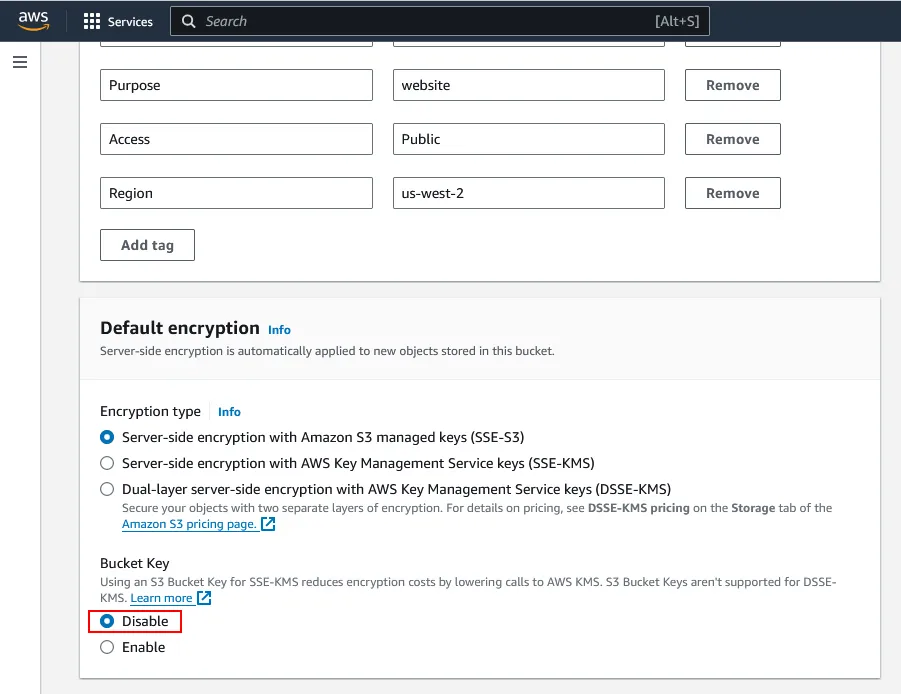
8. Under “Default encryption” section, click on disable for Server-side encryption.
(picture by author)
9. Click on “Create bucket”.
(picture by author)
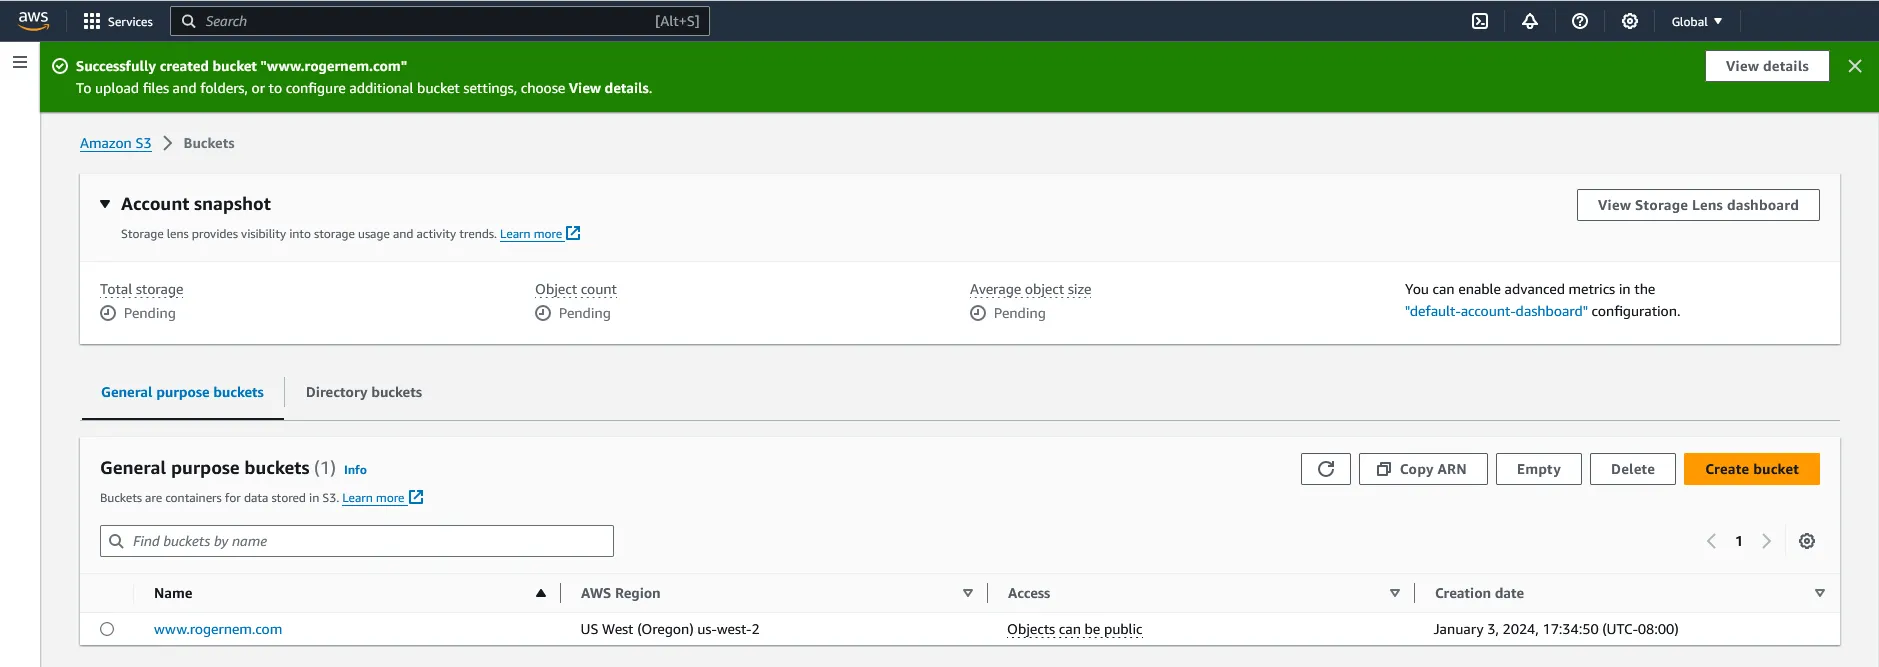
You should see the following message and screen.
Successfully created bucket “www.rogernem.com" To upload files and folders, or to configure additional bucket settings, choose View details.
(picture by author)
Step 2: Enabling static website hosting
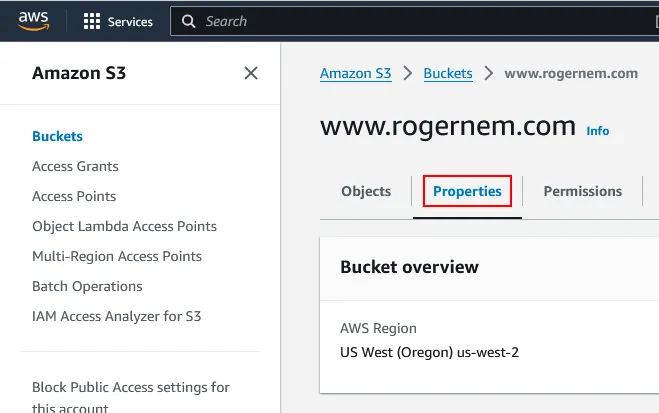
1. In the Buckets list, choose the name of the bucket that you want to enable static website hosting for (www.rogernem.com).
(picture by author)
2. Click on the “Properties” tab**.**
(picture by author)
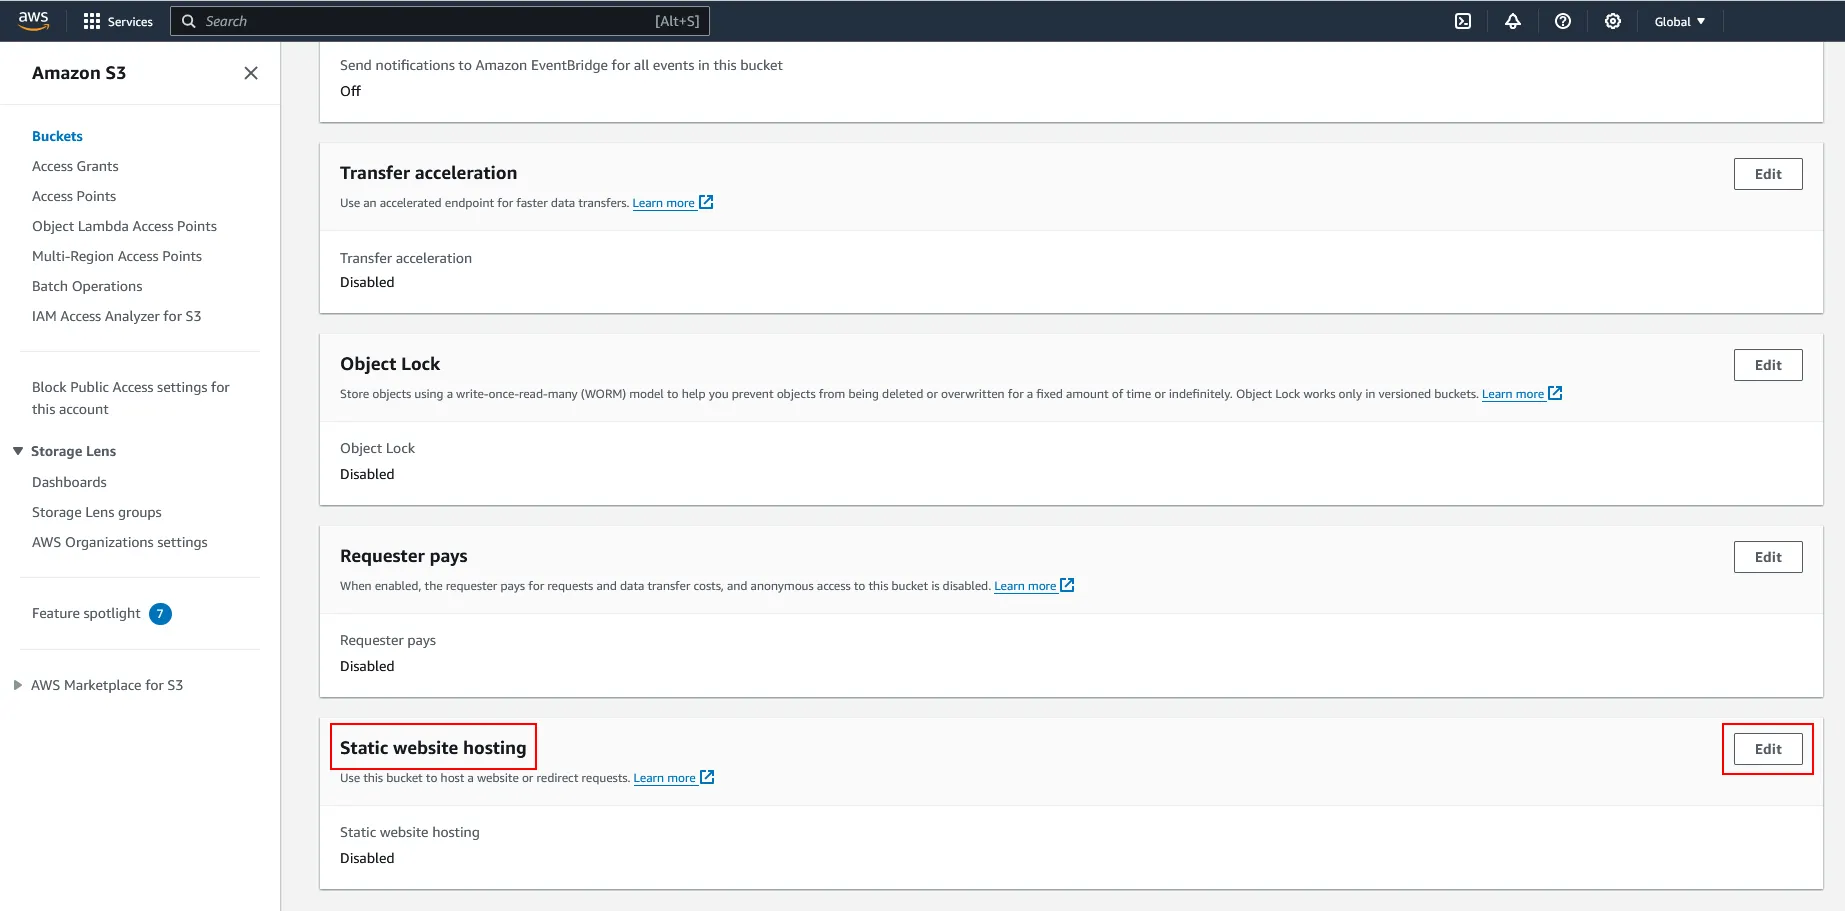
3. Scroll down to the “Static website hosting” section and click on its Edit button.
(picture by author)
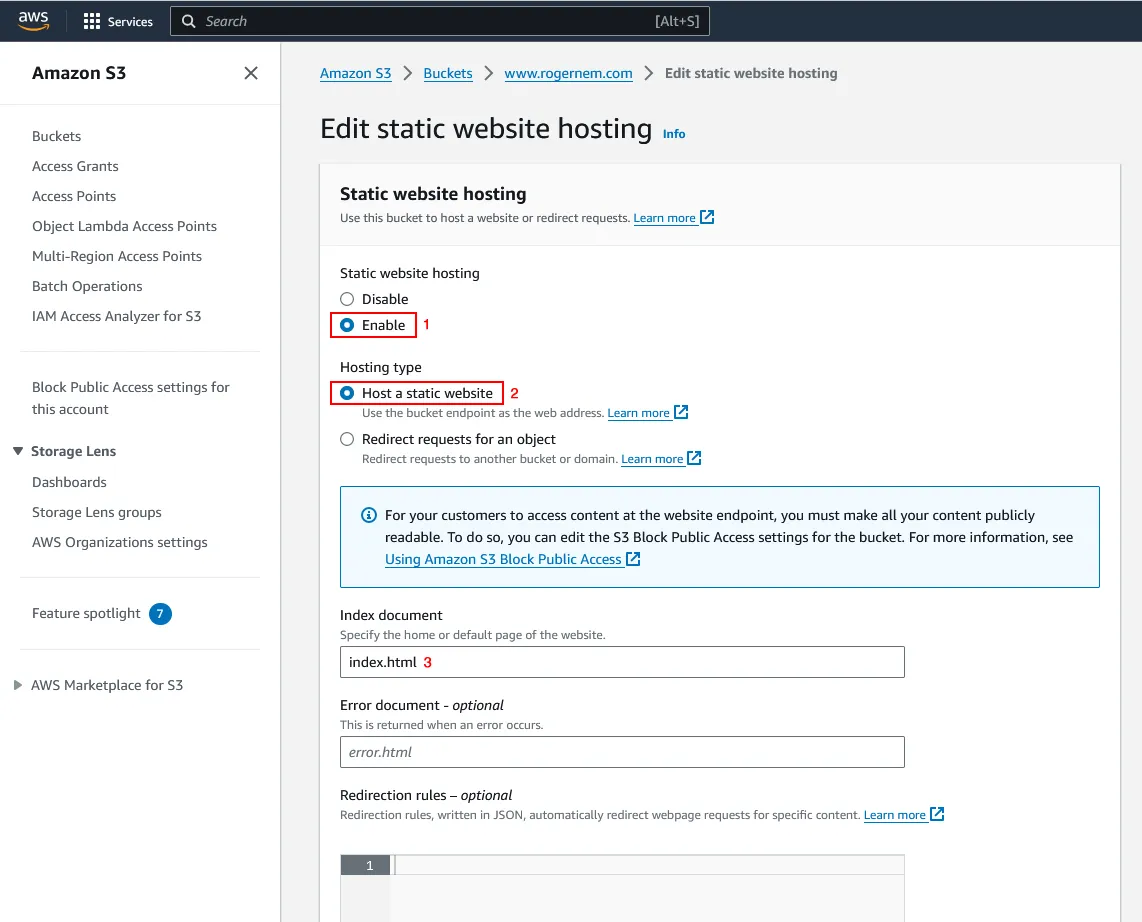
4. Under Static website hosting, choose Enable (1). Also, select Host a static website (2) for the Hosting type. In Index document, enter the file name of the index document, typically index.html(3).
(picture by author)
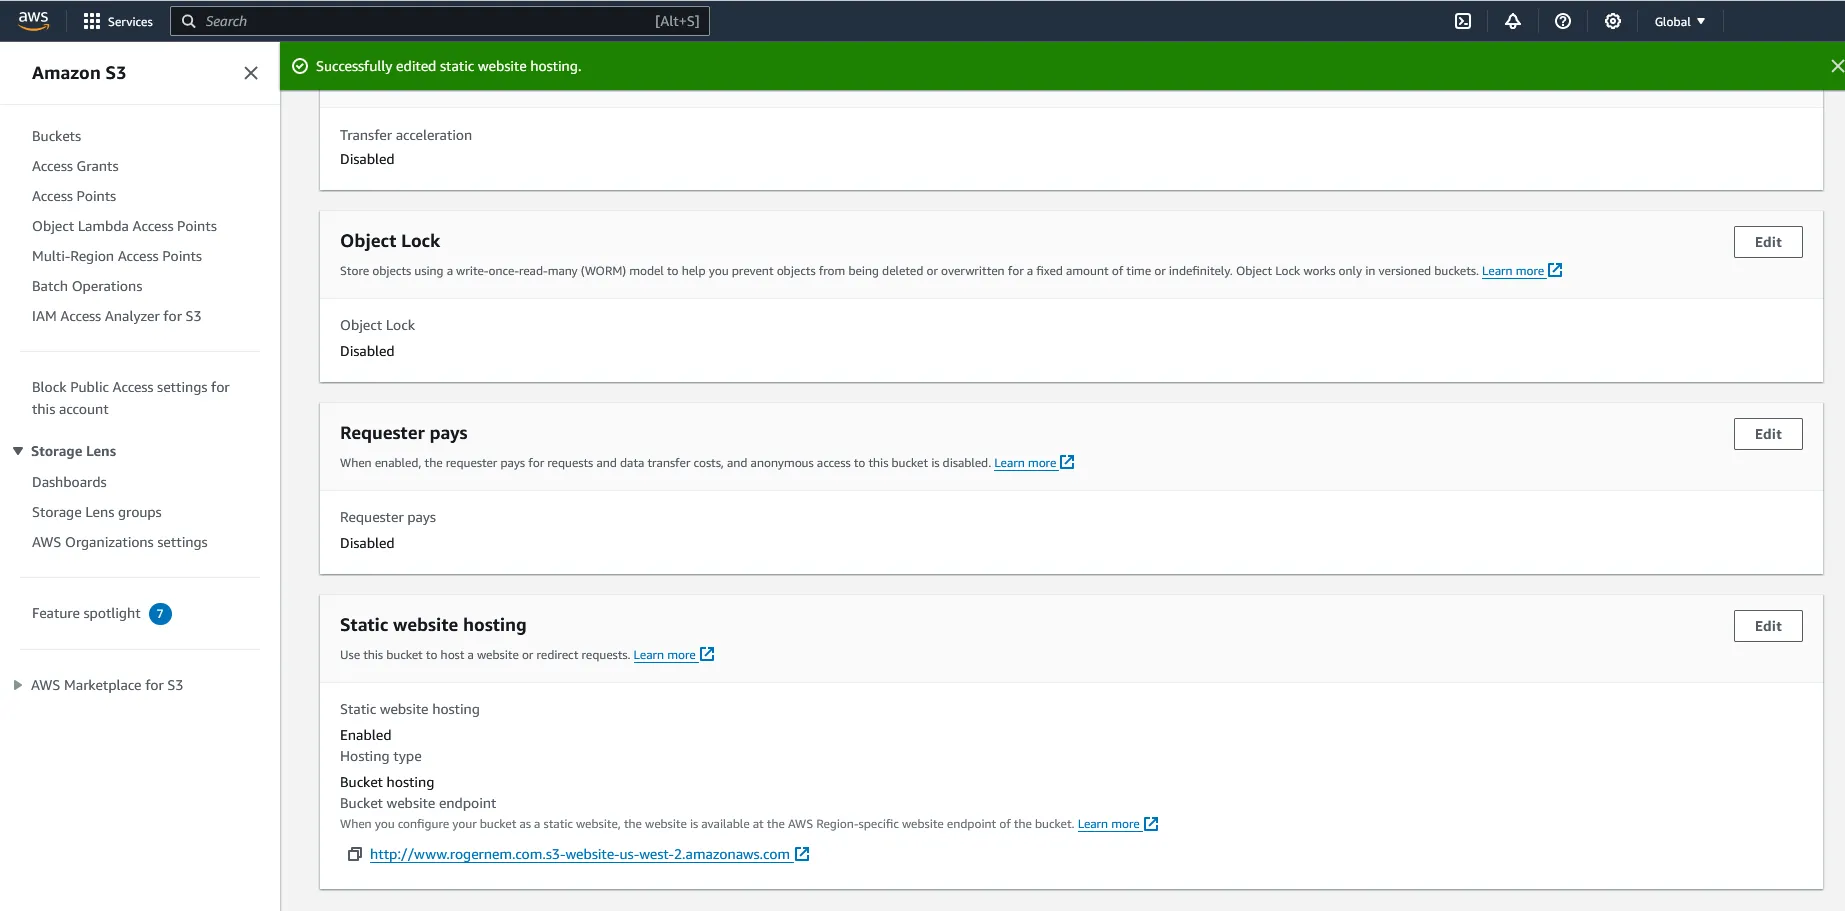
5. Click on “Save Changes”. You should see the following next.
(picture by author)
Under Static website hosting, note the Endpoint which is the Amazon S3 website endpoint for your bucket.
NOTE: After finishing configuring your bucket as a static website, you can use this endpoint to test your website.
Step 3: Securing my S3 bucket through IAM policies
To allow users to access your website and to secure your S3 bucket and block uploads and/or deletions, you will need to add a bucket policy.
Under Buckets, click on the name of your website bucket.
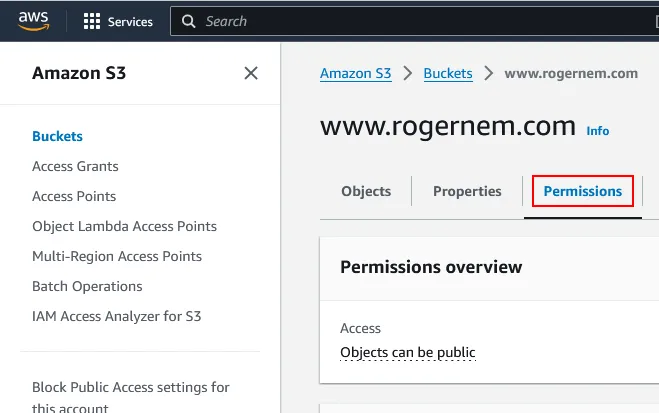
Click on the “Permissions” tab**.**
Under Bucket Policy, choose Edit.
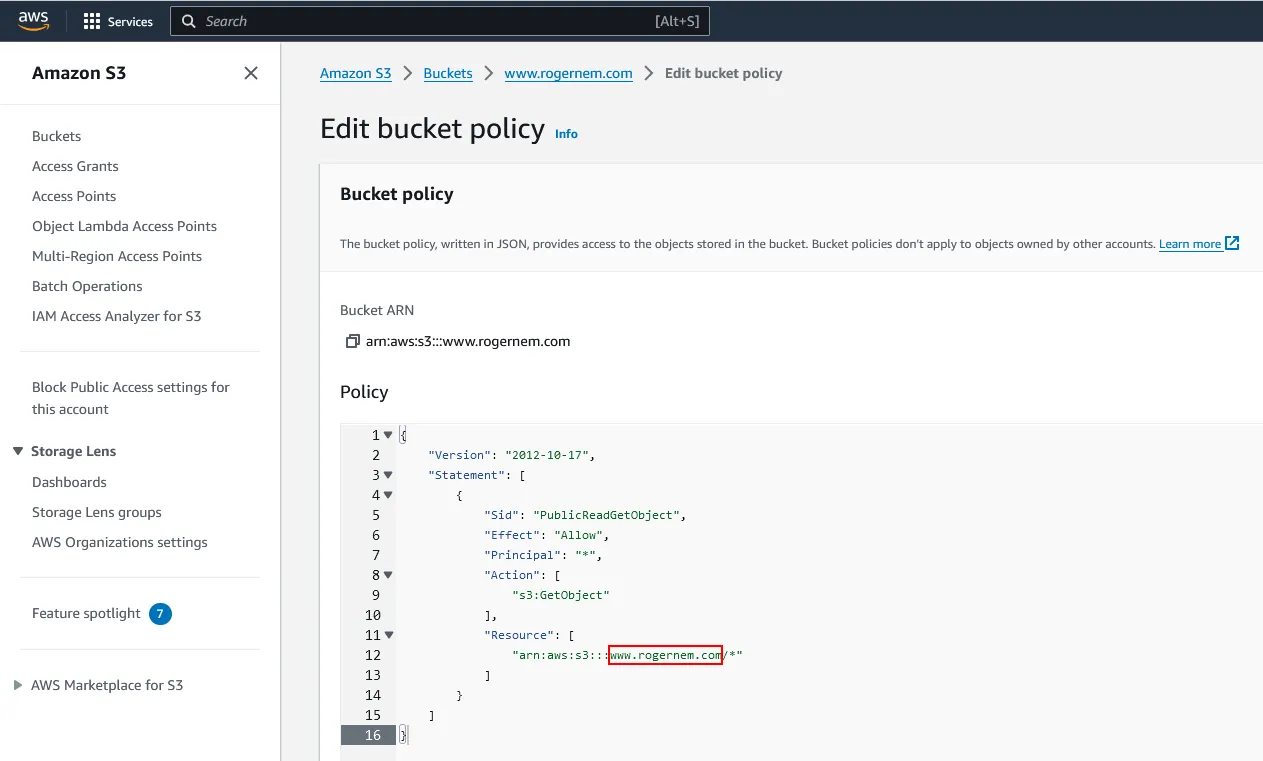
4. To grant public read access for your website, copy the following bucket policy, and paste it in the Bucket policy editor. Make sure to replace bucket-name with the name of your bucket. { "Version": "2012-10-17", "Statement": [ { "Sid": "PublicReadGetObject", "Effect": "Allow", "Principal": "*", "Action": [ "s3:GetObject" ], "Resource": [ "arn:aws:s3:::Bucket-Name/*" ] } ] } NOTE: The Action “s3:GetObject” with Effect “Allow” let users browse your website.
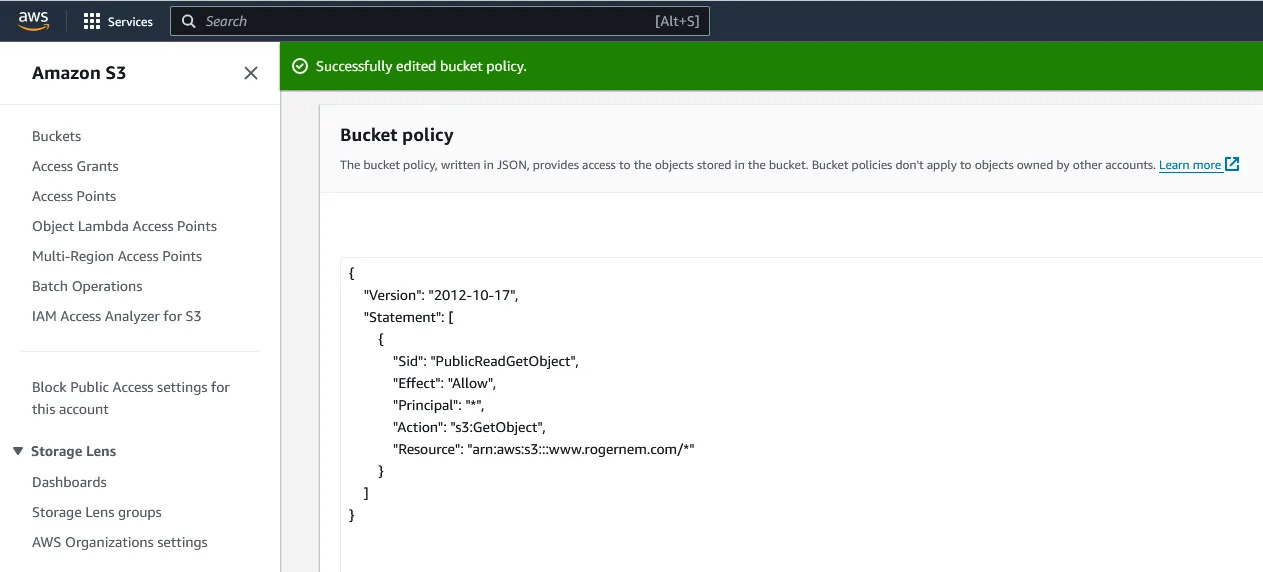
Scroll down and click on “Save changes”. You should see the following next.
Step 4: Uploading web files to my S3 bucket
After completing all the previous steps, you need to upload your website’s files and folders to your website S3 bucket.
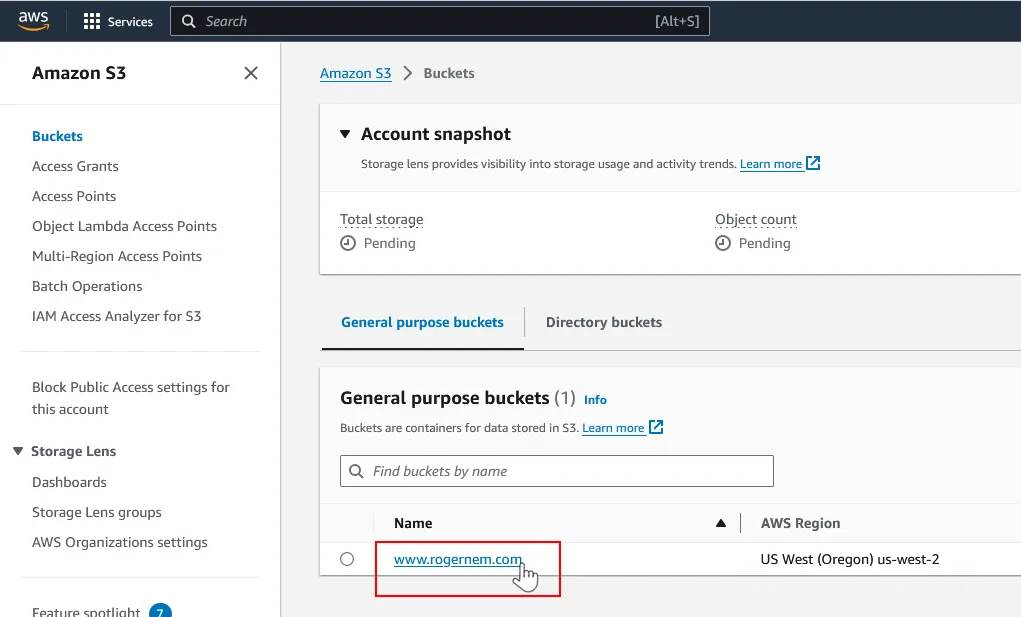
1. Under Buckets, click on the name of your website bucket.
(picture by author)
2. On the Objects tab, you can see that the bucket is currently empty, click on the Upload button.
(picture by author)
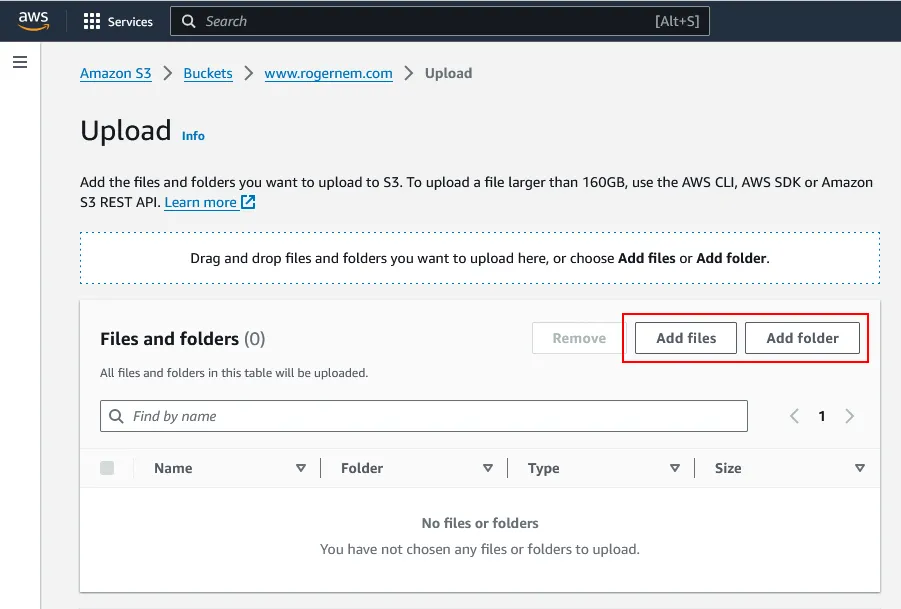
3. This should take you to the Upload page. Click Add files to add the website files and use Add folder to add the website folders.
(picture by author)
Note: The whole website folder shouldn’t be added all at once. Instead, add its content one after the other.
After the necessary files and folders have been added, scroll down and click on Upload. The upload should be done in a few minutes depending on your network and website content size.
NOTE: Do not close the tab while the upload process is happening.
Step 5: Testing my website endpoint
1. Under (picture by author)Buckets, click on the name of your website bucket.
2. Click on the “Properties” tab**.**
(picture by author)
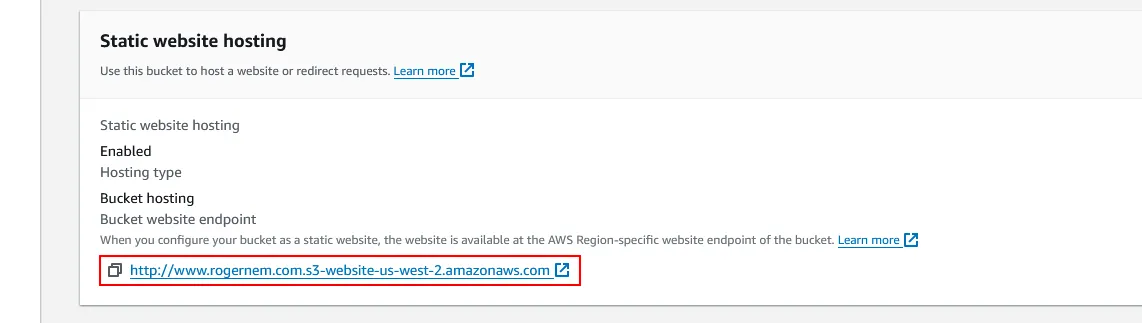
3. Scroll down to the “Static website hosting” section and click on your endpoint URL.
(picture by author)
You should be able to see your website now. Yay!🎉 Congratulations. That’s it!
My Professional Resume Website — www.rogernem.com (picture by author)
If you enjoyed this article and found it helpful, please don’t forget to leave a heart ❤, comment 💬, clap 👏🏻, and share ➦ it to show your support.