Build a CI/CD pipeline for CloudFormation and Cross-Account.
Step-by-step guide on creating a CI/CD for AWS CloudFormation StackSets with CodeCommit, CodeBuild, CodePipeline and S3 to Multi-Account deployments.
Published Mar 4, 2024
A CI/CD pipeline for AWS CloudFormation StackSets facilitates automated infrastructure deployment across multiple accounts. This pipeline streamlines managing and updating CloudFormation templates, ensuring consistency and compliance throughout the organization's AWS accounts. By automating the deployment process, teams can efficiently propagate changes, manage updates, and enforce best practices, promoting scalability, security, and operational efficiency.
I want to share a guide on how you can deploy and update your infrastructure on AWS with a CI/CD pipeline, AWS CloudFormation StackSets, and from an account (master or delegated account) to multiple accounts.
If your organization has several AWS accounts, I recommend that the deployment and updating of the infrastructure be done from an account that it delegates and belongs to the organization or from its master account (Root) to the other accounts that they have according to its purpose (production, development, test, etc.) In addition, I recommend using native AWS services such as CodeCommit (private Git repository), CodeBuild (continuous integration service), CodePipeline (continuous delivery service), and CloudFormation (Infrastructure as Code).
- AWS CloudFormation templates should be stored in a Git repository on CodeCommit to perform workflows that include code revisions and modifications, pull requests, and merge branches.
- The CodePipeline service should be used for the CI/CD pipeline and to automate the environment deployment process.
- The templates will be uploaded to a bucket in S3 so the CloudFormation stacks in the destination accounts can access them.
- AWS CloudFormation (Stack Set) service will be used in the central account ID:111111111111 to provision and manage the resources in the target accounts: dev-ID:222222222222, prod-ID:333333333333
- CodeBuild service must be used to perform a test and thus be able to check the availability of the deployed environment.

I make available some AWS CloudFormation templates that I created for this DEMO. You can get them from the following repository on GitHub:
There is a root template called kloudpepper-ROOT.yml, which is used to define the parameters that will be inserted in the infrastructure to be deployed and, in turn, calls the other separate templates by types of resources or services. The templates are made this way to have an organization when modifying values or data in that particular resource. I explain it better in the previous article:
Also, you're going to look at a JSON file called parameters-test.json. This file contains the parameters used in the environment to be deployed. For example, the CIDR of the VPC, the name of the environment, if it is a production or non-production environment type, and others. We will carry out the DEMO simulation of a non-productive environment.
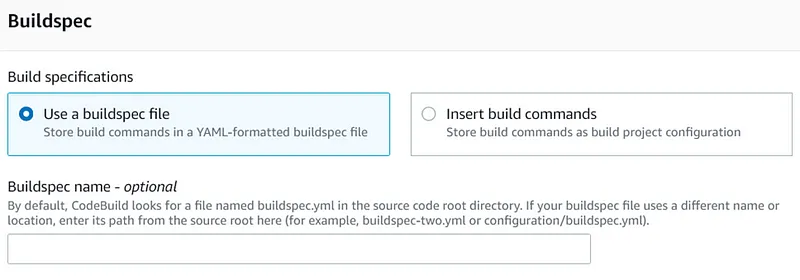
Finally, the buildspec.yml file, which we will use to define a set of build commands in CodeBuild and check that the environment was deployed correctly.
1. In a delegated or root account, you must create an S3 bucket to deposit the templates and other files used to deploy the infrastructure on AWS and configure the CI/CD pipeline. To better understand, refer to Figure 1 and look at the pipeline. To create the Bucket, you must put the exact name you defined for the environment. This step is essential since, in the templates, there is a parameter that refers to this name. Therefore, they can't put different names on the templates' parameters and the Bucket's name.
Example:

2. Insert the following policy in the Bucket created. You have to change the IDs
111111111111 and 222222222222 with the correct IDs that you have in your accounts. Also, you must modify the Resource value to the correct ARN (Bucket's ARN):1
2
3
4
5
6
7
8
9
10
11
12
13
14
15
16
17
18
{
"Version": "2012-10-17",
"Id": "Policy1644732224428",
"Statement": [
{
"Sid": "Stmt1644732214596",
"Effect": "Allow",
"Principal": {
"AWS": [
"arn:aws:iam::111111111111:root",
"arn:aws:iam::222222222222:root"
]
},
"Action": "s3:GetObject",
"Resource": "arn:aws:s3:::kloudpepper-test/*"
}
]
}
3. It's necessary to create two (2) roles to delegate the administration permissions of the destination accounts to the account where the CI/CD pipeline will be configured (Cross-Account IAM Role). AWS has created two (2) CloudFormation templates to create the roles and permissions in the accounts. I share the templates in the Git repository.
3.1 In the delegate or main (Root) account, you can execute the following template in AWS CloudFormation:
Note: You don't have to insert parameters.
3.2 On the target accounts, execute the following template in AWS CloudFormation:
https://github.com/kloudpepper/IaC/blob/main/CloudFormation/extras/AWSCloudFormationStackSetExecutionRole.yml
https://github.com/kloudpepper/IaC/blob/main/CloudFormation/extras/AWSCloudFormationStackSetExecutionRole.yml
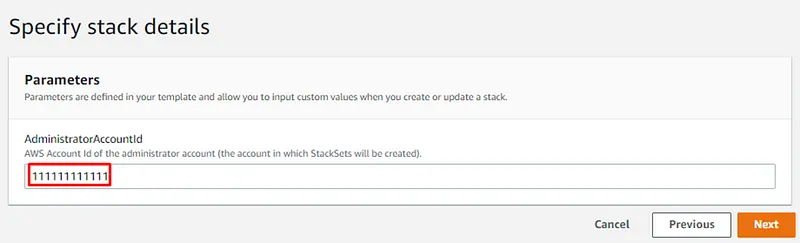
When you execute this template in AWS CloudFormation, it will insert the ID of the parent or delegate account (Root).
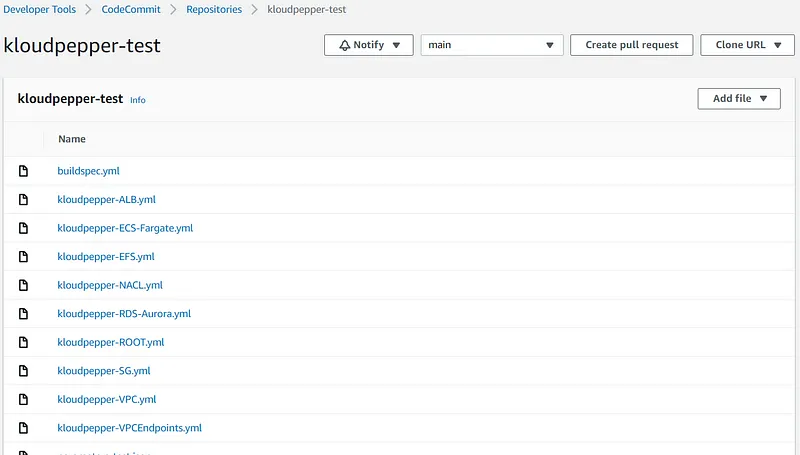
4. Create a CodeCommit repository:
I would like to configure the repository with approval rules and branches to control the template modifications. However, we won't be making those settings for this demo. Create the repository in CodeCommit and upload the templates found on GitHub:

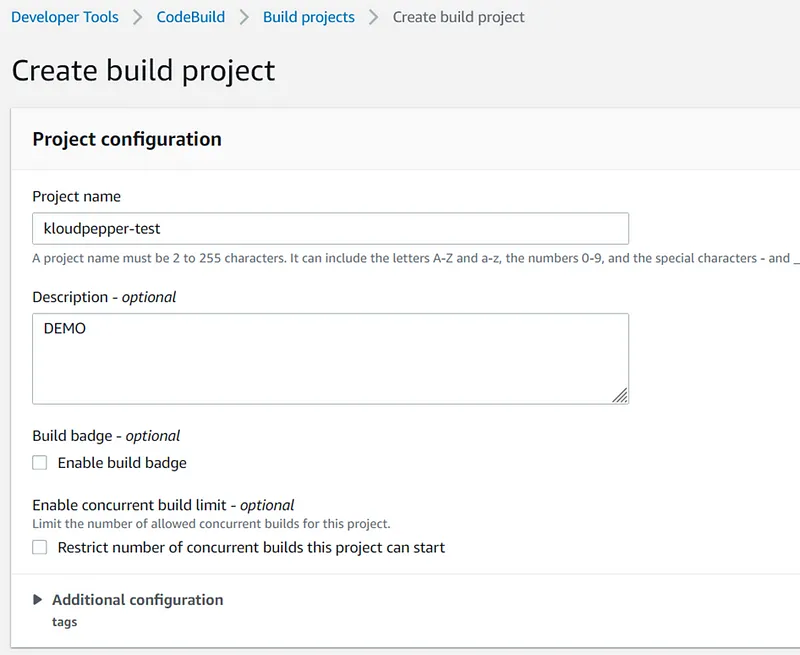
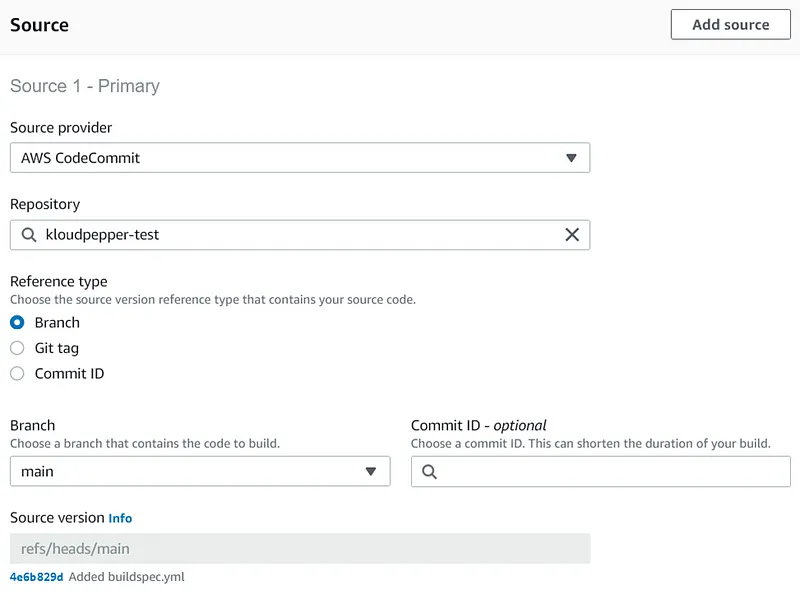
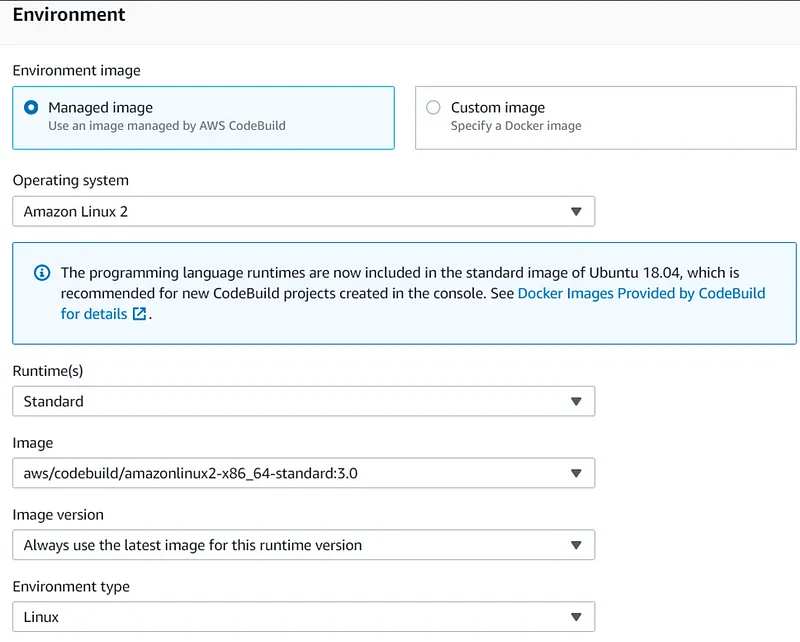
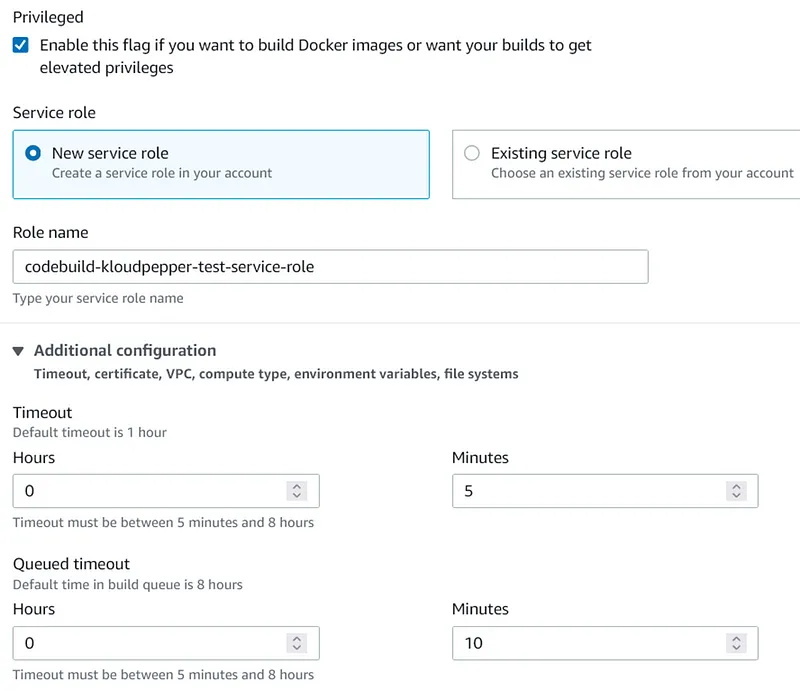
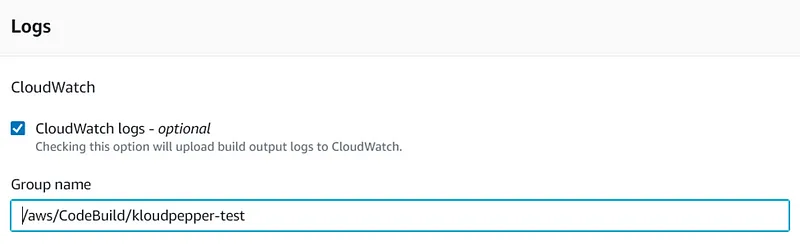
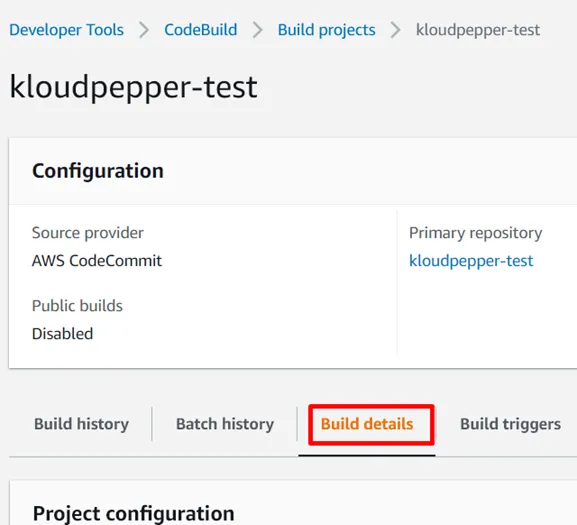
5. Create a building project in CodeBuild and add the following parameters:


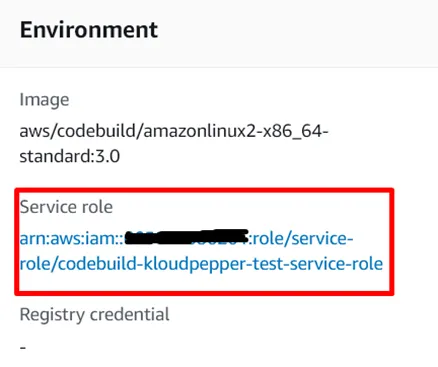
5.1 When you finish creating the project, a role is automatically created for execution. It's necessary to enter the project and find this role. A policy must then be inserted to assume the role of the target account. Follow the next steps:
5.2 Create the following inline policy inside the role. Replace
222222222222 ID with the valid destination account ID: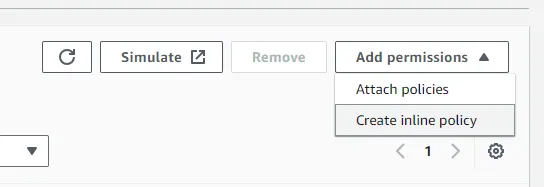
1
2
3
4
5
6
7
8
9
10
11
12
13
14
{
"Version": "2012-10-17",
"Statement": [
{
"Effect": "Allow",
"Resource": [
"arn:aws:iam::222222222222:role/AWSCloudFormationStackSetExecutionRole"
],
"Action": [
"sts:AssumeRole"
]
}
]
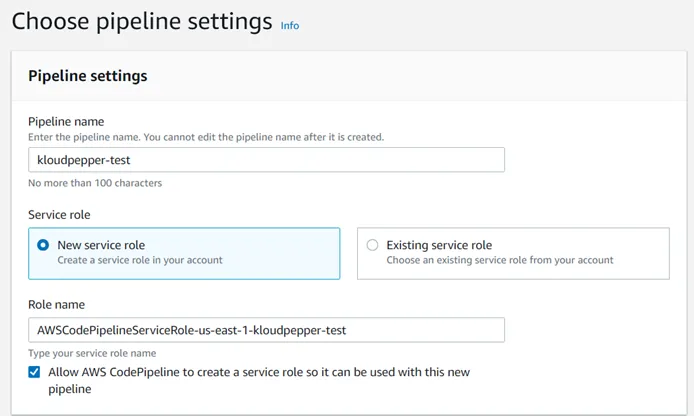
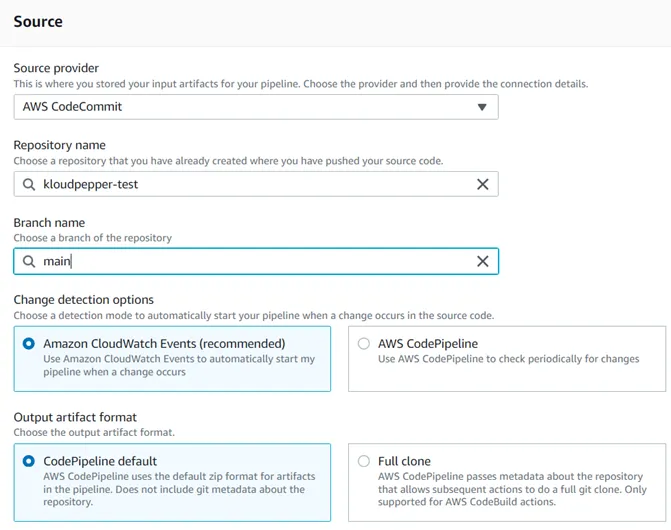
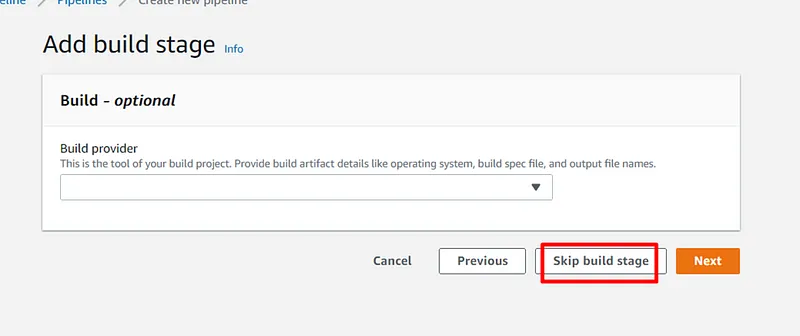
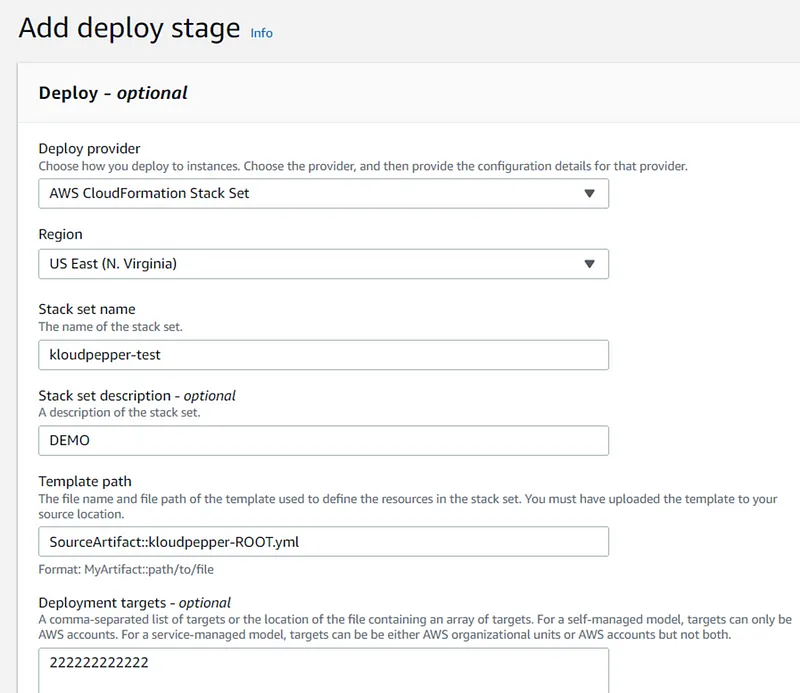
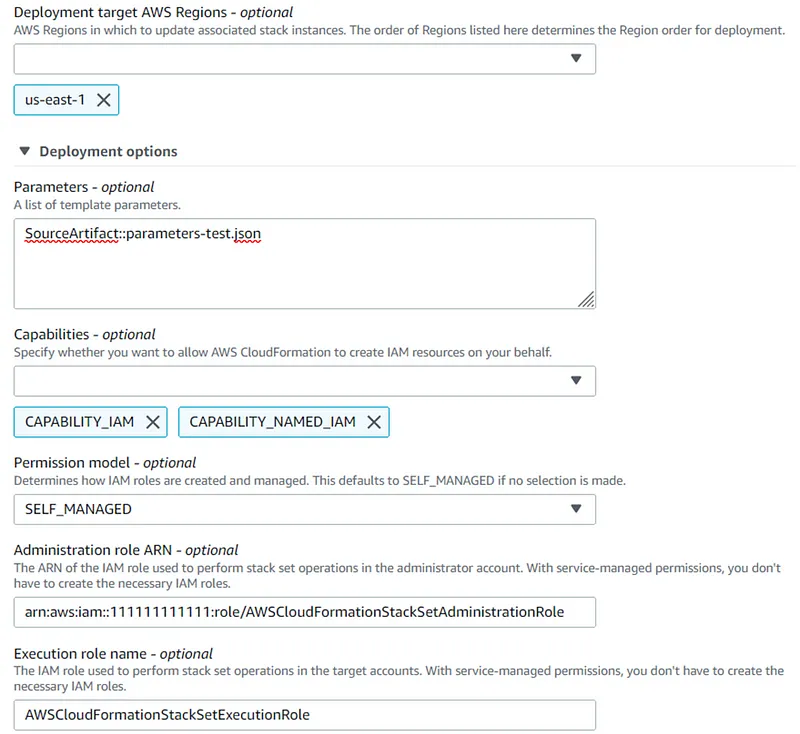
}6. Create a pipeline in CodePipeline and add the following parameters:
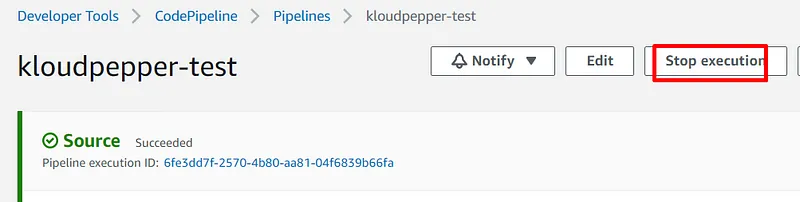
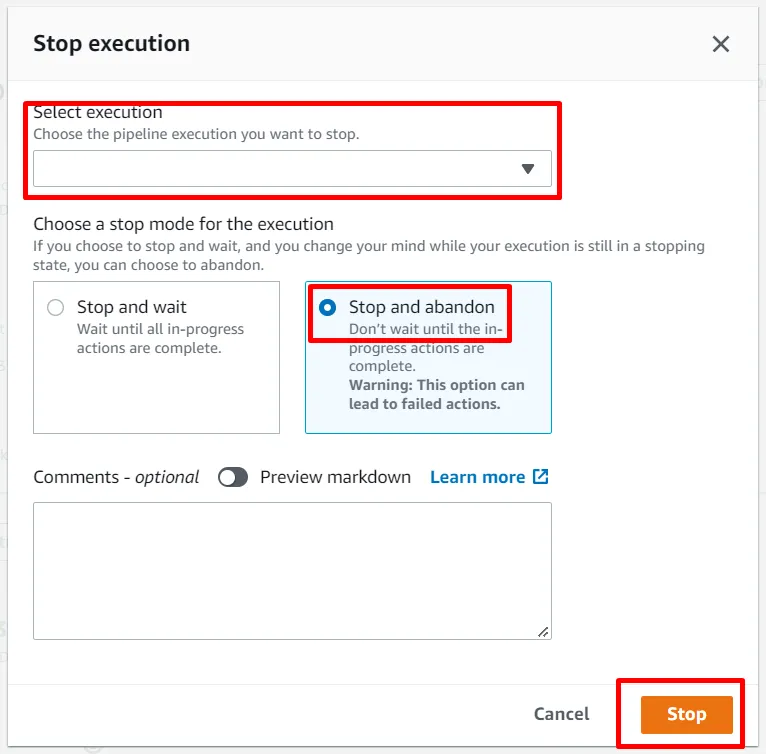
6.1 Once you finish configuring the pipeline, it will automatically start executing. You must stop the execution so you can continue configuring the pipeline:
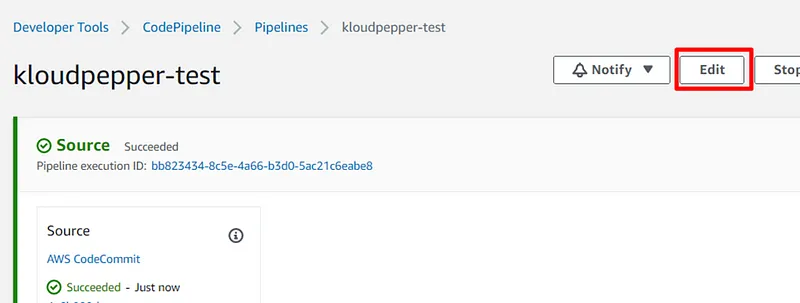
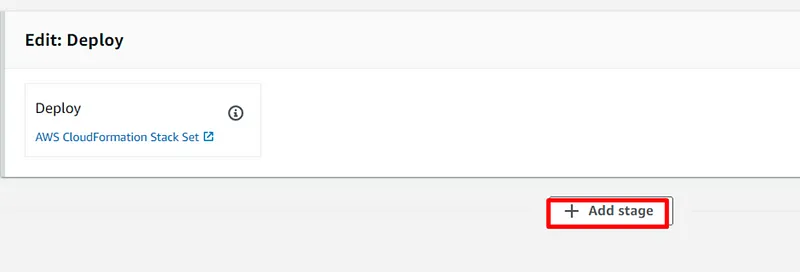
6.2 Edit the pipeline:
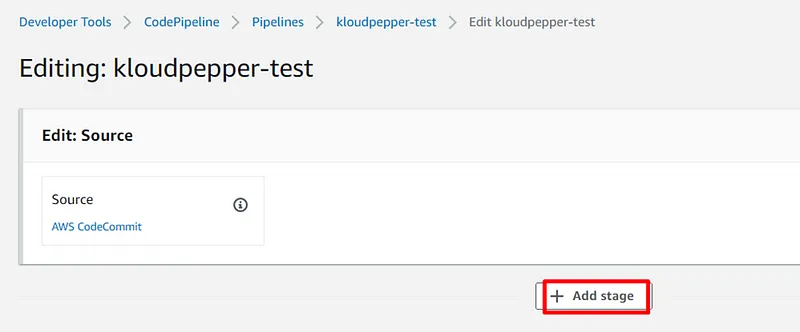
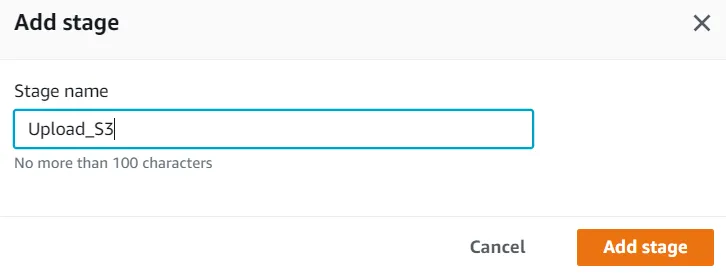
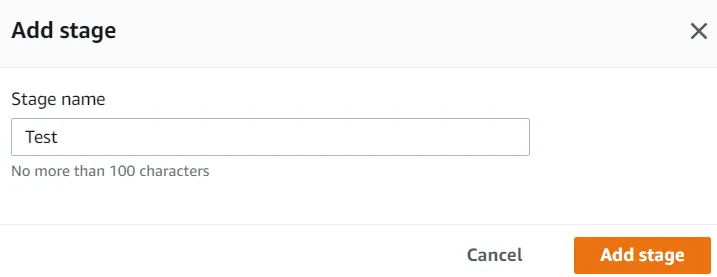
6.3 After the Source stage, add a new stage and enter a name:
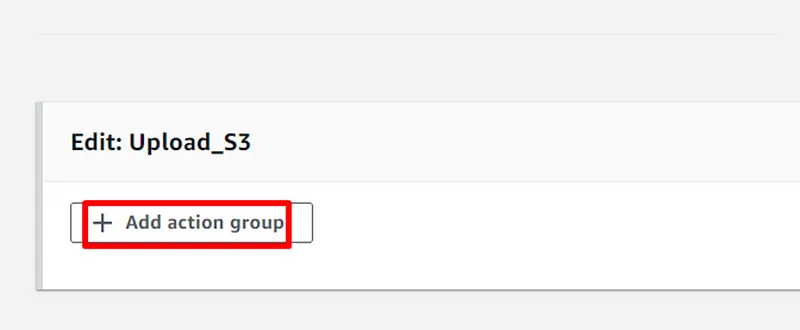
6.4 Add an action in the Upload_S3 stage:
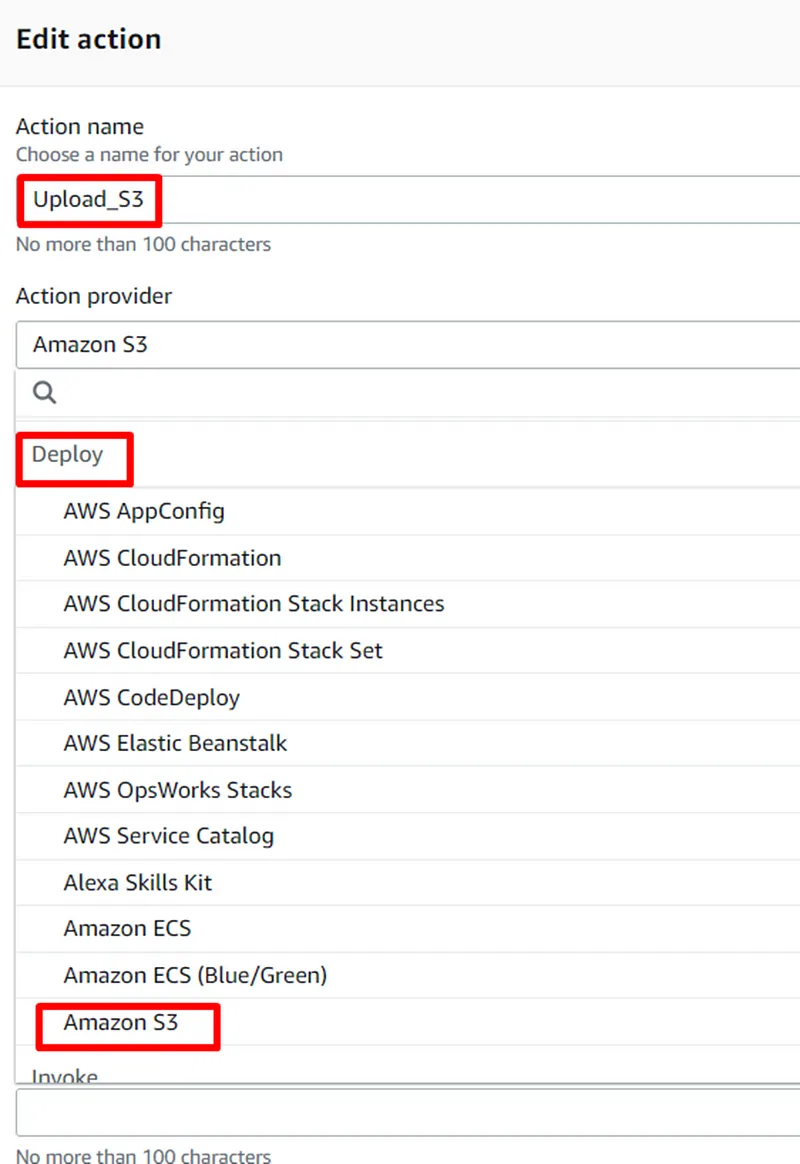
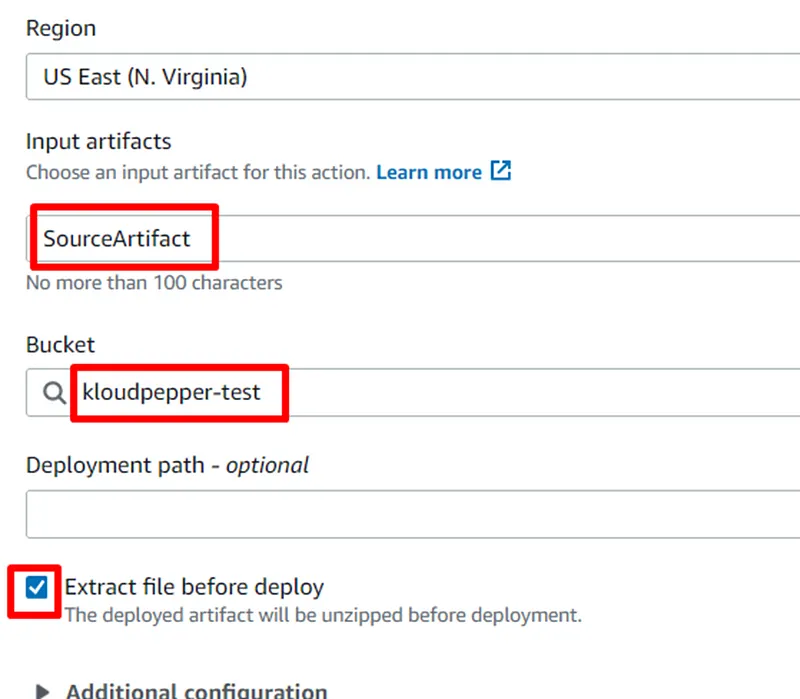
6.5 Add the following parameters in the Upload_S3 action:
6.6 Once you save the configuration in the Upload_S3 action, you have to save the stage:

6.7 After the Deploy stage, add a new stage and enter a name:
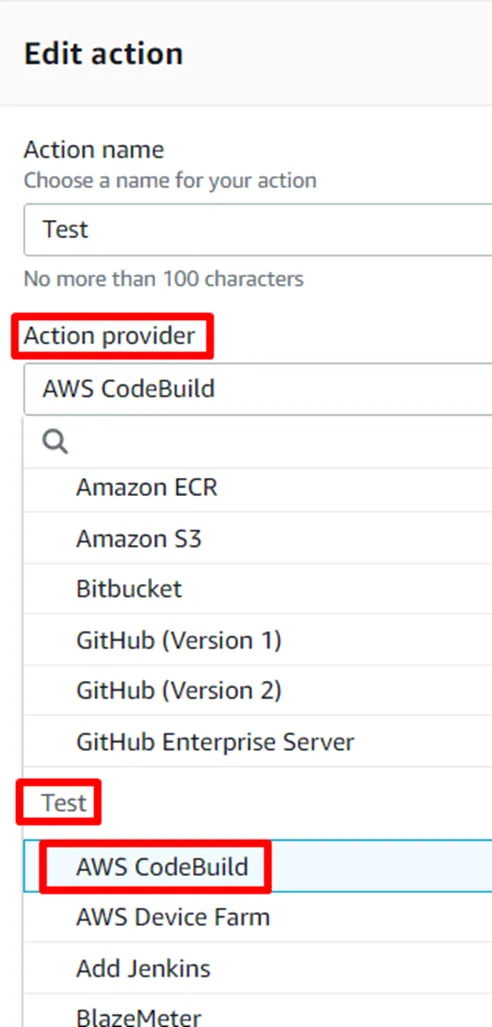
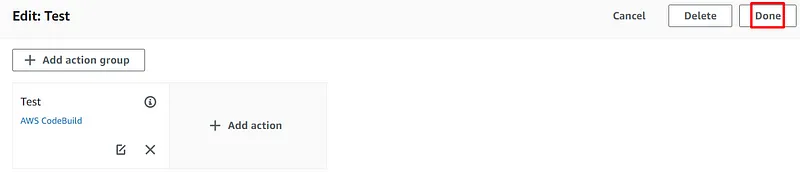
6.8 Add an action in the Test stage:

6.9 Add the following parameters to the Test action:
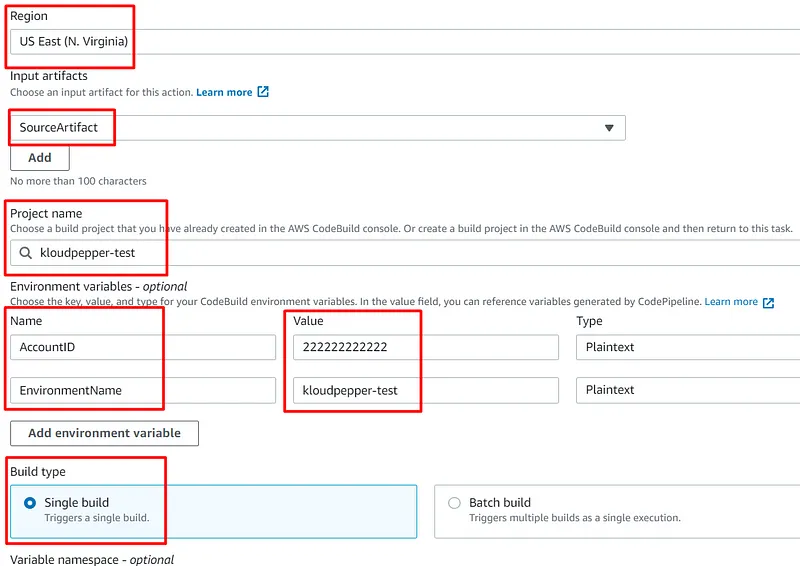
6.10 Once you save the configuration in the Test action, you have to save the stage:
6.11 Finally, save the pipeline:

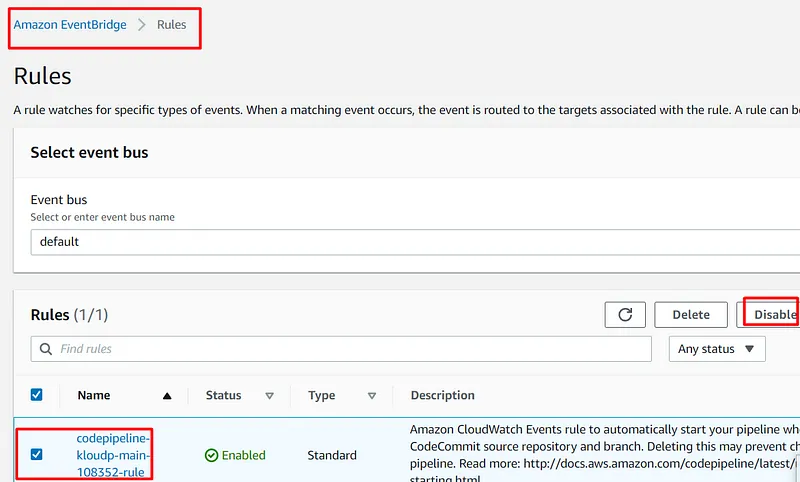
6.12 Disable EventBridge rule (optional):
Remember that we configured the pipeline so that CloudWatch Events automatically runs the pipeline every time there is a change in the CodeCommit repository. If you need to turn off this automatic process, you can go to EventBridge and disable the rule.
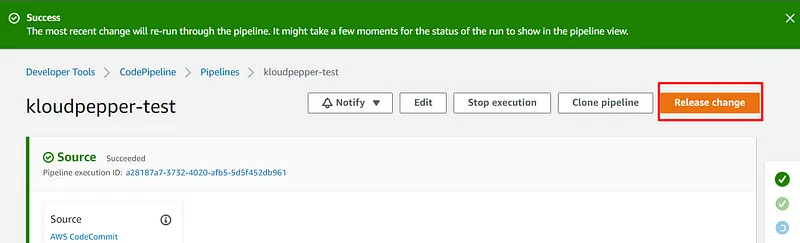
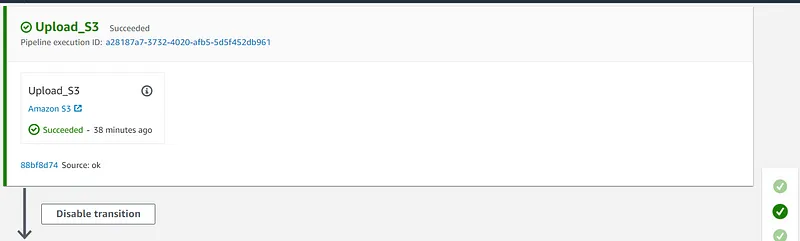
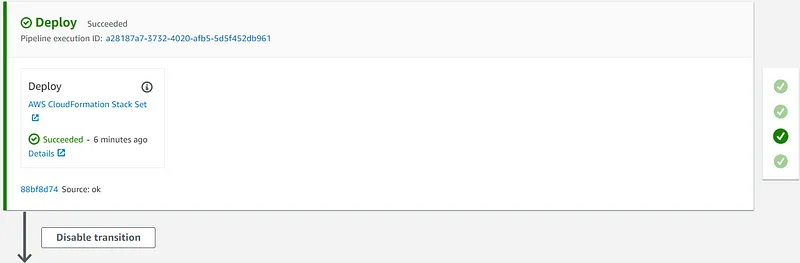
1. Once you have created the pipeline in CodePipeline, go to the Release change button and execute it:
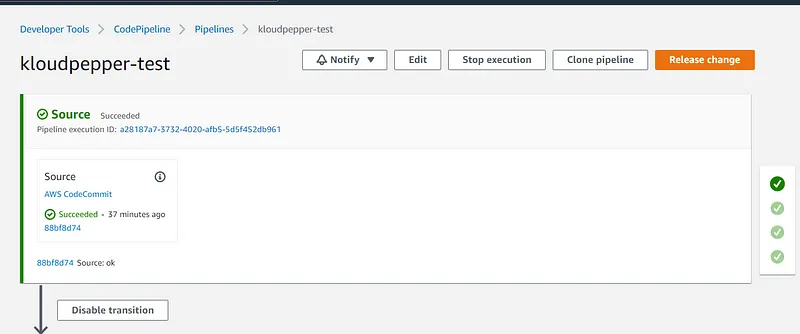
1.2 Wait for the execution to finish and check the stages:

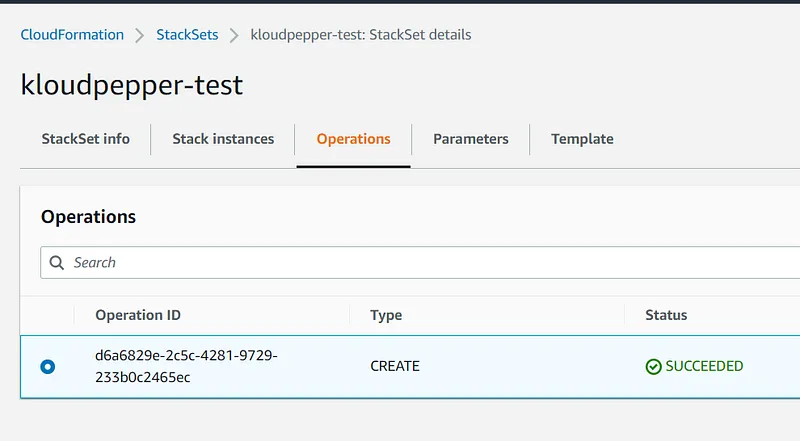
1.3 In the master or delegate account, check the StackSets Operations:
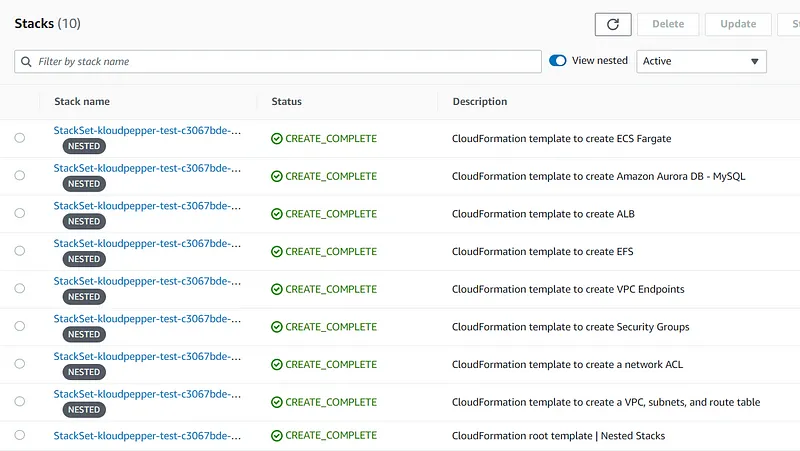
1.4 Finally, in the destination account, check the nested stacks:
I hope that this article will be of great help to you. A big hug, and see you soon.
Thank you!
Comments
Log in to comment