Shopify Customer Care powered by GenAI
Building a Shopify Customer Care Agent powered by GenAI with Amazon Bedrock
Published Mar 8, 2024
Last Modified Mar 11, 2024
How does the application work?
🤓 What are Amazon Bedrock Agents?
☑️ Build an Amazon Bedrock Agent in 4 steps
🔑 Step 1: Generate Shopify Credentials
Install the app and get credentials: 📃 Step 2: Create OpenAPI 3.0 spec
🧑💻 Step 3: Create a Lambda Function
👔 Step 4: Creating a Bedrock Agent
😱 The Bedrock Agent is not working: Lambda Function missing permissions
Do you run an online store that receives a lot of customer service inquiries? If so, you know how common it is for customers to ask the same questions over and over again. They want to know where their order is, how to make a return, or why their discount didn't apply. During busy periods, these questions can quickly overwhelm your customer service team, preventing them from focusing on more important tasks. But what if there was a way to automate these common customer service tasks?
There are a ton of IVR (phone) integrations where customers can call and spend almost 3-4 minutes pressing different buttons or trying to summarize in 2 words what they want just to be forwarded to a representative that can understand what they want and to answer the exact same questions all day.
To overcome this situation I've built a solution that utilizes GenAI to understand what the customer wants and build an agent that is capable to answer these questions using a GenAI API call with Amazon Bedrock.
So whether you're just getting started with AI or you're a seasoned pro, this tutorial will show you how to use Amazon Bedrock Agents and AWS Lambda to take your Shopify management to the next level.
Note: This post has a version in spanish here: https://dev.to/aws-espanol/llevando-la-gestion-de-shopify-al-siguiente-nivel-con-genai-2bje (Versión en Español)
- Create an Amazon Bedrock Agent using one of the foundational models available: Claude Instant V1.
- Create an openAPI 3.0 spec that works with an Amazon Bedrock Agent.
- Create a Lambda Function that meets the requirements to reply an Amazon Bedrock Agent request.

This app is the backend that can be integrated with any Chat client using API Gateway.
This app will use the Bedrock Agents API and will understand what the customer is asking for, then it will try to collect all the input required to be able to get the order information status from Shopify and provide it to the customer in Human Language.
In order to accomplish this when the Agent has all the information it will invoke a Lambda Function that will be in charge of interacting with the Shopify API and provide the Agent with the information that is needed to answer the customer's question.
Amazon Bedrock Agents are IA tools that can automate business tasks like order management with natural language instructions and AWS Lambda, improving the efficiency and reducing manual work.
- Create Shopify credentials. Given that we're going to use Shopify for this tutiral we need an Access Token to query its API.
- Write an OpenAPI 3.0 spec that contains all the documentation about our API to instruct the Agento n how to use it.
- Create a Lambda function that will be in charge of querying the order status in Shopify.
- Create and setup the Agent.
Shopify is t he leading ecom platform built by builders and makes the administration of an online store super easy, since it was built by builders each functionallity has an API.
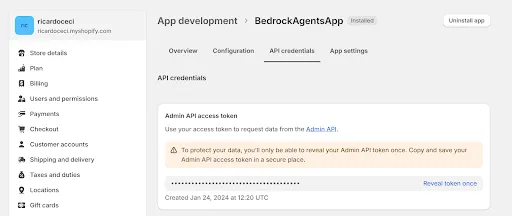
The Lambda Function makes a call to a Shopify API (Orders API), in order to do so it needs an Access Token.
Getting the Access Token: (If you already know how to do this, you can skip this step)
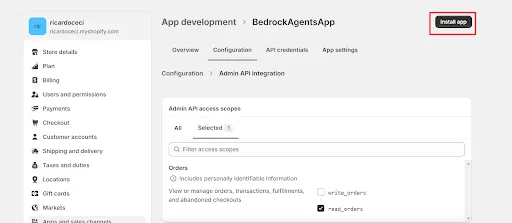
- Create a Custom App in Shopify:
- Define permissions:
- We only need read_orders permission: https://help.shopify.com/en/manual/apps/app-types/custom-apps#get-the-api-credentials-for-a-custom-app
This is the key step and the magic source, the better the spec is the better the Agent will perform.
An openAPI 3.0 spec is a plain text in JSON with a specific format where you indicate:
- API Endpoints
- HTTP Request Methods accepted
- Parameters for each endpoint and its formatting
- Expected responses.
For each bullet there's a "description" field where you can specify in natural language what it does, this is what is going to help the Agent to make a decision.
Document Header:
Path:
- /orders/{orderId}: It will receive GET requests and returns the order information. orderId is a required parameter passed in the URL.
Response:
- Build a response that meets Bedrock Agent requirements.
- Status Code: 200
- An object with a property named content: application/json
- Enum of object properties.
- Object properties:
- Id: Order Number
- Status: Order Status
- MoreInfo: If the order is fulfilled, info about the tracking number, url, etc.
Response:
Full OpenAPI 3.0 Spec:
Save this spec as a text file and upload it to an S3 Bucket, this file will be required in next steps.
This Lambda Function will be in charge to query the order information from Shopify.
Steps to create a Lambda Function:
- Go to AWS Console - Lambda: https://console.aws.amazon.com/lambda/home#/functions
- Create Function
- Author from Scratch
- Set a name
- Runtime: NodeJS (you can use Python or any programming language you feel comfortable with)
- Architecture: X86_64
To make a call to the Shopify API I'm going to use the Axios library, and in the handler body I'll call this object.
If you need any help on adding 3rd party libraries to a NodeJS Lambda Function, leave a commentt and I'll write a post. about it.
The Axios object needs 2 properties:
- URL
- Headers
- Shopify requires a special header to authenticate the requests, named X-Shopify-Access-Token
- Content-Type
In the following request to the Shopify's GraphQL API the orderNumber is passed as argument and it. will return the order staatus and its fulfillments, if there is any fulfillment it will also return the tracking information.
For training purposes I already know that the orderNumber is going to be received in the position 0 of the specified parameters. A great improvement to this can be looking for the property named orderNumber in the event parameter.
The shopifyResponse object stores the required information.
Let's create the responseBody object:
The Bedrock Agent needs to receive some attributes in order to continue its flow:
API responses will belong to an ActionGroup, so the response must specify to wich ActionGroup belongs.
This can be accomplished passing the following properties in the response:
- ActionGroup
- Path
- HTTP Method
- Status Code
- Body (responseBody)
Let's prepare and return the Lambda Function response:
Complete source code: https://github.com/ricardoceci/aws-bedrock-agents-demo
Go to the Bedrock Console and then select "Agents"
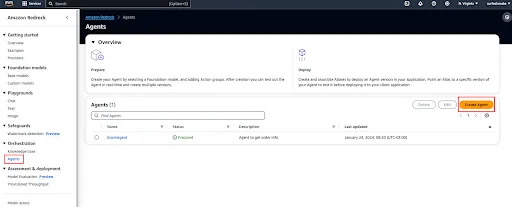
Then:
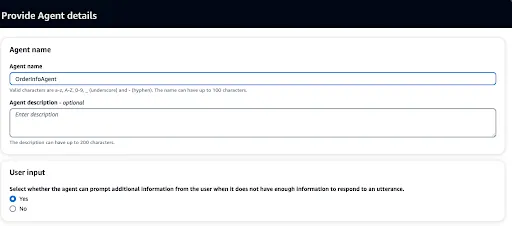
- Give your agent a name: OrderInfoAgent
- Require User Input: YES
- Check if you would like to use an existing role or create a new one, encription and timeout (how long the session will last), and tags.
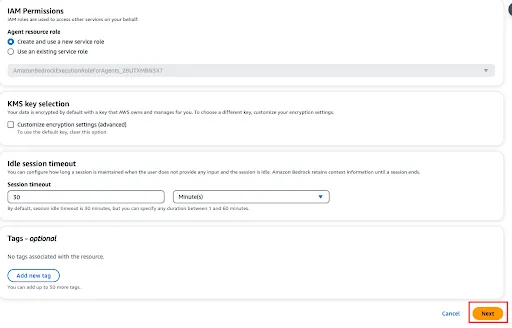
Next Step:
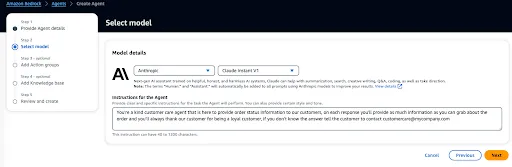
- Select the FM (Foundational Model):
- Here's a guide about how to choose a LLM : https://community.aws/posts/how-to-choose-your-llm
- If you don't see any LLM in the dropdown, this is because you need to enable them: (https://docs.aws.amazon.com/bedrock/latest/userguide/model-access.html).
- Write the instructions for your agent: It is super important to write an excellent prompt, even though the Foundational Model might be capable of understanding multiple languages, writing the prompot in English will make thigs easier, ie: You're a kind customer care agent that is here to provide order status information to our customers, on each response you'll provide as much information as you can grab about the order and you'll always thank our customer for being a loyal customer, if you don't know the answer tell the customer to contact customercare@mycompany.com
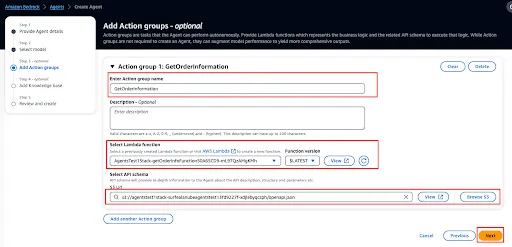
3) Set up the Action Groups, an Agent might have multiple Action Groups, these groups are going to be executed base on the Customer's question. In this case the Agent has only one Action Group.
- Name: GetOrderInformation
- Select the Lambda Function created in the previous step
- Select the OpenAPI spec
4) Don't create a knowledgebase, click Next, review all the information and click Create Agent.
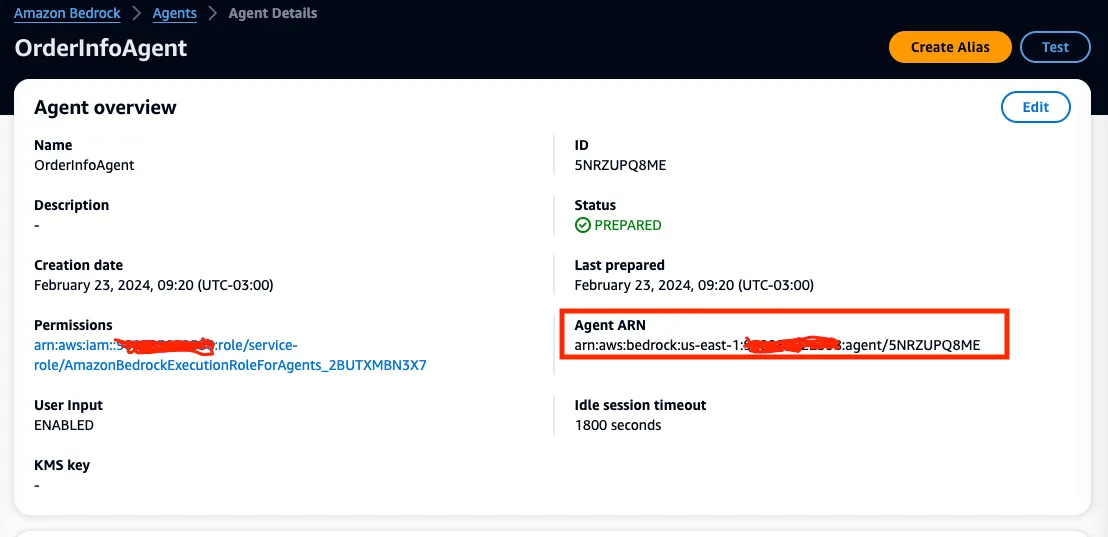
Voilá! in a few minutes the agent will be ready for testing.
Spoiler Alert: Copy the Agent's ARN, you'll need it shortly.
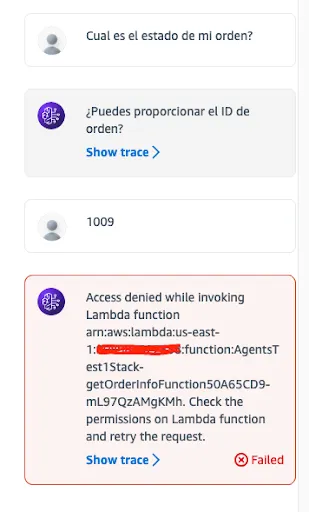
Ok, this is not the expected result, it crashed 🤯
What happened?
The following error was thrown: Access denied while invoking Lambda function arn:aws:lambda:us-east-1:XXXXXXX:function:XXXXXXX. Check the permissions on Lambda function and retry the request.
When clicking Show Trace > there's no clear explanation of what happened, the root cause of this error is that no permissions were given in the Lambda Function to be invoked by the Bedrock Agent.
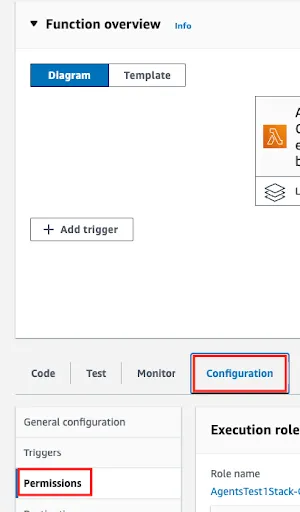
In order to allow the Bedrock Agent to execute a Lambda Function, a Resource Based policy has to be added in the Function.
- In the Lambda Function go to Configurations -> Permissions
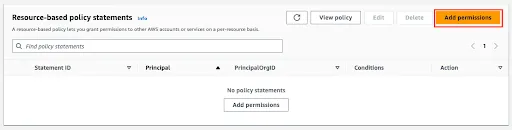
- In the section resource based policy statements click "Add Permissions"
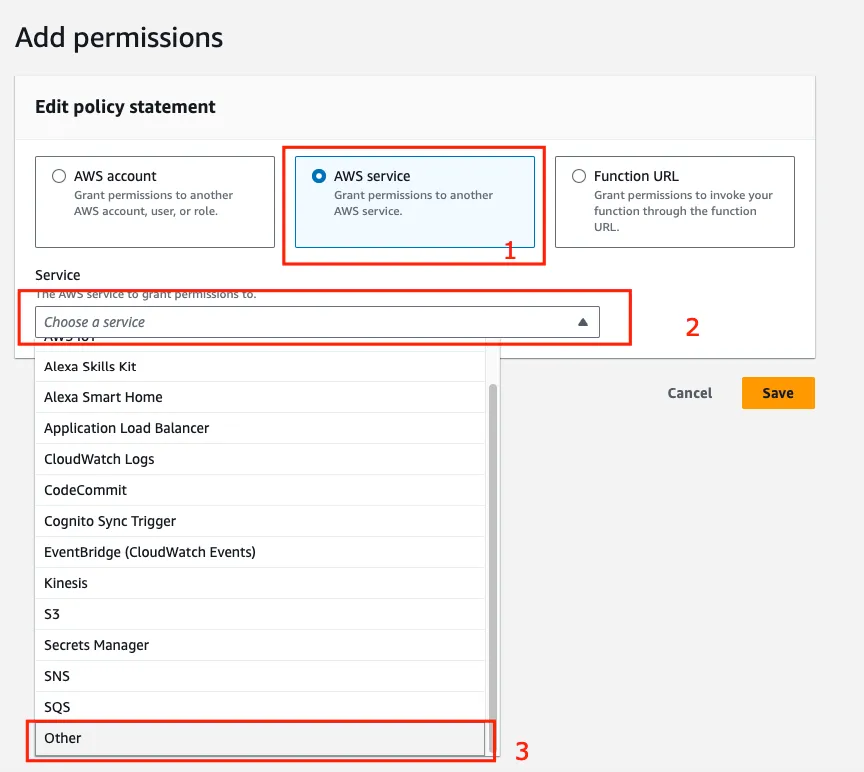
3. Select AWS Service and open the services list. Unfortunately, Amazon Bedrock (at the moment of writing this article) is not part of this list. Select: Other
- Fill in the information
StatementId: An identifier for this policy
Principal: bedrock.amazonaws.com
Source ARN: Bedrock Agent's ARN
Action: lambda:invokeFunction
Now after giving it a second try and asking about the order status, the agent will be capable to answer with the order information and not with an error. (As expected)
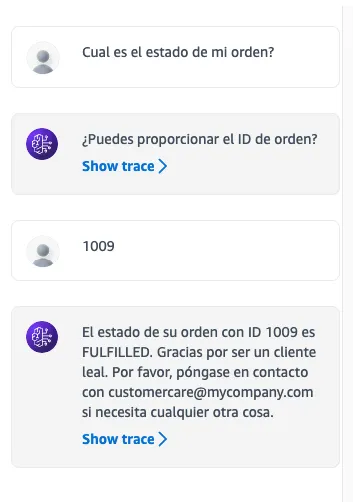
This agent is capable of answering in multiple languages given that the Foundational Model used (Claude v1) is able to do so, not all FM are capable to do it.
In Spanish:
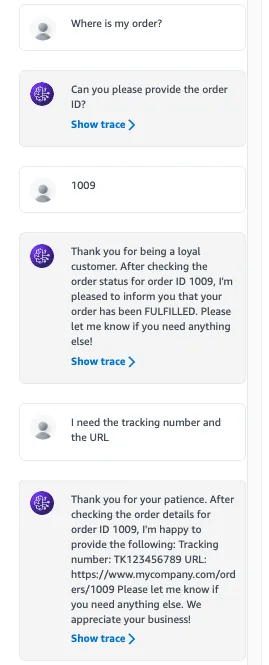
In English:
In this episode you've learned to create a Bedrock Agent in 4 steps and with a few lines of codes if you compare the number of lines you'll have to write if ever wondering to provide intelligence to the Agent.
The Agent is capable of understanding what the customer wants because it is powered by Generative AI using the Foundational Model Claude V1.
The goal of this Agent is to reduce the number of phone calls and repetitive tasks that the Customer Care Service operator handles.
The main goal of Bedrock Agents is to let the developer focus on building the code that delivers the information and then leverage on the Agents capabilities to:
- Understand what customer wants
- Look for the information needed, invoke an API to execute an action.
- Provide the answer to the customer.
Also you've learned how to solve the Invoke permission error in the Lambda Function.
The Bedrock Agent is working, now its time to improve the prompt that empowers the Foundational Model, improve the Lambda Function to provide more information, and make the agent available to be invoked using a public API.
This will be covered in the next episode.