Running Unifi controller on Amazon Lightsail
How to install, configure and run Unifi Network controller on Amazon Lightsail
Marin Frankovic
Amazon Employee
Published Apr 24, 2024
Last Modified May 18, 2024
Before going deeper into topic, this article is based on my personal experience with Unifi Network controller software and Amazon Lightsail service.
Logical question is, "Why would you run your controller in a cloud?". ;) Well, I used to run in a Docker container on my Synology NAS, but that was when I had only one site to manage.
So, main reason I run it on Amazon Lightsail now is:
- I am managing more than 10 sites that are in different locations
- I do not need to open incoming ports on my home network
- Controller load is not impeding my NAS performance
- Controller is always available regardless of my Internet connection
- I have Linux machine in cloud that can be used for other stuff :)
- Predictable cost and ease of use and management
I will cover Lightsail instance setup, how to connect to instance, instance updating, Unifi Network controller installation, instance firewall configuration, how to adopt Unifi devices to controller, how to add certificate to secure traffic and few best practices learned.
I have chosen to go with Ubuntu 22 LTS Linux distribution as I am most familiar with it.
- Go to https://lightsail.aws.amazon.com/ls/webapp/home/instances and login to your AWS account
- Choose option to create new instance
- Select OS only
- Select Ubuntu
- Use existing or create new SSH Key pair (make sure to download keys for use with locally installed SSH client)
- Enable automatic Snapshots (optional)
- Select dual stack networking
- Select size (at time when I was doing this I selected 1 CPU, 1 GB RAM but now would go for 2 CPU, 2 GB RAM)
- Name your instance
- Hit Create Instance
To connect to your instance you have two option. You can either connect via browser-based SSH client or via installed client on your computer. As I am on Windows, I use Putty, but any SSH client will do.
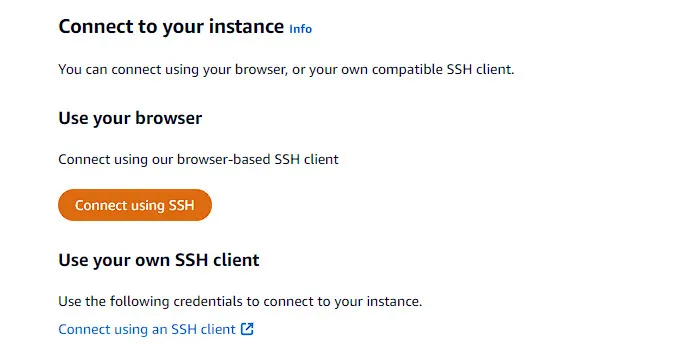
More information on how to connect using your own SSH client can be found in documentation.
One thing that you should definitely do is assign static IP to your instance. To do that, click on your instance and go to Networking tab.
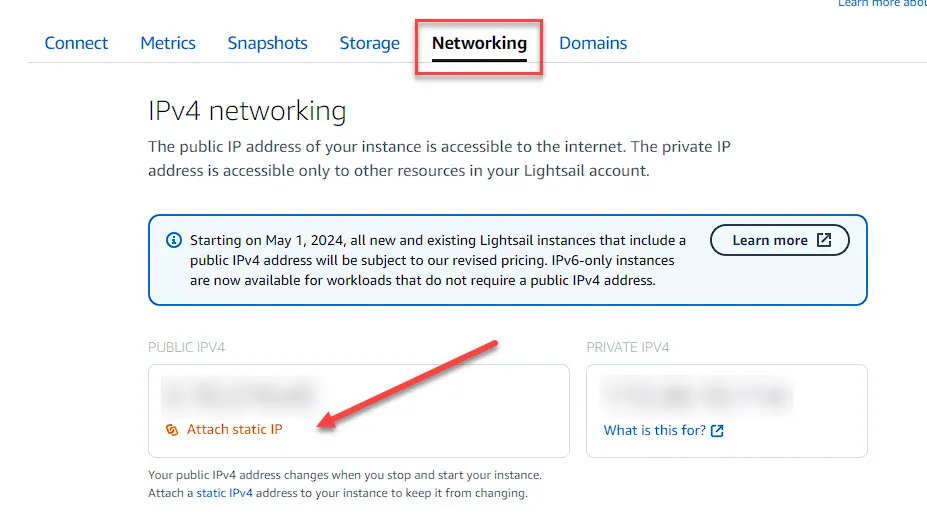
Notice upcoming pricing changes to IPv4 addresses. You can remove IPv4 address but at this point not all Unifi services and devices make use of IPv6.
Once you successfully login to your instance, update all packages and distibution.
-y parameter is used to skip upgrade command to ask confirmation after every package.
Sometimes after running upgrade command, not all packages update. In that case I re-run upgrade command with all packages named in a command.
Reboot your instance after installing all updates.
In my case, all updates are installed and I am ready to install Unifi controller.
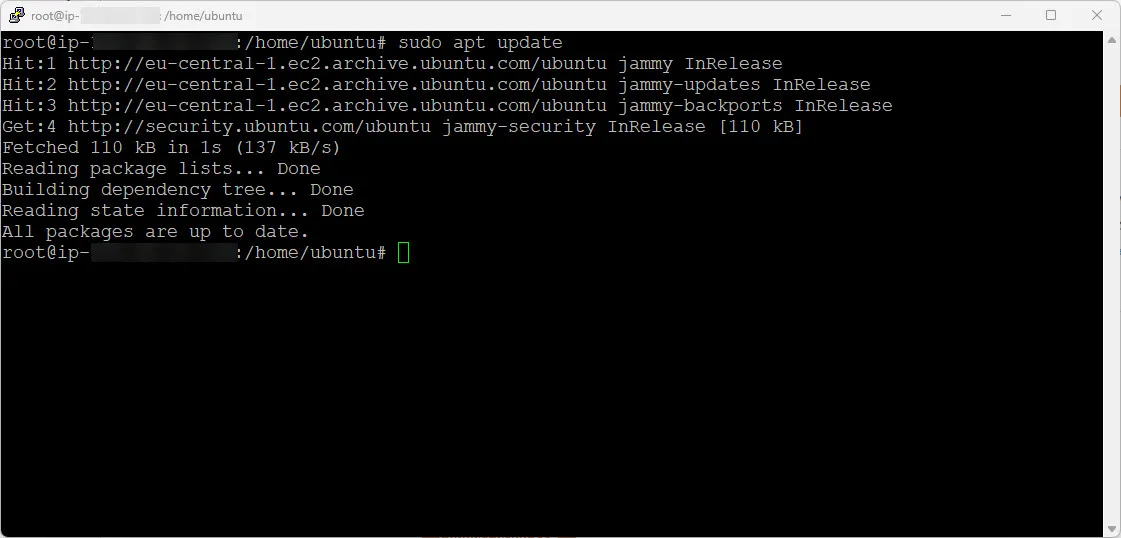
You can install Unifi controller in several different ways. I found it easiest to be just to run prepared installation script that will install everything for you. Including required packages, setup database and application itself. Method 1 is manual installation, Method 2 is script based installation which I used.
- Install required packages
- Add new source list to trusted sources
- Add GPG keys
- Install MongoDB
Sometimes this step is not needed. If your Linux distribution lacks MongoDB or repo does not have it, you can refer to this MongoDB installation guide.
- Install Unifi network controller
- Install ca-certificates package
- Download installation script
In this case I am downloading latest (as of writing this post) version of Unifi Network controller installation script. Other versions can be found on Unifi community page.
- Once you download script, you can run it
If you want to install latest Unifi Network Controller with all requirements in one line, you can use
For both methods, if everything went as planned and there were no errors, you should be able to access your newly installed Unifi Network Controller via browser by entering https://ip.of.your.server:8443.
If you receive error, please continue reading. ;)
If you have existing Unifi Controller installation version 5.0x and above, you can update it by running these few simple commands.
- Install ca-certificate package (if not already available)
- Download update sctript
- Run the script
Unifi Network Controller needs some ports to be open so devices can connect to it and be adopted and managed. To open required ports go to Networking Tab of your instance. I have opened following ports for IPv4 and IPv6.
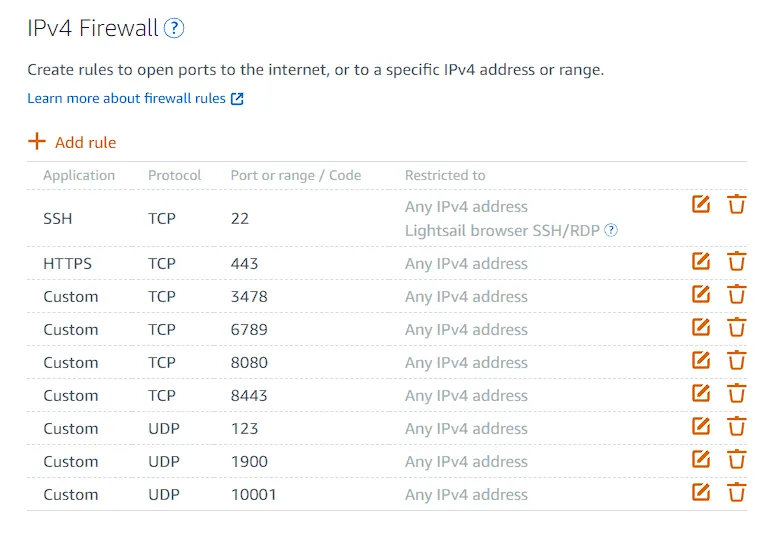
For more information of Unifi Network Controller ports please check out this reference documentation.
Since network controller is not running in your local network I used Layer 3 adoption option.
- Make sure device is in factory default state.
- Connect device to same network as your laptop
- Type in following command
Before doing this I created A and AAAA record in my DNS zone that points to IPv4 and IPv6 address of Amazon Instance. In the command, I used DNS name instead of IP address of the instance.
I also recommend executing above command twice, as sometimes it does not work first time.
This step is optional, but it will make your connection to Unifi Network controller more secure. You can opt to go with free Lets encrypt certificates or with commercial certificates. In my case, i went with commercial certificate as I already have wildcard certificate for my custom domain name.
Make sure you have A record with your domain name pointing to IP address of Light sail instance.
Port 80 must be open for the challenge.
- Download the script
- Execute the script
Example of one liner with required parameters:
More info can be found here.
- Obtain certificate from your provider
- Download your .cer file and root and any Intermediate .cer files
- Transfer all files to your Ubuntu VM to a location where your .key file is
- Run following command to bundle root and intermediate certificates
- Run following commands to import certificates and restart Unifi service
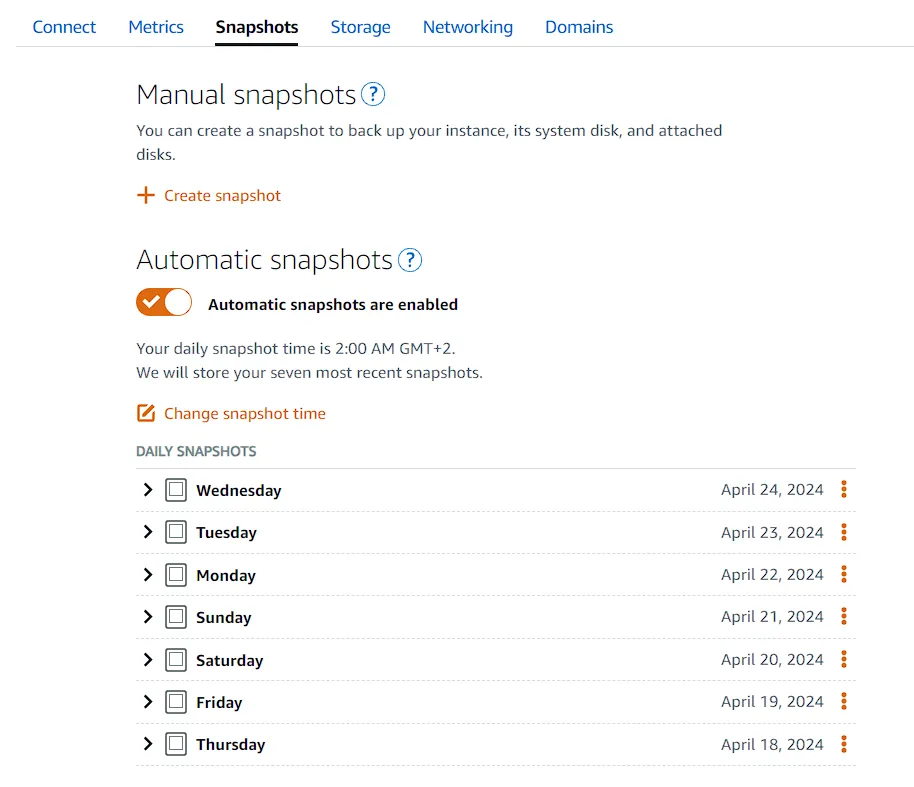
Turn on Amazon Lightsail Automatic snapshots feature on your Ubuntu instance. This saved me more than once! ;)
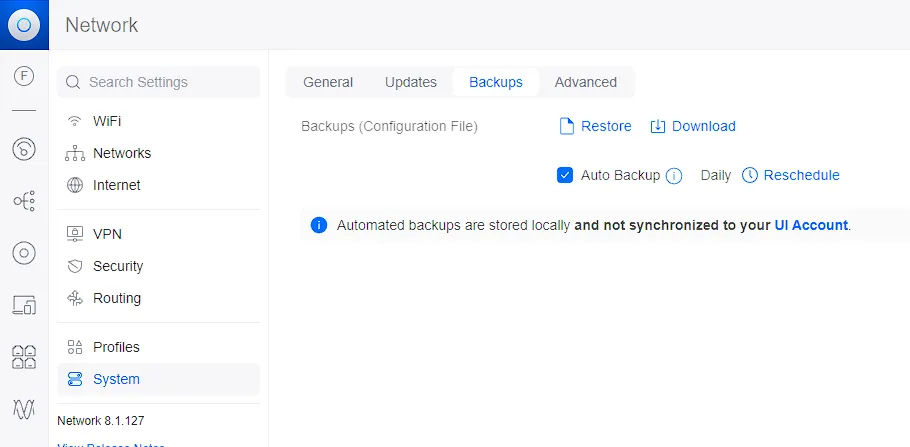
Enable and configure Unifi Network controller backups. Make sure to download them from time to time.
Marin Frankovic (LinkedIn: https://www.linkedin.com/in/frankovic/)
With nearly two decades of hands-on experience in the IT industry, Marin a seasoned Senior Solutions Architect at AWS, specializing in crafting and executing innovative cloud migration strategies. My proficiency spans across AWS, Microsoft, and open-source technologies, enabling me to design and implement robust architecture solutions for diverse sectors. I am AWS and Microsoft certified architect, dedicated to sharing knowledge and skills, contributing to publications and empowering others in virtualization and cloud computing.
Any opinions in this post are those of the individual author and may not reflect the opinions of AWS.
