Setting Up the AWS Organization, Identity Center, and the Amazon Q Developer Pro Subscription
Your development team is excited to use the pro features of Amazon Q Developer—but they need to connect to a valid subscription server. You are the person responsible for all things AWS and it is your job to make this happen. Don't worry, in this blog post I will share with you exactly what you need to do.
Published May 16, 2024
Last Modified Jul 9, 2024
As someone responsible for all things AWS at your company, you may be approached by people asking for different things all the time. Sometimes these questions are simple, sometimes they are not. But what makes you really nervous is when they ask you about something you have done before. Maybe one of those asks is something like this.
Hey. I want to use the pro features of Amazon Q Developer in my IDE. I installed the Amazon Q plugin there, but now it is asking me for a "Start URL" that my admin is supposed to give me. Can you give me that?
You politely respond you are glad to help, but you need to understand more about what is being asked. You ask them to show you the IDE, and this is what they give you.
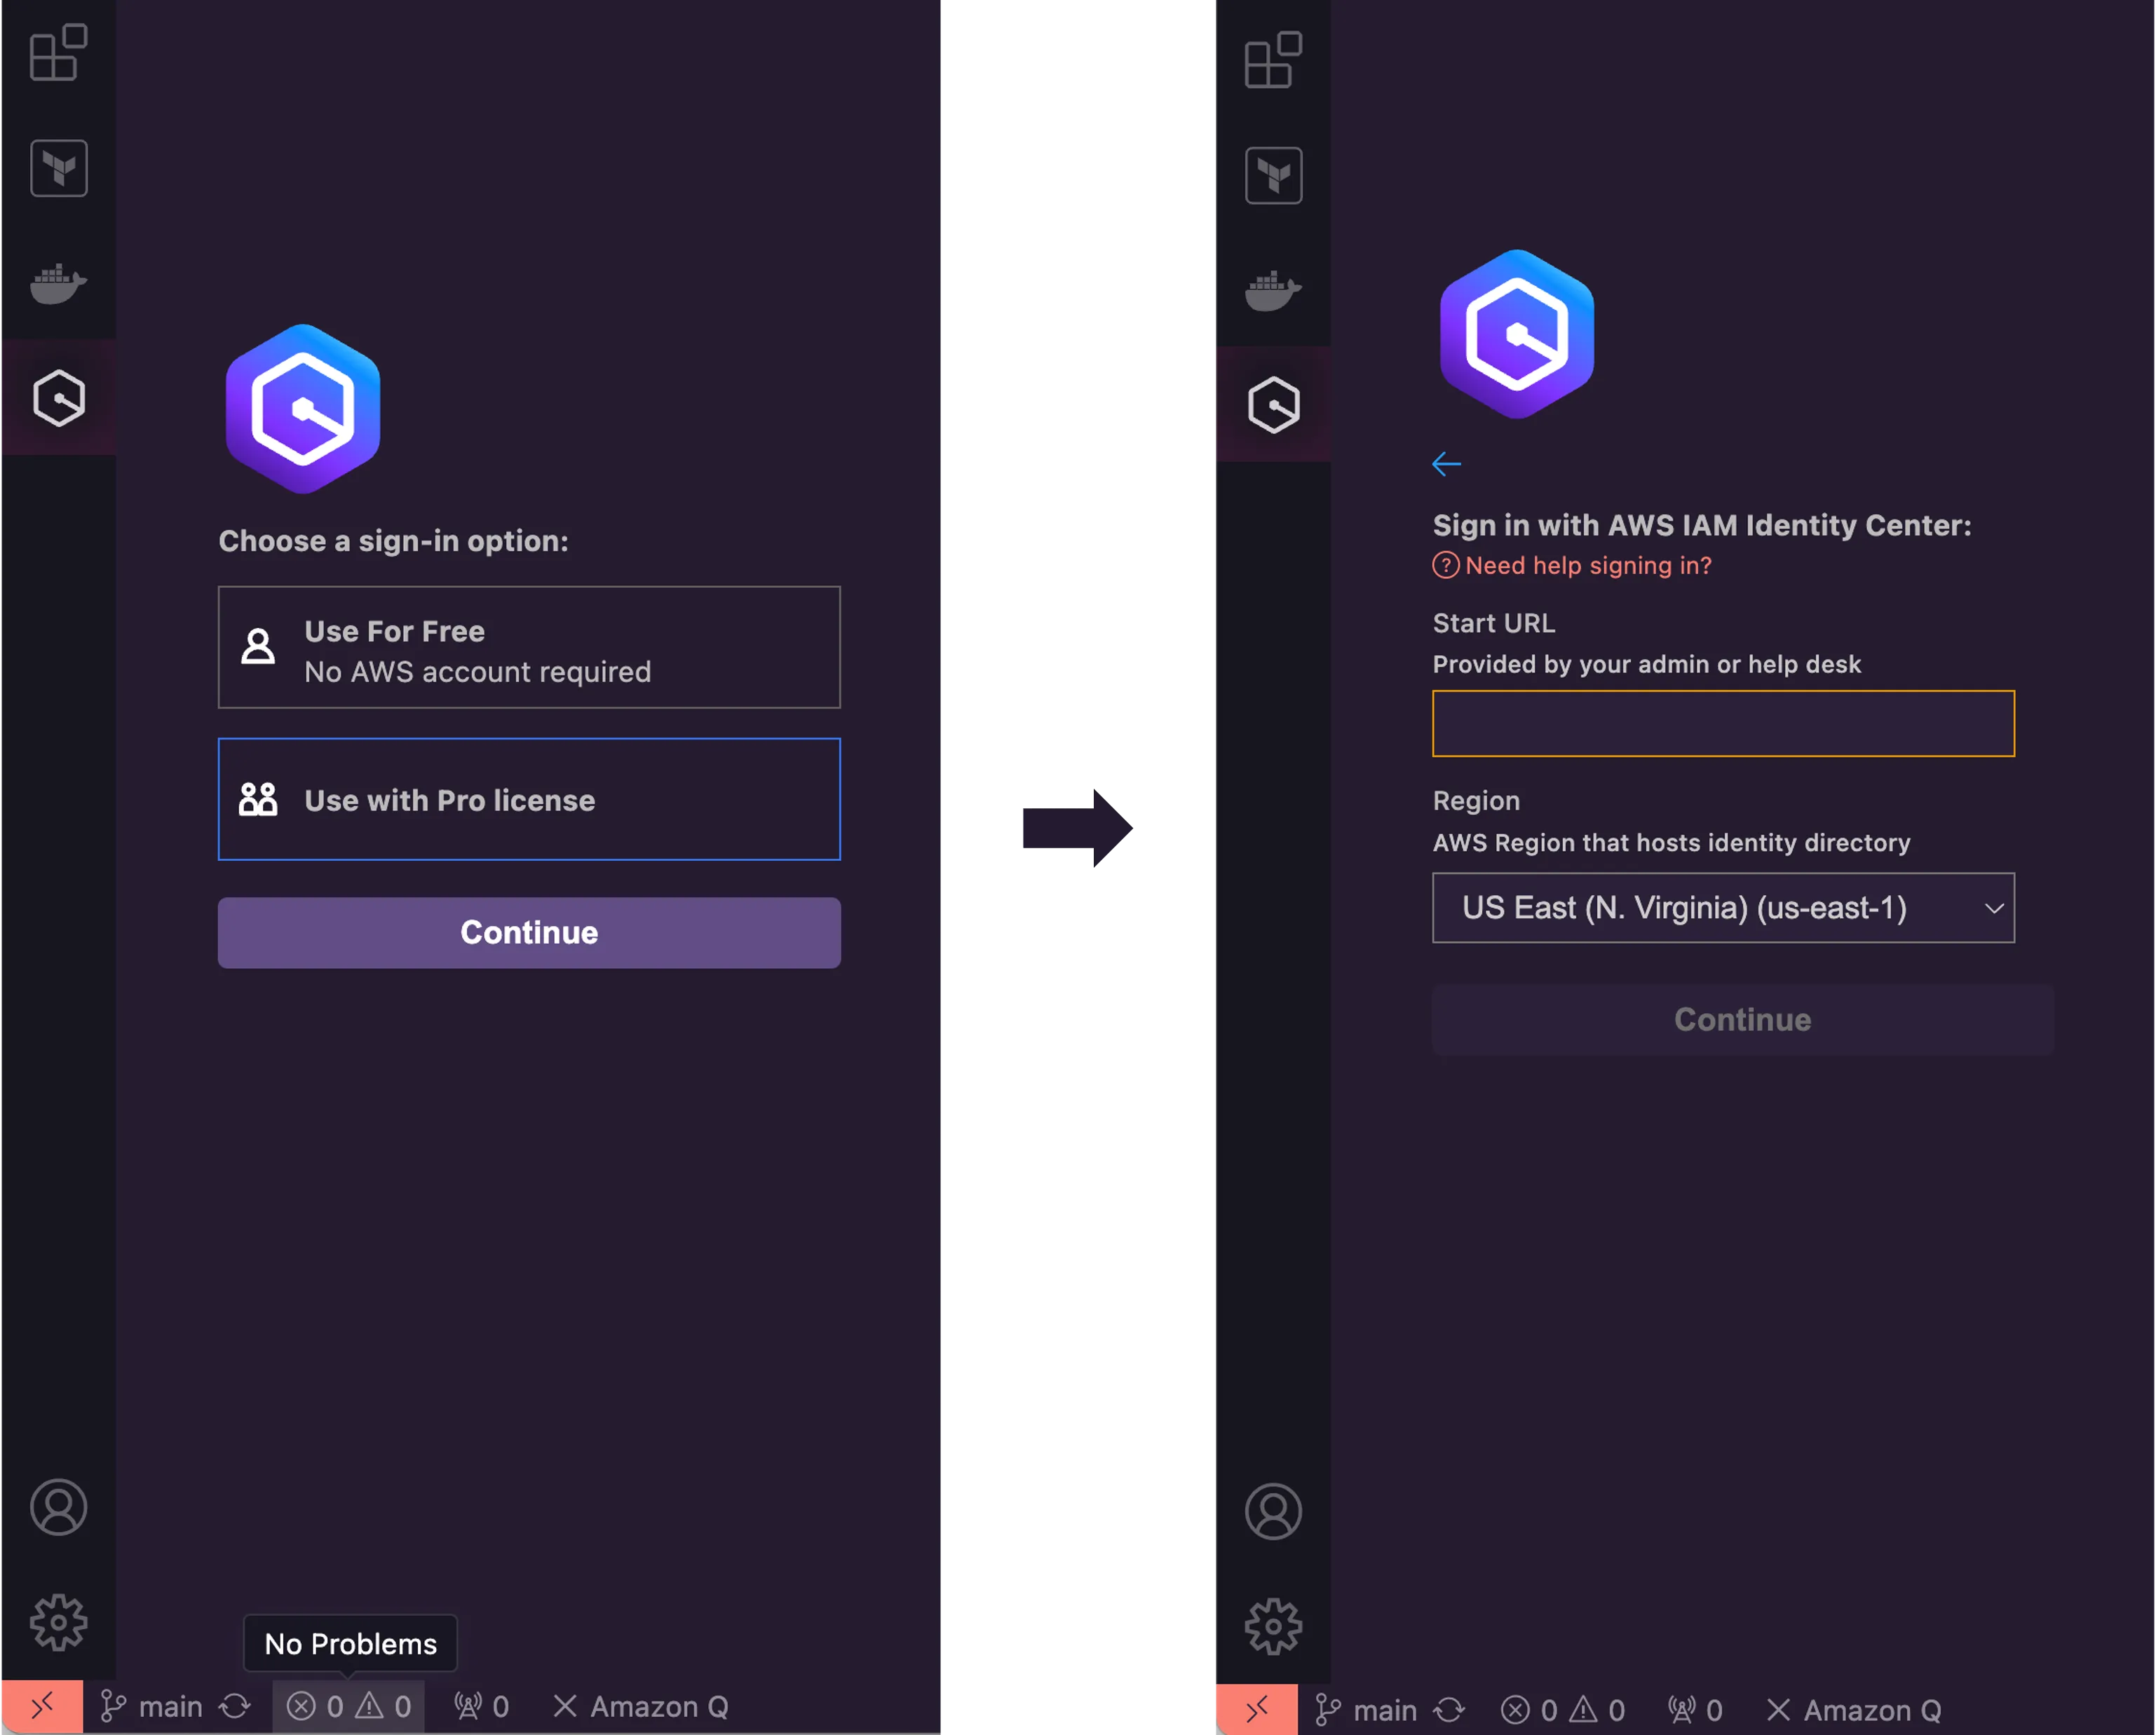
Then you panic, as you have no clue about what that is and how to get that. If this is you, don't worry, in this blog post I will share with you exactly what you need to do. In a nutshell, there are four steps you must complete. The first one is the creation of an AWS Organization for your accounts. The second is giving your AWS user the right permissions to continue the setup. The third one is setting up an AWS Identity Center. The last one is subscribing to Amazon Q Developer Pro.
AWS Organizations is an account management service that enables you to consolidate multiple AWS accounts into an organization that you create and centrally manage. AWS Organizations include account management and consolidated billing capabilities that enable you to better meet the budgetary, security, and compliance needs of your business. For our purposes here, the only thing you actually need to know is that you will need an AWS Organization to complete the next step which is setting up an AWS Identity Center.
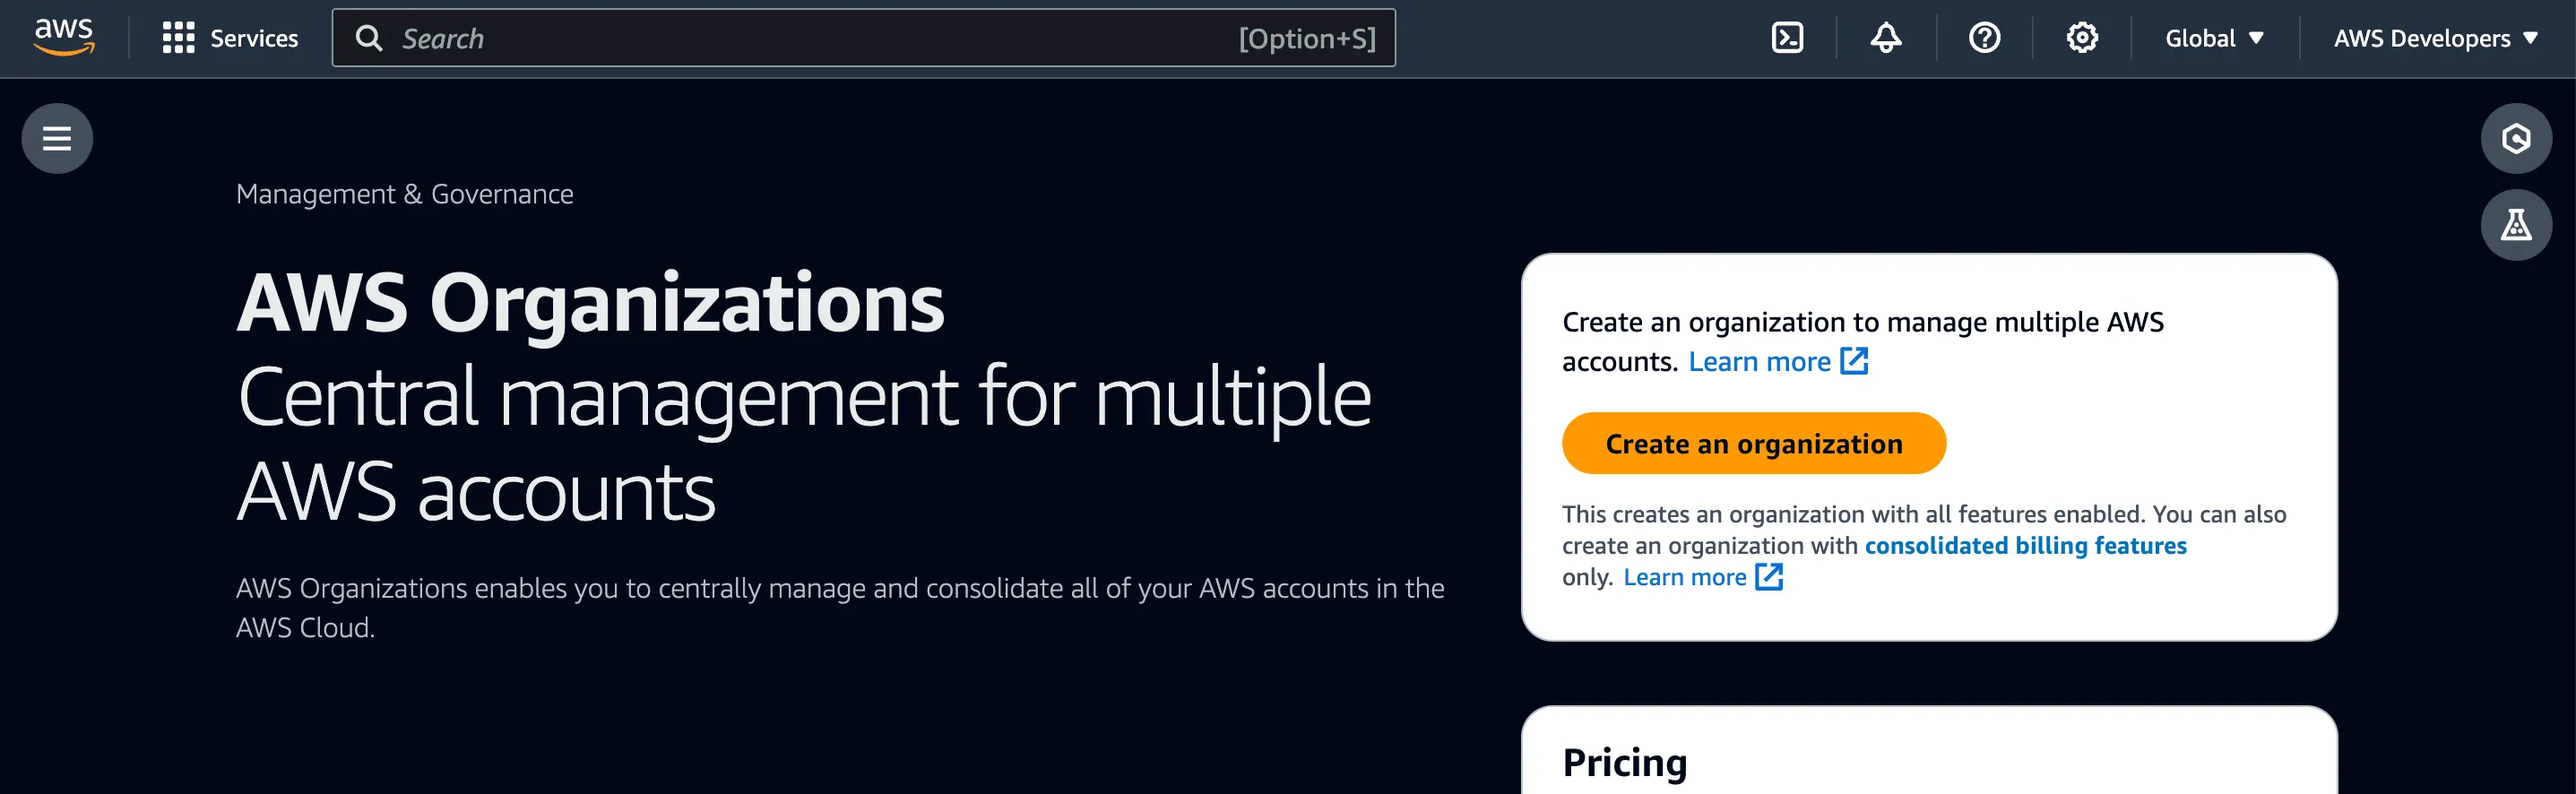
AWS Organizations are not tied to any region and have no cost. If you have never created one, just go ahead and click Create an organization. This is it. You don't need to do nothing more.
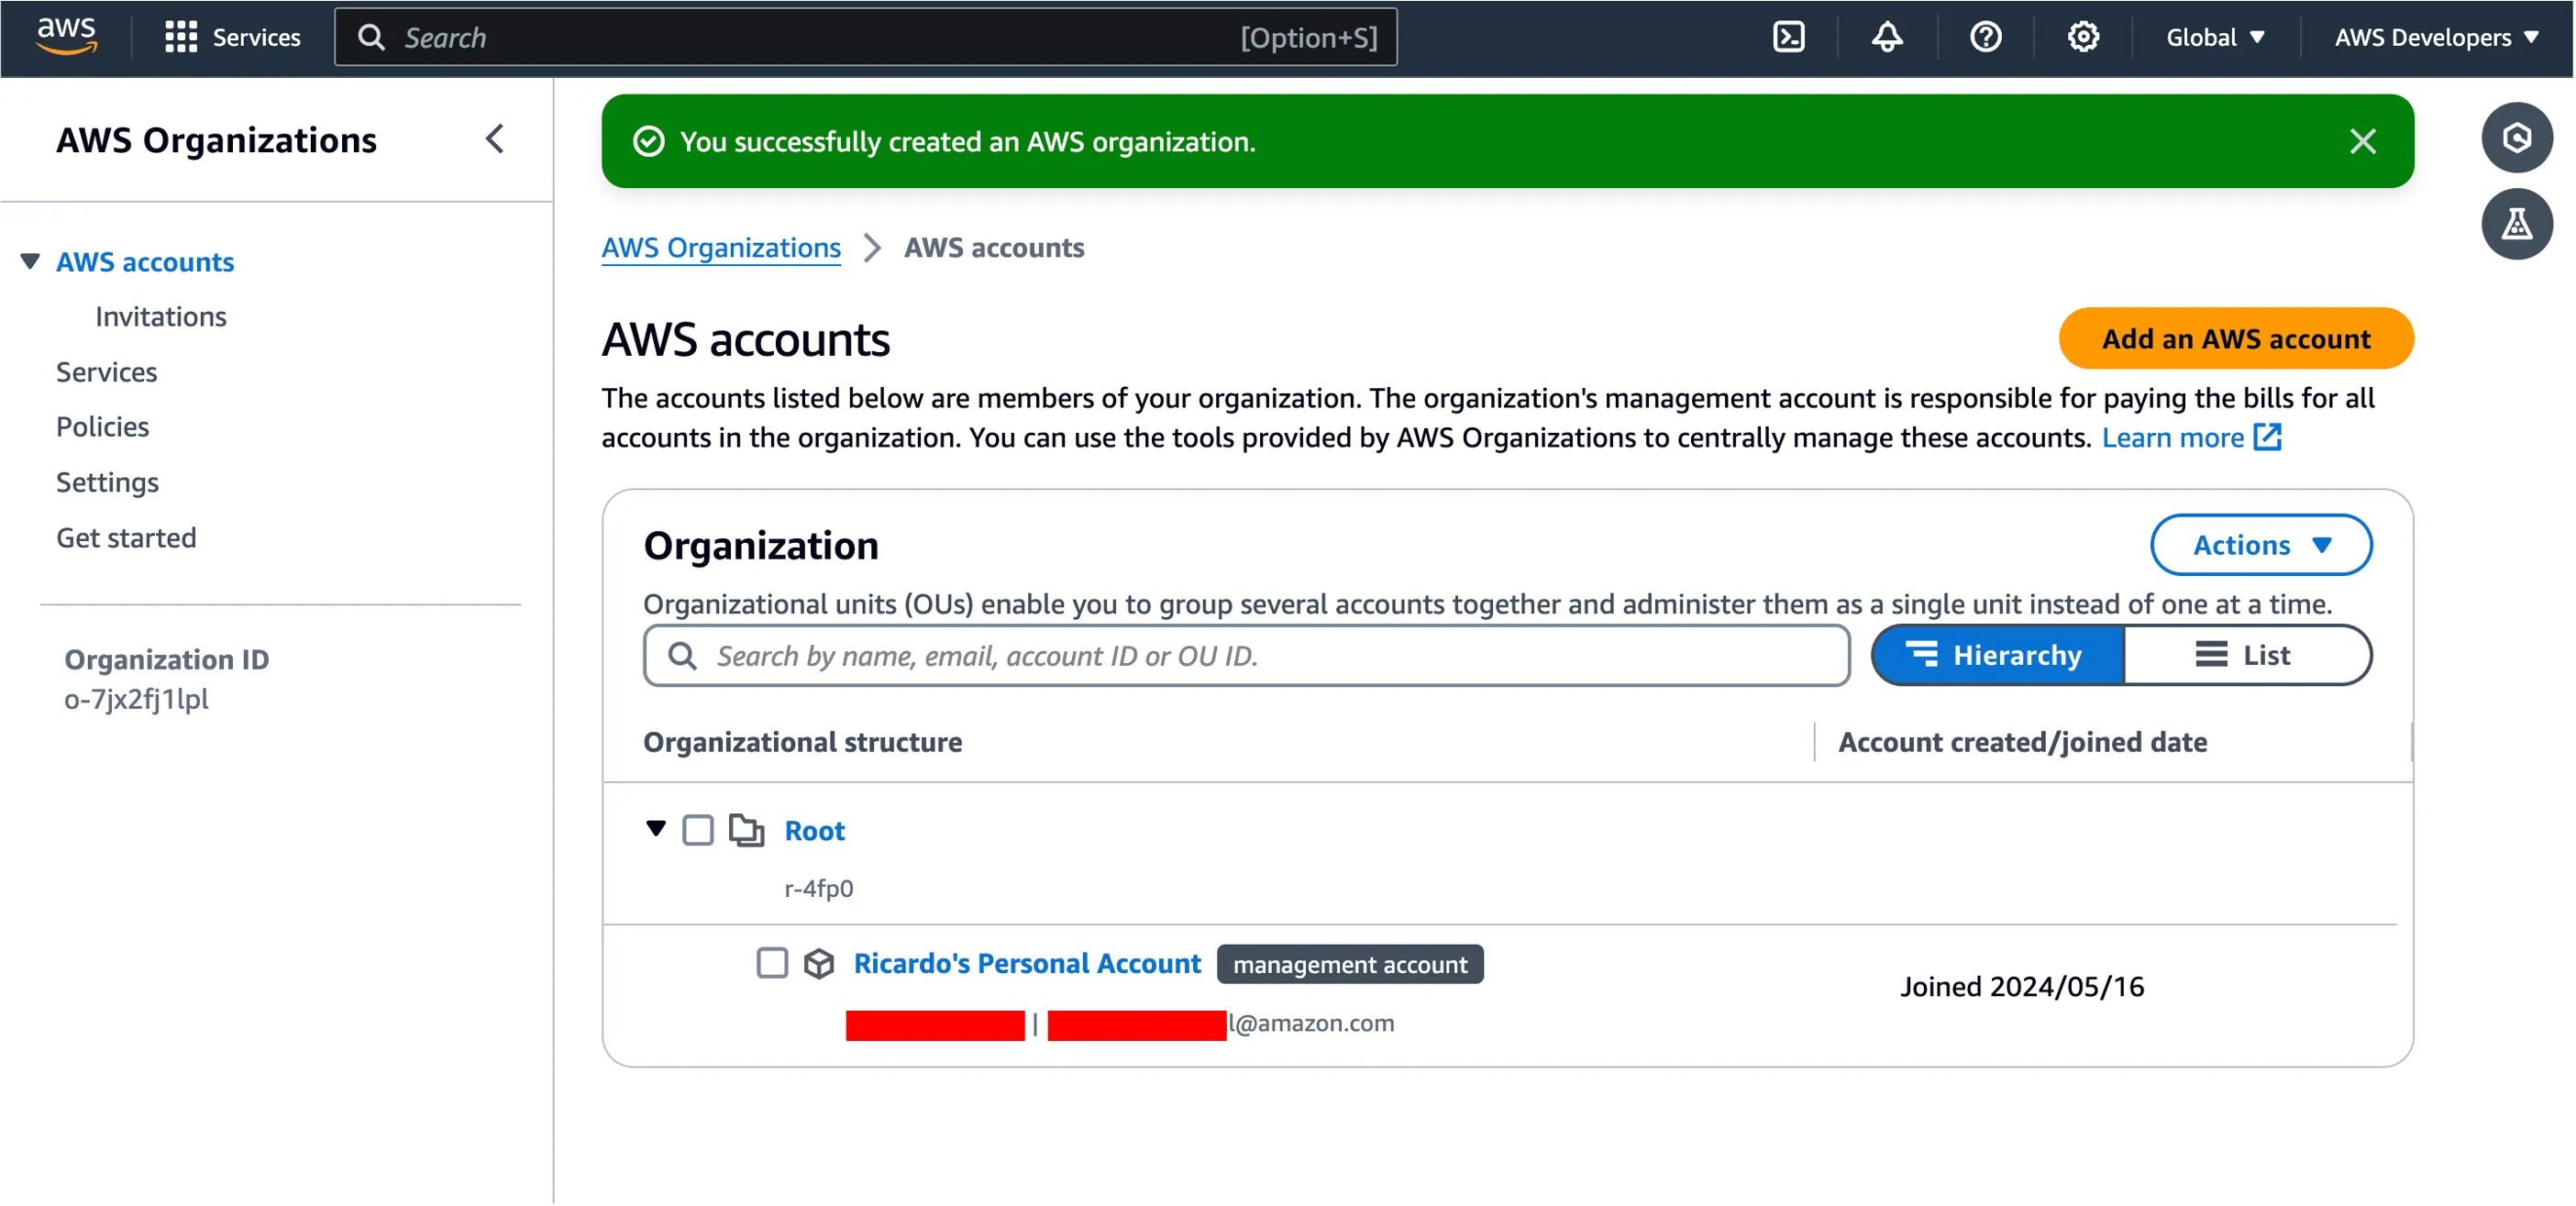
You can add more than one AWS account into the organization, but depending on your needs, this may be optional. Let's go to the next step.
This next step is very important. Failing this step will cause you some serious headache, as the moving parts from this setup will fail. Whether you are using a user directly from IAM or from a central identity center, this user must have the right permissions to continue the setup. Luckily, this can be easily done with a couple of policies. The first one is the
AmazonQFullAccess AWS managed policy. Go ahead and add this policy to your user. The second is a custom policy.Create a new policy named
AmazonQAdminPolicy with the following permissions.Save the new policy and associate to your user.
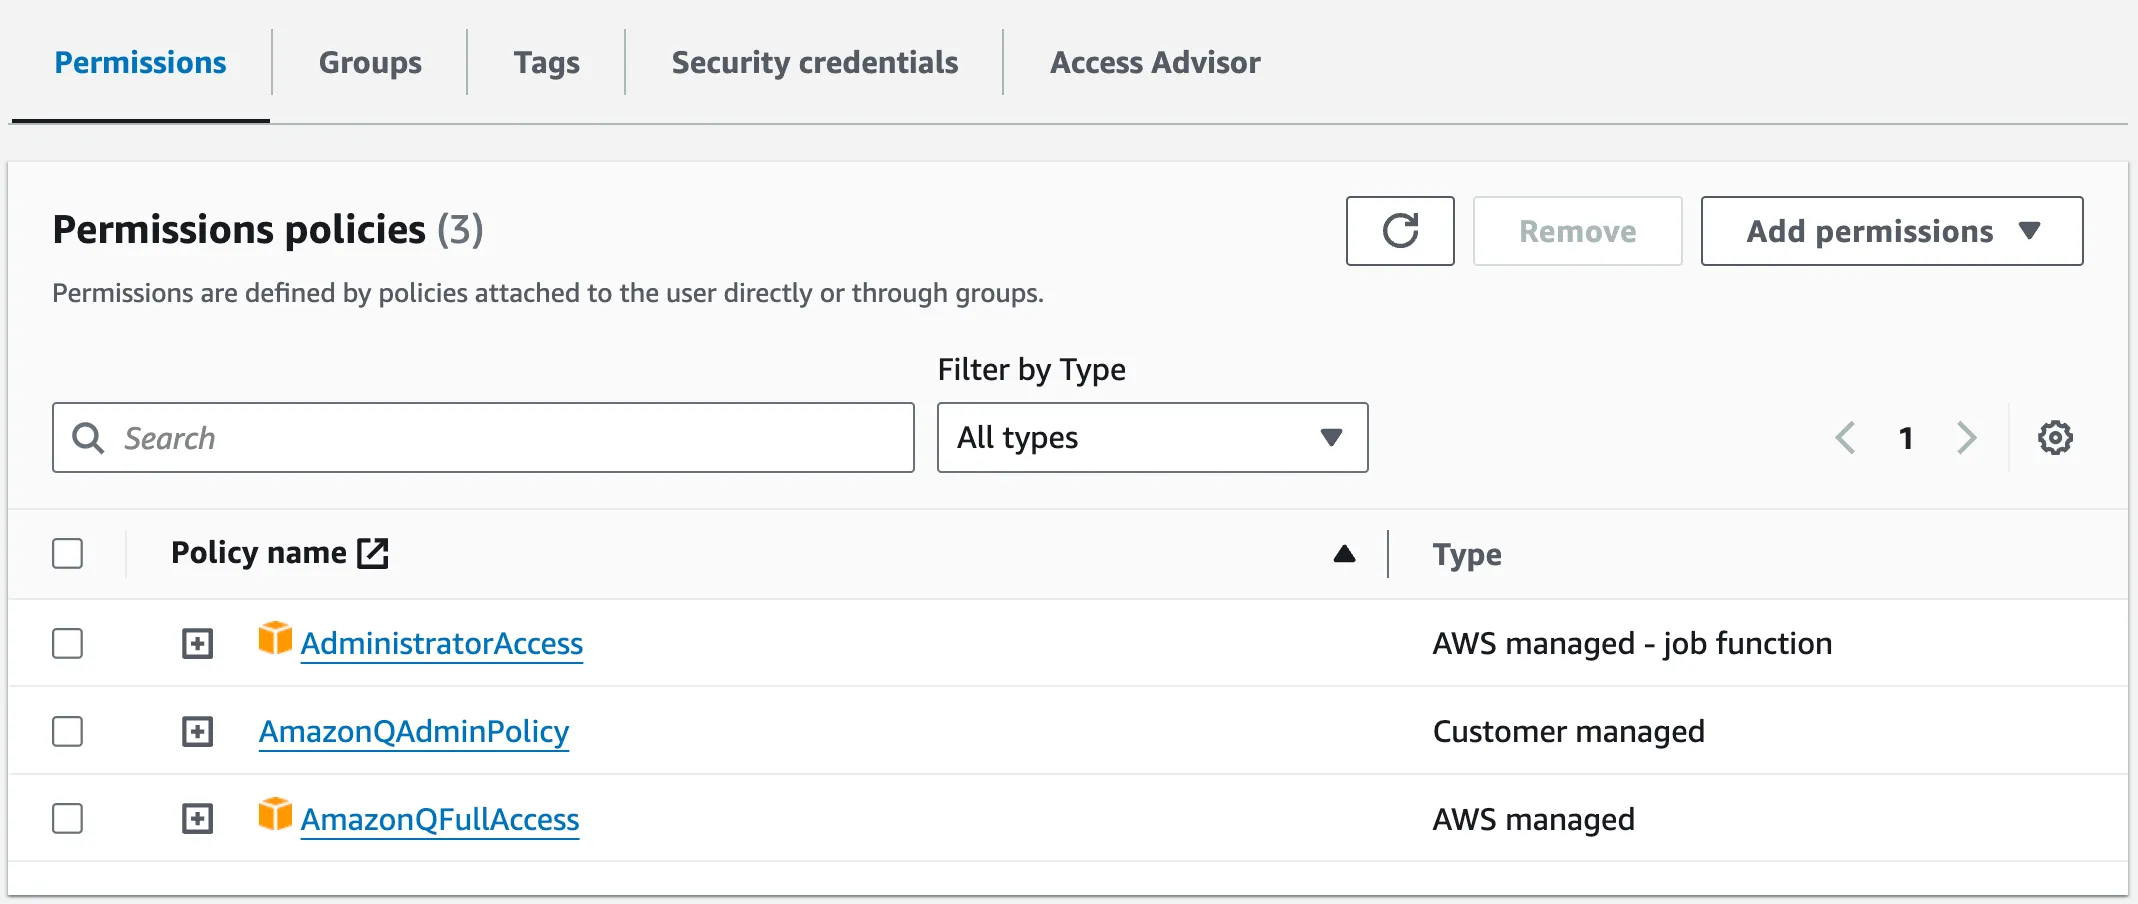
This part is complete. Let's go to the next step. It may be worth noting you must remember to use the same user you just gave permissions to continue this setup.
Why do you need to set up an AWS Identity Center? You may be asking yourself. Well, the short answer is that this is the component your Amazon Q Developer subscription will require in the first place. But if you want the long answer, here it goes. All users of Amazon Q Developer will come from here. This is going to be the place where you are going to set them up, giving them the right permissions, and decide which ones have access to special features of the product.
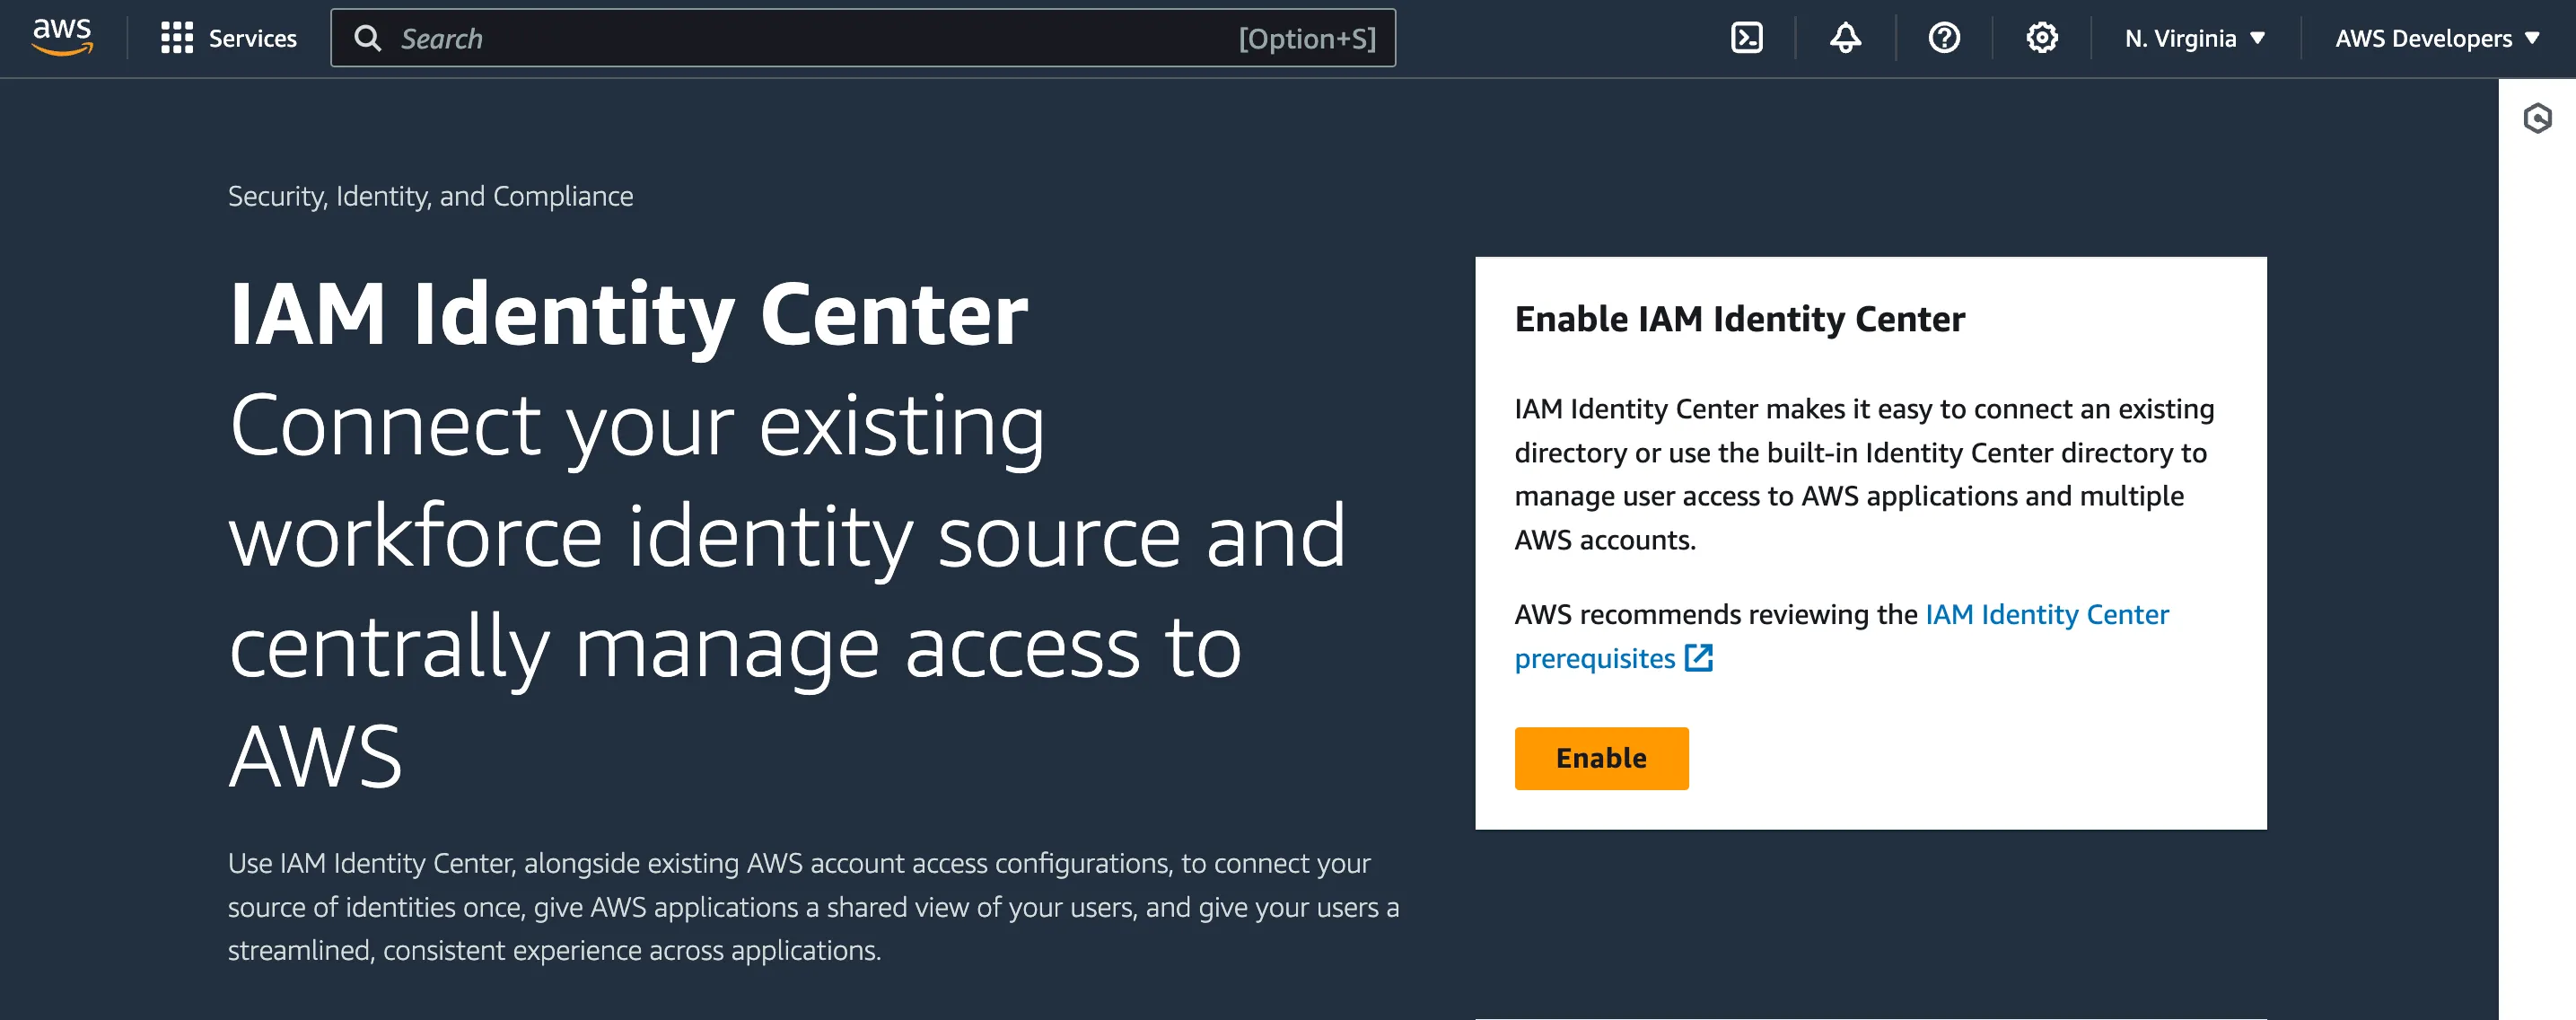
An important aspect to consider before moving forward is which region you are going to set this up. Ideally, you want to set up your IAM Identity Center in one of the regions supported by Amazon Q Developer. You can check the list of supported regions here. Since I live in North Carolina, I will use
us-east-1 for this setup. Click in the Enable button to start the creation of a new Identity Center in the region selected.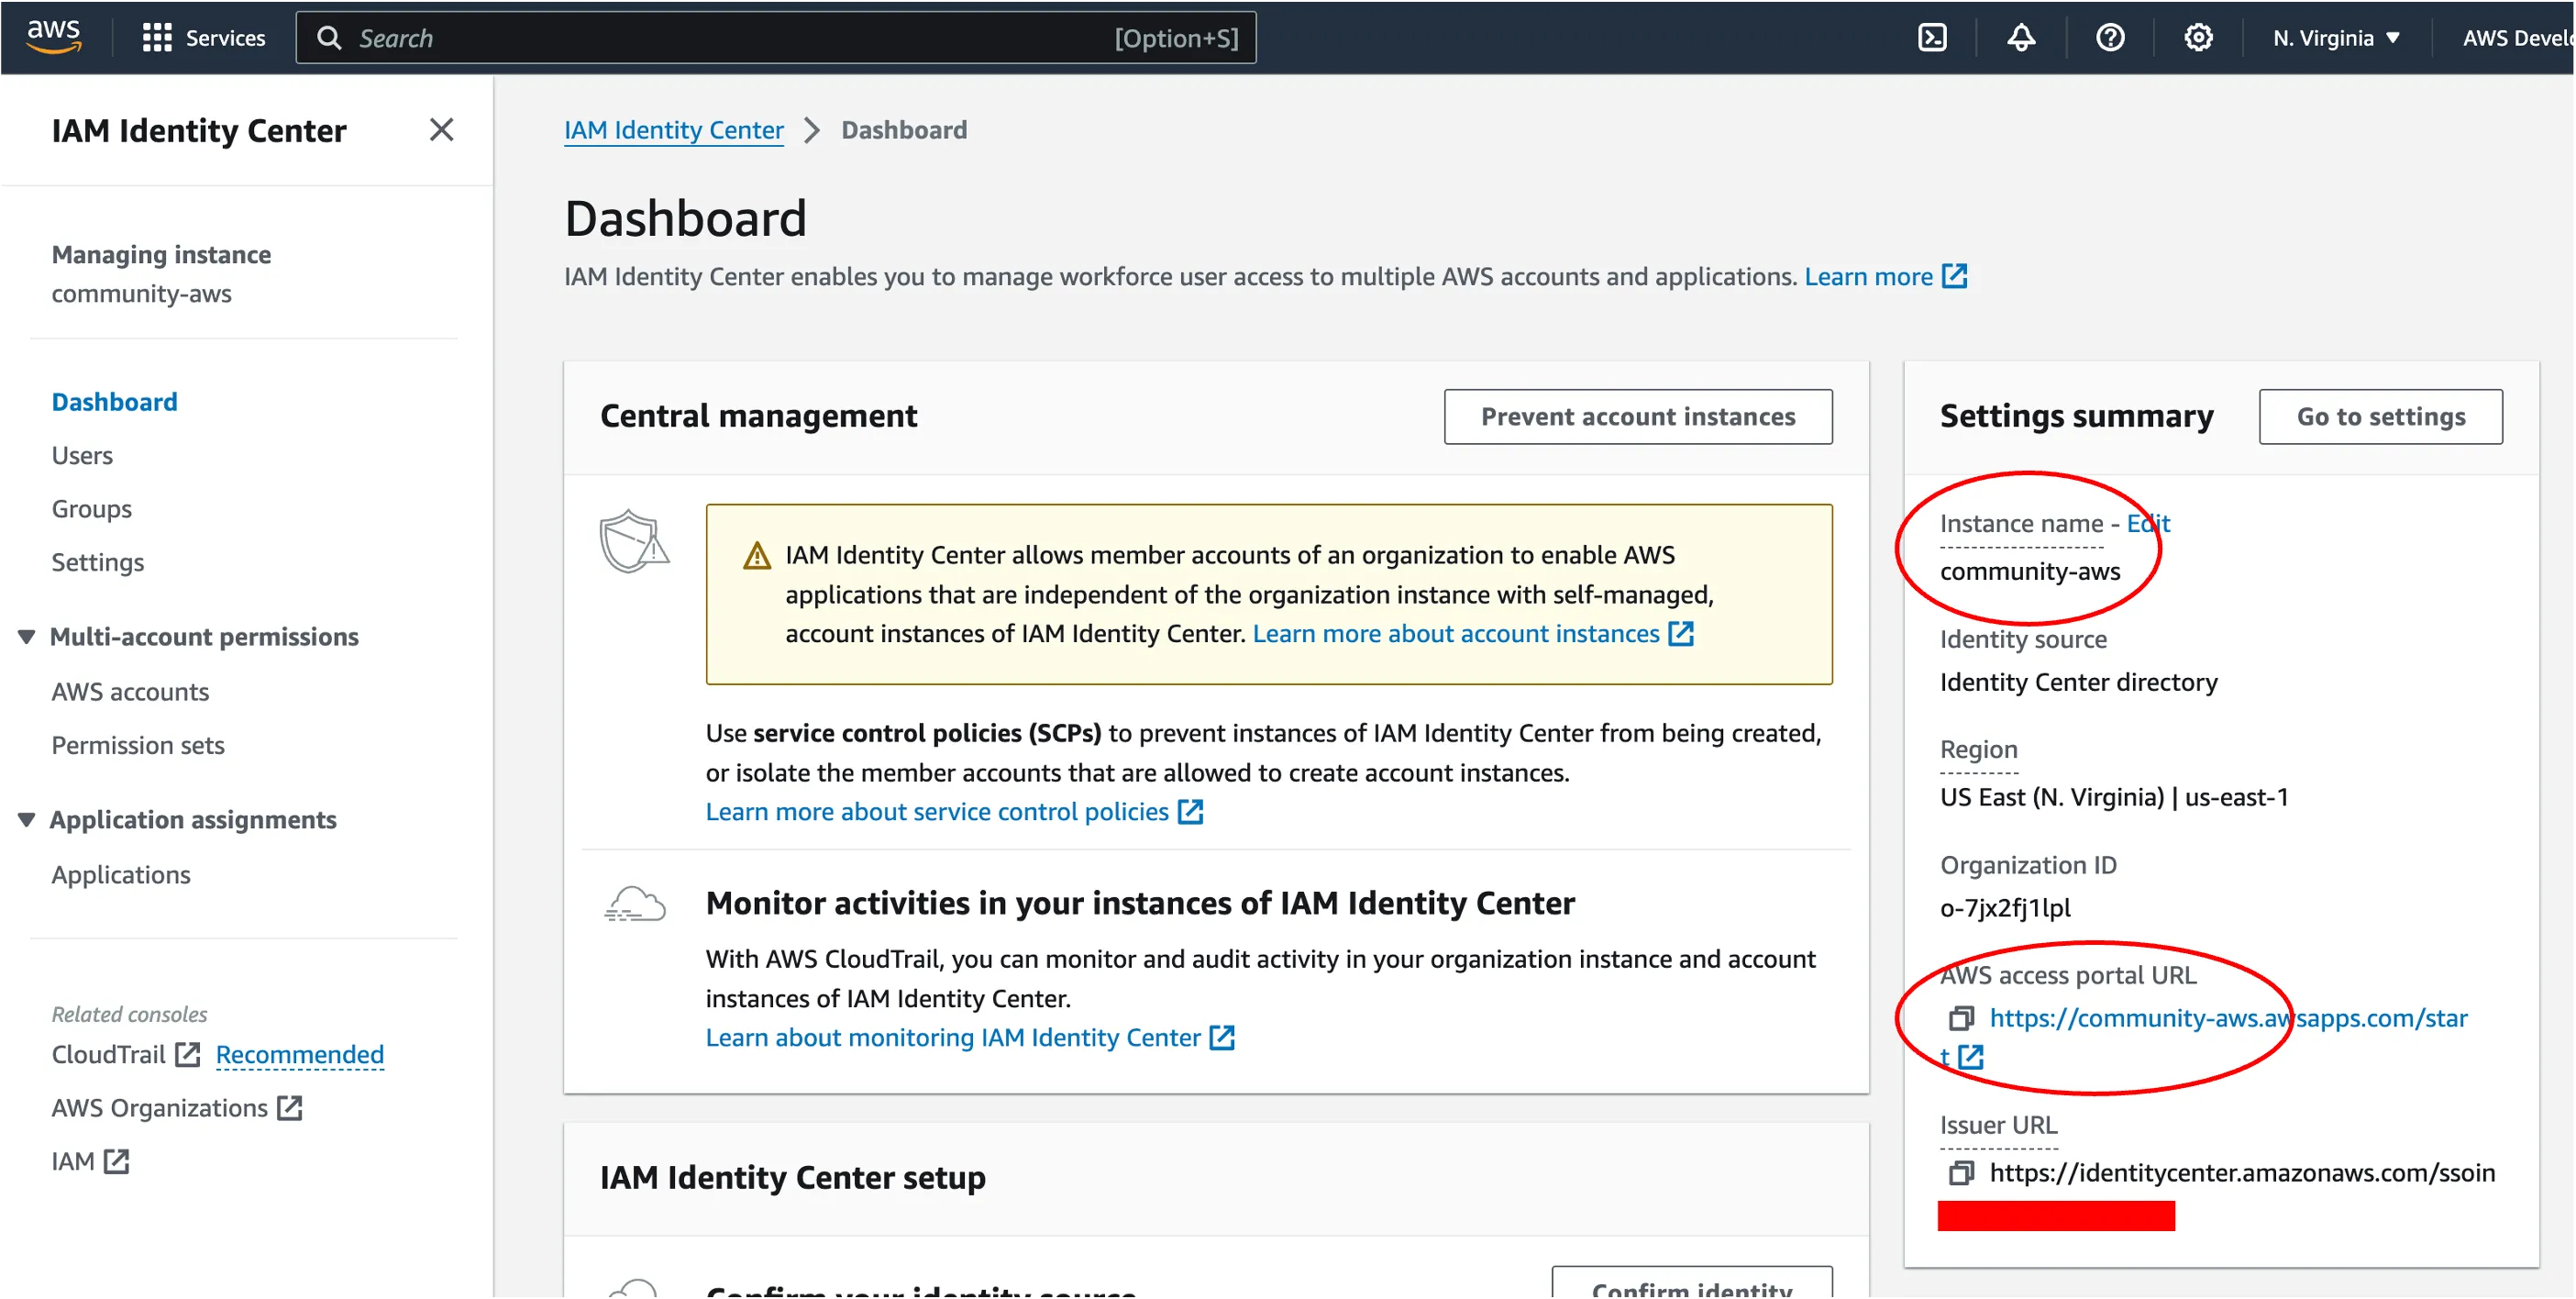
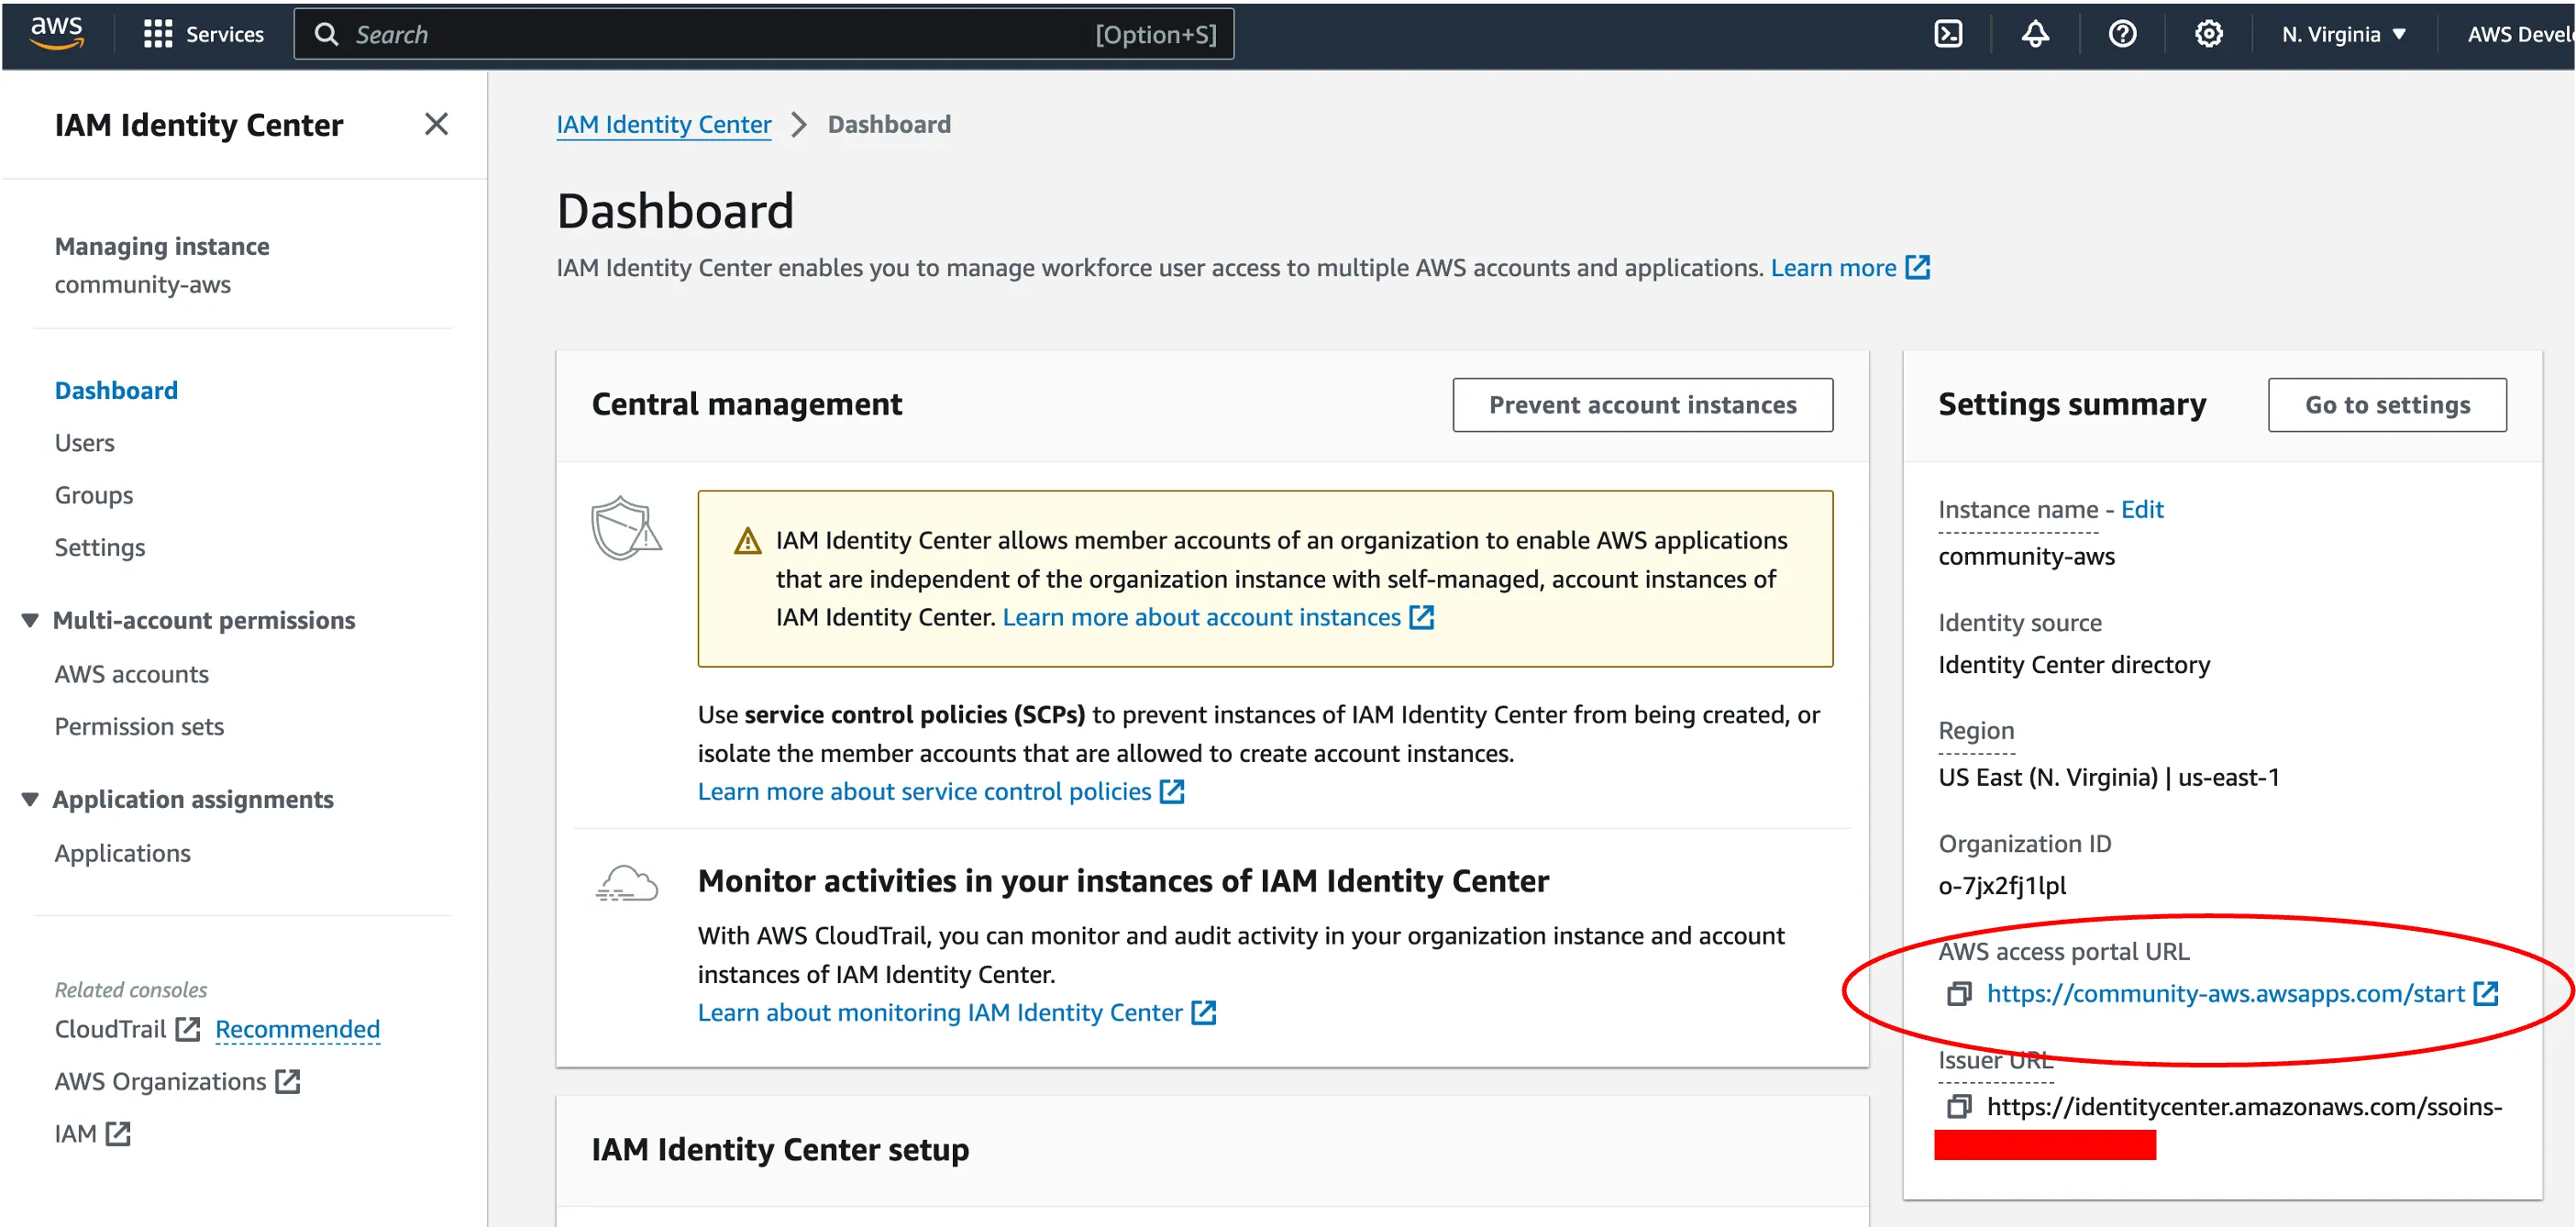
In a few minutes, a new Identity Center will be created. Make sure to change the
Instance Name and the AWS Access Portal URL to something simple to remember. As a highlight, the AWS access portal URL is the "Start URL" your developers were asking before. 😉Your next step should be setting up the right permissions for your users. Here, the idea is to delineate the access to certain features and separating this access by groups. For this example, you will create one single group with access to all product features. But in certain situations, you may want to separate this access by using different groups.
Let's start by creating the permission sets. In the left corner of your screen, go to Multi-account permissions and select the option Permission sets. Then click in the Create permission set button.

In the Select permission type page, you will select Custom permission set and then click Next. Select Inline policy and write the following set of permissions.
Name this permission set as
AmazonQFullPermissions then complete the creation of it. Eventually, you are going to associate this permission set to the group you are going to create next. In the left corner of your screen, go to Managing instance and select the option Groups. Then click in the Create group button.
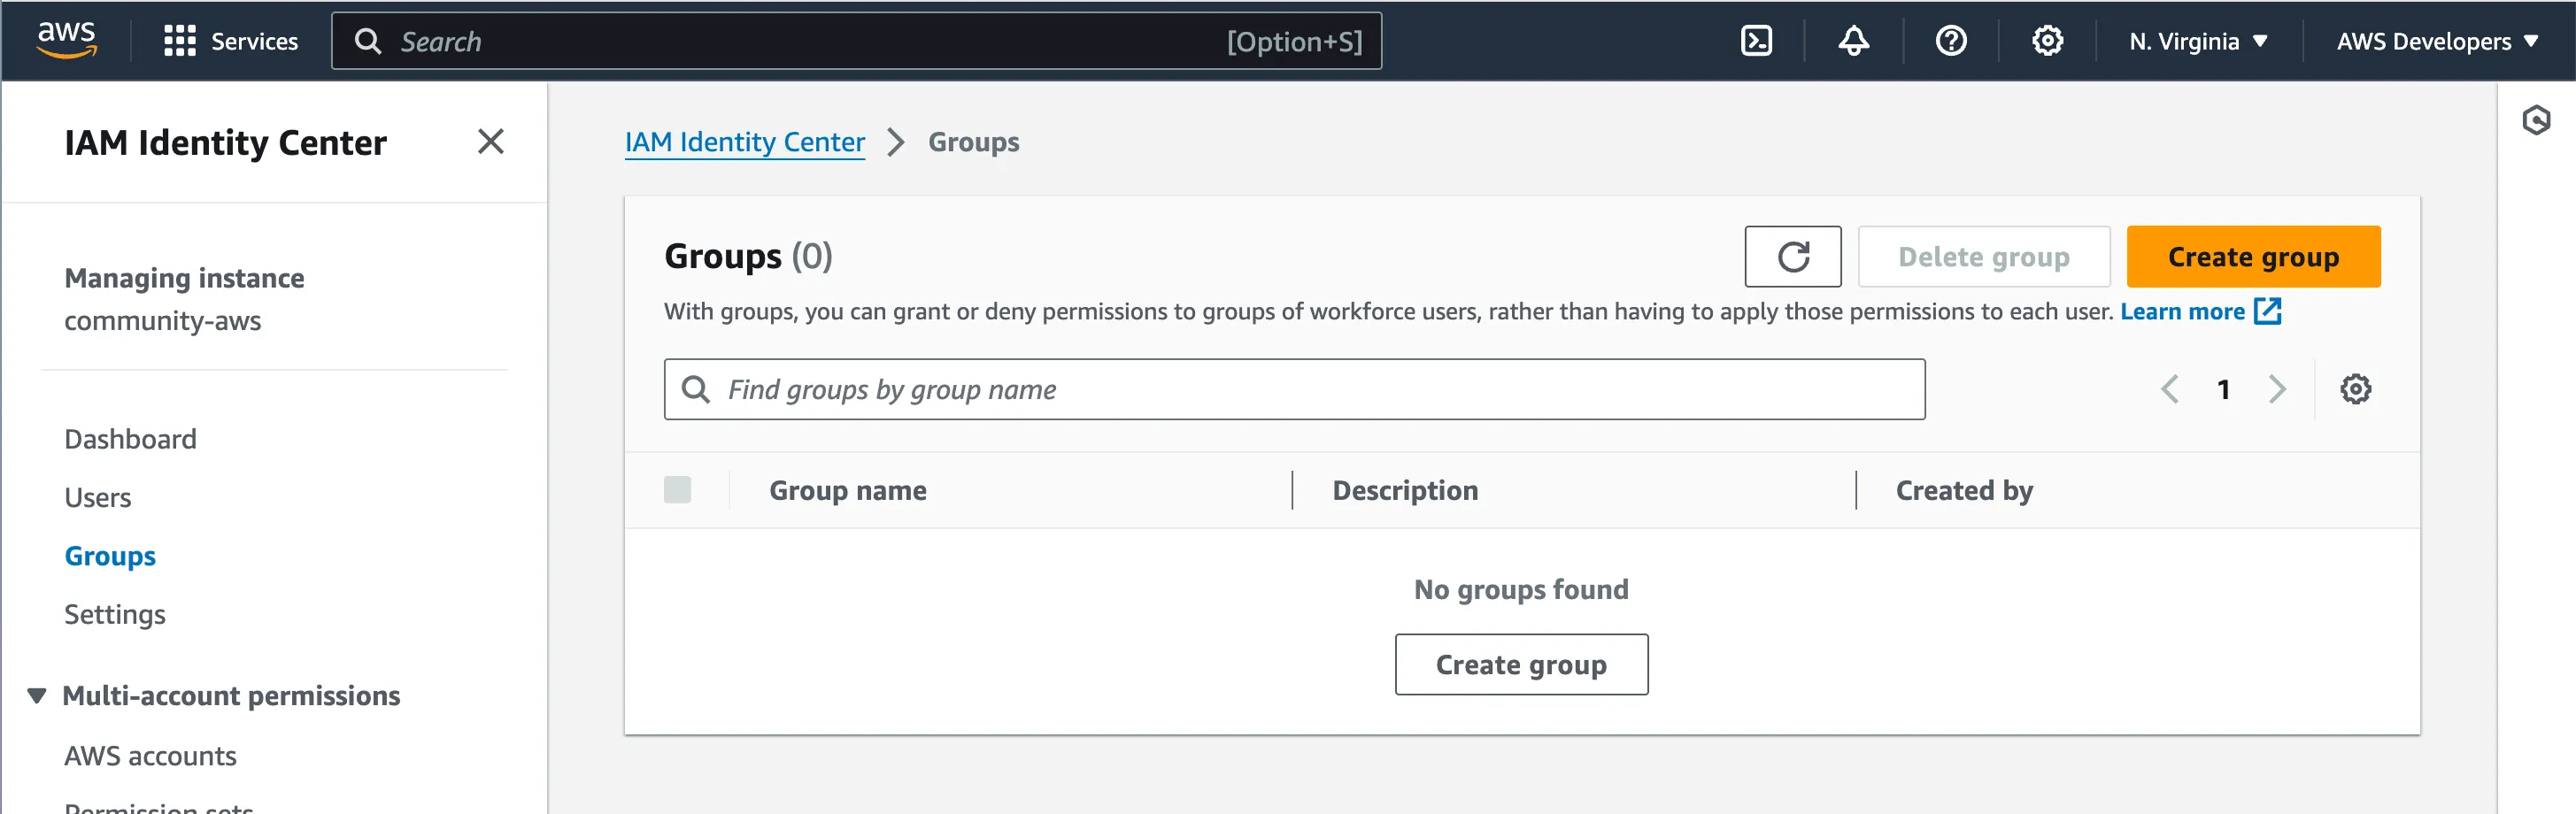
Name this group as
StandardDeveloper then complete the creation of it. You can add users to this group later. Right now, you have to associate the permission set you created before to this group. To do this, go back to Multi-account permissions and select the option AWS accounts. Then select the AWS accounts you want to use for this setup, then click in the Assign users or groups.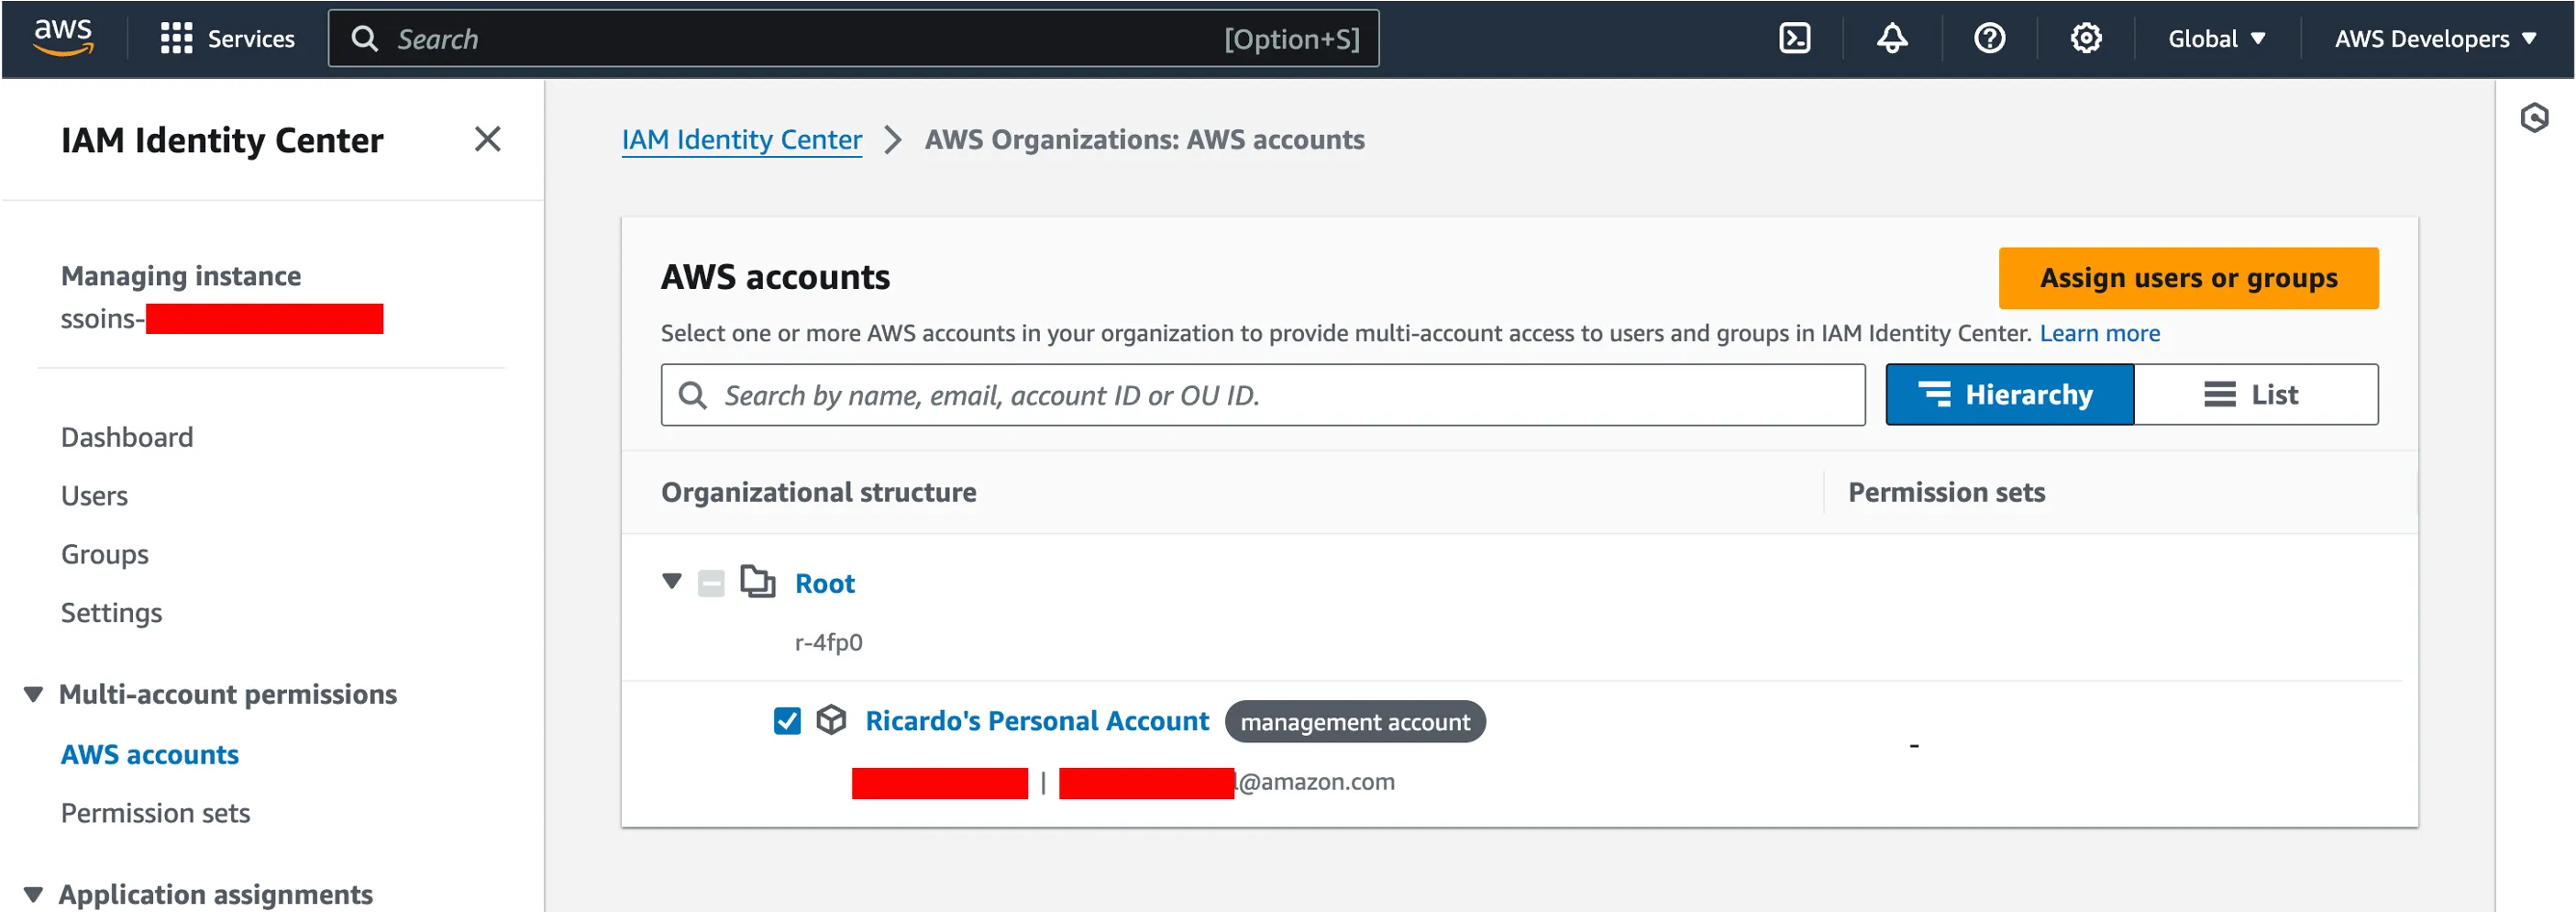
In the wizard that follows, select the
StandardDeveloper group and click Next. Then, select the AmazonQFullPermissions permission set you created earlier, and then click Next then Submit. It may take a few seconds for these permissions to be applied to the selected AWS accounts. Once that completes, you will have finished this part of the setup.At this point, you should add at least one user into the Identity Center and include them in the group
StandardDeveloper. This will be required for you to test if everything works as expected.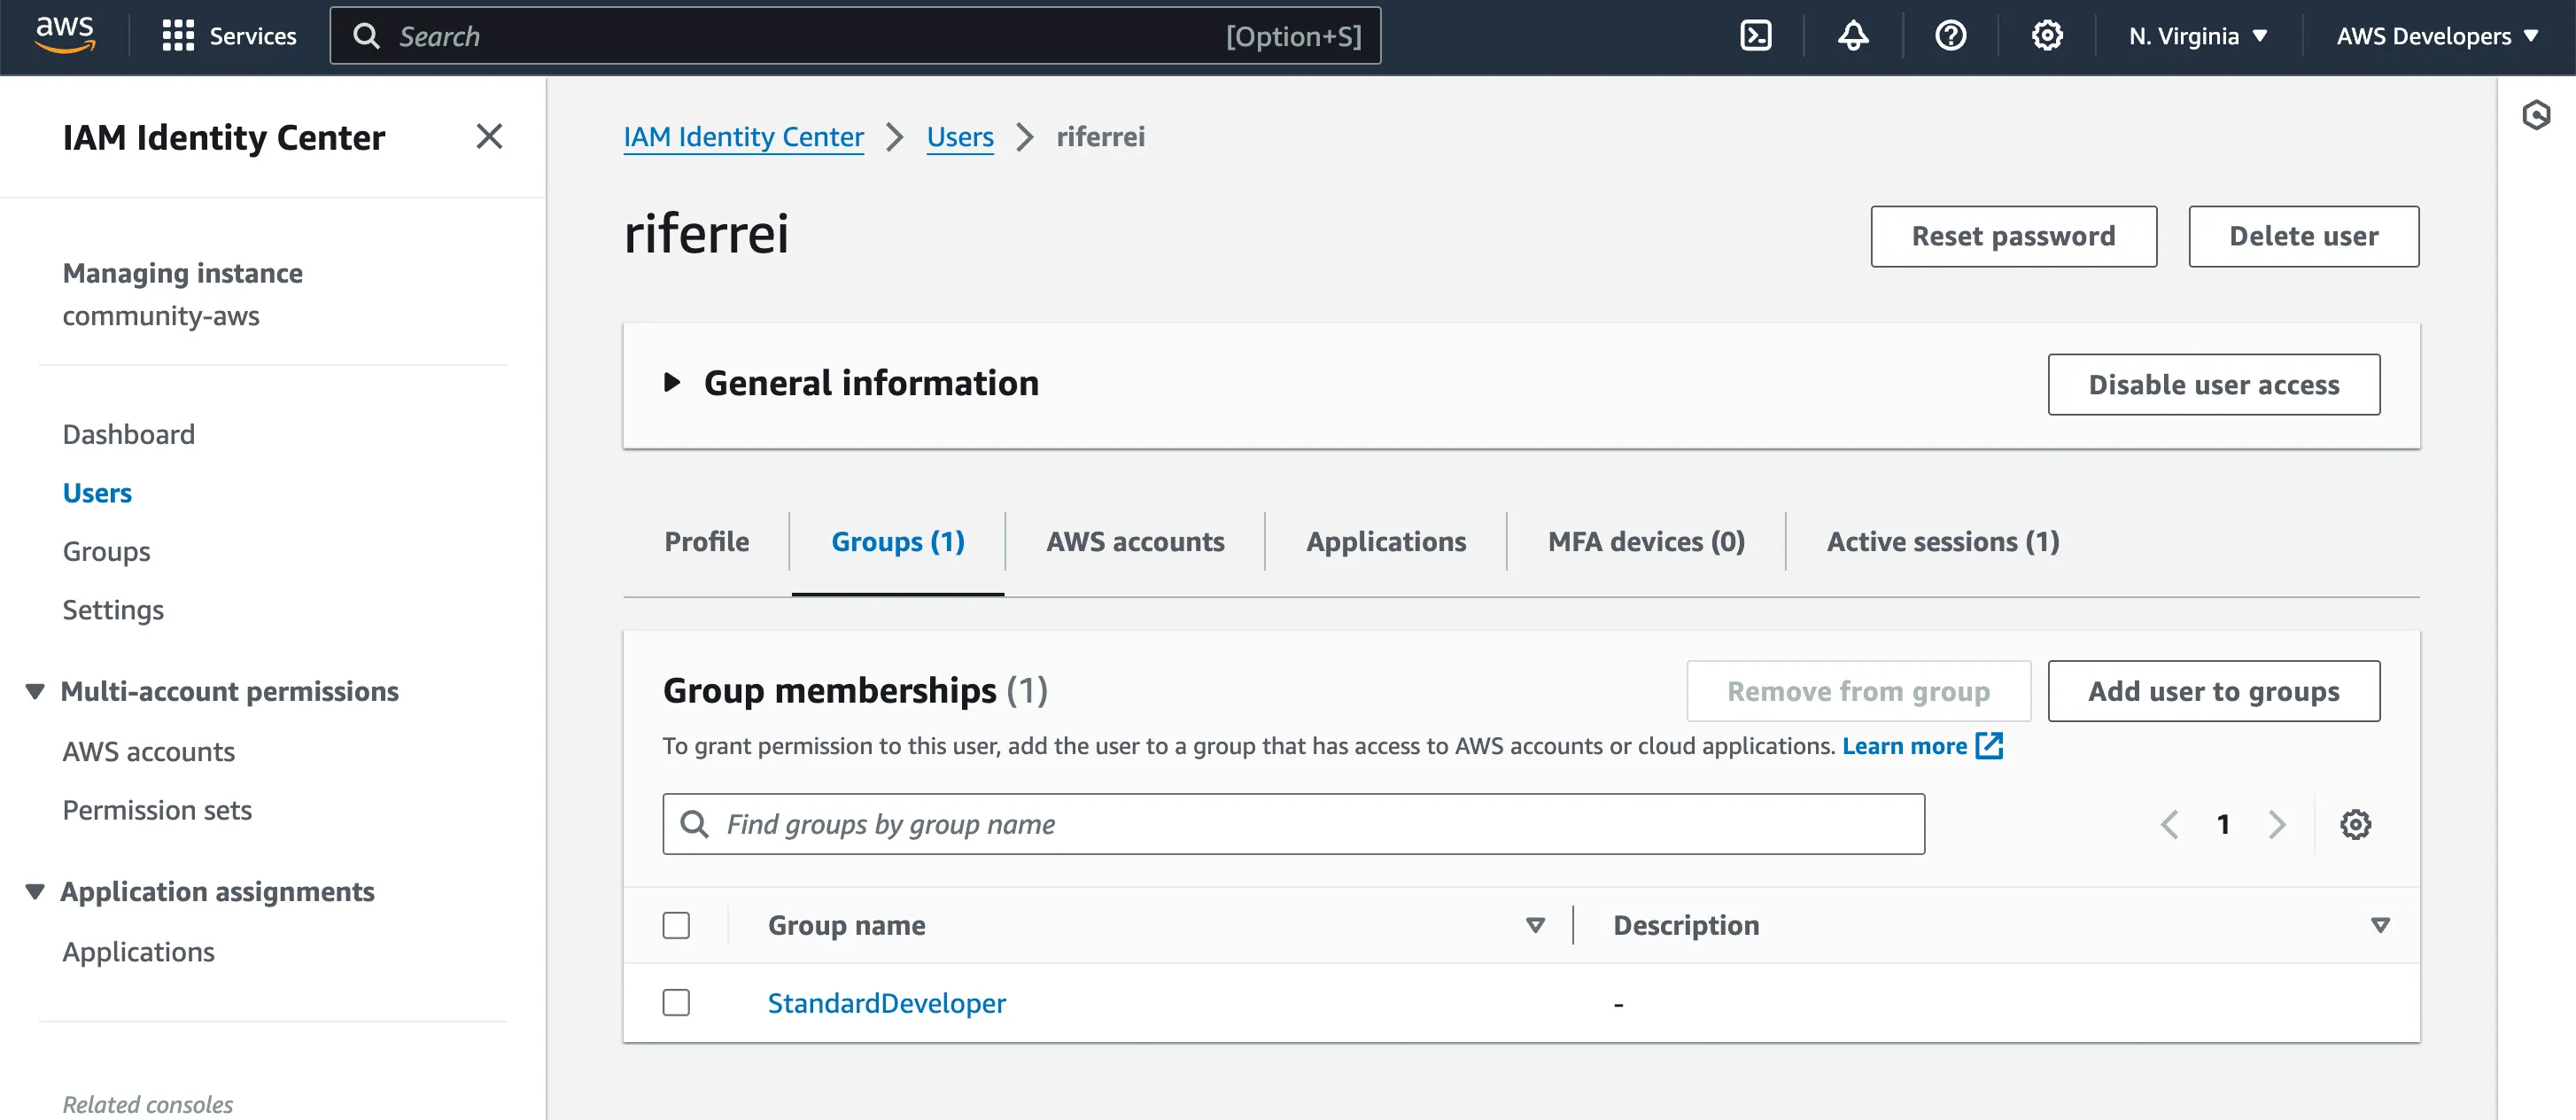
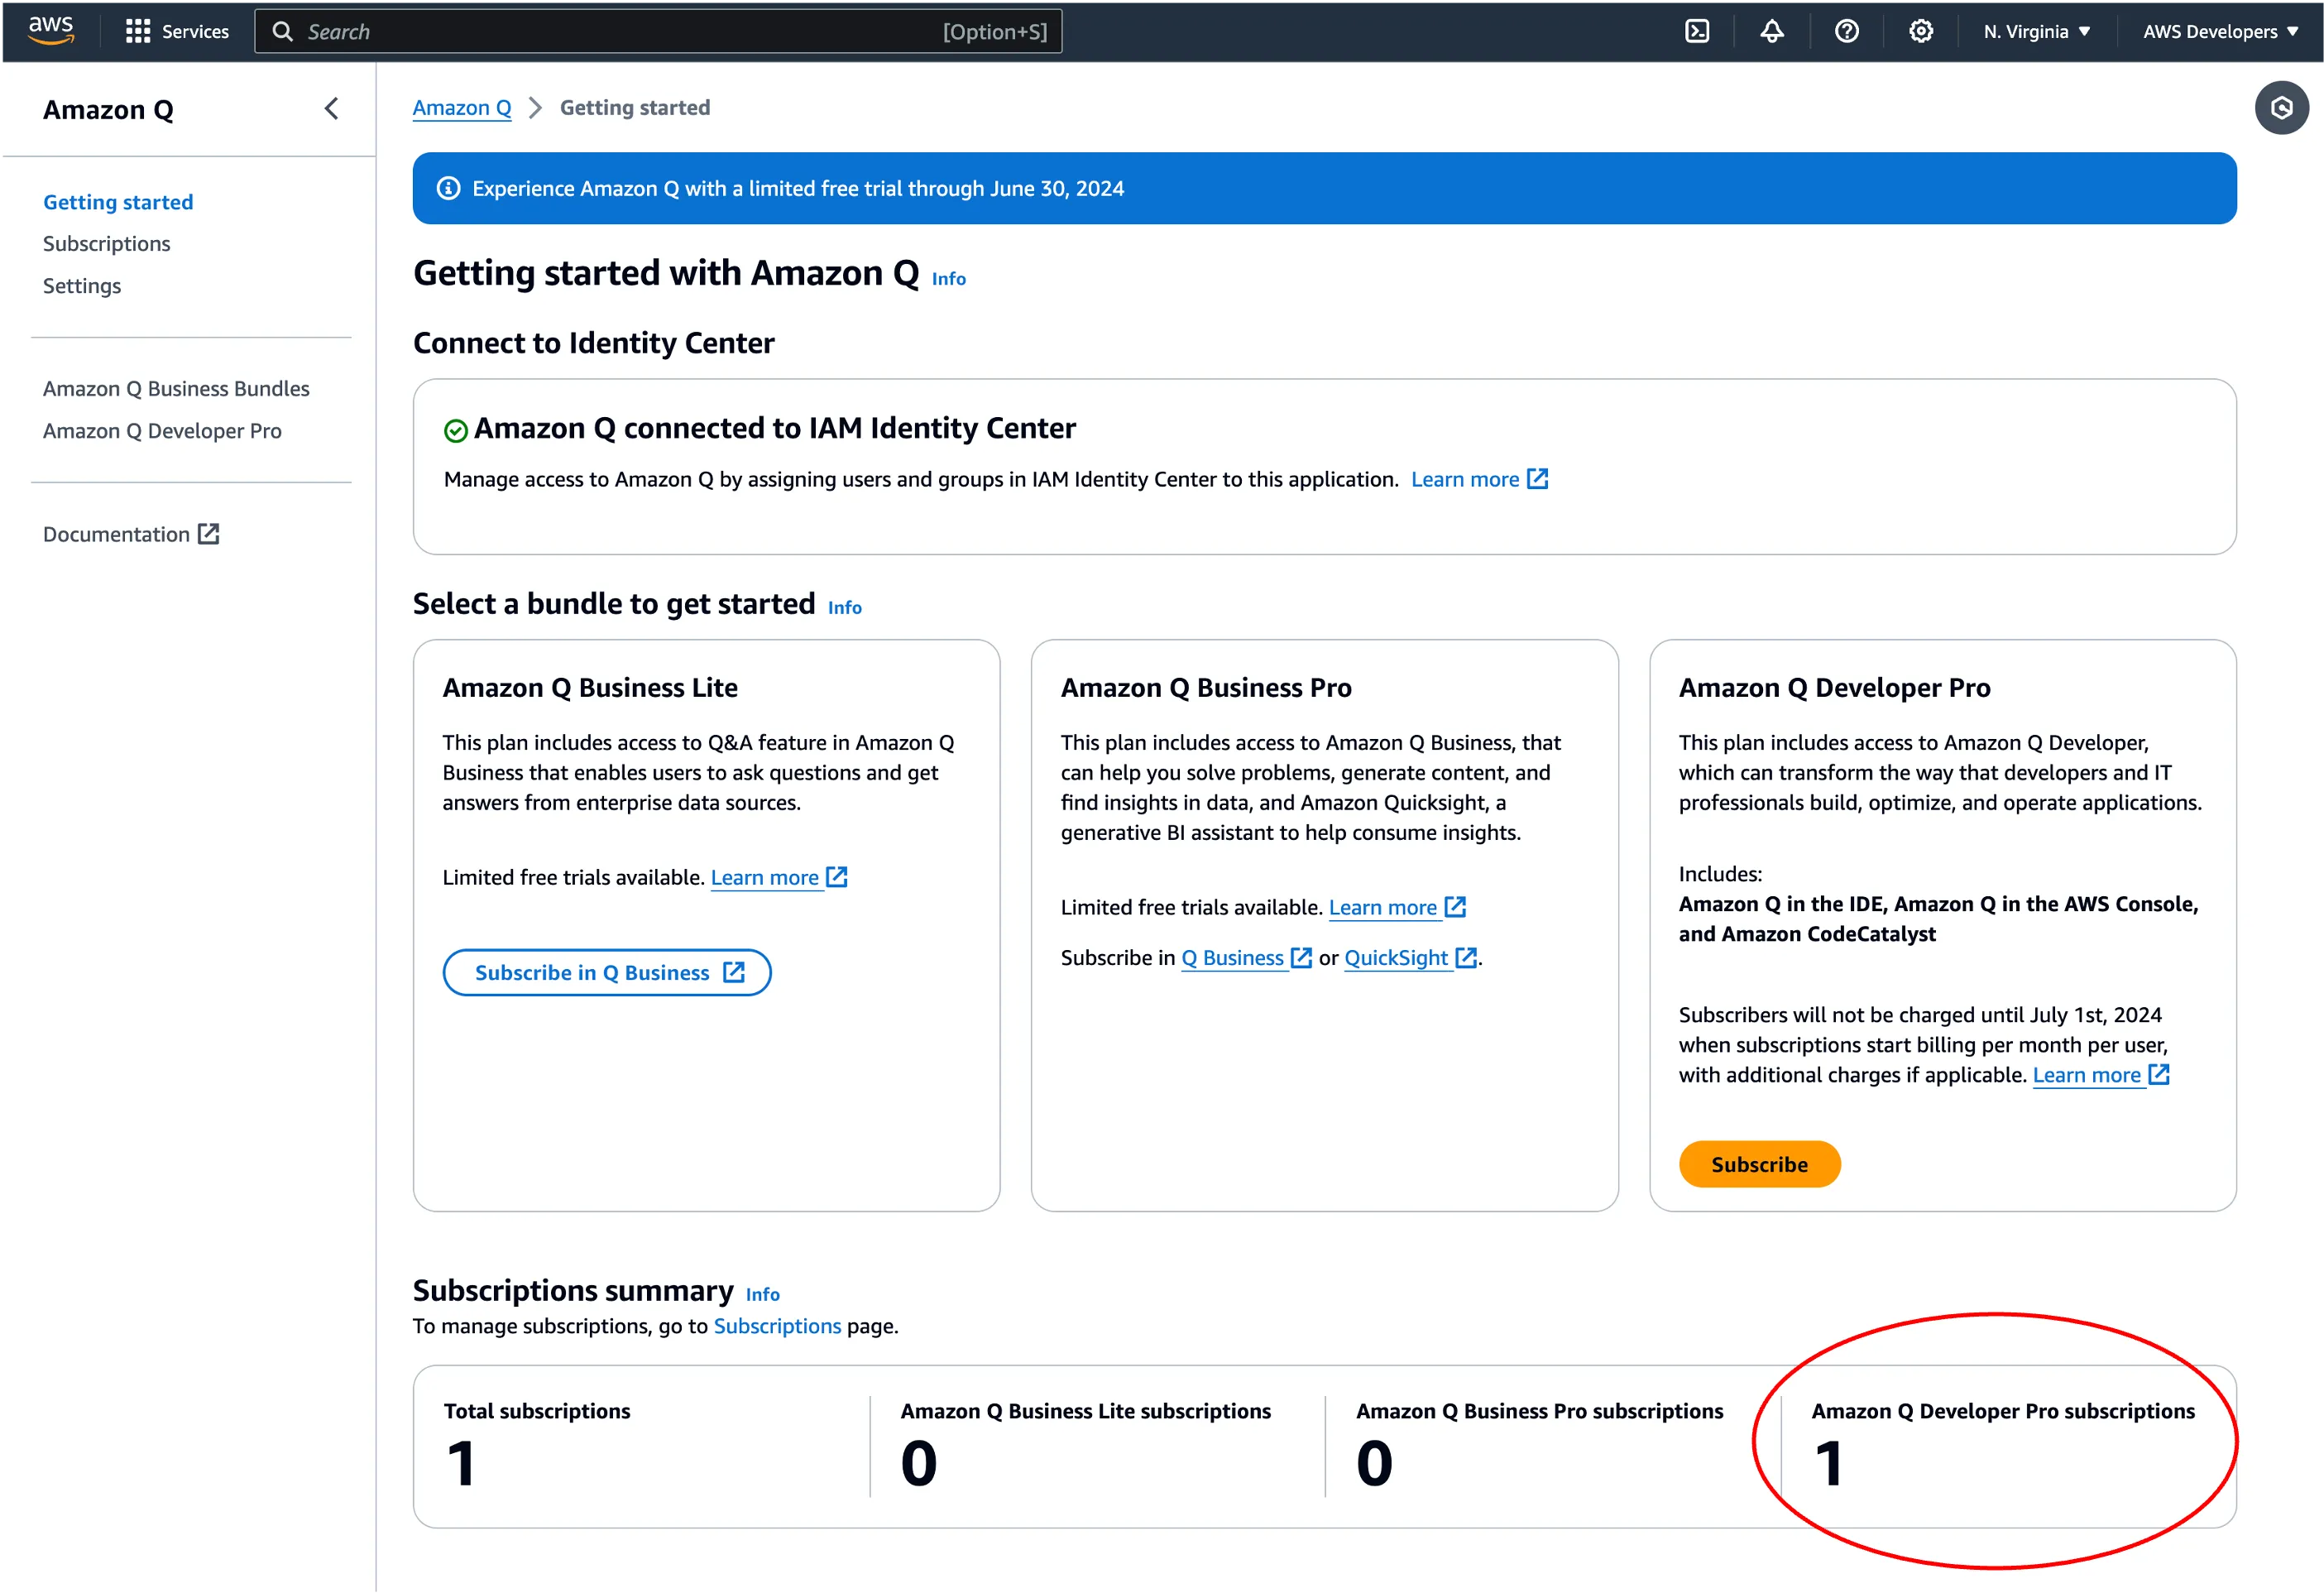
This is the last step of this setup, and you are close to complete it. Now that you took care of the dependencies needed to subscribe to Amazon Q Developer Pro, you can create your subscription. Go to the Amazon Q page in the AWS console. You will be presented with this page.
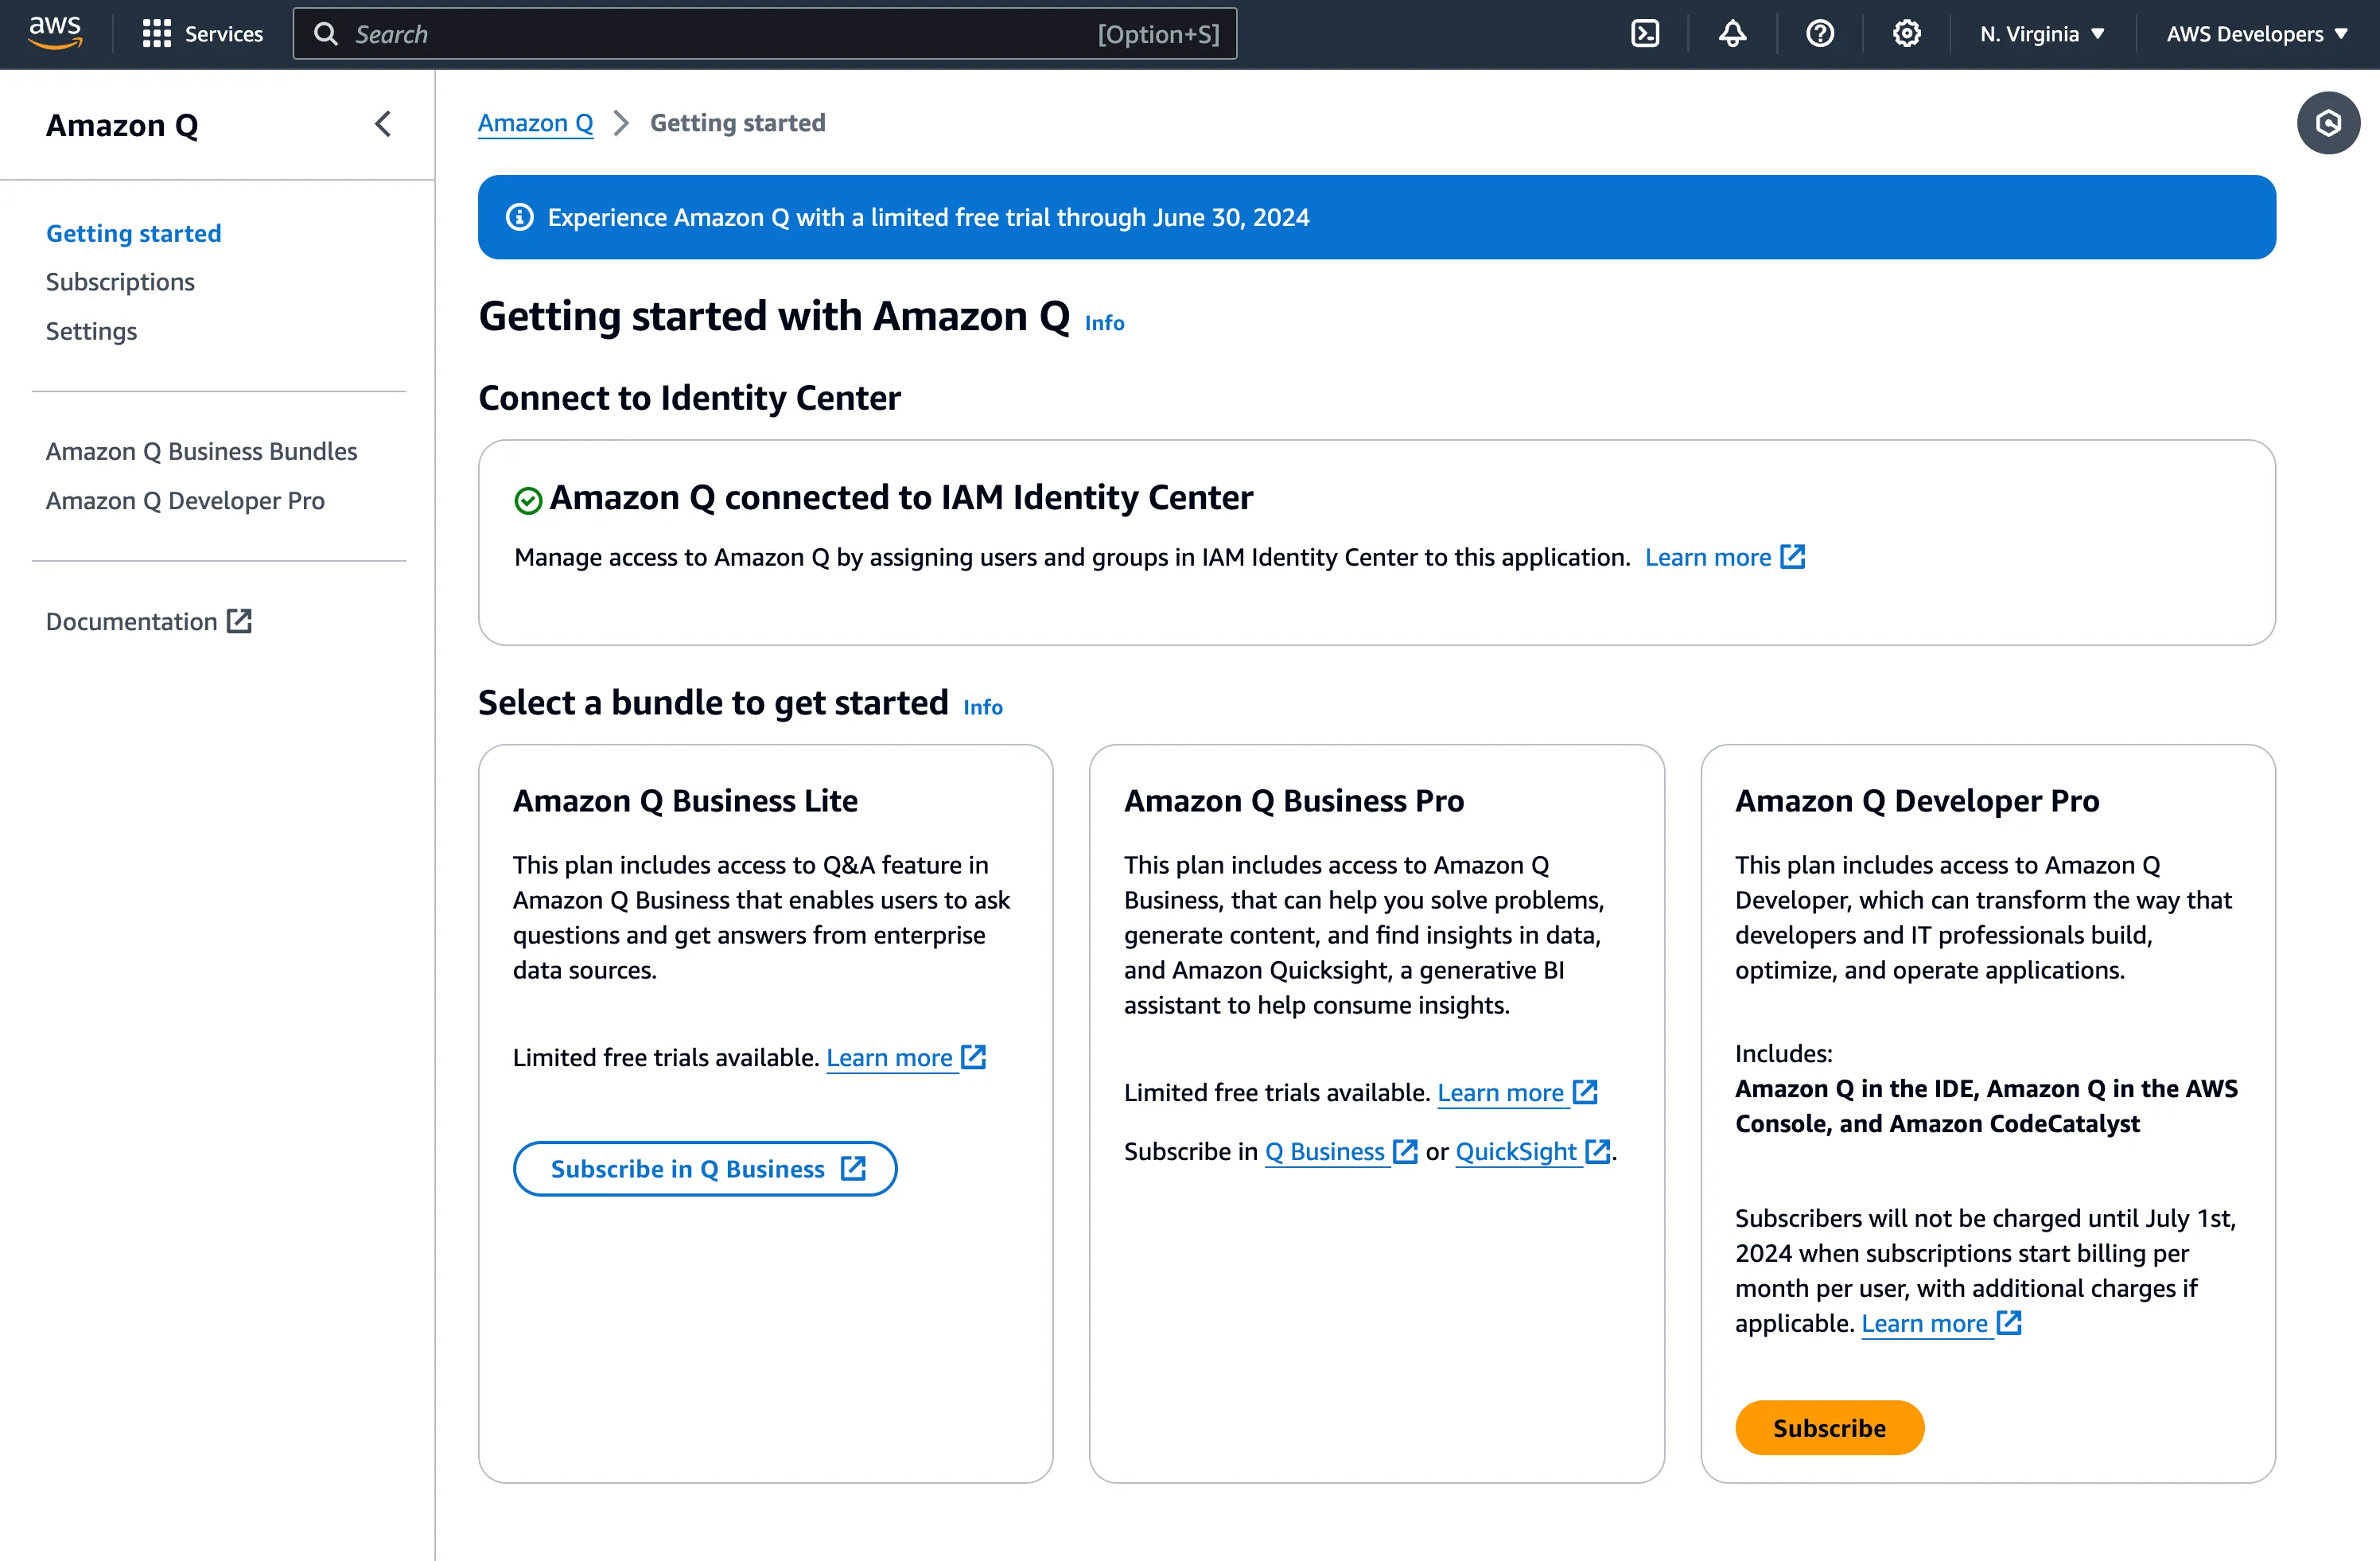
Under the Amazon Q Developer Pro section, click in the Subscribe button. You will be presented with the following dialog.
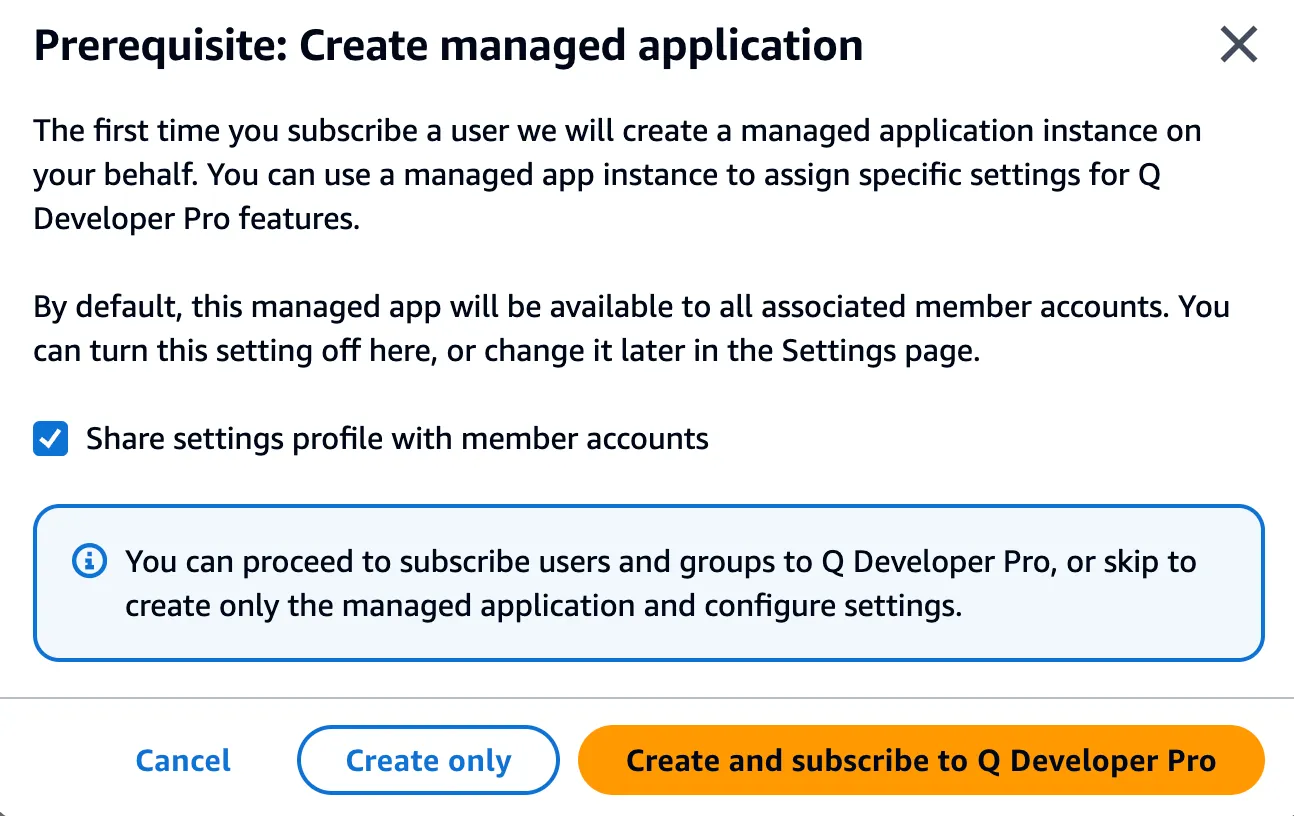
Your options are
Create only and Create and subscribe to Q Developer Pro. Let's understand this for a moment. This setup will create an application in your Identity Center. This application represents the connected users using Amazon Q Developer. For this to work, you must add users/groups to this application, then you must subscribe to the service. The options provided are mainly for you to decide whether to do this in a single step or in two steps. If you have your groups already created with the right permission sets and users added to that group, select the option Create and subscribe to Q Developer Pro. After doing this, you will be asked to start the configuration of which users/groups you want to add to this subscription. For this setup, you must select the group
StandardDeveloper. Then, click in the Assign button.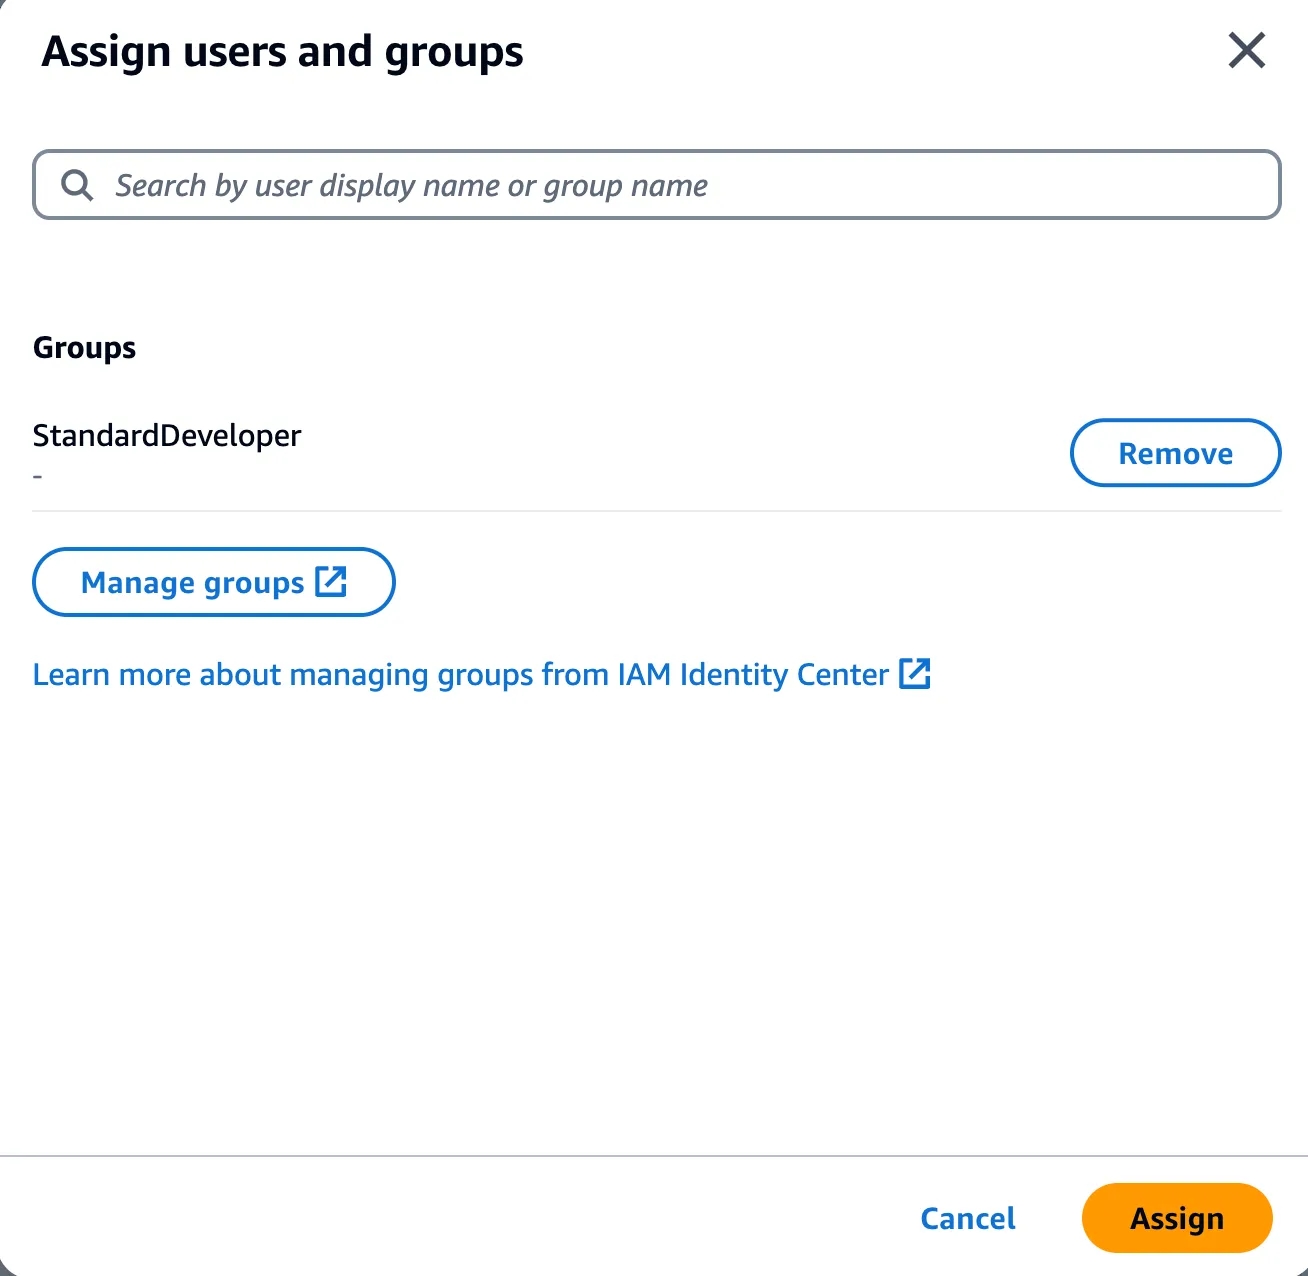
This is it. You have completed the configuration necessary for this setup. Now let's test if everything works as expected.
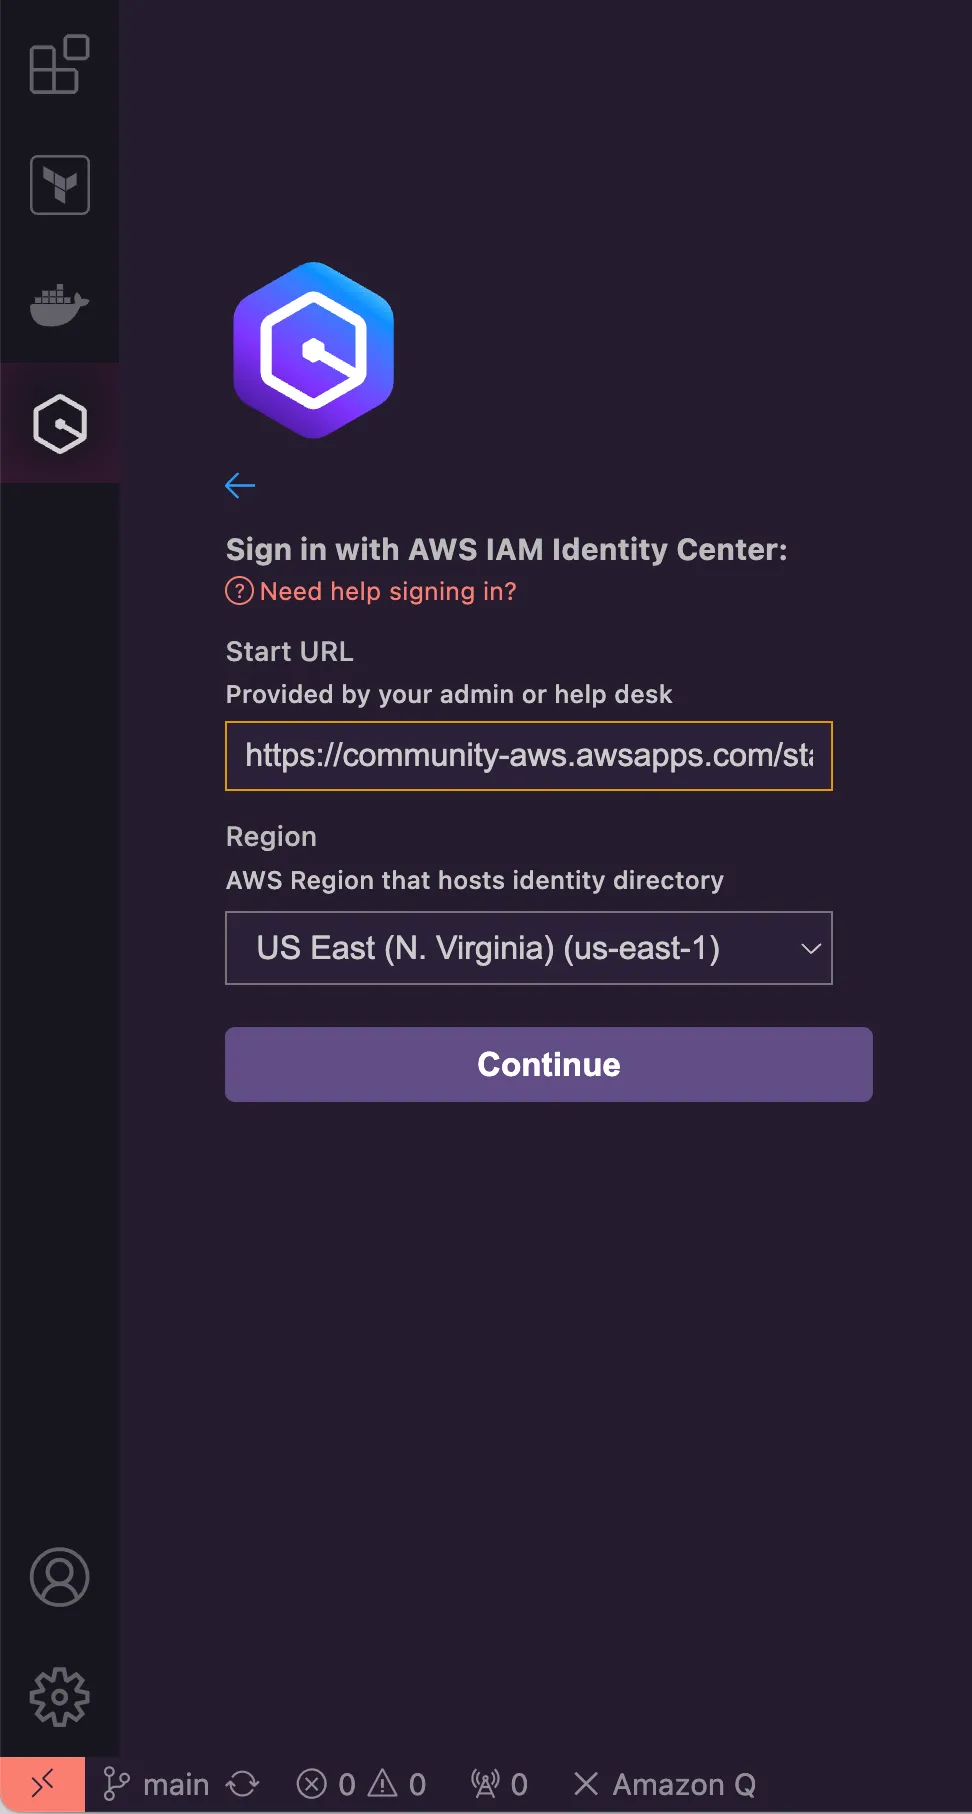
To test if your subscription is working, you need to retrieve the Start URL for the IDE to authenticate with your Identity Center and retrieve the required subscriptions. Go back to the Identity Center and retrieve the AWS Access Portal URL.
In of the supported IDEs for Amazon Q Developer, inform the Start URL value and the region where it is configured. Then click in the Continue button.
From this point on, the IDE will ask you to browser to an authentication page, where you must use one of the users you created and added to the group
StandardDeveloper. Once the authentication finishes, your IDE is connected to the Identity Center and Amazon Q Developer is ready to be used.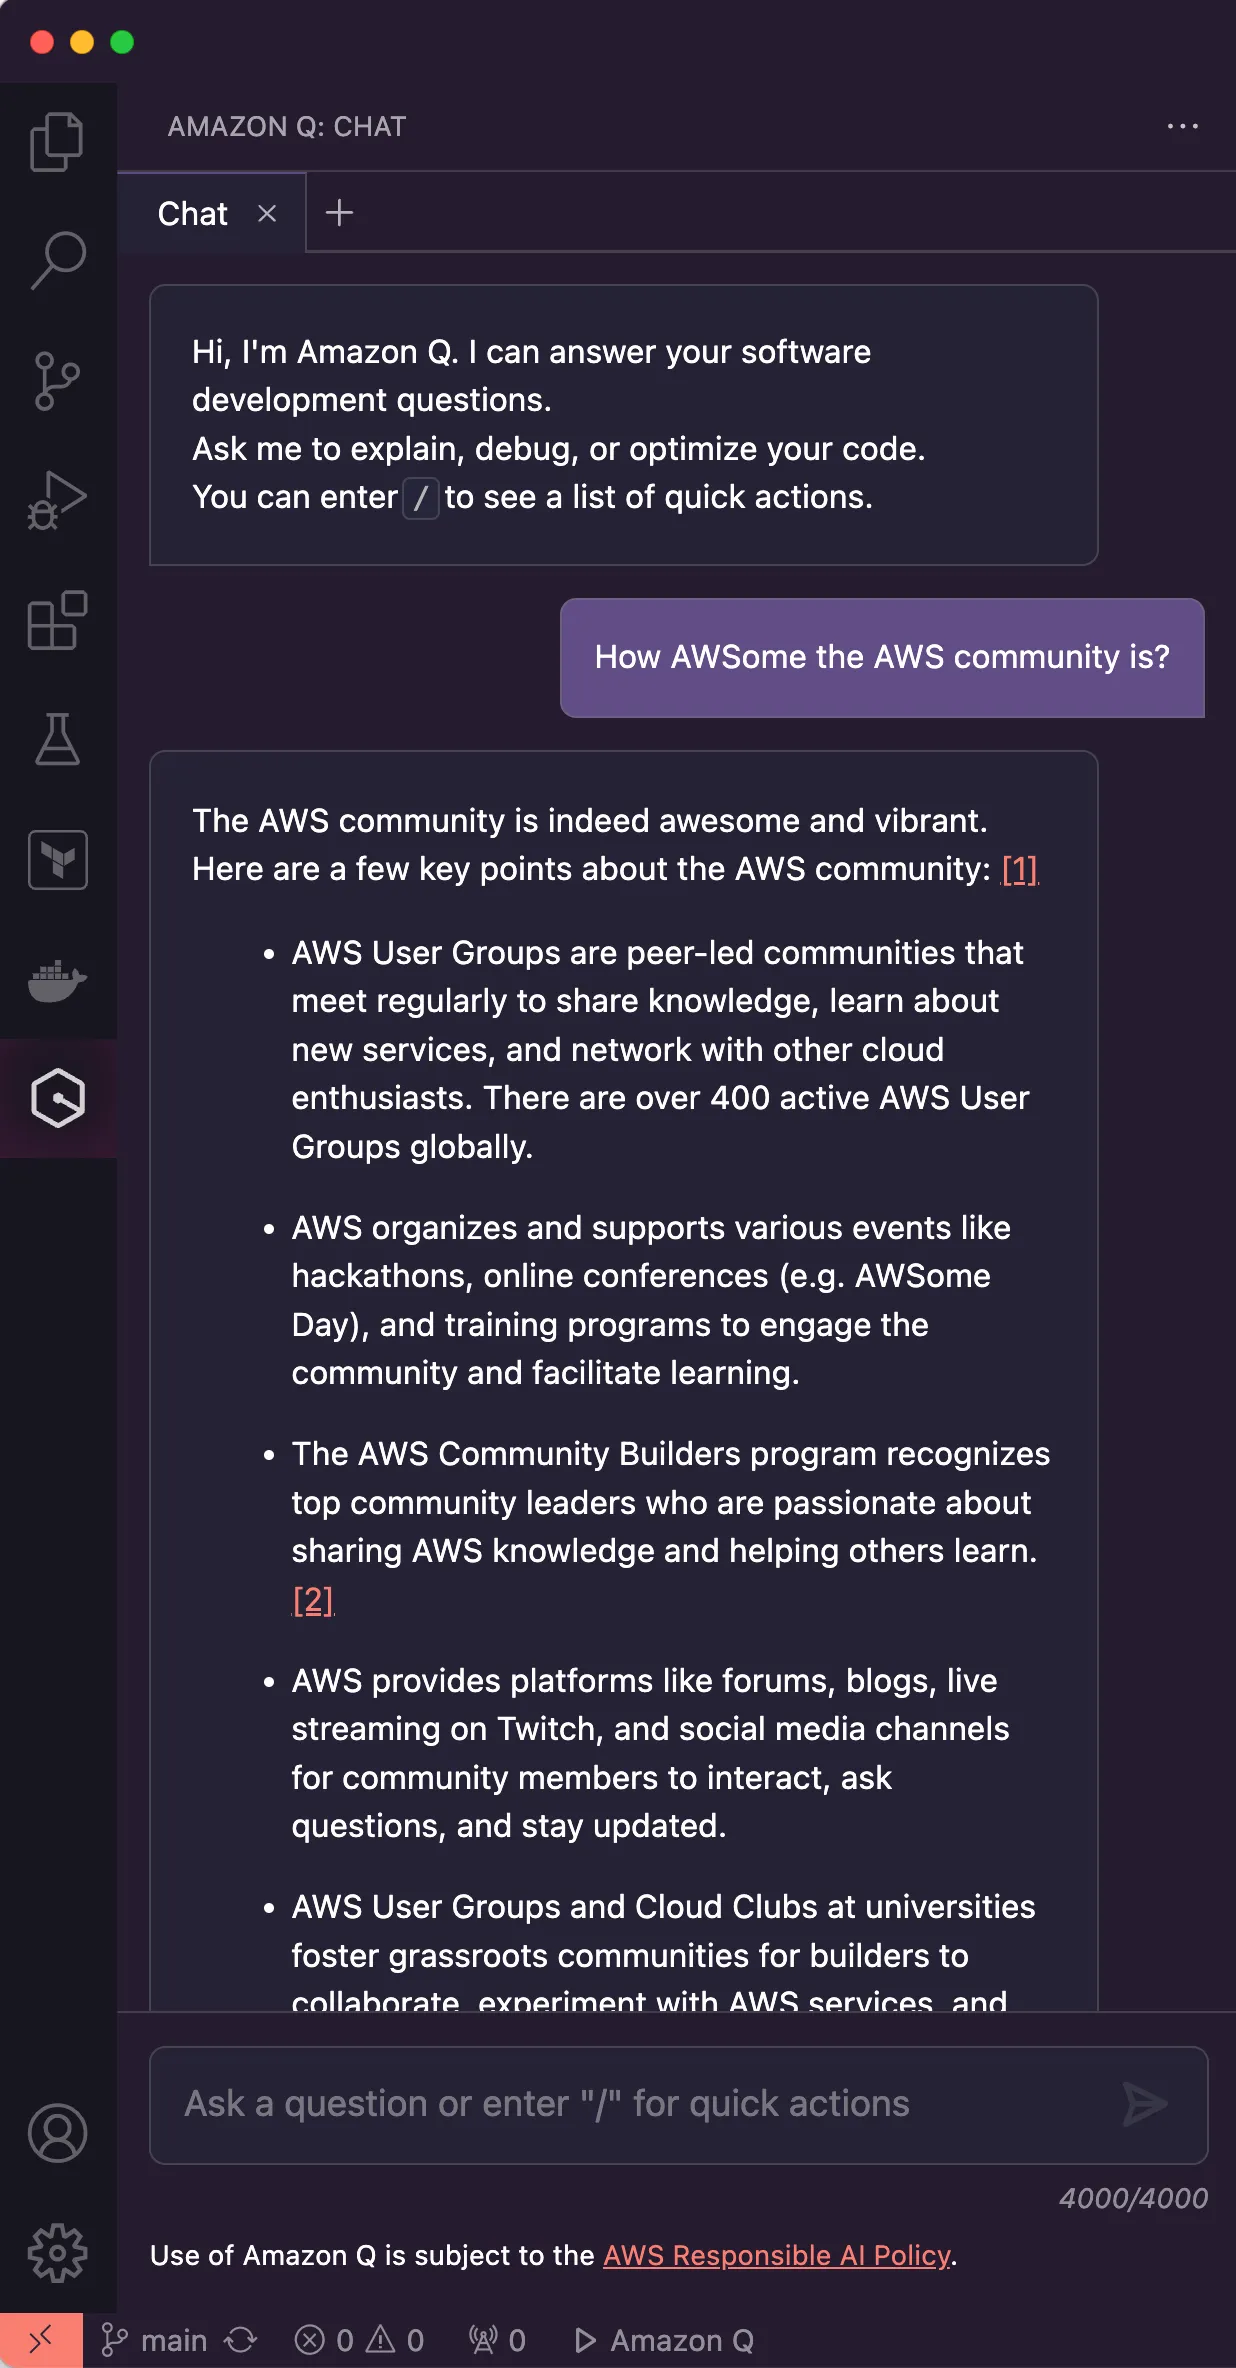
Amazon Q Developer provides users with the power of Generative AI to speed up tasks like coding, testing, and documentation. It provides a perpetual free tier where you can explore the exciting features, but with monthly limits. If you want to give your users more flexibility to explore its features, you must subscribe to the pro version. However, you first need to set up your AWS account for this.
In this blog post, I showed how to configure an AWS account to successfully subscribe to Amazon Q Developer Pro so developers can enjoy its features. It was shown how to create an AWS Organizaton, how to give the AWS user the right permissions, how to set up an Identity Center, and how to create the product subscription.
Follow me on LinkedIn if you want to geek out about technologies.