We use essential cookies and similar tools that are necessary to provide our site and services. We use performance cookies to collect anonymous statistics, so we can understand how customers use our site and make improvements. Essential cookies cannot be deactivated, but you can choose “Customize” or “Decline” to decline performance cookies.
If you agree, AWS and approved third parties will also use cookies to provide useful site features, remember your preferences, and display relevant content, including relevant advertising. To accept or decline all non-essential cookies, choose “Accept” or “Decline.” To make more detailed choices, choose “Customize.”
Customize cookie preferences
We use cookies and similar tools (collectively, "cookies") for the following purposes.
Essential
Essential cookies are necessary to provide our site and services and cannot be deactivated. They are usually set in response to your actions on the site, such as setting your privacy preferences, signing in, or filling in forms.
Performance
Performance cookies provide anonymous statistics about how customers navigate our site so we can improve site experience and performance. Approved third parties may perform analytics on our behalf, but they cannot use the data for their own purposes.
Allowed
Functional
Functional cookies help us provide useful site features, remember your preferences, and display relevant content. Approved third parties may set these cookies to provide certain site features. If you do not allow these cookies, then some or all of these services may not function properly.
Allowed
Advertising
Advertising cookies may be set through our site by us or our advertising partners and help us deliver relevant marketing content. If you do not allow these cookies, you will experience less relevant advertising.
Allowed
Blocking some types of cookies may impact your experience of our sites. You may review and change your choices at any time by selecting Cookie preferences in the footer of this site. We and selected third-parties use cookies or similar technologies as specified in the AWS Cookie Notice.
Your privacy choices
We display ads relevant to your interests on AWS sites and on other properties, including cross-context behavioral advertising. Cross-context behavioral advertising uses data from one site or app to advertise to you on a different company’s site or app.
To not allow AWS cross-context behavioral advertising based on cookies or similar technologies, select “Don't allow” and “Save privacy choices” below, or visit an AWS site with a legally-recognized decline signal enabled, such as the Global Privacy Control. If you delete your cookies or visit this site from a different browser or device, you will need to make your selection again. For more information about cookies and how we use them, please read our AWS Cookie Notice.
Have you ever wondered what it would be like to use AI21 Labs Jurassic 2 model from OpenSearch? Now you can bring the power of Generative AI to your search applications! In this tutorial, we will guide you through the process step by step.
In the first part of this series, you learned the concept of models at OpenSearch. This is a powerful feature that allows you to leverage AI-based models to augment the value of your data, whether using pre-trained, custom, and externally available models.
In this tutorial, I will walk you through in how to do this with a hands-on example. You will deploy a model backed by Amazon Bedrock, that exposes AI21 Labs Jurassic 2 as a model. You will build a connector blueprint for your model, will deploy it, and even practice changing the connector to update its configuration.
Setting up a development cluster
To keep you focused and engaged, this tutorial will assume that you are using a local OpenSearch cluster. But everything you learn here can be used later on with Amazon OpenSearch clusters. To launch a local OpenSearch cluster, use the Docker Compose available in this GitHub repository.
💡 Tip: Docker Desktop users should set host memory utilization to a minimum of 4 GB by opening Docker Desktop and selecting Settings → Resources.
This starts two services: an opensearch instance, an opensearch-dashboards instance. You will use the OpenSearch instance to deploy the model and execute inferences. As for the OpenSearch Dashboards instance, you will leverage the feature Developer Tools as IDE to run commands. Keep in mind that it may take several minutes for the services to start up, as Docker may need to pull their images first from the repositories. This local OpenSearch cluster was configured to intentionally disable security. While this is good for development environments, keep in mind that this is not a best practice for production workloads.
To verify if OpenSearch is up and running, you can go to your browser and point to the following location:
You should see a JSON payload with the following content:
If the status field is showing as green, this means your OpenSearch cluster is ready for business. Since OpenSearch uses the ML Commons Framework, it is important to ensure everything is fully initialized before you start sending tasks. To check if the ML Commons Framework plugin is initialized, go to your browser and point to the following location:
You should see a JSON payload with the following content:
This means that the internal index .plugins-ml-config has been created, which indicates the plugin is initialized. This should happen relatively fast; but if for some reason you don't see this result right way, try to reload your browser. If you are still unable to see this content, something may be wrong with your OpenSearch cluster. Check the container logs for more details.
Now that you verified everything is working fine, you can prepare your OpenSearch cluster for the models' feature. There are specific settings that you must enable in your cluster before proceeding. Go to your browser and point to the following location:
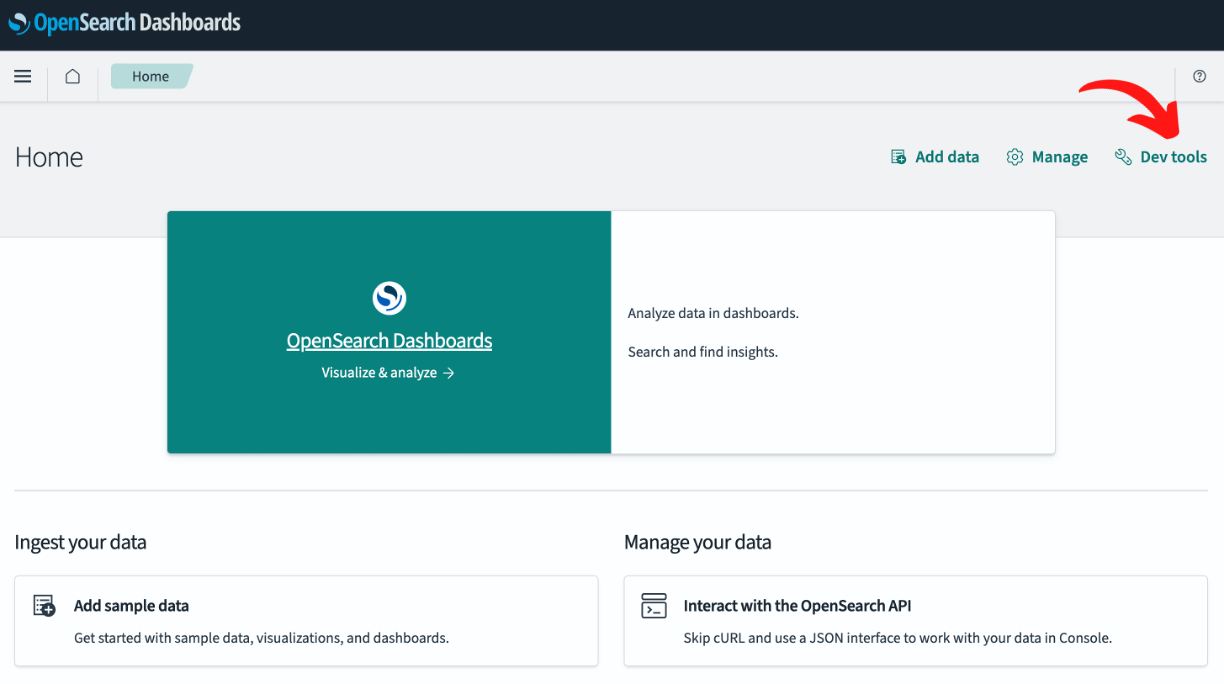
This will open the main page of OpenSearch Dashboards. You will use the feature Developer Tools from OpenSearch Dashboards to run a set of REST API calls against OpenSearch. Alternatively, you can use your own client tool to run these commands—but using Developer Tools will certainly make your life easier. Follow these steps to access this feature.
Click on the Dev Tools button.
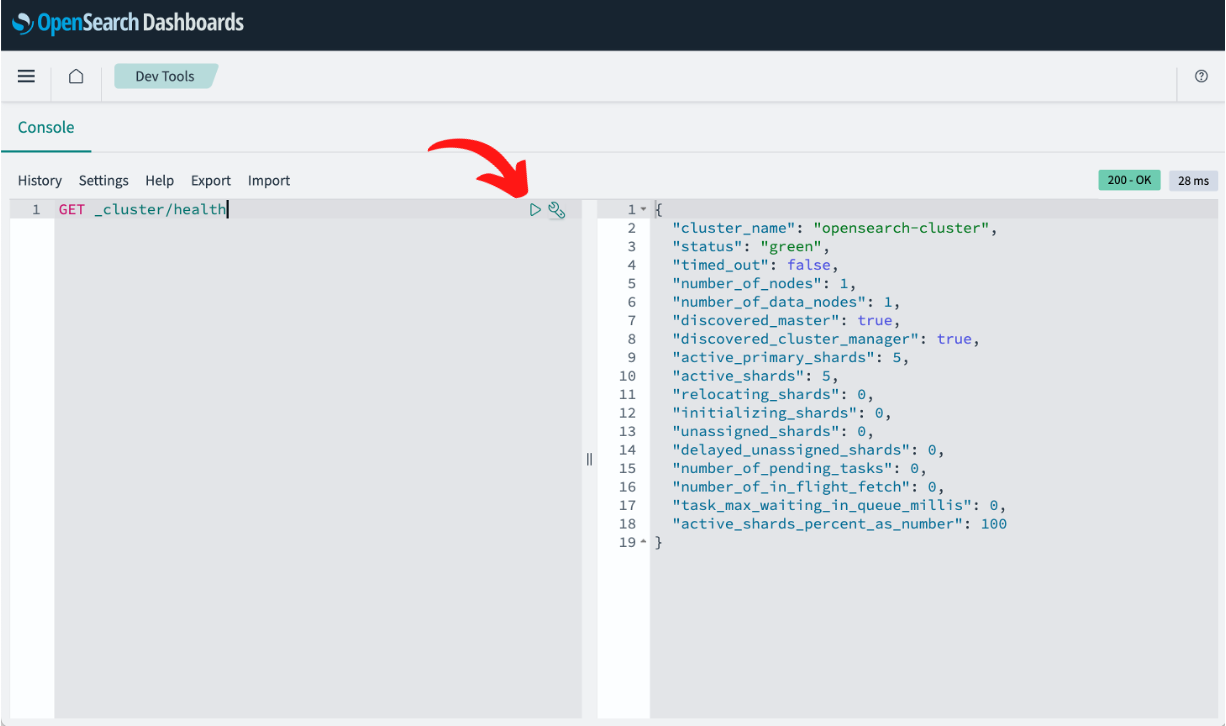
With the editor open, try the command GET _cluster/health to verify the OpenSearch cluster. To execute the command, leave the line that starts the command selected, and click in the ▶️ execute button.
There will have it. Now you can run commands against your OpenSearch cluster with ease. The Developer Tools feature allows you to export and import commands. So everything you will do in this tutorial can be saved into a file and then reused in another OpenSearch cluster, such as a domain from Amazon OpenSearch.
Enable the following persistent setting:
Executing this command should produce the following output:
Later on in this tutorial, you will see that after deploying the model, a change in the connector blueprint created for AI21 Labs Jurassic 2 will be needed. By default, you are not allowed to change connector blueprints. While this is a good thing for production clusters, during development, ML developers may need to make changes to the connector blueprints, so you need to configure OpenSearch to allow this. For this reason, the plugins.ml_commons.update_connector.enabled setting was used.
Your OpenSearch cluster is now ready. Everything done so far was required for you to be able to start what this tutorial really is about: teaching you how to deploy and test models. Let's see how this is done in the following sections.
Creating a model group
To work with models, each model must belong to a model group. As you learned in the first part of this series, model groups act as containers for deployed models. It gives you a convenient way to find related models. Therefore, before deploying a model, you need to first create a model group if one doesn't exist yet. Create a new model group using the following command:
You should see a JSON payload with the following content:
Please take a note of the value of the field model_group_id. When you register the model later on, you will be required to specify to which model group the model will belong to. Alternatively, you can search for the model group with the following command:
Creating a connector blueprint
For OpenSearch to run inferences in models outside of the cluster, you need to create a connector. They are the building blocks that integrate your OpenSearch cluster with AI services such as Amazon Bedrock. To create a connector, an ML developer must first create a connector blueprint. Connector blueprints provide the specification about how the connection with the AI service is established; how the interactions with AI services must be implemented, as well as how to handle the API contract from the model.
To create a connector blueprint for Amazon Bedrock using the AI21 Labs Jurassic 2 foundation model, run the following command:
You should see a JSON payload with the following content:
Please take a note of the value of the field connector_id. When you register the model later on, you will be required to specify which connector blueprint the model should use.
Let's understand the connector blueprint created. Within the JSON payload, the fields protocol and credentials are used to specify how OpenSearch will authenticate with Amazon Bedrock. Make sure to provide an AWS access key and secret key from a user/role that has permissions to invoke Amazon Bedrock. Alternatively, you can also include another field called session_key within the credentials field to use a session key if needed.
In the actions field, you provided all the information that OpenSearch will use to establish connections with Amazon Bedrock and send requests. Note that the url field uses some of the values that you provided in the parameters field using the ${value} expression. This is a handy way for you to reuse a value that may repeat several times throughout the connector blueprint configuration. In the request_body field, the value provided adheres with the specification of the AI21 Labs Jurassic 2 foundation model. This is important to know because if you decide to use another foundation model from Amazon Bedrock, you will need to update this field value accordingly. Even better, you can create another connector blueprint in the same model group with a different configuration.
Also, note that if you need to search for a specific connector blueprint by its name, such as the Amazon Bedrock created earlier, you can use the following search:
This will allow you to review any configuration made to the connector blueprint. Being a search-based technology, OpenSearch allows you to use the built-in supported searches like Full-text queries to find virtually anything you want.
Registering and deploying the model
Now that you have created the model group and the connector blueprint, you can finally register and deploy your model. To start things off, execute the following command to register the model.
Mind that the fields model_group_id and connector_id use the values you took note in previous sections. The output of this command should contain the following JSON payload:
Please take a note of the value of the field model_id. This is your model that you will use to run inferences. It may take some time for the model to register. In this case, you can use the field task_id to follow up about the status of the registering process. Behind the command you just ran, a task was created at OpenSearch in one of its nodes. If you want to check the status of this task, use the following command:
You should see a JSON payload with the following content:
With the output of this command, not only you can retrieve the model_id value from the model, but you can also check the status of the task with the field state. COMPLETED indicates the task has been successfully completed.
Alternatively, you can also check the status of the model itself. To check the status of the model, use the following command:
You should see a JSON payload with the following content:
Mind the value of the field model_state. Right now it is set to REGISTERED which means that OpenSearch is aware of this model but is not necessarily ready to be used. Let's change this. To deploy the model, run the following command:
Executing this command creates a task with OpenSearch to deploy the model. This happens in one of the nodes from the cluster. To verify if the command completed, you can verify the status of the model again:
Will generate an output similar to this:
Note the value of the field model_state. This time it says DEPLOYED which means that OpenSearch is now both aware of this model and ready to allow inferences to be executed. The output now also includes other relevant details such as which nodes from the OpenSearch cluster are being used for planning the execution, as well as how much planning and worker nodes there are. For the usage of the model, this information is totally irrelevant. But it is useful for system administrators who want to know a bit better how OpenSearch is scheduling the work of inference executions across the cluster.
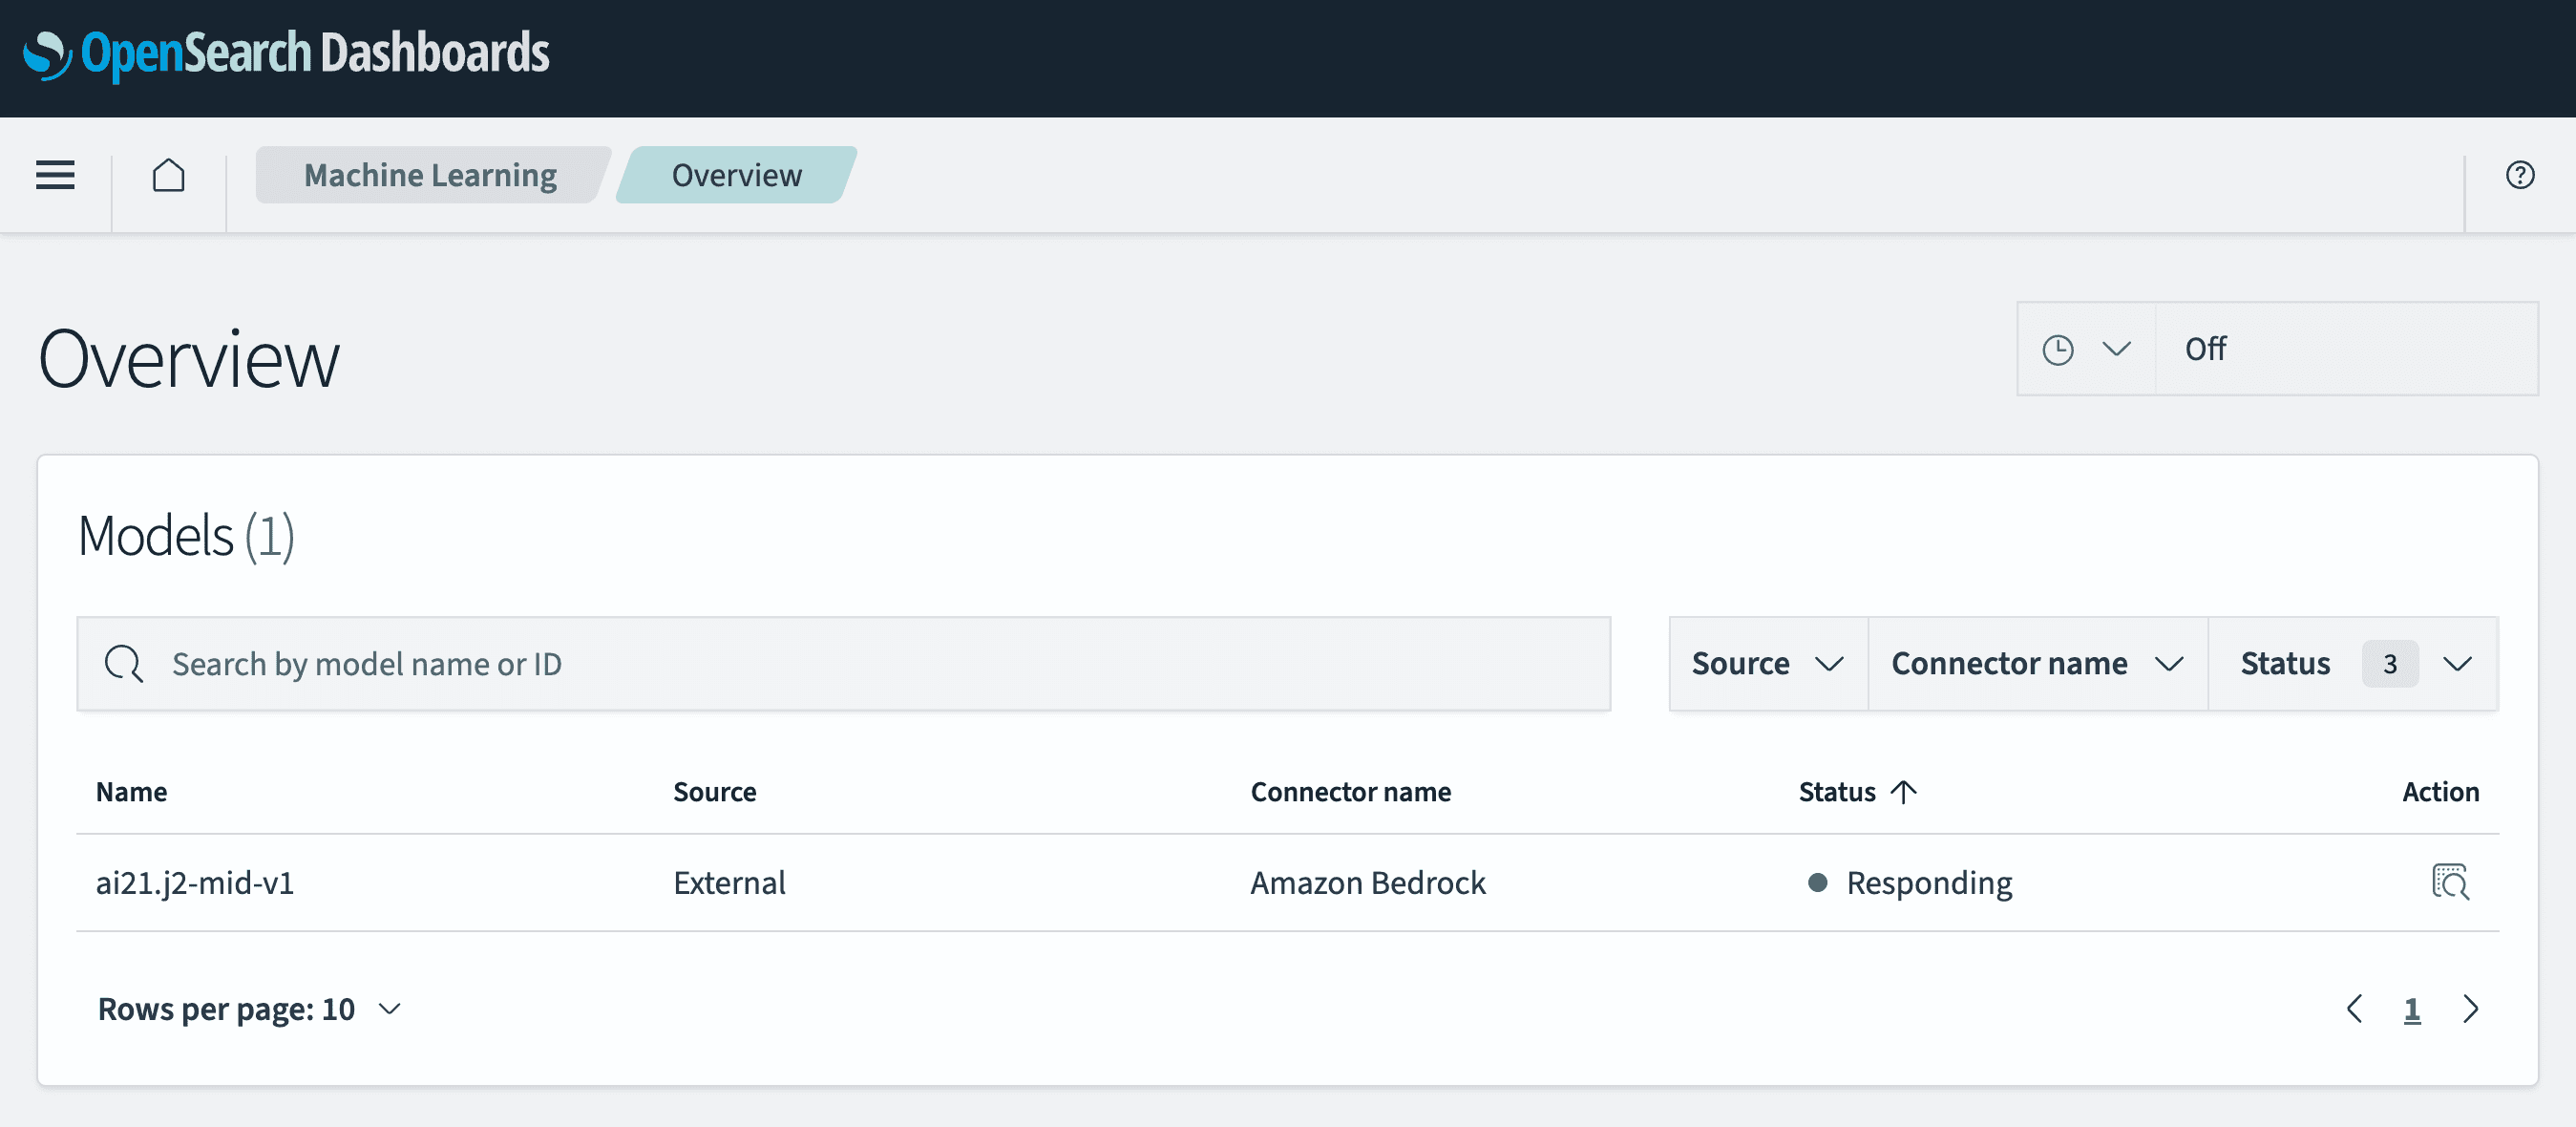
Another way to verify if the mode is properly deployed and ready to be used is using OpenSearch Dashboards. If you go to OpenSearch Plugins then Machine Learning, you will see a table containing all your deployed models. Look for the model named ai21.j2-mid-v1.
Testing the model with inferences
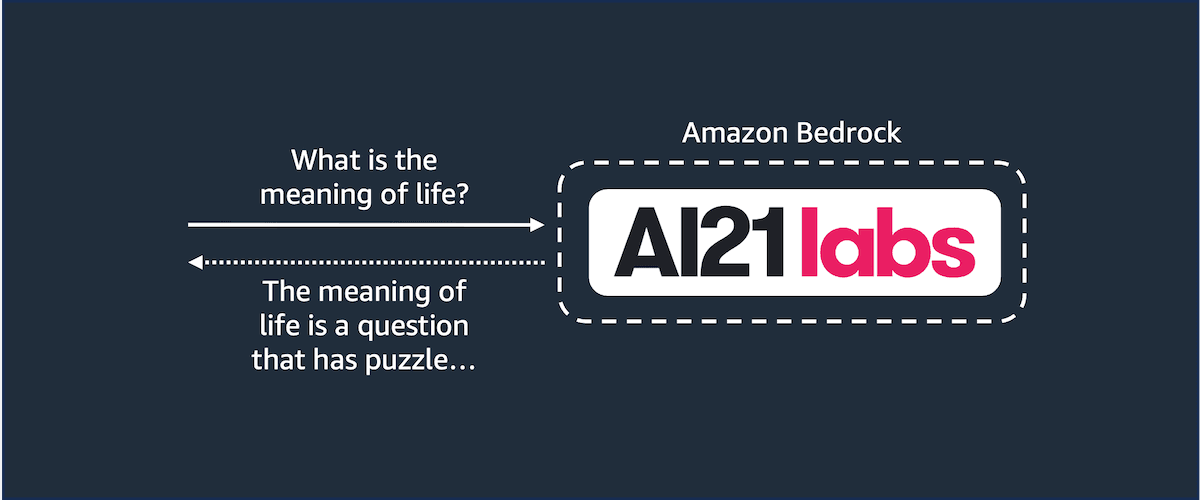
Now that your model is properly deployed, it is time for you to test it. Testing a model is the process of running inferences against the model. As a first test, you can ask the model about one of the most asked questions by human beings: what is the meaning of life?
To ask this question, run the following command:
You should see a JSON payload with a similar content:
The first thing you should know about this JSON payload is that the response from Amazon Bedrock is contained in the field inference_results[0].output[0].dataAsMap. Anything before this is a structure that OpenSearch will include as its default response schema. Secondly, the response sent by the model for the question What is the meaning of life? is in the field completions[0].data.text.
With this said, the response provided by the model is rather complicated. It contains fields that developers may not be interested in, namely the tokens from each part of the answer. Moreover, it forces users to navigate over a complex structure to retrieve the actual answer to the question. The complexity of the responses sent by models is something that ML developers—while creating connector blueprints—should be concerned about. As it should be of their interest to create simple and better experiences for their users.
To illustrate what could be done for this case, let's see how to update the existing connector blueprint to process the response generated by the model to generate a simpler and less verbose one.
Processing the response from the model
To improve the response generated by the model, you need to update the connector blueprint used by the model. Given that you know the ID of the connector, updating its configuration is fairly simple, as long as:
Your OpenSearch cluster is configured to allow changes in the connectors.
The model using the connector blueprint is under the UNDEPLOYED state.
Regarding the first requirement, you have already configured your OpenSearch cluster to allow connector changes, so you don't need to worry about. However, keep in mind that if you ever have to work with an OpenSearch cluster not managed by you, you may need to verify this requirement first.
The second requirement is what right now you need to do something about. Since the model has been deployed, you can't change the connector blueprint. Any attempt to change the connector blueprint while the model is deployed will generate the following JSON output:
To undeploy the mode, run the following command:
Now you can update the connector blueprint configuration. What you are going to do is provide a way for the connector to process the response sent by the model. This can be achieved with custom pre-and-post processing functions. To illustrate how this works, run the following command:
You should see a JSON payload with the following content:
This means that the connector blueprint was updated successfully. Note that within the connector blueprint configuration, it was added a new field called post_process_function. You can use this field to provide to the configuration a way for you to process the response coming from the model. In this new version of the connector blueprint, you have implemented a Painless script expression return params['completions'][0].data.text; to return to the user, the value contained in the JSON Path specified.
With the connector blueprint properly updated, you can re-deploy the model. To deploy the model, run this command again:
Now, ask the model again about the meaning of life.
Once the execution of the inference completes, you will receive a simpler and straightforward response this time:
Cool, right? Just keep in mind that using pre-and-post processing functions creates a tight coupling between your connector and the API contract used by the model. Whenever that API contract changes because the endpoint schema is updated, you will need to update your connector blueprint accordingly.
Automating steps
At this point, you have successfully finished this tutorial and had the opportunity to explore the models' feature. Throughout the tutorial, you may have observed that the majority of the steps involved executing a series of commands against the OpenSearch cluster. This repetitive and manual process can be both tedious and prone to errors. Fortunately, you can automate all of this. OpenSearch offers RESTful APIs for virtually everything, allowing you to automate the execution of complicated processes like deploying models.
The tutorial's accompanying GitHub repository includes a Python code example that automates all of these steps for you. To make the code work, you simply need to provide the OpenSearch cluster's endpoint and the AWS credentials that will be utilized to configure the connector. This may be useful when you need to implement new versions of the model whenever updates are made to the connector blueprint specification.
Another way to automate things is via AWS CloudFormation templates with Amazon OpenSearch. With this resource, you can quickly spin up an integration from Amazon OpenSearch and one external model (such as Amazon SageMaker) using infrastructure-as-code. You can learn more about how this works here.
Summary
In this part of the series, you have learned with a hands-on example how to configure, deploy, and test a model backed by Amazon Bedrock. You have learned the details to prepare an OpenSearch cluster to use this feature, the steps to create and update connector blueprints, as well as how to verify the steps along the way. Hopefully, this hands-on experience may have got you excited to try things by yourself. For more examples connecting to external models hosted on Amazon SageMaker, Amazon Bedrock, and others, see the connector blueprints examples in the ML Commons repository.
There is one more scenario that I think you should consider. What if you would like to build your own model with your dedicated infrastructure? Here, you have learned how to use a known service, such as Amazon Bedrock. But what if you want to integrate your own ML APIs with OpenSearch?
In the third part, you will learn how to use a custom ML API as your model. You will learn how to use this model in scenarios beyond running inferences, such as integrating the model with neural searches. And you will have the chance to practice all of this using an Amazon OpenSearch domain running on AWS.