Live Streaming from Unity - Integrated Chat (Part 4)
In this post, we'll integrate live chat directly into a game!
Todd Sharp
Amazon Employee
Published Feb 21, 2024
So far in this series, we've focused on how to broadcast from a game created in Unity to an Amazon Interactive Video Service (Amazon IVS) real-time stage. In this post, we'll focus on integrating Amazon IVS chat directly into our game. With integrated chat, a player/streamer can view and respond directly to their stream viewers without having to leave the game at all. This brings a new level of interactivity to gameplay, and lays the foundation for enhancing both the player's experience (via dynamic environment changes based on viewer polls, comments and feedback) and the viewer's experience (by potentially letting the viewer modify what they're seeing without affecting gameplay). This is game changing stuff (pun intended).
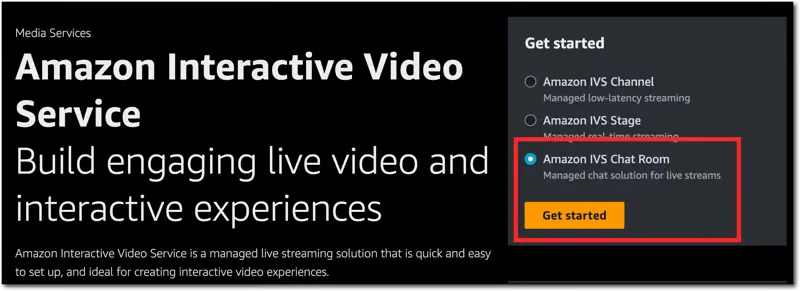
We'll need an Amazon IVS chat room, so head to the Amazon IVS console, select 'Amazon IVS Chat Room' and click 'Get Started'.
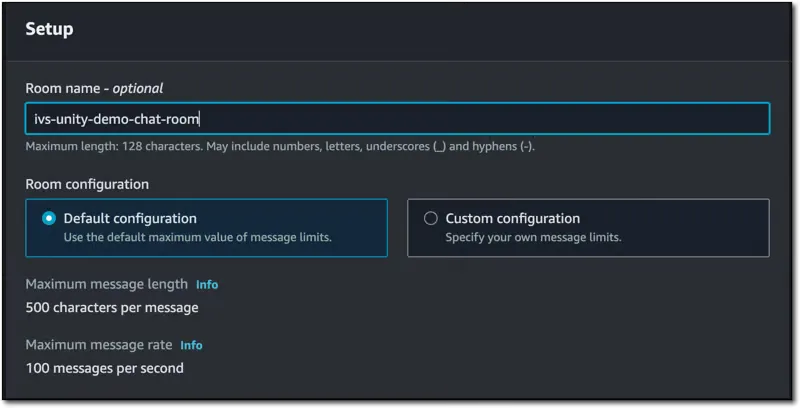
Give the chat room a name and accept the default configuration.
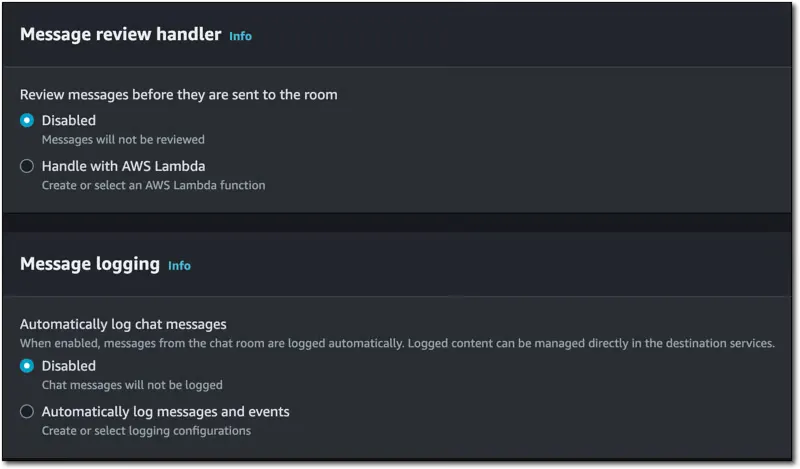
We won't get into moderation and logging in this post, but it's good to point out that it is possible to create an AWS Lambda chat handler for moderation. You can also set up chat logging if you have a need to persist, analyze, or replay chat later on.
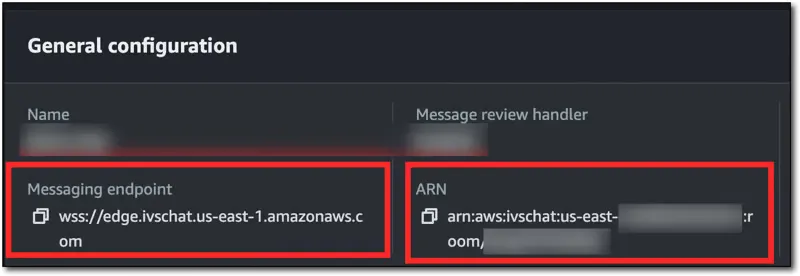
Click 'Create room' and copy the chat room's ARN as we'll need this to generate chat tokens later on. Also make a note of the 'Messaging Endpoint'.
We'll need an endpoint to generate chat tokens for users. For this, we can modify the super basic endpoint that we created in part 2 of this series to create a route for
/chat-token which will utilize the @aws-sdk/client-ivschat module to get the tokens.If you're using that service we created in part 2, add the module:
Add a function to use the SDK to generate the token:
And add a listener for that endpoint:
Of course, an AWS Lambda or a proper backend service would be more likely in production. For testing, this script works just fine and means that we don't have to manually generate the tokens and paste them into our Unity script every time we want to test it.
To test out this new endpoint:
Which should return a response with the chat token.
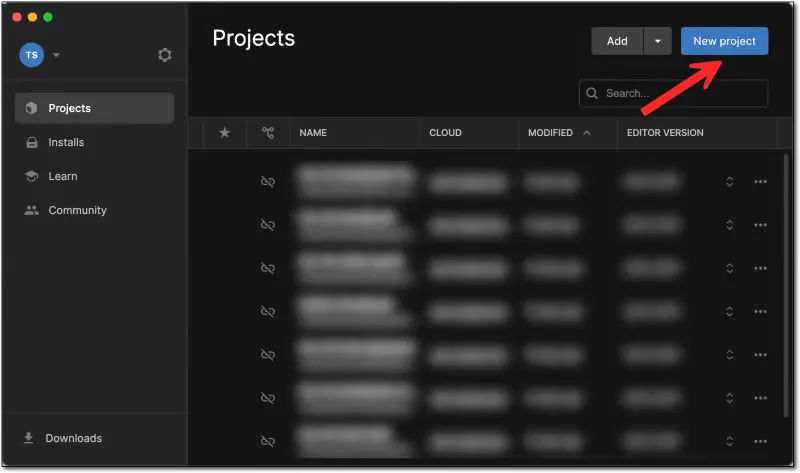
To demonstrate chat integration, let's create a new game. From Unity Hub, click on 'New Project'.
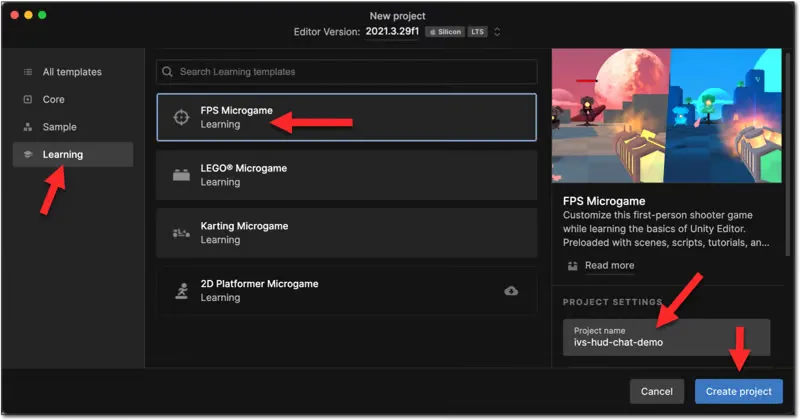
We're going to use the 'FPS Microgame' this time.
We'll need WebSocket support, and once again there's a Unity package that we can use to help us out. Go to Window -> Package Manager to bring up the dialog and 'Add from git URL' using the
NativeWebSocket (repo) GitHub URL https://github.com/endel/NativeWebSocket.git#upm.
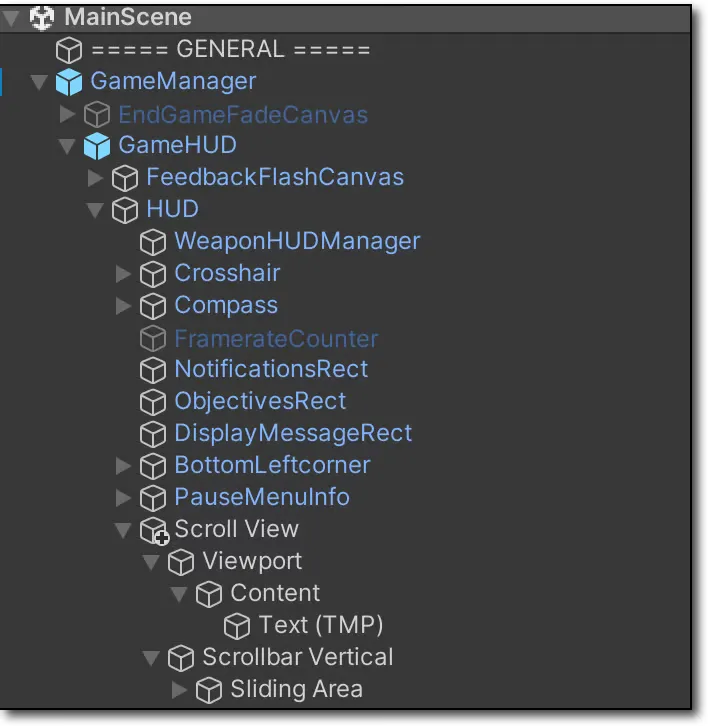
Where you decide to render your chat is completely up to you and what makes sense for your game. I decided to place a scrollable text component in the HUD, so I settled on this set of components.
We'll need to add a script that will handle establishing the chat connection and responding to incoming messages.
Create a new script called `IVSChat` in your project. Open up the new script in your editor and add some imports to the top of the script.
Next, we'll create some classes to model our token requests and responses. Again, you could externalize these if necessary.
Declare a few variables for our
IVSChat class.Next, add a
GetChatToken() to make a request to our chat token service and retrieve a token. Make sure to pass your chat ARN that we collected above.Now a
ConnectChat() function that will handle establishing the WebSocket, and set up some connection listeners that will handle parsing and rendering the incoming chat messages. Update [YOUR CHAT ENDPOINT] with the value we saved above.The only thing left to do is update the
Start() method to call the ConnectChat() function and the Update() method to dispatch the message queue. Also, some clean-up is added to Destroy().Note that we're not adding functionality to reply, but the
NativeWebSocket has full support if you want to add that.At this point, we can play our game and connect up to the chat room to test things out. You can build your own testing page (read more) or use this CodePen with a token and your chat endpoint.
In this post, we learned how to connect to an Amazon IVS chat room and handle incoming messages in our game created with Unity. As mentioned before, this feature will enable further dynamic interactions. In the next post, we'll look at using this feature to create a dynamic camera view that viewers can control by sending chat messages to the chat room.
Here is the full script for this post if you need to refer to it.
Any opinions in this post are those of the individual author and may not reflect the opinions of AWS.
